Introduction
This manual provides detailed instructions for the assembly, operation, and maintenance of your Tribesigns 2-Drawer Lateral File Cabinet. This multifunctional cabinet features open storage spaces, two file drawers, and a storage cabinet designed to organize office machines, paper, files, and supplies. It can be positioned beside or under a desk and is equipped with wheels for mobility.
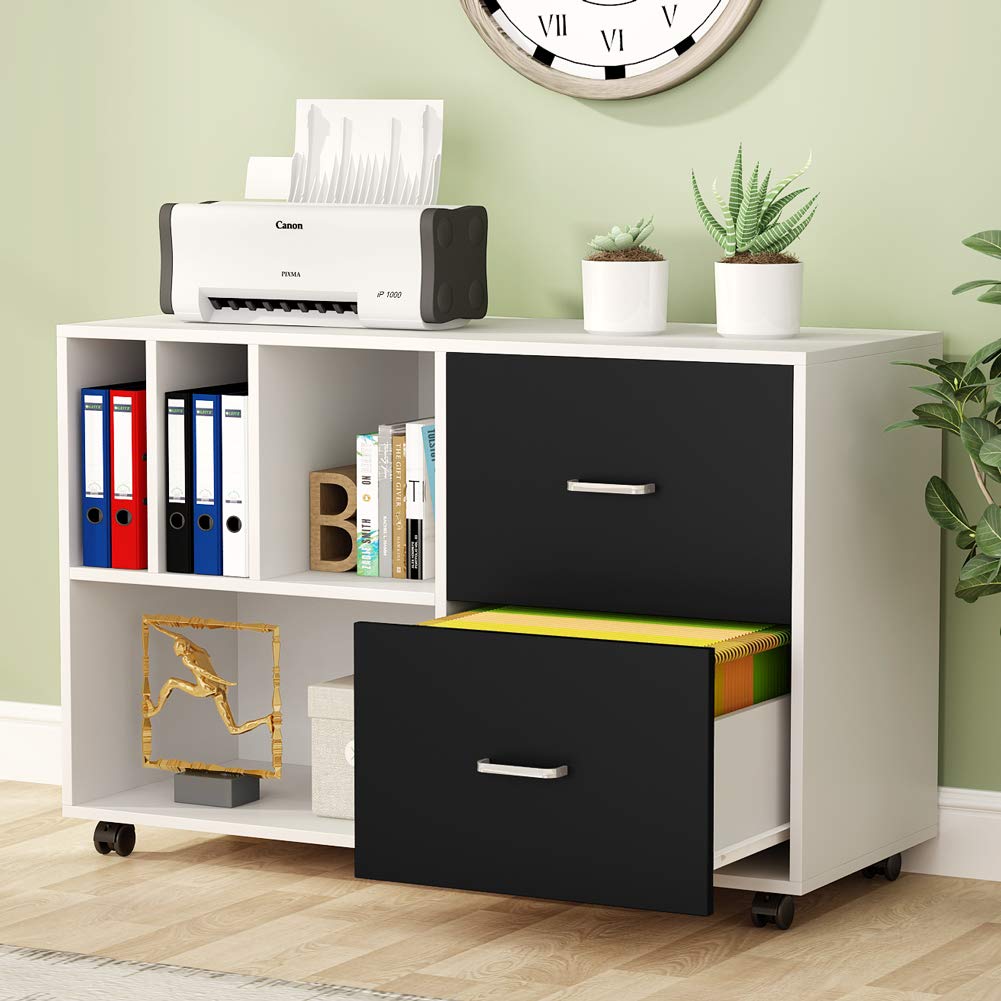
Overall view of the Tribesigns 2-Drawer Lateral File Cabinet, showcasing its design and features.
Safety Information
- Read all instructions carefully before assembly and use.
- Keep small parts and packaging materials away from children.
- Assemble the cabinet on a soft, clean surface to prevent scratches.
- Do not overload drawers or shelves. Distribute weight evenly.
- Ensure the cabinet is placed on a level surface to prevent tipping.
- Engage wheel brakes when the cabinet is stationary to prevent unintended movement.
Package Contents
Before beginning assembly, please verify that all components and hardware listed below are present and undamaged. If any parts are missing or damaged, contact customer support.
- Cabinet Panels (Top, Bottom, Sides, Back, Internal Shelves)
- Drawer Components (Fronts, Sides, Backs, Bottoms)
- Drawer Slides
- Handles
- Casters (Wheels) with Brakes
- Assembly Hardware (Screws, Dowels, Cam Locks, etc.)
- Assembly Tools (e.g., Hex Key)
Setup and Assembly
Follow these steps carefully for proper assembly of your file cabinet.
Step 1: Unpack and Identify Parts
Carefully unpack all components and hardware from the packaging. Refer to the included parts list to identify each piece and ensure nothing is missing.
Step 2: Attach Casters
Attach the four casters to the designated holes on the bottom panel of the cabinet. Ensure that the two casters with built-in brakes are positioned at the front of the cabinet for easy access and stability.

Detail of a 360-degree swivel caster with an integrated brake for securing the cabinet.
Step 3: Assemble Cabinet Frame
Connect the side panels, back panel, and internal shelves to the bottom panel using the provided hardware (e.g., screws, dowels, cam locks). Follow the diagrams in your assembly guide to ensure correct orientation. Tighten all connections securely but do not overtighten.
Step 4: Assemble Drawers
Assemble the two drawers by connecting the front, side, and back panels with the drawer bottoms. Attach the drawer slides to the sides of the drawers and the corresponding tracks inside the cabinet frame. Secure the handles to the drawer fronts.

Detail of the sturdy steel handle for the file cabinet drawers.

Illustration of the drawer slide mechanism, designed for smooth and full extension.
Step 5: Final Inspection
Once all components are assembled, perform a final check to ensure all screws are tightened and the cabinet is stable. Place the top panel securely. The cabinet is now ready for use.

Dimensional diagram of the assembled file cabinet, indicating overall size and internal compartment measurements.
Operating Instructions
Using the File Drawers
The two large drawers are designed to accommodate legal-size hanging file folders. Pull the drawers out fully for easy access to your documents. The high-quality steel handles provide a comfortable grip.
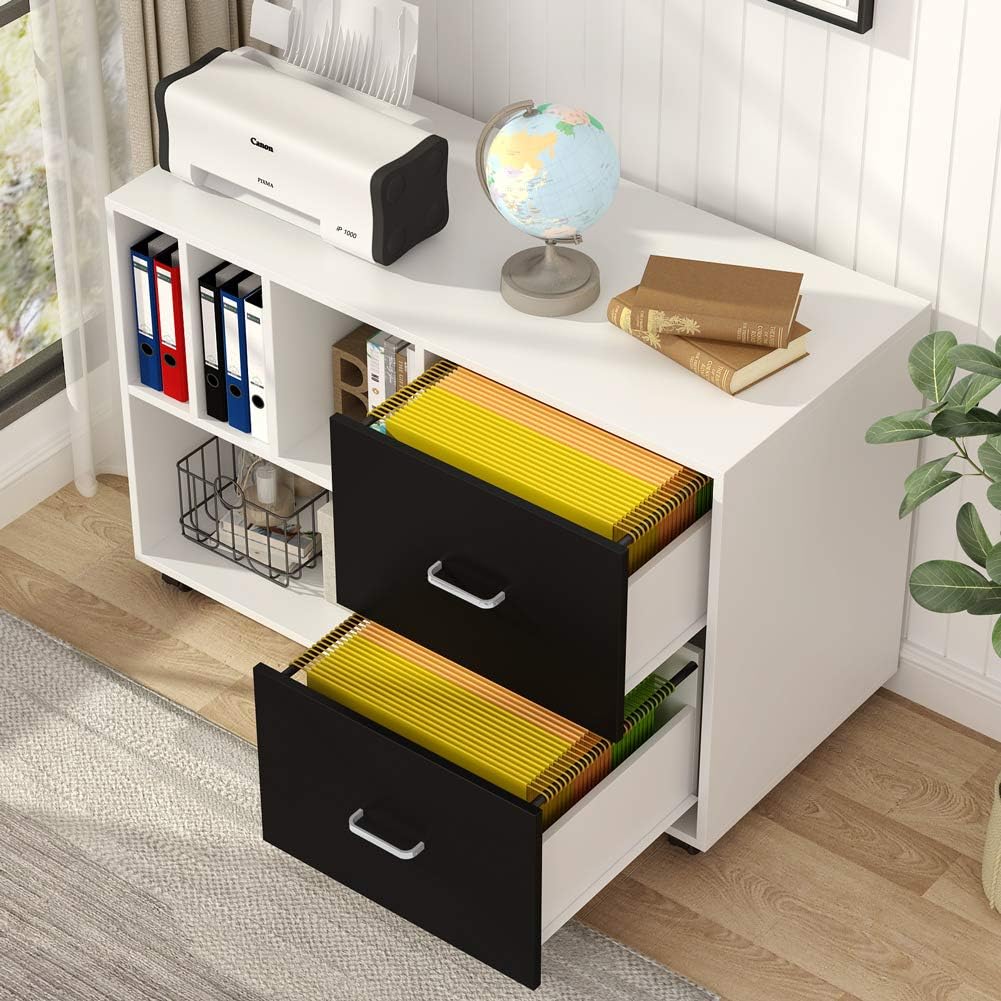
The two spacious drawers are designed to hold legal-size hanging files, providing ample storage for documents.

Detail illustrating the document organizer section and the capacity for legal-size files in the drawers.
Utilizing Open Storage Shelves
The open storage shelves provide convenient space for documents, books, and decorative items. The partitioned compartments allow for organized storage and easy categorization of your belongings.
Mobile Functionality
The cabinet is equipped with four casters, allowing it to be moved and adjusted freely. To secure the cabinet in a desired position, engage the brakes on the front casters by pressing down on the lever.
Maintenance
Cleaning
Wipe all surfaces with a soft, damp cloth. Avoid using abrasive cleaners, harsh chemicals, or solvents, as these may damage the finish. The cabinet's surface is designed to be easy to clean, anti-scratch, waterproof, and heat-resistant.

Key features of the cabinet's durable surface for easy maintenance.
General Care
Periodically check all hardware connections, including screws and bolts, and tighten them if necessary to maintain the cabinet's stability and structural integrity.
Troubleshooting
Drawers Not Aligning Perfectly
If the drawers do not align perfectly or slide smoothly, check that all drawer slides are correctly installed and that the cabinet frame is assembled squarely. Adjust screws on the slides or frame as needed to correct alignment.
Cabinet Instability
Ensure that all casters are locked when the cabinet is stationary. Verify that all assembly hardware is securely tightened. If the cabinet still feels unstable, re-check the assembly steps to ensure all components are correctly fitted.
Damaged or Missing Parts
If you encounter scratches, chipped boards, or missing screws upon arrival or during assembly, please contact Tribesigns customer support immediately for assistance and replacement parts.
Specifications
| Brand | Tribesigns |
| Color | White |
| Product Dimensions | 39.4"D x 15.7"W x 26"H |
| Special Feature | Durable |
| Mounting Type | Floor Mount |
| Room Type | Home Office |
| Number of Shelves | 2 |
| Base Type | Casters |
| Installation Type | Freestanding |
| Top Material Type | Particle Board |
| Back Material Type | Alloy Steel |
| Item Weight | 66 pounds |
| Material | Steel |
Warranty Information
This Tribesigns product is covered by a 1-year limited warranty. This warranty covers manufacturing defects and material flaws under normal use. Please retain your proof of purchase for any warranty claims. The warranty does not cover damage caused by misuse, accidents, or unauthorized modifications.
Customer Support
For any questions, technical assistance, or to report missing or damaged parts, please contact Tribesigns customer support. Refer to your purchase documentation or the Tribesigns official website for the most current contact information.


