1. Introduction
This manual provides detailed instructions for the Anbernic RG351P Handheld Game Console. It covers setup, operation, maintenance, and troubleshooting to ensure optimal performance and longevity of your device. The RG351P is a portable retro gaming console featuring an RK3326 quad-core processor, a 3.5-inch IPS screen, and an open-source Linux system, supporting a wide range of classic game formats.
2. Product Overview
Familiarize yourself with the components and controls of your RG351P console.

Figure 2.1: Front view of the Anbernic RG351P Handheld Game Console, showing the screen, D-pad, action buttons, and dual analog sticks.

Figure 2.2: Various views of the RG351P console, illustrating its compact design and port locations on the top, bottom, and sides.
2.1 Console Components
- 3.5-inch IPS Screen: High-definition display with OCA full lamination (320*480 resolution).
- D-Pad: Directional pad for navigation.
- Action Buttons (A, B, X, Y): Standard gaming input.
- Dual 3D Rockers (Analog Sticks): For precise control in games.
- SELECT/START Buttons: System and game control.
- L1/L2/R1/R2 Buttons: Shoulder buttons for additional game input.
- TF Card Slot: For game storage (supports up to 256GB).
- 3.5mm Earphone Jack: For audio output.
- OTG 1 (Type-C): Data transfer port.
- OTG 2 (Type-C): Data transfer and charging port.
- Stereo Speakers: High-quality double horn stereo speakers.
3. Setup
3.1 Initial Charging
Before first use, fully charge the console. Connect the provided USB Type-C charging cable to the OTG 2 port on the console and to a compatible USB power adapter (not included). A full charge takes approximately 4 hours. The battery indicator will show charging status.
3.2 Inserting the TF Card
The console comes with a 64GB TF card pre-loaded with classic games. Locate the TF card slot on the console. Gently insert the TF card into the slot until it clicks into place. Ensure the card is inserted correctly to avoid damage.

Figure 3.1: Package contents including the RG351P console, user manual, and USB charging cable.
4. Operating Instructions
4.1 Powering On/Off
- To Power On: Press and hold the Power button (usually located on the top or side) for a few seconds until the screen illuminates.
- To Power Off: Navigate to the system menu and select the "Shutdown" or "Power Off" option. Alternatively, press and hold the Power button until the device powers down.
4.2 System Navigation
The RG351P runs on an open-source Linux system. Use the D-pad or analog sticks to navigate through menus and select options with the A button. The B button typically acts as a back or cancel function.
4.3 Playing Games
The console supports various game formats including PSP, N64, NDS, PS1, CPS1, CPS2, FBA, NEOGEO, GBA, GBC, GB, SFC, FC, MD, SMS, GG, MSX, PCE, WSC, and more. From the main menu, select the desired emulator or game system, then choose a game from the list to begin playing.
4.4 Adding Games
Users can download and add games in relevant formats to the TF card. Connect the TF card to a computer using a card reader. Organize game ROMs into the appropriate emulator folders on the TF card. Refer to online communities or specific system guides for detailed instructions on adding games to the open-source Linux system.
4.5 Music Function
The RG351P also functions as a music player, supporting lossless music formats such as APE, MP3, WMA, OGG, FLAC, WAV, and AAC. Connect 3.5mm stereo earphones for an optimal audio experience. Navigate to the music player application within the system to manage and play audio files.

Figure 4.1: The RG351P console demonstrating its music playback capabilities with connected earphones.
5. Maintenance
- Cleaning: Use a soft, dry cloth to clean the console's exterior. For the screen, use a microfiber cloth specifically designed for electronics. Avoid abrasive cleaners or solvents.
- Storage: Store the console in a cool, dry place away from direct sunlight and extreme temperatures.
- Battery Care: To prolong battery life, avoid fully discharging the battery frequently. Charge the device regularly, even if not in use for extended periods.
- TF Card Handling: Always safely eject the TF card from your computer before removing it to prevent data corruption.
6. Troubleshooting
| Problem | Possible Cause | Solution |
|---|---|---|
| Console does not power on. | Low battery; faulty charging cable/adapter. | Ensure the console is fully charged. Try a different USB Type-C cable and power adapter. |
| Games run slowly or experience frame drops. | Emulator settings; system overload; game compatibility. | The RK3326 chip is designed to minimize frame drops. Ensure the system is not running too many background processes. Check if the game is compatible with the emulator version. |
| No sound from speakers. | Volume too low; headphones connected; speaker malfunction. | Increase volume using the dedicated buttons. Disconnect headphones if present. Restart the console. |
| TF card not recognized. | Improper insertion; corrupted card; incompatible format. | Reinsert the TF card correctly. Try the card in another device to check for corruption. Ensure the card is formatted correctly for the system. |
7. Specifications
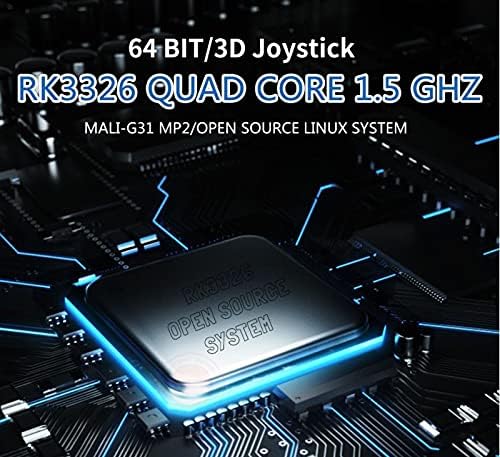
Figure 7.1: Close-up view of the RK3326 quad-core chip, the processing unit of the RG351P console.
- Model: RG351P
- CPU: RK3326 quad core 1.5 GHz
- GPU: Mali-G31 MP2
- RAM: DDR3L 1GB
- Internal Memory: 64GB (pre-installed TF card)
- Screen: 3.5 inch IPS screen, OCA full lamination, 320*480 resolution
- System: Open source Linux system
- Supported Game Formats: PSP, N64, NDS, PS1, CPS1, CPS2, FBA, NEOGEO, NEOGEO POCKET, GBA, GBC, GB, SFC, FC, MD, SMS, GG, MSX, PCE, WSC, and more.
- Battery: Li-polymer 3500 mAh, up to 8 hours playing time
- Charging: 1.3A charging, max load 2A, USB Type-C cable, 4 hours for full charge
- Speaker: High quality double horn stereo speaker
- TF Card Support: Max 256GB
- Interfaces: TF Card Slot, 3.5mm Earphone, OTG 1 (Type-C Data Transfer), OTG 2 (Type-C Data Transfer/Charging)
- Functions: Game, Music, Double OTG, Double 3D rocker, 3.5mm stereo earphones support
- Language: English
- Dimensions: 15.2cm (L) x 7.1cm (W) x 1.8cm (H)
- Weight: 0.19kg
8. Warranty and Support
For warranty information and technical support, please refer to the documentation provided with your purchase or contact the manufacturer, Anbernic, directly through their official support channels. Keep your proof of purchase for any warranty claims.


