
Technical Pro TPWMU99
Technical Pro TPWMU99 UHF Wireless Handheld Microphone User Manual
Model: TPWMU99
Introduction
This manual provides detailed instructions for the setup, operation, and maintenance of your Technical Pro TPWMU99 UHF Wireless Handheld Microphone. Please read this manual thoroughly before using the product to ensure proper functionality and to prevent damage.
Safety Information
To ensure safe operation and prolong the life of your microphone, please observe the following precautions:
- Do not expose the microphone or receiver to water or excessive moisture.
- Avoid dropping or subjecting the device to strong impacts.
- Do not attempt to disassemble or repair the unit yourself. Refer all servicing to qualified personnel.
- Use only the specified battery type for the microphone.
- Keep the device away from heat sources and direct sunlight.
Package Contents
Verify that all items are present in your package:
- Technical Pro TPWMU99 Wireless Handheld Microphone
- USB Receiver
- 1/8" to 1/4" Audio Cable
- Battery
Note: The provided product data listed "amplifier" in the package contents, which is not applicable to this microphone product. The list above reflects the actual components based on product description and images.
Product Overview
The Technical Pro TPWMU99 is a professional UHF wireless handheld microphone system designed for clear audio capture. It features a high-sensitivity dynamic microphone with a cardioid pickup pattern and a USB-powered receiver for versatile connectivity.

Figure 1: Technical Pro TPWMU99 UHF Wireless Handheld Microphone and USB Receiver. This image displays the Technical Pro TPWMU99 UHF Wireless Handheld Microphone alongside its compact USB receiver. The microphone features a black body with a green power indicator and a power switch. The USB receiver is black with a blue accent.

Figure 2: Close-up view of the microphone and USB receiver. This image provides a detailed view of the microphone's head, body, power switch, and the USB receiver's design.
Setup
1. Installing Batteries
The microphone requires batteries for operation. Locate the battery compartment, typically at the bottom of the microphone handle. Insert the required batteries, ensuring correct polarity (+/-).
2. Connecting the USB Receiver
The USB receiver powers via a USB port and transmits audio wirelessly. Plug the USB receiver into a compatible USB port on your audio device (e.g., PA system, computer, DJ mixer, amplifier). The receiver will draw power directly from the USB port.

Figure 3: Microphone connected to a PA system. The image illustrates the Technical Pro TPWMU99 wireless microphone transmitting an audio signal (represented by blue waves) to a PA system. The PA system's control panel, featuring USB input, microphone volume, treble, and bass controls, is visible.
3. Powering On
Once the batteries are installed and the USB receiver is connected, slide the power switch on the microphone to the "ON" position. The power indicator light on the microphone should illuminate, indicating it is active and attempting to connect to the receiver.
Operating Instructions
1. Basic Operation
- Power On/Off: Use the slide switch on the microphone to turn it on or off.
- Volume Control: Adjust the microphone volume using the controls on your connected audio device (PA system, mixer, etc.).
- Wireless Range: The microphone operates within a wireless range of approximately 150 feet (45 meters). Optimal performance is achieved within this range and with a clear line of sight to the receiver.
2. Microphone Features
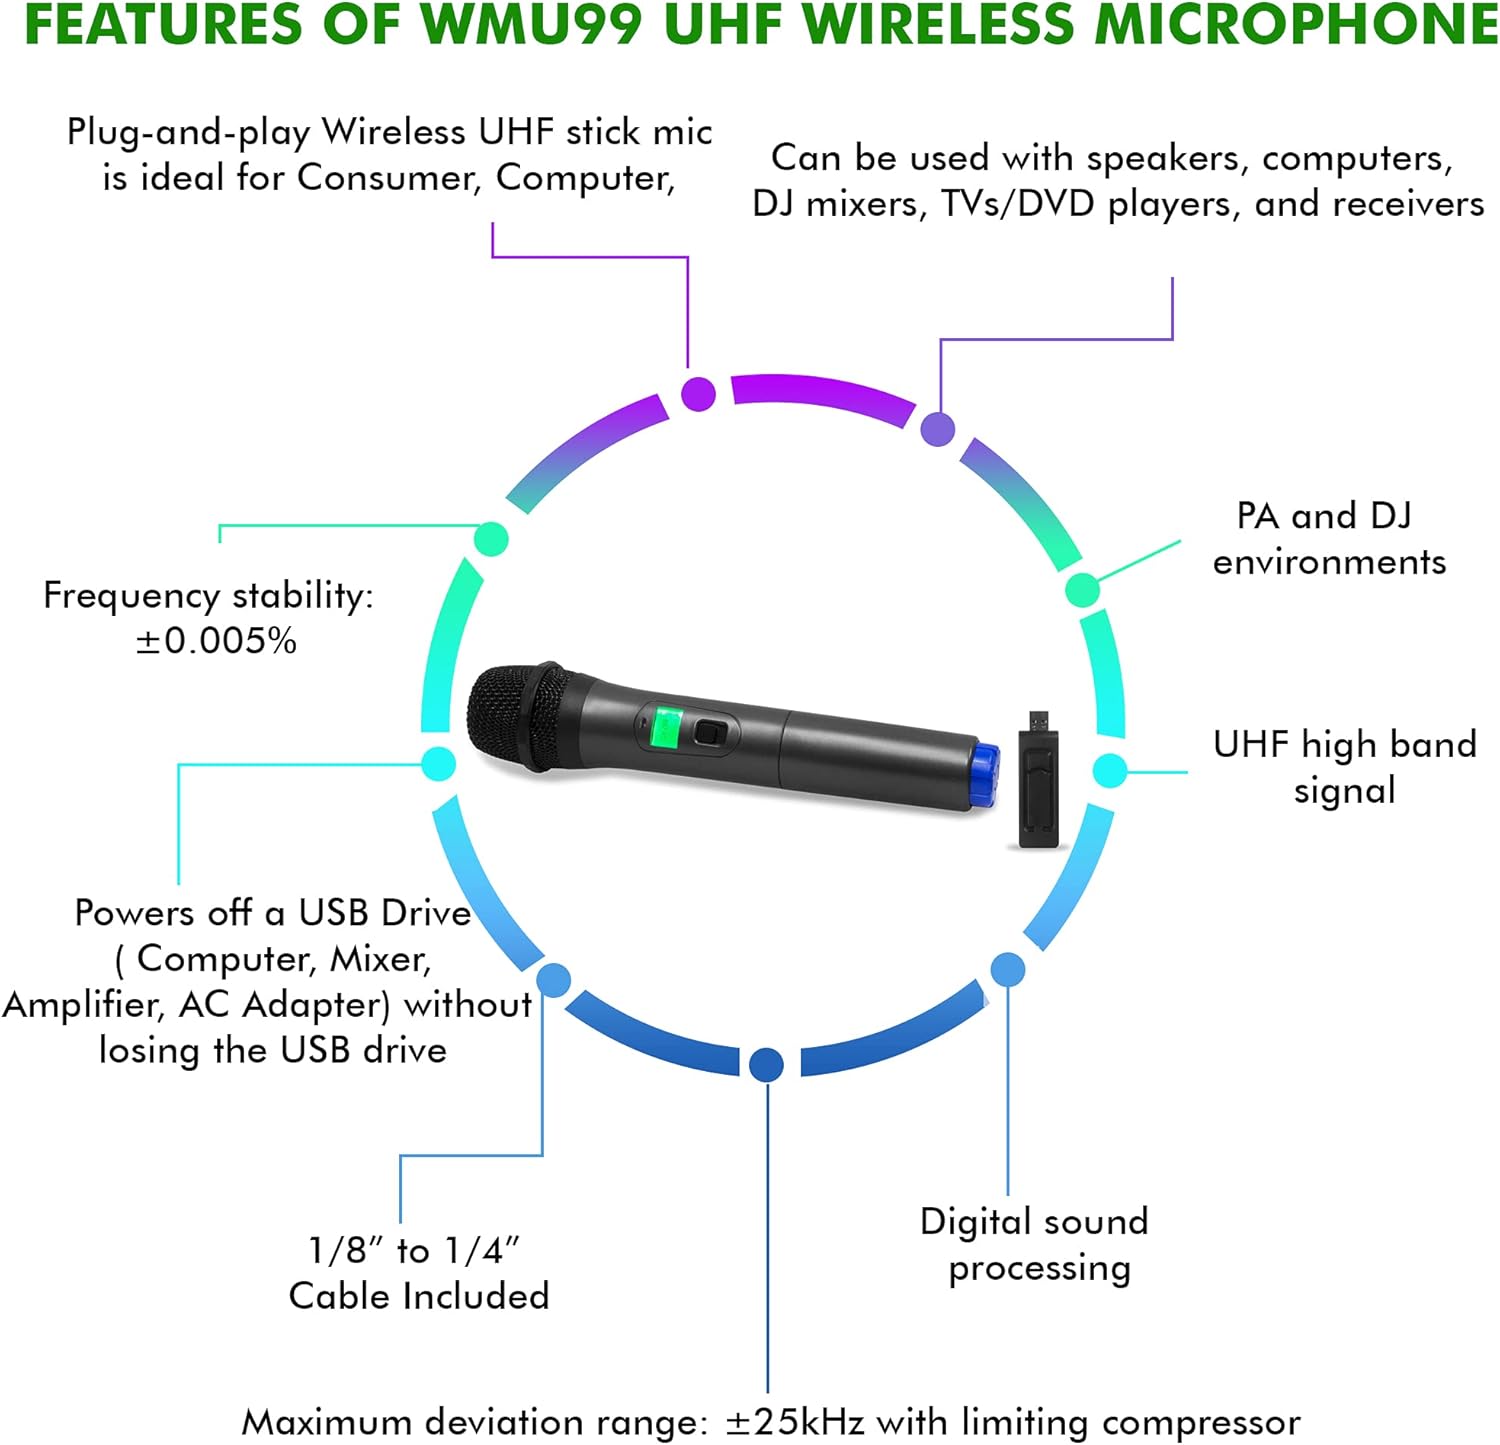
Figure 4: Key features of the WMU99 UHF Wireless Microphone. A circular diagram highlighting key features of the WMU99 UHF Wireless Microphone. Features include plug-and-play functionality, compatibility with various devices (speakers, computers, DJ mixers, TVs/DVD players, receivers), suitability for PA and DJ environments, UHF high band signal, digital sound processing, 1/8" to 1/4" cable included, power via USB drive, and frequency stability of ±0.005%.
- Cardioid Pattern: The microphone features a cardioid pickup pattern, which primarily captures sound from the front, reducing background noise and feedback.
- UHF High Band Signal: Utilizes UHF high band signal connection technology for stable and clear wireless transmission.
- Plug-and-Play: Designed for ease of use, simply connect the receiver and power on the microphone.
- Versatile Compatibility: Can be used with speakers, computers, DJ mixers, TVs/DVD players, and receivers that have a compatible USB input for the receiver.
Maintenance
Cleaning
Wipe the microphone and receiver with a soft, dry cloth. Do not use liquid cleaners or solvents, as they may damage the finish or internal components.
Battery Replacement
When the microphone's performance degrades or the power indicator dims, replace the batteries with new ones of the specified type. Always dispose of used batteries responsibly.
Storage
Store the microphone and receiver in a cool, dry place away from direct sunlight and extreme temperatures when not in use for extended periods. Remove batteries if storing for a long time to prevent leakage.
Troubleshooting
| Problem | Possible Cause | Solution |
|---|---|---|
| No sound from microphone |
|
|
| Poor sound quality or dropouts |
|
|
| Microphone powers on but does not connect |
|
|
Specifications
| Feature | Detail |
|---|---|
| Model Number | TPWMU99 |
| Brand | Technical Pro |
| Microphone Form Factor | Microphone System |
| Connectivity Technology | UHF Wireless, USB (for receiver) |
| Connector Type | USB |
| Power Source | Battery (microphone), Corded Electric (USB for receiver) |
| Wireless Range | 150 ft |
| Frequency Response | 40Hz-20kHz (Note: Product specifications also list 18 KHz) |
| Signal-to-Noise Ratio | 100 dB |
| Audio Sensitivity | 10 Decibels |
| Polar Pattern | Unidirectional (Cardioid) |
| Compatible Devices | Amplifier, Personal Computer, Speaker, DJ Mixers, TVs/DVD players |
| Item Weight | 10 ounces (approx. 283 grams) |
| Package Dimensions | 10 x 4 x 2 inches (approx. 25.4 x 10.16 x 5.08 cm) |
| UPC | 610370147856 |

Figure 5: Physical dimensions of the microphone. This image provides the dimensions of the Technical Pro TPWMU99 microphone. The microphone's length is 1.69 inches, width is 1.3 inches, and height is 1.3 inches. The USB receiver is also shown for scale.
Warranty and Support
Technical Pro products are designed for reliability and performance. For warranty information, please refer to the warranty card included with your purchase or visit the official Technical Pro website. For technical support or service inquiries, please contact Technical Pro customer service through their official channels.
Note: Specific warranty terms and support contact details may vary and are typically provided with the product packaging or on the manufacturer's website.
Related documentsTPWMU99


Ask a question about this manual
Ask about setup, troubleshooting, compatibility, parts, safety, or missing instructions. Manuals+ will review the question and use this page’s manual context to help answer it.