1. Introduction
This manual provides essential information for the safe and efficient operation of your Harvia KIP-30B Electric Sauna Heater. Please read all instructions carefully before installation and use.
The Harvia KIP-30B is a traditional Finnish electric sauna heater designed to deliver a satisfying and invigorating sauna experience. It features a durable stainless steel construction and an innovative built-in control panel at the base of the heater for ease of use.

Figure 1: Harvia KIP-30B Electric Sauna Heater with sauna stones in place.
2. Important Safety Information
WARNING: To reduce the risk of fire, electric shock, or injury, read and follow all instructions before using this appliance.
- Installation must be performed by a qualified electrician in accordance with all national and local electrical codes.
- Ensure proper ventilation in the sauna room.
- Do not place any objects on the heater or cover it, as this may cause fire.
- Use only sauna stones specifically designed for electric sauna heaters. Ensure the stone compartment is adequately filled.
- Exit immediately if uncomfortable, dizzy, or sleepy. Staying too long in a heated area is capable of causing overheating.
- Supervise children at all times.
- Check with a doctor before use if pregnant, in poor health, or under medical care.
- Breathing heated air in conjunction with consumption of alcohol, drugs, or medication is capable of causing unconsciousness.
3. Setup and Installation
The Harvia KIP-30B heater is designed for wall-mounted installation. Proper installation is crucial for safety and optimal performance.
3.1 Unpacking and Inspection
- Carefully remove the heater from its packaging.
- Inspect the heater for any signs of damage during transit. Do not install a damaged unit.
- Verify all components listed in the packing list are present.
3.2 Mounting the Heater
- Choose a suitable wall location within the sauna room, ensuring adequate clearance from combustible materials as specified in the installation guide (not provided in this summary).
- Securely mount the heater to the wall using appropriate fasteners. The heater's stainless steel construction is designed for durability.
3.3 Electrical Connection
IMPORTANT: Electrical installation must be performed by a licensed electrician.
- The Harvia KIP-30B operates on 240V, single-phase power with an amperage of 18.8 AMPS.
- Connect the heater to a dedicated circuit with appropriate wiring and circuit breaker as per local electrical codes.
- Ensure all connections are secure and properly insulated.
3.4 Placing Sauna Stones
- Place the sauna stones into the heater's stone compartment. Ensure direct rock-to-heating element contact for efficient heat transfer.
- Arrange stones loosely to allow for air circulation. Do not pack them too tightly.
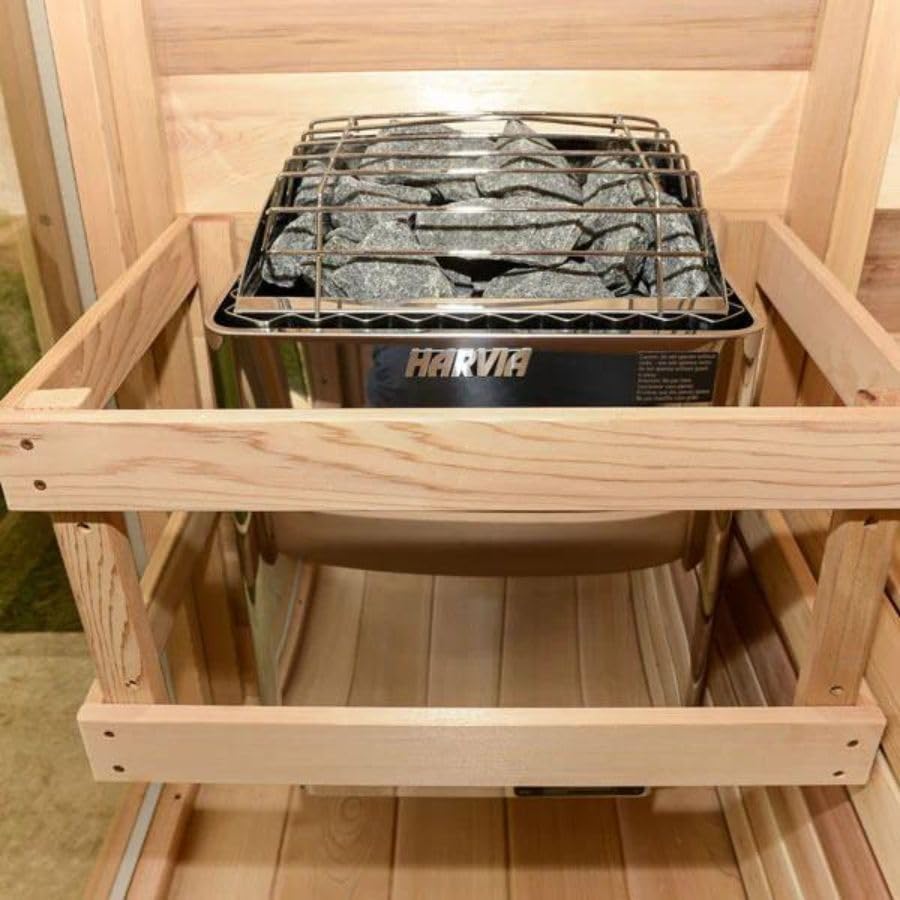
Figure 2: Harvia KIP-30B Electric Sauna Heater installed in a sauna room, showing the wooden safety barrier.
4. Operating Instructions
The KIP-30B features built-in controls at the base of the heater for easy operation.
4.1 Powering On and Setting Temperature/Time
- Locate the two control knobs at the base of the heater. One knob controls the operating time, and the other controls the temperature.
- Turn the temperature knob to your desired heat setting. The heater is designed to heat sauna rooms from 84 to 130 cu. ft.
- Turn the timer knob to set the desired operating duration. The heater will operate for the set time and then automatically shut off.
- Allow approximately 15-20 minutes for the sauna to reach the desired temperature.
4.2 Creating Steam (Löyly)
- Once the stones are hot, you may gently ladle small amounts of water over them to create steam (löyly).
- Use only clean tap water. Do not use chlorinated water or water containing fragrances directly on the stones unless specifically designed for sauna use.
- Avoid pouring excessive amounts of water at once, as this can cool the stones too quickly and potentially damage the heating elements.
4.3 Shutting Off the Heater
- The heater will automatically shut off once the set timer expires.
- To manually turn off the heater, turn the timer knob back to the "0" position.
5. Maintenance
Regular maintenance ensures the longevity and safe operation of your Harvia KIP-30B sauna heater.
- Sauna Stones: Periodically inspect the sauna stones. Replace any cracked or crumbling stones to maintain efficient heating and prevent damage to the heating elements. Rearrange stones annually to ensure proper air circulation.
- Cleaning: Wipe the exterior of the heater with a damp cloth. Do not use abrasive cleaners or solvents. Ensure the heater is cool and disconnected from power before cleaning.
- Electrical Connections: Have a qualified electrician inspect electrical connections annually to ensure they remain tight and free from corrosion.
6. Troubleshooting
If you encounter issues with your sauna heater, refer to the following common troubleshooting steps:
| Problem | Possible Cause | Solution |
|---|---|---|
| Heater does not turn on. | No power, circuit breaker tripped, timer not set. | Check power supply, reset circuit breaker, ensure timer knob is set to an operating time. |
| Sauna not heating sufficiently. | Incorrect temperature setting, insufficient sauna stones, poor room insulation, door/window open. | Adjust temperature, ensure adequate and properly arranged stones, check sauna room for heat leaks. |
| Heater makes unusual noises. | Stones settling, foreign object in stone compartment, damaged heating element. | This can be normal as stones heat up. If persistent or loud, inspect stones for foreign objects or damage. Contact service if necessary. |
If the problem persists after attempting these solutions, contact a qualified service technician.
7. Specifications
- Model: KIP-30B
- Brand: Harvia
- Power: 3kW
- Voltage: 240V
- Phase: Single Phase
- Amperage: 18.8 AMPS
- Installation: Wall-mounted
- Construction: Stainless steel
- Recommended Sauna Room Size: 84 to 130 cu. ft.
- Item Weight: 26.9 pounds
- Package Dimensions: 27.5 x 19.13 x 15 inches
- Controls: Built-in timer and thermostat knobs
8. Warranty and Support
For warranty information or technical support, please refer to the documentation included with your purchase or visit the official Harvia website. Keep your proof of purchase for warranty claims.
Manufacturer: Harvia


