
1. Introduction
This manual provides detailed instructions for the installation, operation, and maintenance of your SIMPSON Cleaning 7110163 Manifold Replacement Kit. This kit is an original equipment replacement part designed to restore the functionality of your pressure washer pump. Please read this manual thoroughly before attempting any installation or operation to ensure safe and effective use.

Figure 1: SIMPSON Cleaning 7110163 Manifold Replacement Kit
2. Safety Information
- Always ensure the pressure washer engine is turned OFF and the spark plug ignition lead is disconnected before performing any maintenance or installation.
- Wear appropriate personal protective equipment, including safety glasses and gloves, when handling tools and components.
- Release any residual pressure in the system by squeezing the spray gun trigger before disconnecting hoses or components.
- Refer to your pressure washer's main owner's manual for additional safety guidelines and operating procedures.
3. Package Contents
The SIMPSON Cleaning 7110163 Manifold Replacement Kit includes the following components:
- Manifold assembly with pre-installed valves and integrated unloader
- Thermal Relief Valve (TRV)
- Integrated soap injection system
- Garden hose inlet
- High-pressure hose outlet
- Mounting hardware (bolts, washers, soap hose screen)
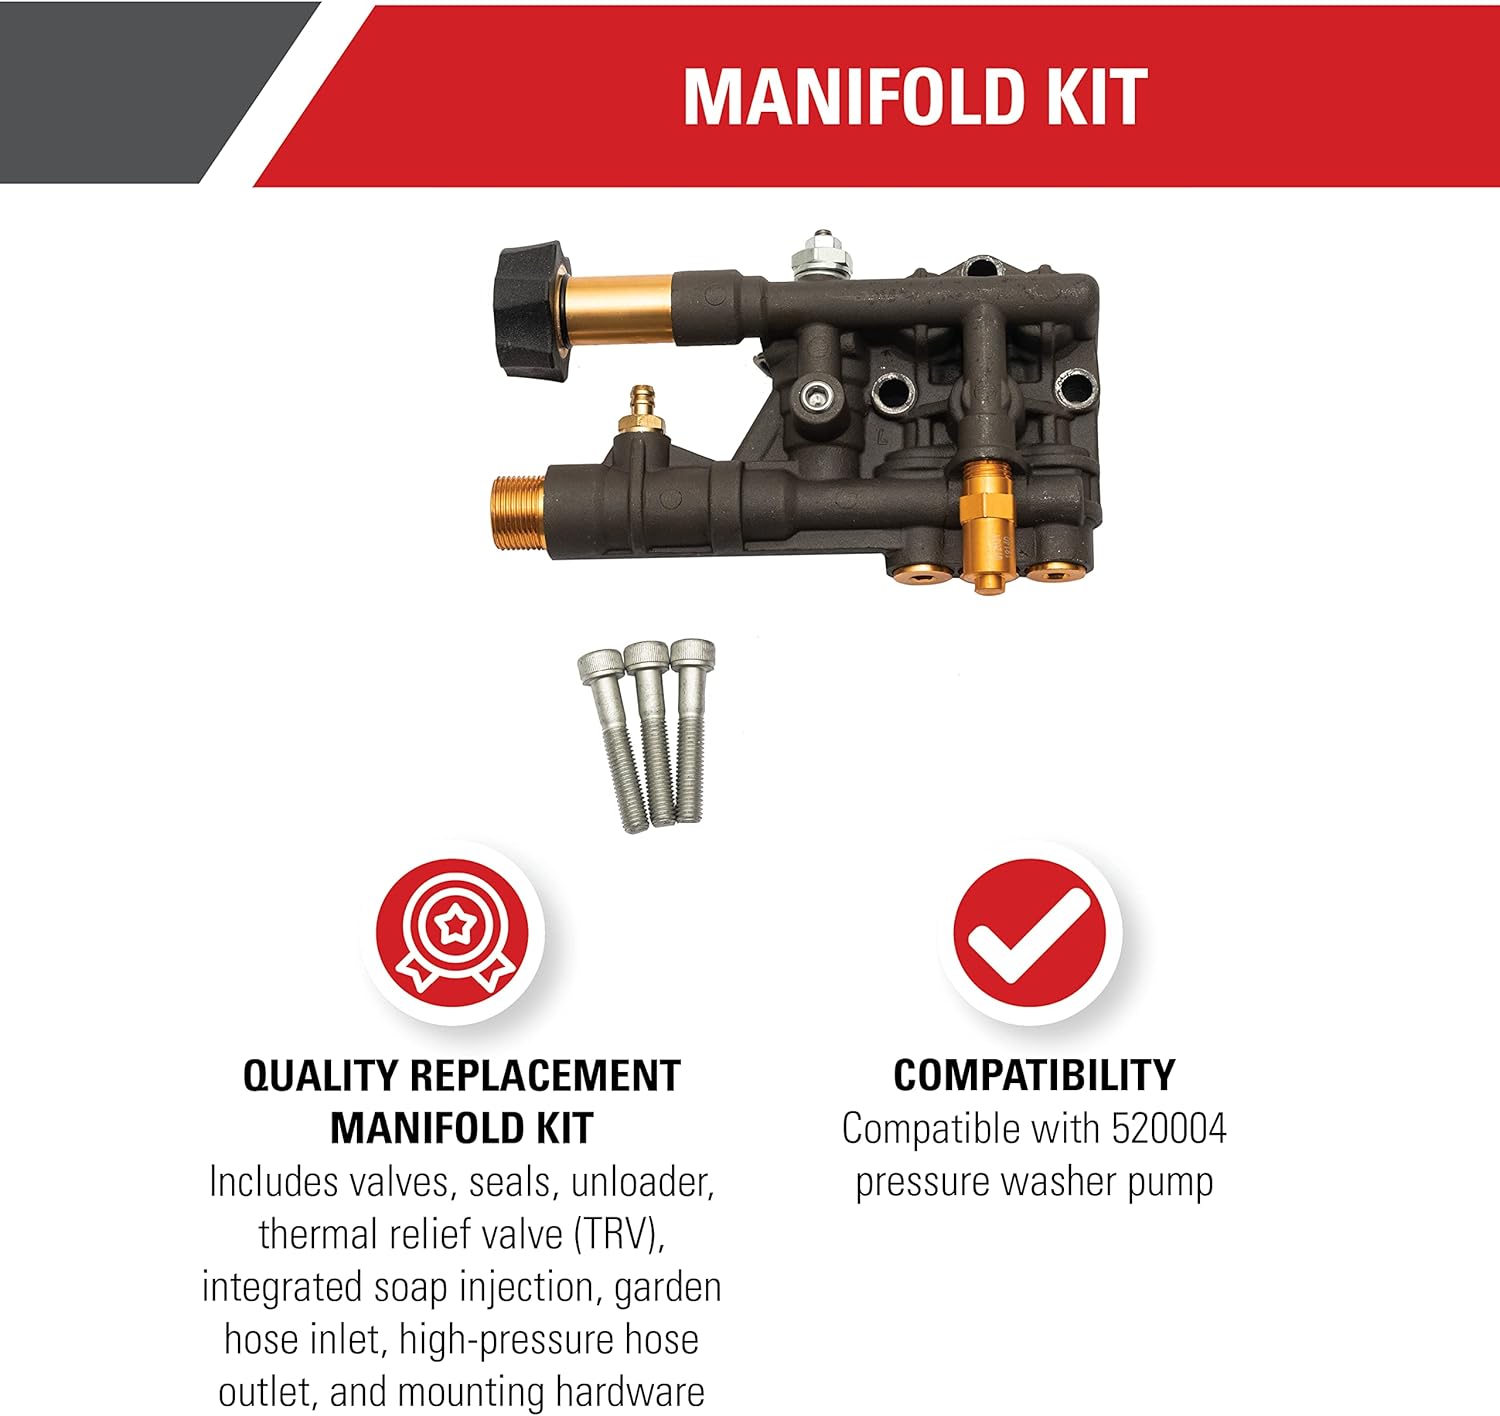
Figure 2: Components included in the Manifold Replacement Kit.
4. Compatibility
This manifold replacement kit is specifically designed for use with the OEM Technologies 520004 Axial Cam Pressure Washer Pump. Please verify your pump's model number before installation to ensure proper fit and function.

Figure 3: The manifold kit is compatible with the 520004 pressure washer pump.
5. Setup and Installation
Follow these steps to replace the manifold on your pressure washer pump. For visual guidance, refer to the embedded videos.
5.1 Preparation
- Turn off the pressure washer engine and disconnect the spark plug wire to prevent accidental starting.
- Shut off the water supply to the pressure washer.
- Squeeze the spray gun trigger to release any remaining pressure in the system.
5.2 Removing the Old Manifold
- Remove the bolts securing the old manifold to the pump.
- Carefully pull the old manifold free from the engine shaft.
- Remove the old shaft key from the engine shaft. If it's not on the shaft, check inside the old pump or if it fell off.
5.3 Installing the New Manifold
- Clean the engine shaft and apply a light coating of anti-seize to the shaft and the new key.
- Insert the new shaft key into the keyway of the engine shaft.
- Slowly pull the engine's recoil rope to rotate the shaft until the keyway is at the top.
- Align the keyway of the new manifold with the key on the engine shaft and carefully push the pump completely onto the engine.
- Rotate the pump until its mounting holes align with the engine block mount.
- Insert the new bolts to secure the pump to the engine block. Pro Tip: Tighten the bolts in an X-pattern to ensure even pressure. Torque to manufacturer recommendations.
- Reconnect the spark plug ignition lead.
5.4 Connecting Hoses and Priming
- Connect your garden hose to the manifold's water inlet.
- Connect your high-pressure hose to the manifold's high-pressure outlet.
- Turn on the water supply.
- Squeeze the spray gun trigger to prime the pump and release any trapped air until a steady stream of water emerges.
Installation Videos:
Video 1: SIMPSON 7110163 Replacement Manifold Installation Guide. This video demonstrates the step-by-step process of replacing the manifold on a pressure washer pump, specifically for the 7110163 model.
Video 2: OEM Technologies Pressure Washer Pump Installation Instructions. This video provides a general guide on how to install an OEM Technologies pressure washer pump, which can be helpful for understanding the manifold replacement process.
Video 3: General Pressure Washer Pump Installation. This video offers a general overview of how to install a pressure washer pump, providing additional context for the manifold replacement.
6. Operating Instructions
Once the new manifold is installed and the pump is primed, you can operate your pressure washer as usual. The manifold manages water flow and pressure, including the soap injection system and thermal relief valve.
- Soap Injection: The integrated soap injection system allows for the application of cleaning detergents. Refer to your pressure washer's main manual for specific instructions on using the detergent tank and adjusting soap flow.
- Pressure Output: The manifold is designed to deliver the specified pressure for your OEM Technologies 520004 pump.
- Thermal Relief Valve (TRV): The TRV is a safety feature that opens to release hot water and allow cooler water into the pump if the internal temperature becomes too high, preventing damage.
For detailed operating procedures, always consult the owner's manual provided with your complete pressure washer unit.
7. Maintenance
Regular maintenance ensures the longevity and optimal performance of your manifold and pressure washer.
- Inspect Connections: Periodically check all hose connections and mounting bolts for tightness and leaks. Tighten as necessary.
- Clean Soap Hose Screen: Inspect and clean the soap hose screen regularly to prevent clogs and ensure proper detergent flow.
- Winterization: If storing the pressure washer in freezing temperatures, ensure the pump and manifold are properly winterized according to your pressure washer's owner's manual to prevent freeze damage.
- General Cleaning: Keep the exterior of the manifold clean from dirt and debris.
8. Troubleshooting
If you encounter issues after installing the new manifold, consider the following common problems and solutions:
| Problem | Possible Cause | Solution |
|---|---|---|
| No or Low Pressure | Air in the pump; Clogged inlet screen; Insufficient water supply; Loose connections. | Prime the pump by squeezing the trigger until a steady stream of water appears. Check the water inlet screen for debris. Ensure the water supply is fully open. Tighten all hose connections. |
| Water Leaks from Manifold | Loose mounting bolts; Damaged seals/O-rings; Improper installation. | Check and tighten mounting bolts in an X-pattern. Inspect seals and O-rings for damage and replace if necessary. Re-evaluate installation steps to ensure correct assembly. |
| No Soap Injection | Clogged soap hose screen; Detergent tank empty; Incorrect nozzle used. | Clean the soap hose screen. Refill the detergent tank. Ensure a low-pressure (black) nozzle is used for detergent application. |
9. Specifications
- Model Number: 7110163
- Product Dimensions: 7 x 3.7 x 2 inches
- Item Weight: 2.2 pounds
- Material: Durable construction (typically brass and aluminum for pressure washer components)
- Includes: Valves, seals, unloader, thermal relief valve (TRV), integrated soap injection, garden hose inlet, high-pressure hose outlet, mounting hardware.
10. Warranty and Support
This SIMPSON Cleaning product is covered by the manufacturer's warranty. For specific warranty details, please refer to the documentation included with your purchase or visit the official SIMPSON website. If you require technical assistance, replacement parts, or have questions not addressed in this manual, please contact SIMPSON customer support.
You can also visit the SIMPSON Store on Amazon for more information and products.


