1. Introduction
Thank you for purchasing the Lithomy Handheld Garment Steamer E16. This manual provides essential information for the safe and efficient operation, maintenance, and troubleshooting of your new garment steamer. Please read it thoroughly before first use and retain it for future reference.
2. Important Safety Instructions
When using electrical appliances, basic safety precautions should always be followed to reduce the risk of fire, electric shock, and personal injury.
- Read all instructions before using the steamer.
- Use the appliance only for its intended use.
- To protect against the risk of electric shock, do not immerse the steamer in water or other liquids.
- Always turn off and unplug the steamer from the electrical outlet before filling or emptying water, and when not in use.
- Do not operate the steamer with a damaged cord or plug, or if the appliance has been dropped or damaged.
- Keep the steam nozzle away from your body and hands during operation. Steam is hot and can cause burns.
- Do not leave the steamer unattended while it is connected to power.
- Use only distilled or demineralized water to prevent mineral buildup.
- Keep out of reach of children.
Warning: If you find the product damaged, deformed, or exhibiting abnormal performance, stop using it immediately and contact customer support.

Image: Lithomy Garment Steamer with included accessories: fabric brush, heat-protective glove, and storage pouch.
3. Package Contents
Please check the package for the following items:
- Lithomy Handheld Garment Steamer E16
- Fabric Brush Attachment
- Heat-Protective Glove
- Storage Pouch
- User Manual (this document)
4. Product Overview
Familiarize yourself with the components of your Lithomy Garment Steamer E16.
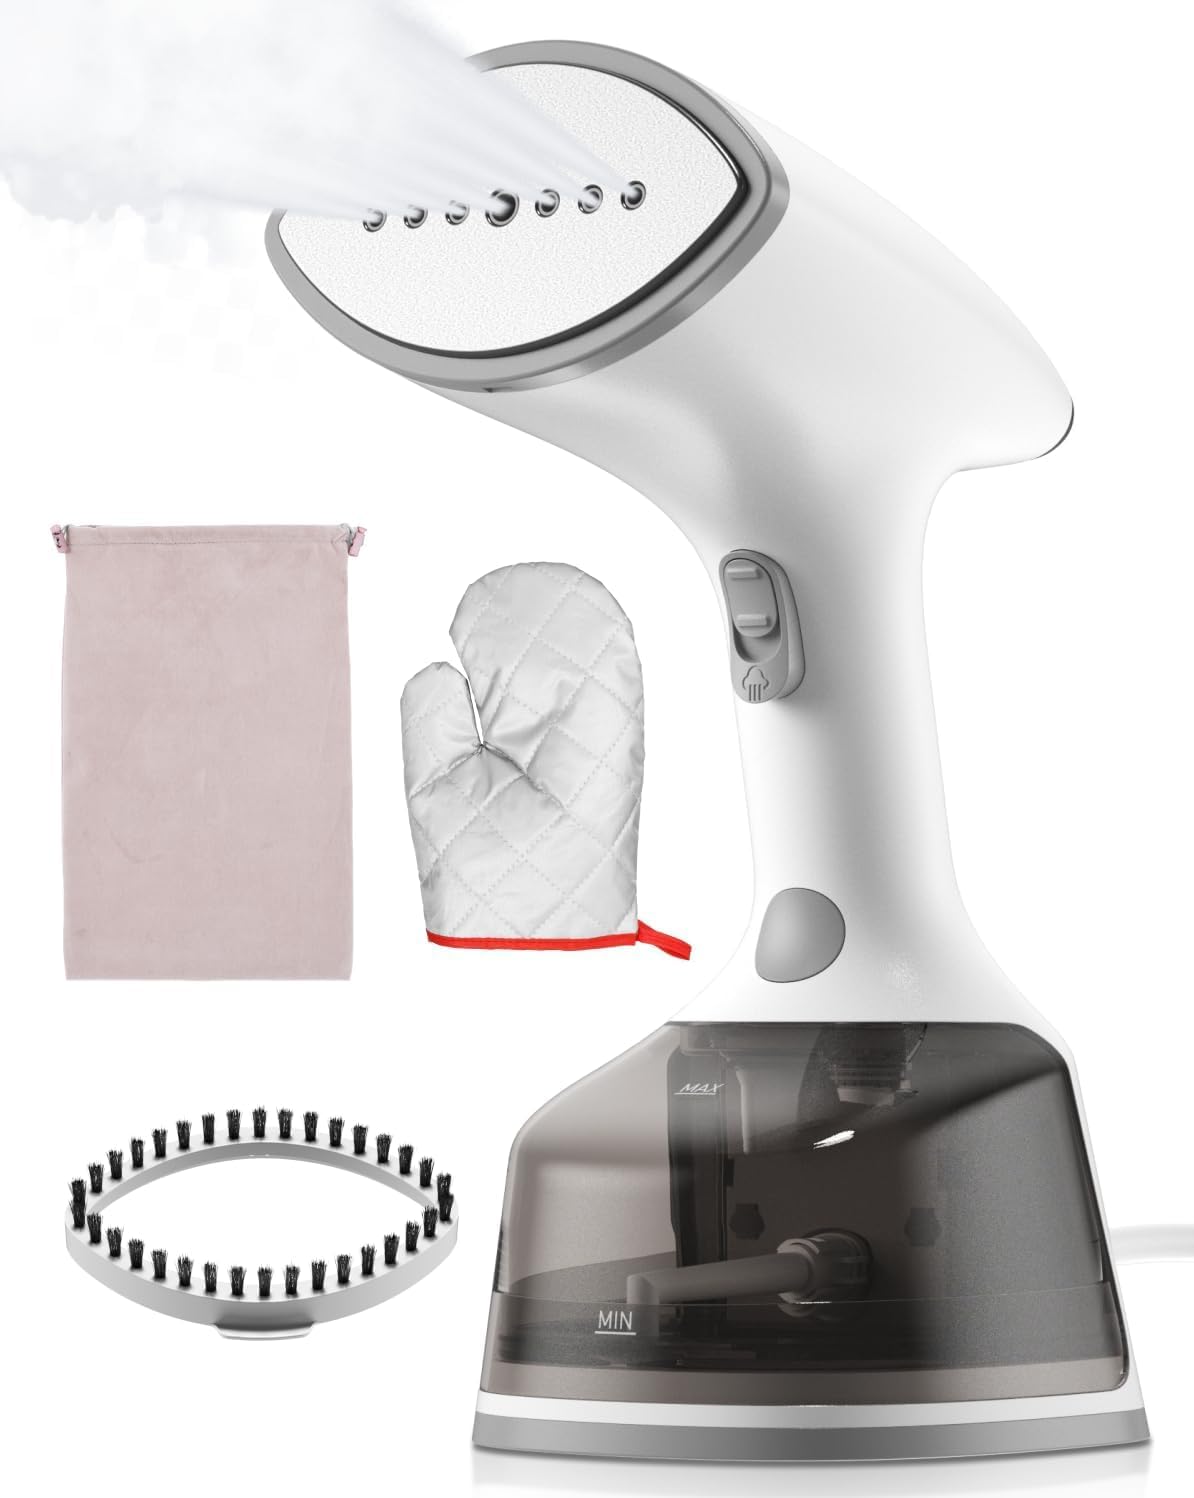
Image: Front view of the Lithomy Handheld Garment Steamer E16.
- Steam Nozzle
- LCD Control Panel (Power button, Steam Mode buttons)
- Steam Release Lock Button
- Handle
- Detachable Water Tank (with MIN/MAX indicators)
- Power Cord
5. Setup and Preparation
5.1 Filling the Water Tank
- Ensure the steamer is unplugged from the power outlet.
- Remove the detachable water tank from the main unit.
- Open the water tank cap.
- Fill the tank with distilled or demineralized water. Do not exceed the MAX water level indicator.
- Close the water tank cap securely and reattach the tank to the steamer unit.

Image: Step-by-step guide for filling the water tank, ensuring not to exceed the maximum level.
5.2 Attaching the Fabric Brush
The fabric brush can be attached to the steam nozzle for enhanced wrinkle removal and to remove lint or pet hair from fabrics.
- Align the fabric brush with the steam nozzle.
- Press firmly until it clicks into place.
- To remove, gently pull the brush away from the nozzle.

Image: The fabric brush attachment, designed to be used with the steamer head.
6. Operating Instructions
6.1 Basic Steaming Procedure
- Add Water: Ensure the water tank is filled as described in Section 5.1.
- Power On: Plug the steamer into a suitable electrical outlet. Touch the power switch icon on the LCD display. The light will flash, indicating preheating.
- Preheating: Wait approximately 20-30 seconds for the steamer to preheat. The light will stop flashing and remain steady when preheating is complete.
- Select Steam Mode: Touch the steam icon on the LCD display to select your desired steam mode. The steamer offers two steam modes:
- Mode 1 (Delicate): Suitable for most fabrics and light wrinkles.
- Mode 2 (Turbo): Provides a more powerful steam burst for tougher wrinkles and thicker fabrics.
- Begin Steaming: Turn the steam release lock button on the front of the garment steamer to the unlocked position to release continuous steam. Hold the steamer upright and move it slowly over the fabric, allowing the steam to penetrate.
- Horizontal and Vertical Steaming: The steamer is designed for both vertical steaming of hanging garments and horizontal steaming on a flat surface without leaking.
- Shut Down: After use, press and hold the power button for 2 seconds. The indicator light will go out, and the device will stop working. Unplug the steamer from the outlet.

Image: Step-by-step visual guide for operating the steamer, including water filling, power on, preheating, mode selection, steam release, and shutdown.

Image: LCD screen showing two steam settings and recommended fabric types for each mode (delicate for chiffon, silk, linen; turbo for cotton, nylon, wool, denim).
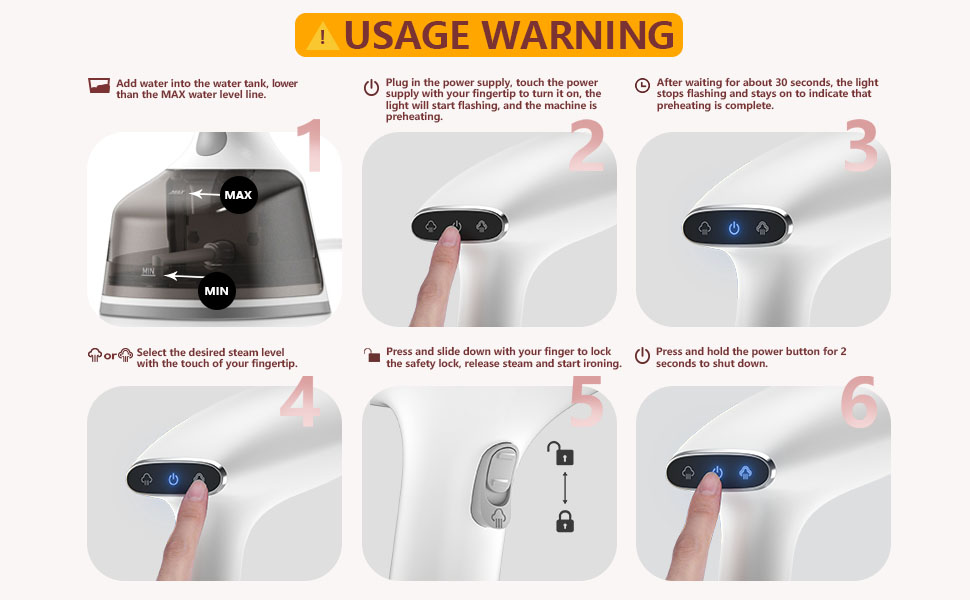
Image: Demonstrating 2-in-1 horizontal and vertical steaming capabilities.
6.2 Usage Tips
- For best results, hang garments on a hanger.
- Pull the fabric taut with one hand while steaming with the other.
- Move the steamer slowly from top to bottom.
- Always wear the heat-protective glove provided.
- Do not steam clothes while wearing them.
7. Maintenance and Cleaning
7.1 After Each Use
- Unplug the steamer and allow it to cool completely.
- Empty any remaining water from the water tank.
- Wipe the exterior of the steamer with a soft, damp cloth.
- Store the steamer in a cool, dry place.
7.2 Descaling (Monthly or as Needed)
If you notice reduced steam output or mineral residue, descaling may be necessary. Using distilled water regularly will minimize the need for descaling.
- Ensure the steamer is unplugged and cool.
- Mix a solution of 50% white vinegar and 50% water.
- Fill the water tank with this solution up to the MAX line.
- Plug in the steamer and allow it to heat up.
- Run the steamer until the tank is empty.
- Repeat the process with clean distilled water to rinse out any vinegar residue.
8. Troubleshooting
| Problem | Possible Cause | Solution |
|---|---|---|
| No steam or low steam output. |
|
|
| Water leaking from nozzle. |
|
|
| Steamer not turning on. |
|
|
9. Specifications
| Model: | E16 |
| Brand: | Lithomy |
| Power: | 1500W |
| Voltage: | 120 Volts |
| Water Tank Capacity: | 300 Milliliters |
| Heat-up Time: | 20-30 seconds |
| Continuous Steaming Time: | Up to 20 minutes |
| Product Dimensions (L x W x H): | 9.45" x 4.33" x 4.72" (24cm x 11cm x 12cm) |
| Item Weight: | 1.4 Kilograms / 3.08 pounds |
| UPC: | 797372611551 |
Note: Product specifications are subject to change without notice for improvement.
10. Warranty and Customer Support
Lithomy products are designed and manufactured to the highest quality standards. For warranty information or customer support, please refer to the contact information provided at the point of purchase or visit the official Lithomy website.
If you encounter any issues with your product, please contact our customer service team before attempting any repairs yourself.
Important: The provided product data does not contain specific warranty duration or direct customer support contact details. Please consult your purchase documentation for this information.


