
DAYBETTER
DAYBETTER 100 ft LED Strip Lights User Manual
Model: FLSL5025BMRGBUS
1. Introduction
Thank you for choosing DAYBETTER LED Strip Lights. This manual provides detailed instructions for the installation, operation, maintenance, and troubleshooting of your new LED strip lights. Please read this manual carefully before use to ensure proper functionality and safety.

Image 1.1: DAYBETTER 100ft LED Strip Lights, showing the light strips, remote control, and smartphone app interface.
2. What's in the Box
Verify that all components are present in your package:
- 2 rolls of 50ft LED lights (total 100ft)
- 1 Power Adapter
- 1 IR Remote Control
- 1 IR Receiver/Controller Box with built-in microphone
- User Manual (this document)
3. Setup and Installation
Follow these steps for proper setup and installation of your LED strip lights:
3.1. Preparation
- Ensure the installation surface is clean, dry, and smooth.
- Unroll the LED strips carefully to avoid tangling or damage.
3.2. Physical Installation
- Connect the LED strip(s) to the IR Receiver/Controller Box. Ensure the arrows on the connectors align.
- Connect the Power Adapter to the IR Receiver/Controller Box.
- Peel off the adhesive backing from the LED strip.
- Carefully press the LED strip onto the desired surface, applying firm and even pressure.
- Plug the power adapter into a standard electrical outlet.
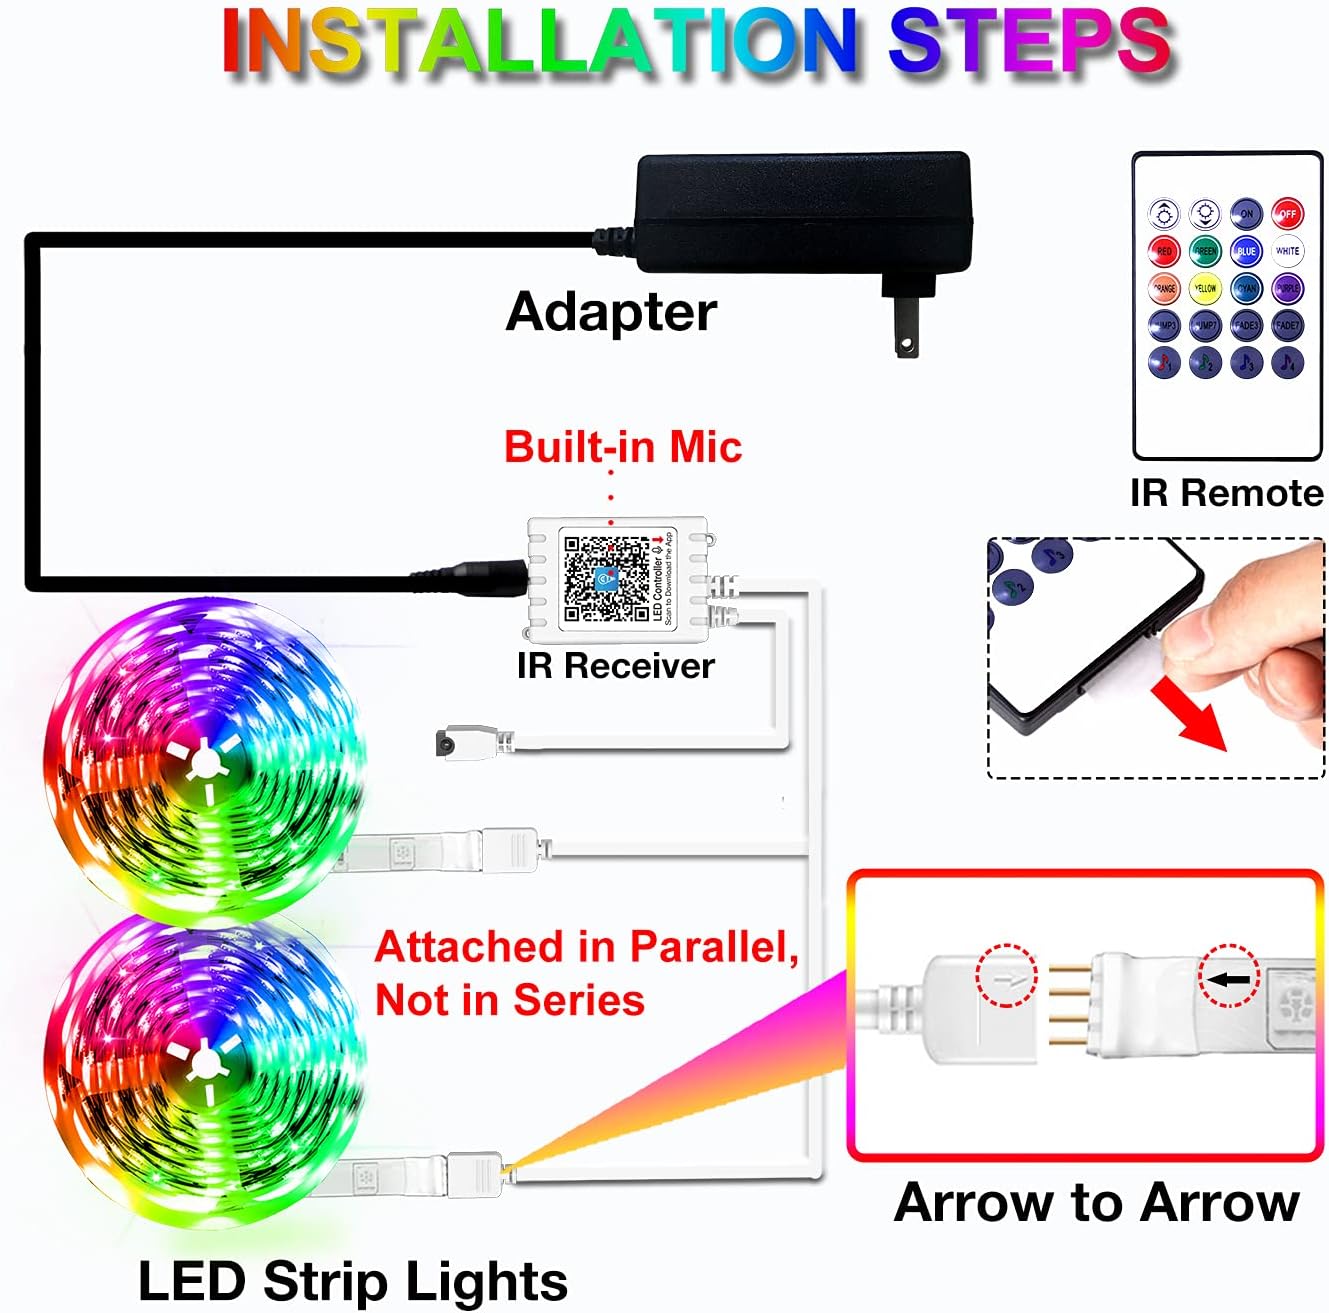
Image 3.1: Installation Steps. Note that the two 50ft rolls are attached in parallel, not in series, to the IR receiver.

Image 3.2: The IR Remote and Receiver, which includes a built-in microphone for music sync features.
3.3. App Download and Connection
To unlock full features, download the companion app:
- Scan the QR code on the IR Receiver/Controller Box or search for 'Apollo Lighting' or 'Smart Light app' in your smartphone's app store.
- Install and open the app.
- Ensure Bluetooth is enabled on your smartphone. The app should automatically detect the LED lights.
- Follow the in-app instructions to pair and connect to your lights.

Image 3.3: App Download and Connection Process. The app allows for comprehensive control of the LED strips.
4. Operating Instructions
Your DAYBETTER LED Strip Lights can be controlled via the included IR remote or the smartphone app.
4.1. Remote Control Operation
Point the IR remote directly at the IR receiver for optimal response. The remote allows for basic functions:
- On/Off: Power the lights on or off.
- Color Selection: Choose from preset static colors.
- Brightness Adjustment: Increase or decrease light intensity.
- Mode Selection: Cycle through various dynamic lighting modes (e.g., flash, fade, jump).
- Music Mode: Activate music synchronization (requires the built-in microphone on the IR receiver).
4.2. App Control Operation
The smartphone app provides advanced control and customization options:
- Color Wheel: Select from a wide spectrum of colors.
- Custom Modes: Create and save your own lighting effects.
- Music Sync: Synchronize lights with music playing on your phone or ambient sounds detected by the controller's microphone.
- Timer Function: Schedule lights to turn on/off at specific times.
- Group Management: Control multiple DAYBETTER light sets simultaneously (if applicable).
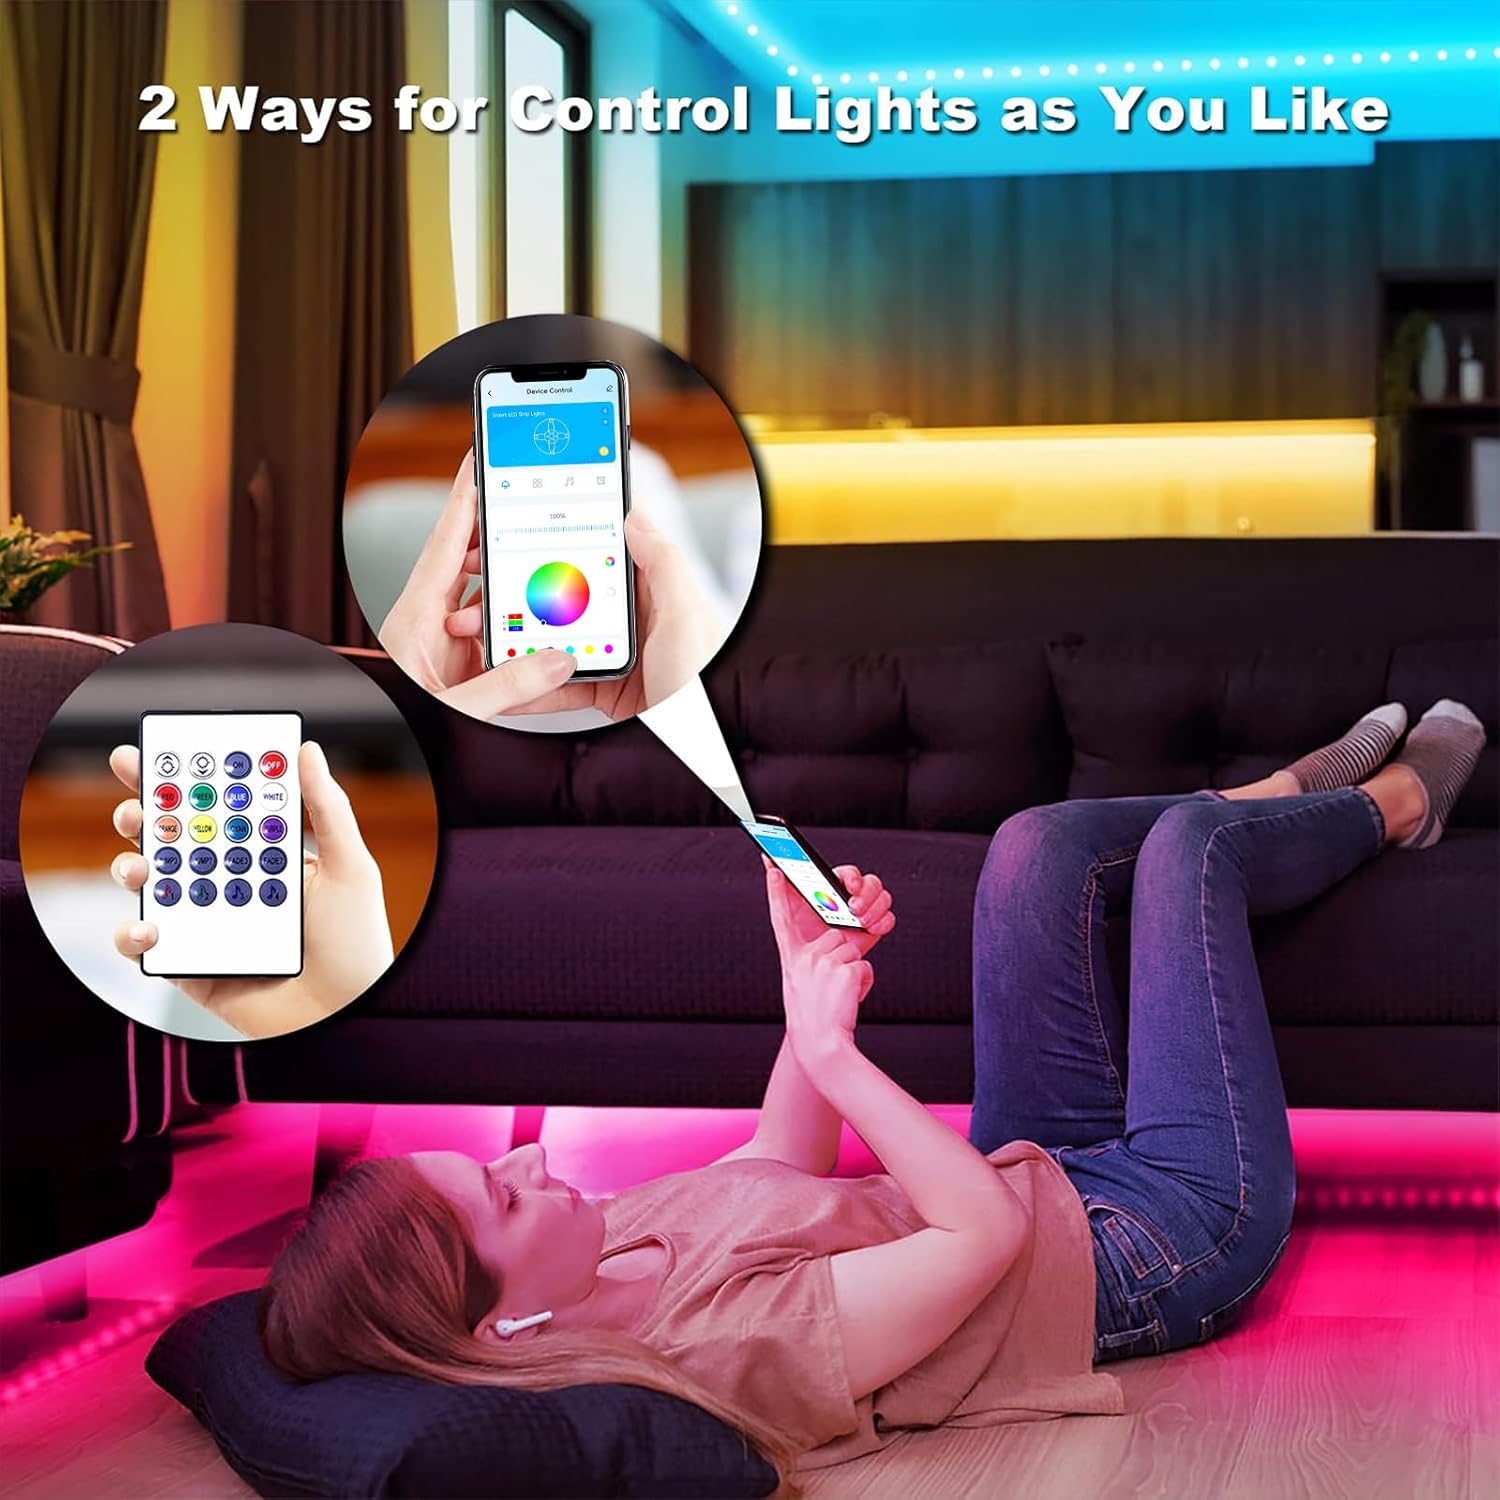
Image 4.1: Control Options. The lights can be controlled using either the included IR remote or the dedicated smartphone application.

Image 4.2: Music Sync Feature. The lights can change color and pattern in response to music or sound, creating a dynamic atmosphere.

Image 4.3: Timer Setting. Users can set schedules for the lights to automatically turn on or off, aligning with daily routines.
5. Maintenance
To ensure the longevity and optimal performance of your DAYBETTER LED Strip Lights, follow these maintenance guidelines:
- Cleaning: Gently wipe the LED strips with a dry, soft cloth to remove dust. Do not use liquid cleaners or abrasive materials.
- Adhesion: If the adhesive begins to weaken over time, you may reinforce it with additional adhesive clips or tape (not included).
- Storage: If storing the lights for an extended period, ensure they are clean, dry, and rolled loosely to prevent damage to the strip or connections.
- Power Supply: Always use the original power adapter provided with the product.
5.1. Cutting and Reconnecting (Advanced Users)
The LED strips can be cut at designated marks (usually indicated by a scissor icon or copper pads) to adjust length. Ensure power is disconnected before cutting. For reconnecting, use appropriate connectors (not included) and ensure polarity is correct.

Image 5.1: Cutting and Reconnecting LED Strips. Always cut at designated marks and use proper connectors for safe reconnection.
6. Troubleshooting
If you encounter issues with your DAYBETTER LED Strip Lights, refer to the following common problems and solutions:
| Problem | Possible Cause | Solution |
|---|---|---|
| Lights do not turn on. | No power, loose connection, faulty adapter. | Check power outlet. Ensure all connections (strip to controller, controller to adapter, adapter to wall) are secure. Try a different outlet. |
| Remote control not working. | Battery depleted, IR receiver blocked, remote not pointed correctly. | Replace remote battery. Ensure no obstructions between remote and IR receiver. Point remote directly at the receiver. |
| App cannot connect to lights. | Bluetooth off, app not updated, lights not in pairing mode. | Ensure Bluetooth is on. Restart the app and lights. Re-pair the device in the app settings. |
| Lights are dim or inconsistent colors. | Power supply issue, damaged section of strip, incorrect connection. | Check power adapter. Inspect the strip for physical damage. Ensure connections are secure and arrows are aligned. |
| Lights fall off surface. | Surface not clean/dry, adhesive worn out. | Clean and dry surface thoroughly before reapplication. Use additional adhesive clips or strong double-sided tape. |
If the problem persists after trying these solutions, please contact DAYBETTER customer support.
7. Specifications
| Feature | Detail |
|---|---|
| Model Number | FLSL5025BMRGBUS |
| Total Length | 100 ft (2 x 50ft rolls) |
| Light Source Type | LED |
| Light Color | Multicolor (RGB) |
| Control Method | App Control, Remote Control |
| Connectivity Technology | Bluetooth |
| Special Features | Timer, Dimmable, Music Sync, Color Changing, Linkable |
| Indoor/Outdoor Usage | Indoor |
| Voltage | 24 Volts |
| Wattage | 5 watts |
| Average Life | 50000 Hours |
8. Warranty and Support
DAYBETTER products are designed for quality and reliability. For specific warranty information, please refer to the product packaging or contact DAYBETTER customer support directly.
If you require assistance, have questions, or need to report an issue, please contact DAYBETTER US customer service through their official channels. Contact information can typically be found on the product packaging or the brand's official website.
For more information, visit the DAYBETTER Store on Amazon.
Related documents


Ask a question about this manual
Ask about setup, troubleshooting, compatibility, parts, safety, or missing instructions. Manuals+ will review the question and use this page’s manual context to help answer it.