1. Safety Information
Please read all safety instructions before operating the product. Failure to follow these instructions may result in injury or damage to the product.
- Keep away from naked flame or direct heat sources.
- Do not immerse the product or its components in water.
- Adult supervision is recommended for children operating this product.
- Ensure all battery compartments are securely closed before use.
2. Product Overview
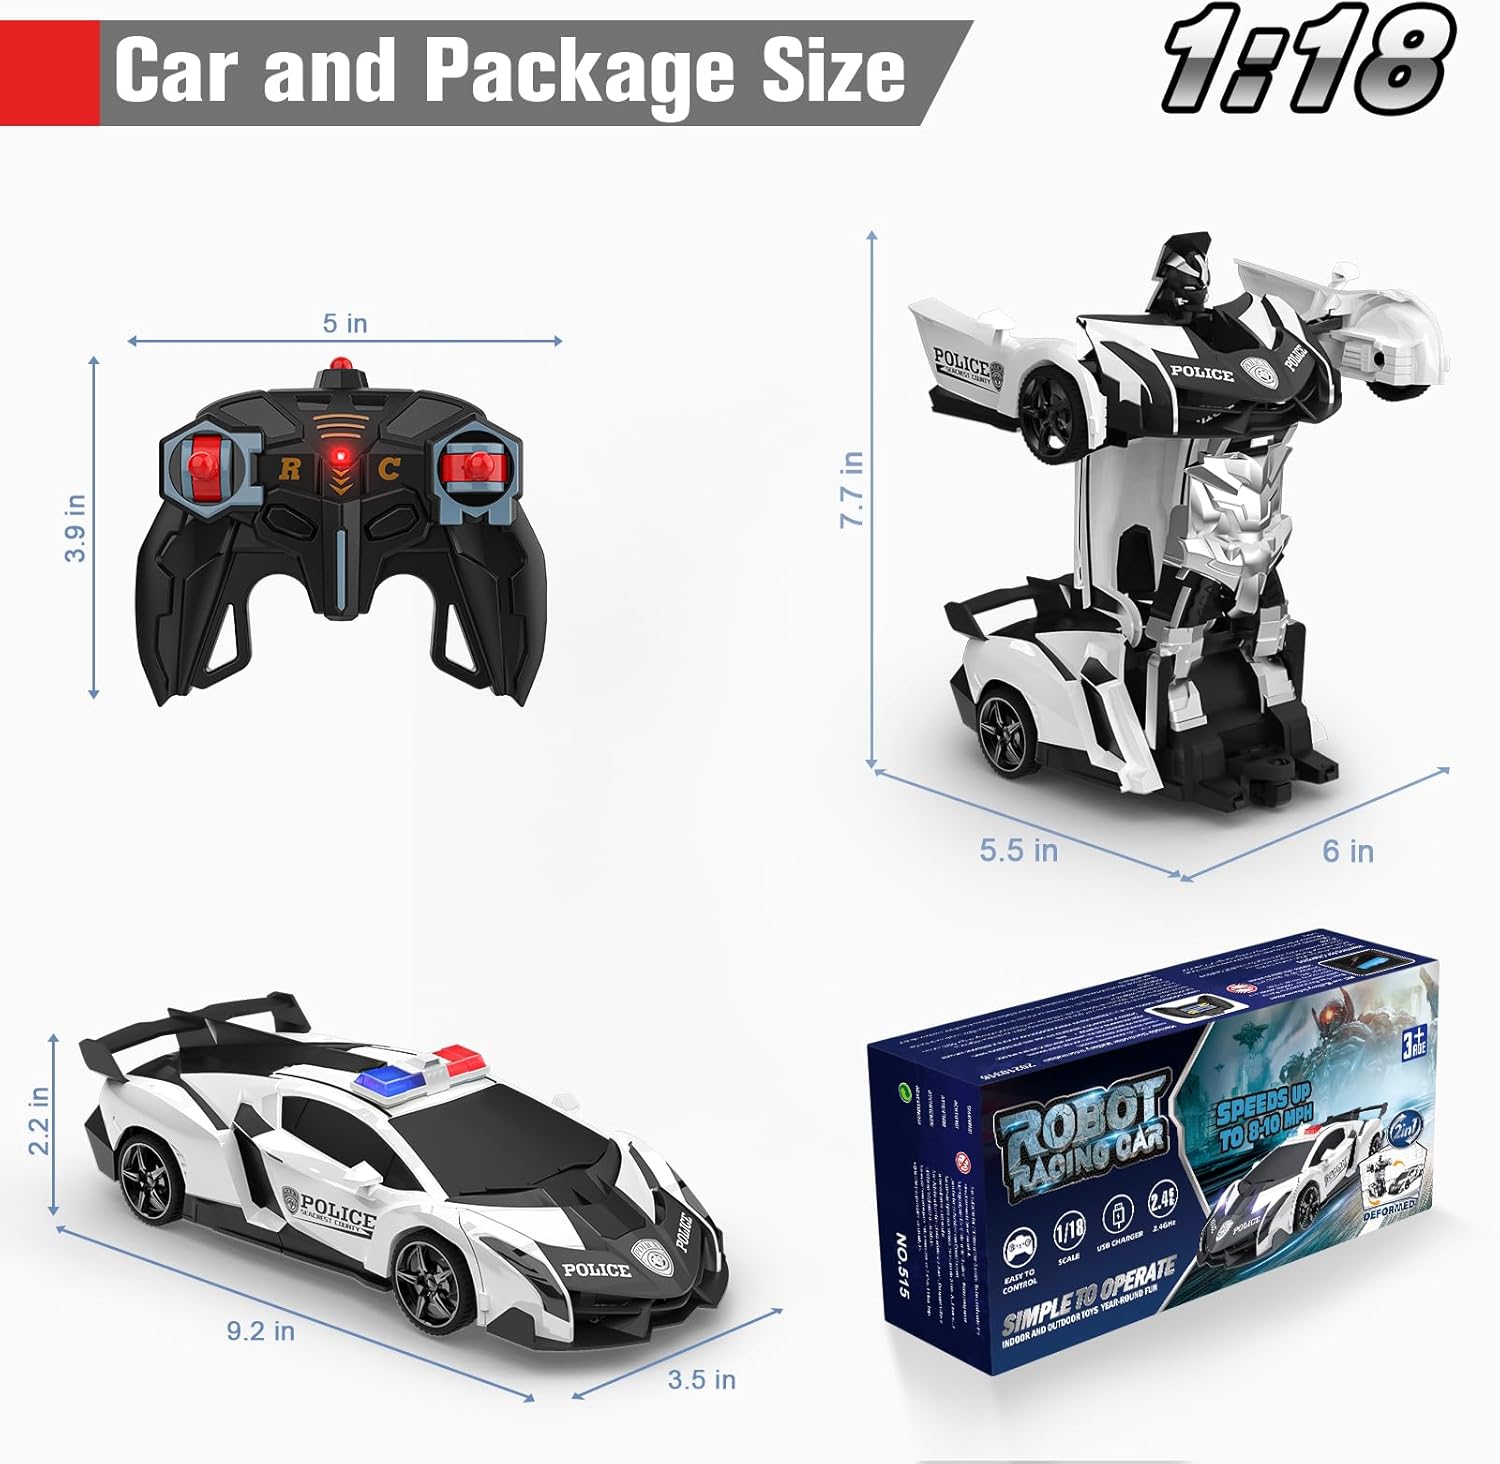
The BLUEJAY Transform RC Car Robot Model NO.515 is a versatile remote-controlled vehicle capable of transforming between a car and a robot. It features a 2.4Ghz control system for interference-free operation, one-button deformation, 360° rotation, and drift capabilities.

3. Package Contents
Verify that all items listed below are included in your package:
- 1 x RC Transform Car
- 1 x Remote Controller
- 1 x Screwdriver
- 1 x Car Battery (Rechargeable Lithium Polymer)
- 1 x Car Battery Charger
4. Setup
4.1 Car Battery Installation and Charging
- Locate the battery compartment on the underside of the RC car.
- Use the provided screwdriver to open the battery compartment cover.
- Connect the rechargeable Lithium Polymer battery to the car's battery connector.
- Place the battery inside the compartment and close the cover securely with the screwdriver.
- To charge the car battery, connect it to the included car battery charger. Plug the charger into a suitable power source. A full charge typically takes approximately 1 hour and provides 20-30 minutes of play time.

4.2 Remote Controller Battery Installation
- Locate the battery compartment on the back of the remote controller.
- Open the battery compartment cover.
- Insert two (2) 1.5V AA batteries (not included), ensuring correct polarity (+/-).
- Close the battery compartment cover securely.
5. Operating Instructions
5.1 Power On/Off and Pairing
- Turn on the power switch on the RC car (located on the underside, refer to Figure 4.1).
- Turn on the power switch on the remote controller.
- The car and remote should automatically pair. If not, turn both off and on again.
5.2 Basic Controls
Use the joysticks and buttons on the remote controller to operate the RC car:
- Forward/Backward: Use the left joystick.
- Turn Left/Right: Use the right joystick.

5.3 Transformation
The RC car can transform between car mode and robot mode with a single button press.
- Press the Deformation button on the remote controller to initiate the transformation. The car will automatically convert to robot mode.
- Press the Deformation button again to transform the robot back into car mode.
5.4 360° Rotation and Drift
The RC car robot is designed for dynamic movement, including 360-degree rotations.
- In both car and robot modes, specific control inputs (refer to remote control diagram) allow for flexible 360-degree turning and drifting maneuvers.

5.5 Auto Demo Function
For an automatic demonstration of the product's capabilities:
- Press the Auto Demo button on the remote controller. The car will perform a sequence of movements and transformations.
6. Maintenance
6.1 Cleaning
- Wipe the RC car and remote controller with a clean, dry cloth.
- Do not use water or chemical cleaners, as this may damage electronic components.
6.2 Battery Care
- Always remove batteries from both the car and the remote controller if the product will not be used for an extended period.
- Store batteries in a cool, dry place.
- Do not attempt to charge non-rechargeable batteries.
7. Troubleshooting
If you encounter issues with your BLUEJAY Transform RC Car Robot, refer to the table below for common problems and solutions.
| Problem | Possible Cause | Solution |
|---|---|---|
| Car does not move or respond to remote. | Low battery in car or remote; Car/remote not powered on; Not paired. | Charge car battery; Replace remote batteries; Ensure both are powered on; Turn both off and on to re-pair. |
| Car does not transform. | Low car battery; Obstruction; Transformation button not pressed correctly. | Ensure car battery is fully charged; Check for any physical obstructions; Press the deformation button firmly. |
| Short play time. | Battery not fully charged; Old battery. | Ensure car battery is charged for the recommended 1 hour; Consider replacing the battery if it's old. |
| Interference with other RC toys. | Operating near other 2.4Ghz devices. | The 2.4Ghz system is designed to minimize interference, but try operating in a less congested area if issues persist. |
8. Specifications
| Feature | Detail |
|---|---|
| Product Dimensions | 9.2 x 4.2 x 2.7 inches |
| Item Weight | 14 ounces |
| Item Model Number | NO.515 |
| Manufacturer Recommended Age | 36 months - 12 years |
| Car Battery | 1 Lithium Polymer battery (included) |
| Remote Controller Batteries | 2 x 1.5V AA batteries (not included) |
| Control Frequency | 2.4Ghz |


