
Introduction
This manual provides detailed instructions for the installation, operation, and maintenance of your NC SWM 9702 Car Radio 1 Din MP5 Player. Please read this manual thoroughly before using the product to ensure proper functionality and safety. Keep this manual for future reference.
Product Features
- 7-Inch HD Retractable Screen: Provides a clear and intuitive display for navigation, video playback, and system controls.
- Android Operating System: Offers a familiar interface and access to various applications.
- Bluetooth 4.0 Connectivity: Supports hands-free calling and audio streaming for safe driving.
- Mirror Link Function: Seamlessly projects your smartphone screen (iOS/Android) onto the player's display via USB or WiFi.
- GPS Navigation: Built-in GPS with support for offline maps (Europe) and real-time traffic updates.
- Rear View Camera Input: Enhances parking safety with automatic display when reversing (camera optional/included with this model).
- FM Radio: High-quality radio tuner with a frequency range of 87.5~108MHz.
- USB & AUX Input: Multiple connectivity options for media playback from USB drives and external audio devices.
- Steering Wheel Control Support: Allows integration with your vehicle's steering wheel controls for convenient operation.
- Lossless Audio Support: Compatible with APE/FLAC and other popular audio formats.
- 4-Core CPU: Ensures smooth performance and faster operation.
What's in the Box
Verify that all components listed below are present in your package:
- 1 x Android Head Unit (SWM 9702)
- 1 x GPS Antenna
- 2 x Disassembly Keys
- 2 x Power Cords (Wiring Harnesses)
- 1 x Rear View Camera (4LED)
- 1 x USB Cable

Figure 1: All components included in the NC SWM 9702 package.
Setup and Installation
Professional installation is recommended for this product. Ensure the vehicle's power is disconnected before beginning installation.
Pre-Installation Checklist
- Ensure your vehicle's dashboard has a 1-DIN slot.
- Gather necessary tools (screwdrivers, wire strippers, electrical tape, multimeter).
- Identify your vehicle's wiring harness for power, speakers, and accessories.
Wiring Connections
Refer to the provided wiring diagram (usually on the unit or in a separate sheet) for precise connections. Below are general guidelines:
- Yellow Wire (B+): Connect to constant 12V power.
- Red Wire (ACC): Connect to switched 12V power (ignition).
- Black Wire (GND): Connect to vehicle chassis ground.
- Blue Wire (ANT): Connect to power antenna or amplifier remote turn-on.
- Speaker Wires: Connect to corresponding vehicle speaker wires (e.g., White/White-Black for Front Left, Gray/Gray-Black for Front Right, Green/Green-Black for Rear Left, Purple/Purple-Black for Rear Right).
- Reverse Input Wire: Connect to the vehicle's reverse light signal for automatic camera display.
- GPS Antenna: Connect the GPS antenna to the dedicated port on the back of the unit and mount it in a location with a clear view of the sky (e.g., dashboard, A-pillar).
- Rear View Camera: Connect the camera's video output to the "CAM IN" or "REVERSE VIDEO" input on the unit. Power the camera from the reverse light circuit.
Mounting the Unit
- Carefully slide the head unit into the 1-DIN mounting sleeve until it clicks into place.
- Secure the unit using the provided mounting brackets or screws.
- Reassemble the dashboard trim panels.
Operating Instructions
Basic Operation
- Power On/Off: Press the power button (usually VOL knob) to turn the unit on or off.
- Volume Control: Rotate the VOL knob or use the on-screen controls.
- Screen Retraction: The screen automatically retracts when the unit is turned off or can be manually retracted/extended via a dedicated button.
- Home Screen: Tap the Home icon to return to the main menu.
Bluetooth Hands-free and Audio
- Go to the Bluetooth menu on the head unit.
- Enable Bluetooth on your mobile phone and search for available devices.
- Select "SWM 9702" (or similar name) from the list and pair.
- Once connected, you can make/receive calls and stream audio directly through the car speakers.
Mirror Link Function
This feature allows you to display your smartphone's screen on the head unit.
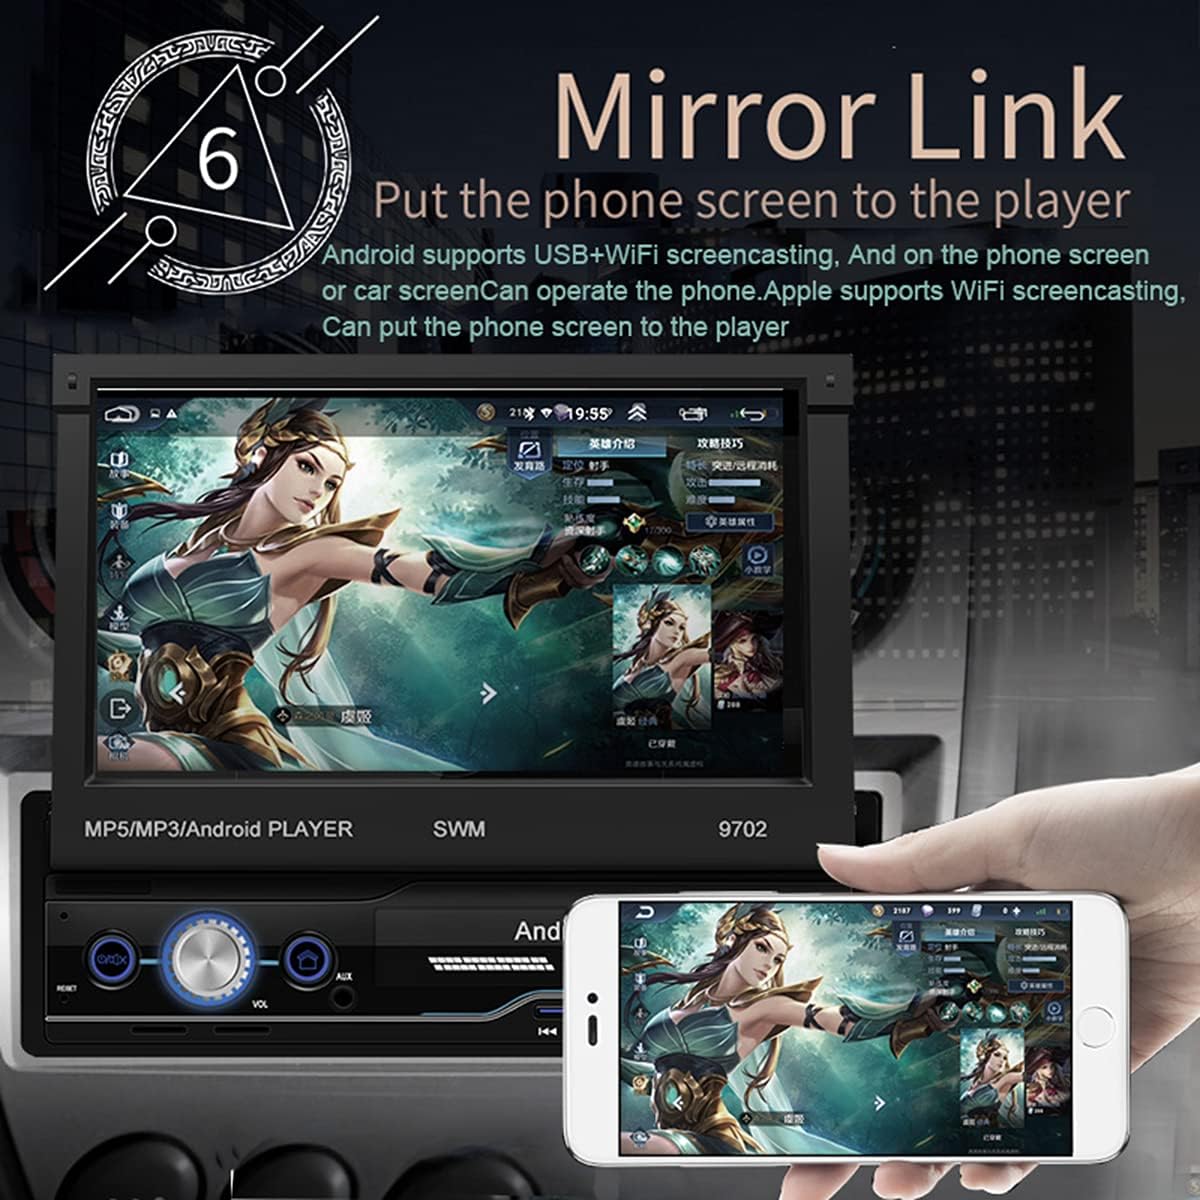
Figure 2: Mirror Link in action, showing a smartphone screen duplicated on the car radio display.
- For Android: Connect your phone via USB or WiFi. Follow the on-screen prompts to enable USB debugging or WiFi mirroring. You can control the phone from the car screen.
- For iOS (Apple): Connect via WiFi. The phone screen will be mirrored to the player. Control is typically from the phone itself.
GPS Navigation
The unit comes with pre-installed offline maps for Europe and supports online navigation.

Figure 3: GPS Navigation interface showing map data and route details.
- Tap the "Navigation" or "GPS" icon on the home screen.
- Select your preferred navigation application (e.g., Google Maps, Waze, or the pre-installed offline map).
- Enter your destination and follow the voice and visual prompts.
Rear View Camera Function
When properly installed, the unit automatically displays the rear view when the vehicle is put into reverse gear.
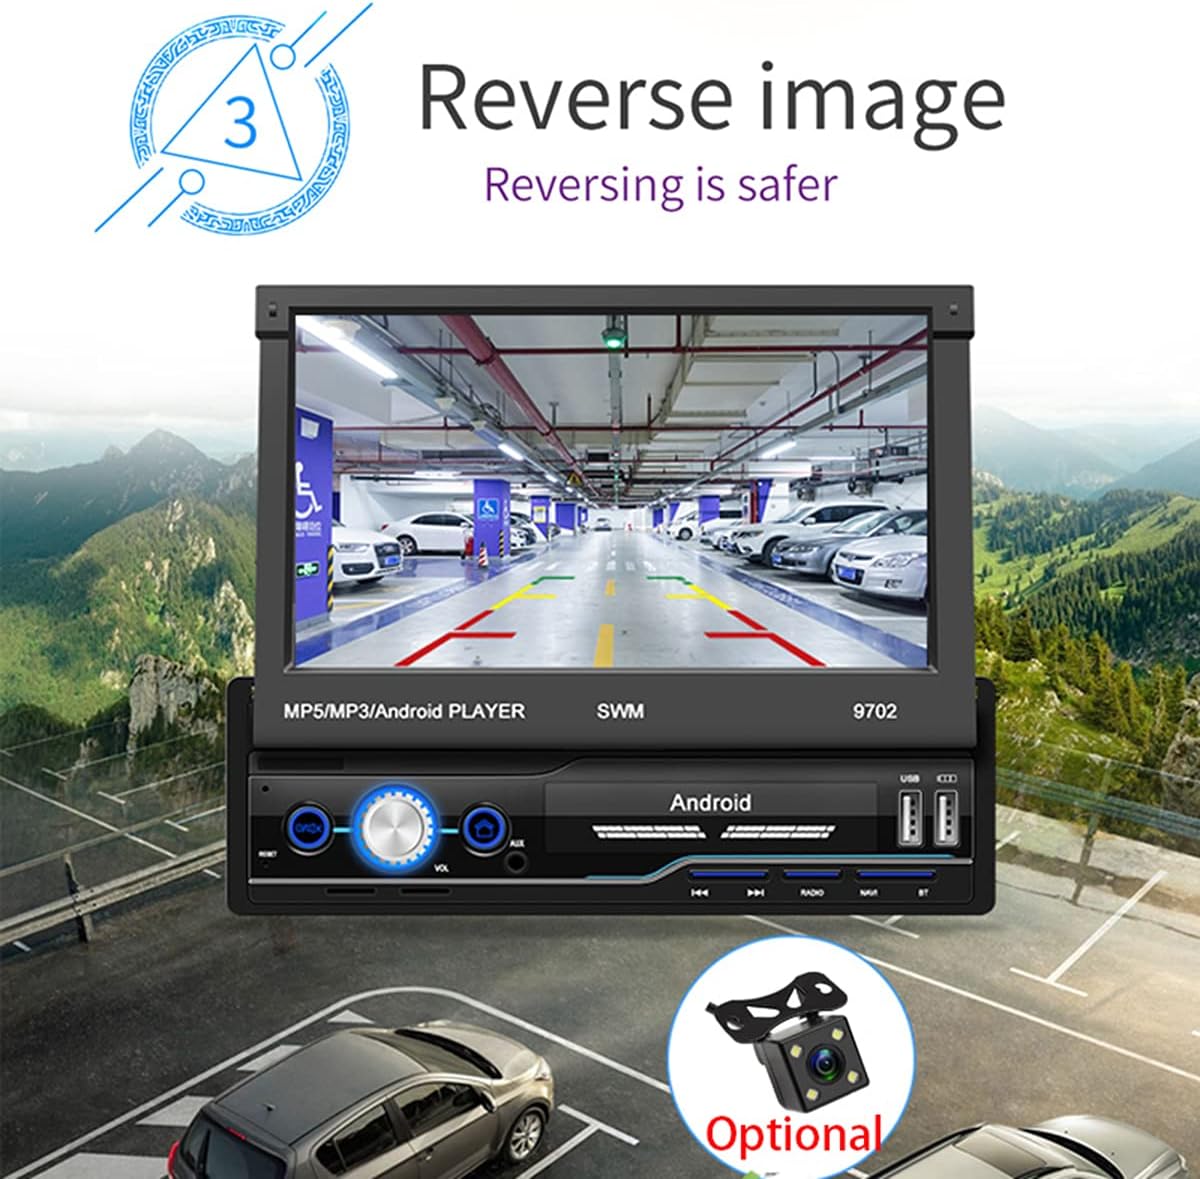
Figure 4: Rear view camera display for safer reversing.
- Ensure the rear view camera is correctly wired to the unit and the vehicle's reverse light circuit.
- When shifting into reverse, the screen will automatically switch to the camera view.
FM Radio
- Tap the "Radio" icon on the home screen.
- Use the scan function to automatically search and save available stations.
- Manually tune by frequency or select from saved presets.
USB and AUX Playback
- USB: Insert a USB flash drive into the USB port. The unit will automatically detect and allow you to browse and play audio/video/picture files.
- AUX: Connect an external audio device (e.g., MP3 player) to the AUX input using a 3.5mm audio cable. Select "AUX" as the source.
Steering Wheel Control Learning
If your vehicle has steering wheel controls, you can configure them to operate the head unit.
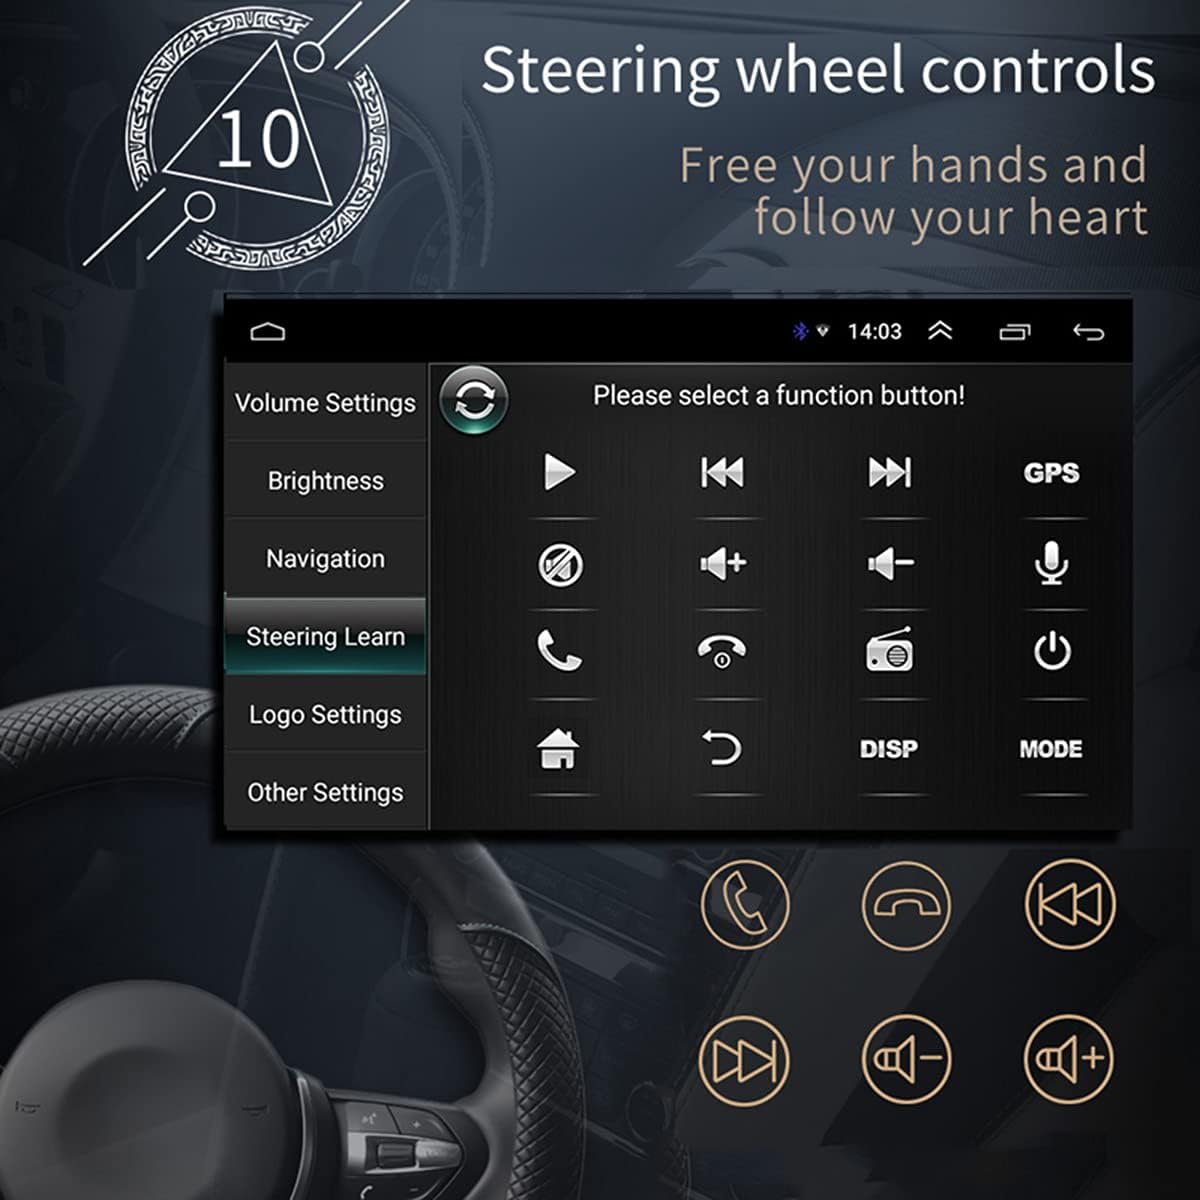
Figure 5: Steering Wheel Control learning interface.
- Go to "Settings" > "Steering Wheel Learning" or "SWC".
- Follow the on-screen instructions to assign functions to your steering wheel buttons. This typically involves pressing a button on the screen, then pressing the corresponding button on your steering wheel.
WiFi Connection
Connect the unit to a WiFi hotspot for online features and app downloads.

Figure 6: WiFi connection enables access to online applications.
- Go to "Settings" > "Network & Internet" > "Wi-Fi".
- Turn on Wi-Fi and select your desired network from the list.
- Enter the password if prompted and connect.
APE/FLAC Lossless Audio Playback
The unit supports high-quality audio formats for superior sound experience.

Figure 7: Music player interface demonstrating APE/FLAC support.
- Ensure your audio files are in supported formats (MP3, WMA, WAV, APE, FLAC).
- Play them from a USB drive or other connected media.
Maintenance
- Cleaning the Screen: Use a soft, lint-free cloth to gently wipe the screen. Do not use abrasive cleaners or solvents.
- General Cleaning: Keep the unit free from dust and debris. Use a soft brush or compressed air for vents and buttons.
- Software Updates: Periodically check the manufacturer's website or the unit's settings for available software updates to ensure optimal performance and new features.
Troubleshooting
If you encounter issues, refer to the following common problems and solutions before contacting support.
| Problem | Possible Cause | Solution |
|---|---|---|
| Unit does not power on. | Incorrect wiring (B+ or ACC), blown fuse, vehicle battery issue. | Check power connections (Yellow and Red wires), inspect fuses, ensure vehicle battery is charged. |
| No sound from speakers. | Speaker wires incorrectly connected, volume too low, mute enabled, incorrect audio source. | Verify speaker wiring, increase volume, check mute setting, select correct audio source (FM, USB, AUX, BT). |
| GPS signal weak or not found. | GPS antenna improperly installed or obstructed, unit not receiving satellite signals. | Ensure GPS antenna is mounted in a clear location (e.g., dashboard), check antenna connection. |
| Mirror Link not working. | Incorrect USB cable, USB debugging not enabled (Android), incompatible phone. | Use original or high-quality USB cable, enable USB debugging in phone developer options, check compatibility list. |
| Rear view camera not displaying. | Camera not powered, video input wire disconnected, reverse trigger wire not connected. | Check camera power supply, verify video cable connection, ensure reverse trigger wire is connected to reverse light. |
Specifications
| Feature | Detail |
|---|---|
| Model | SWM 9702 |
| Voltage | 12V |
| System | Android |
| Configuration | 1G RAM + 16G Storage |
| Screen Size | 7 Inches (HD Retractable) |
| Screen Resolution | 1024*600 |
| Panel Size | 188*58mm |
| Panel Lighting | Blue |
| Power Output | 60W |
| Working Temperature | -10~60 degrees Celsius |
| Bluetooth Version | 4.0 |
| Power Amplifier Chip | TDA7388 |
| Radio Frequency | FM 87.5~108MHz |
| GPS Navigation | Support (Built-in offline map: Europe) |
| Wireless WIFI | Support |
| Mobile Internet | Support (Apple/Android) |
| USB Interface | 2 rear tail cable plus front |
| RCA Terminal Introduction | 2 audio outputs, 2 audio inputs, 2 video inputs, 1 reversing input, 1 video output |
| Front AUX Audio Input | Yes |
| DVR Function | Support |
| Car Logo Replacement | Support |
| Supported Picture Format | JPG |
| Factory Setting Password | 1111 |
Warranty and Support
For warranty information, technical support, or service inquiries, please refer to the purchase documentation or contact the retailer/manufacturer directly. Keep your proof of purchase for warranty claims.
Manufacturer: N\\C
Date First Available: July 29, 2021