
1. Product Overview
The BYTECH BYOPCA223BK Car LED Bulb Strip is designed to enhance your vehicle's interior ambiance with vibrant, customizable lighting. This kit includes multiple LED strips that can be easily installed to create a dynamic and colorful atmosphere.
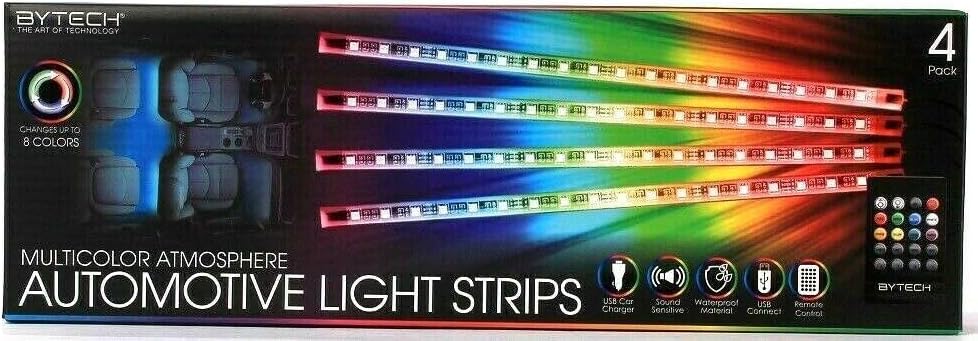
Image 1.1: Packaging of the BYTECH BYOPCA223BK Car LED Bulb Strip, displaying four individual LED light strips and a remote control. The packaging highlights features such as "Changes up to 8 Colors" and "Multicolor Atmosphere."
2. Package Contents
Please verify that all items listed below are present in your package.
- 4 x BYTECH Car LED Light Strips
- 1 x USB Car Charger Adapter
- 1 x Remote Control
- Installation Accessories (e.g., adhesive tape, cables)
3. Specifications
| Feature | Detail |
|---|---|
| Model Number | BYOPCA223BK |
| Brand | BYTECH |
| Light Source Type | LED |
| Voltage | 12 Volts |
| Form Factor | Strip |
| Number of Pieces | 4 |
| Color Options | Up to 8 colors (as per packaging) |
| Sound Sensitive | Yes (as per packaging icon) |
| Material | Waterproof (as per packaging icon) |
| Item Weight | 277 g |
| UPC | 805112076291 |
4. Safety Information
- Ensure the vehicle's power is off before installation.
- Do not obstruct airbags or other safety features during installation.
- Keep wiring away from moving parts or heat sources.
- Use only with 12-volt DC power sources.
- Avoid direct eye exposure to the LED lights.
- If the product is damaged, discontinue use immediately.
5. Setup and Installation
The BYTECH Car LED Bulb Strips are designed for easy installation. Follow these steps for optimal placement and connection.
5.1 Choosing Installation Location
Identify flat, clean surfaces within your vehicle's interior where you wish to install the LED strips. Common locations include under the dashboard, beneath seats, or along door panels. Ensure the chosen locations do not interfere with vehicle operation or passenger movement.
5.2 Cleaning the Surface
Before applying the strips, thoroughly clean the chosen surfaces with an alcohol wipe or a mild cleaner. Allow the surface to dry completely to ensure proper adhesion.
5.3 Attaching the LED Strips
Peel off the protective backing from the adhesive tape on the back of each LED strip. Carefully press the strip firmly onto the cleaned surface, holding it in place for a few seconds to secure adhesion.
5.4 Wiring and Connection
Route the cables from each LED strip to a central connection point, typically near the vehicle's 12V power outlet (cigarette lighter socket). Use cable clips or ties to secure the wiring and keep it tidy, preventing interference with pedals or other vehicle controls.
Connect the main power cable from the LED strips to the provided USB car charger adapter.
5.5 Powering On
Insert the USB car charger adapter into your vehicle's 12V power outlet. The LED strips should illuminate, indicating a successful connection.
6. Operation
The BYTECH Car LED Bulb Strips are controlled via the included remote control.
6.1 Remote Control Functions
The remote control allows you to power the lights on/off, change colors, adjust brightness, and select various lighting modes.
- Power Button: Turns the LED strips on or off.
- Color Selection Buttons: Choose from up to 8 distinct colors (e.g., red, green, blue, white, purple, cyan, yellow, orange).
- Brightness Adjustment: Increase or decrease the intensity of the light.
- Mode Buttons: Select different lighting effects such as fading, strobing, or sound-activated modes.
- Sound Sensitive Mode: Activates lighting that reacts to music or ambient sounds within the vehicle.
6.2 Changing Colors and Modes
Press the desired color button on the remote to switch the LED strip color. Use the mode buttons to cycle through available lighting effects.
6.3 Sound Activation
To activate the sound-sensitive feature, press the designated sound mode button on the remote. The lights will then synchronize with the rhythm of music or other sounds.
7. Maintenance
- Cleaning: Gently wipe the LED strips with a soft, dry cloth to remove dust. For stubborn dirt, use a slightly damp cloth and dry immediately. Do not use harsh chemicals or abrasive cleaners.
- Adhesion Check: Periodically check the adhesive on the back of the strips to ensure they remain securely attached. Reapply or reinforce with stronger adhesive if necessary.
- Wiring Inspection: Regularly inspect the wiring for any signs of wear, fraying, or damage. Ensure all connections are secure.
- Storage: If removing the strips for extended periods, store them in a cool, dry place away from direct sunlight.
8. Troubleshooting
| Problem | Possible Cause | Solution |
|---|---|---|
| Lights do not turn on. | No power to the USB adapter. Loose connection. Faulty LED strip. | Check if the vehicle's 12V outlet is active. Ensure the USB adapter is fully inserted. Verify all cable connections are secure. Test with another 12V power source if available. |
| Remote control not working. | Dead battery in remote. Obstruction between remote and receiver. | Replace the remote control battery. Ensure a clear line of sight to the LED strip receiver (if applicable). |
| Lights flicker or change colors erratically. | Unstable power supply. Loose wiring. | Check the vehicle's 12V outlet for stable power. Secure all wiring connections. |
| Adhesive not holding. | Surface not clean or dry. Insufficient pressure during installation. | Re-clean and dry the surface thoroughly. Apply firm pressure for a longer duration. Consider using additional automotive-grade adhesive tape. |
9. Warranty and Support
For warranty information or technical support, please contact BYTECH customer service. Refer to your purchase receipt for specific warranty terms and conditions.
Website: www.bytechintl.com
Email: support@bytechintl.com
Phone: Please refer to the BYTECH website for regional contact numbers.