
Beacon Pet fhs 505A
User Manual
Multifunction Portable Desktop Electric Household Sewing Machine
Model: TOPCHANCES 505A (fhs 505A)
1. Introduction
Thank you for purchasing the TOPCHANCES 505A Multifunction Portable Desktop Electric Household Sewing Machine. This machine is designed for ease of use, featuring 12 built-in stitch patterns, two speed settings, and double thread capability, making it suitable for various household sewing tasks. Please read this manual thoroughly before operation to ensure safe and efficient use of your new sewing machine.
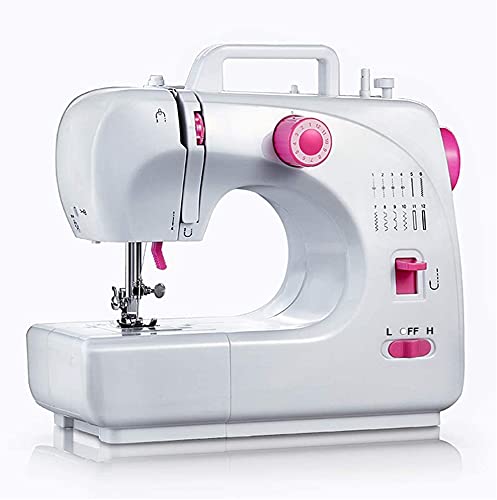
Image: Front view of the TOPCHANCES 505A Multifunction Portable Desktop Electric Household Sewing Machine, showcasing its compact design and controls.
2. Safety Instructions
- Always disconnect the machine from the power supply when not in use, before cleaning, or when changing parts.
- Keep fingers away from the needle, handwheel, and other moving parts during operation.
- Never operate the machine with damaged power cords or plugs.
- Do not allow children to operate the sewing machine without supervision.
- Use only the specified power adapter (DC 6V 1200mA) or 4 'AA' batteries.
- Ensure the machine is placed on a stable, flat surface during use.
3. Product Overview
Familiarize yourself with the various components of your sewing machine.
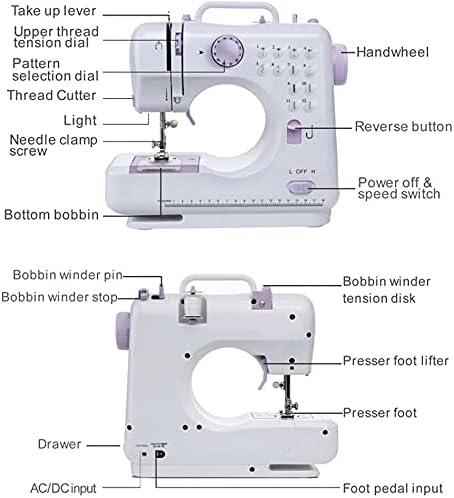
Image: Front view diagram of the sewing machine with key parts labeled, including Take-up lever, Upper thread tension dial, Pattern selection dial, Thread Cutter, Light, Needle clamp screw, Bottom bobbin, Handwheel, Reverse button, and Power off & speed switch.
Image: Back view diagram of the sewing machine with key parts labeled, including Bobbin winder pin, Bobbin winder stop, Bobbin winder tension disk, Presser foot lifter, Presser foot, Drawer, AC/DC input, and Foot pedal input.
4. Setup
4.1 Power Connection
- AC Adapter: Insert the DC 6V 1200mA adapter into the AC/DC input jack on the back of the machine. Plug the adapter into a standard wall outlet.
- Batteries: Alternatively, open the battery compartment on the bottom of the machine and insert 4 'AA' batteries (not included), ensuring correct polarity.
4.2 Foot Pedal Connection
Connect the foot pedal cable into the foot pedal input jack on the back of the machine. The foot pedal can be used to start and stop sewing, offering hands-free control.
4.3 Threading the Machine
Proper threading is crucial for smooth operation and good stitch quality.
- Winding the Bobbin: Place an empty bobbin onto the bobbin winder pin. Guide the thread from a spool through the bobbin winder tension disk and around the bobbin. Push the bobbin winder pin to the right. Start the machine briefly until the bobbin is full, then cut the thread and return the pin to the left.
- Inserting the Bobbin: Open the bobbin cover plate. Insert the wound bobbin into the bobbin case, ensuring the thread unwinds counter-clockwise. Pull the thread through the tension spring and out the slot.
- Upper Threading: Place a spool of thread on the spool pin. Guide the thread through the upper thread guide, down through the tension assembly, up and through the take-up lever, and then down to the needle. Use the needle threader to pass the thread through the eye of the needle from front to back.
- Bringing up the Bobbin Thread: Hold the upper thread loosely. Turn the handwheel towards you to lower the needle, catching the bobbin thread. Pull both threads under the presser foot and towards the back of the machine.
5. Operating Instructions
5.1 Stitch Selection
The machine features 12 built-in stitch patterns. Rotate the pattern selection dial to choose your desired stitch. Refer to the stitch guide printed on the machine for visual reference.

Image: The sewing machine highlighting the 12 built-in stitch patterns available for selection.
5.2 Speed Control
Use the 'L' (Low) and 'H' (High) switch to adjust the sewing speed. 'OFF' turns the machine off.
5.3 Starting and Stopping
You can start and stop the machine using either the hand switch or the foot pedal. Ensure the speed switch is set to 'L' or 'H' before starting.
5.4 Forward and Reverse Sewing
Press and hold the reverse button to sew in reverse, useful for securing stitches at the beginning and end of a seam.
5.5 Automatic Thread Rewind
The machine is equipped with an automatic thread rewind function for convenient bobbin winding.
5.6 Sleeve Sewing
The free arm design allows for easy sewing of cylindrical items like sleeves and pant hems.
5.7 Adjustable Stitch Length
Adjust the stitch length as needed for different fabric types and sewing projects.
5.8 Buttonhole Sewing
The machine supports both one-step and four-step buttonhole sewing. Refer to the stitch pattern guide for the specific buttonhole stitches.
5.9 Built-in Sewing Light
A built-in light illuminates the sewing area for improved visibility.
5.10 Thread Cutter
Use the integrated thread cutter located on the side of the machine to trim threads after sewing.
6. Maintenance
- Cleaning: Regularly clean lint and dust from the bobbin area and feed dogs using a small brush. Disconnect power before cleaning.
- Needle Replacement: Replace the needle regularly, especially if it becomes bent, dull, or if stitches are skipping. Loosen the needle clamp screw, remove the old needle, insert a new needle with the flat side facing the back, and tighten the screw. Use only #14 needles for this machine.
- Storage: Store the machine in a dry, dust-free environment when not in use.
7. Troubleshooting
| Problem | Possible Cause | Solution |
|---|---|---|
| Skipped stitches | Incorrect needle, bent needle, improper threading. | Replace needle, re-thread machine correctly. |
| Thread breakage | Incorrect tension, poor quality thread, improper threading. | Adjust tension, use good quality thread, re-thread. |
| Machine not sewing | No power, bobbin winder engaged, foot pedal not connected. | Check power, disengage bobbin winder, connect foot pedal. |
| Uneven stitches | Incorrect tension, wrong needle for fabric. | Adjust tension, use appropriate needle. |
8. Specifications
- Model No.: FHSM-505A (fhs 505A)
- Stitch Patterns: 12 built-in
- Thread Type: Two-thread lockstitch
- Speed Control: High/Low selector
- Power Supply: DC 6V 1200mA adapter or 4 'AA' batteries (not included)
- Product Weight: Approximately 1943g
- Product Dimensions: 27.5cm (W) x 12cm (D) x 26cm (H) / 10.83" (W) x 4.72" (D) x 10.24" (H)
- Features: Forward and reverse sewing, automatic thread rewind, sleeve sewing, adjustable stitch length, drawer, all-purpose presser foot replacement holder, hand switch/foot pedal operation, one-step button, four-step buttonhole sewing, built-in sewing light, thread cutter.
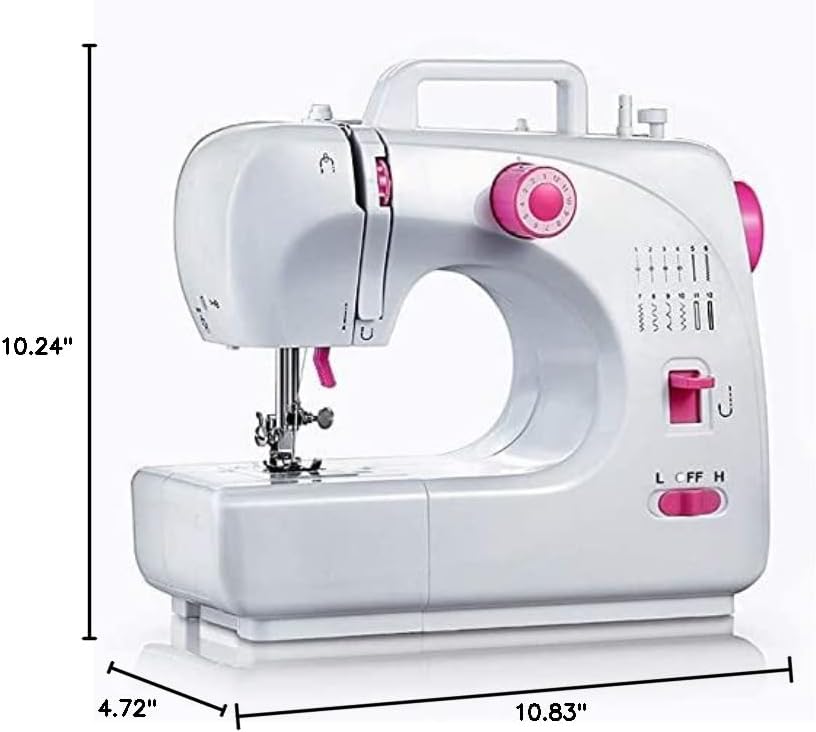
Image: Diagram illustrating the dimensions of the sewing machine in centimeters.
9. Included Accessories
The following accessories are included with your sewing machine:
| Item | Quantity | Description |
|---|---|---|
| Foot pedal | 1 | For hands-free operation. |
| Thread spool | 2 | Pre-wound spools for immediate use. |
| Bobbin | 2 | Empty bobbins for winding thread. |
| Needle threader | 1 | Tool to assist in threading the needle. |
| Needle (#14) | 1 | Standard needle for general sewing. |
| Adaptor | 1 | Power adapter (DC 6V 1200mA). |
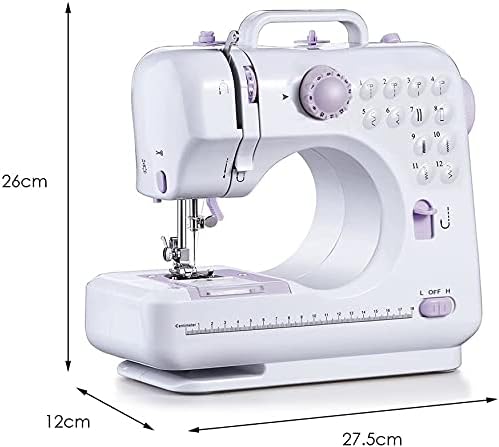
Image: Visual representation of the accessories included with the sewing machine, such as foot pedal, thread spools, bobbins, needle threader, needle, and power adapter.
10. Warranty and Support
For any questions, technical support, or warranty inquiries, please contact the seller or refer to the product's purchase platform for customer service options. Keep your purchase receipt as proof of purchase.
Ask a question about this manual
Ask about setup, troubleshooting, compatibility, parts, safety, or missing instructions. Manuals+ will review the question and use this page’s manual context to help answer it.