
1. Product Overview
The Yuecoom YX-1708 is an automatic battery charging controller module designed to manage battery charging and discharge cycles. It features automatic charging initiation when the battery voltage is low and automatic power-off when the battery is fully charged, preventing both under-voltage and over-voltage conditions. This module supports various battery types and voltage configurations, offering reliable performance for battery management applications.
Key Features:
- Automatic Charging Control: Initiates charging when battery voltage is low and stops when fully charged.
- Over-voltage and Under-voltage Protection: Prevents damage to the battery from improper charging levels.
- High Current Capacity: Supports a maximum load of 30A.
- Durable Construction: Features a thick circuit board for enhanced longevity.
- Voltage Options: Compatible with 12V, 24V, 36V, and 48V battery systems.
2. Safety Information
- Always ensure correct polarity when connecting the battery, charger, and load to prevent damage to the module and connected devices.
- Do not exceed the maximum rated current of 30A.
- Operate the module in a dry environment, away from moisture and extreme temperatures.
- Disconnect all power sources before making or changing any connections.
- Keep out of reach of children.
- If you are unsure about any installation steps, consult a qualified technician.
3. Package Contents
- 1 x Yuecoom YX-1708 Charge Control Module
4. Product Diagram and Components
The following diagram illustrates the key components and connection points of the YX-1708 charging controller module.
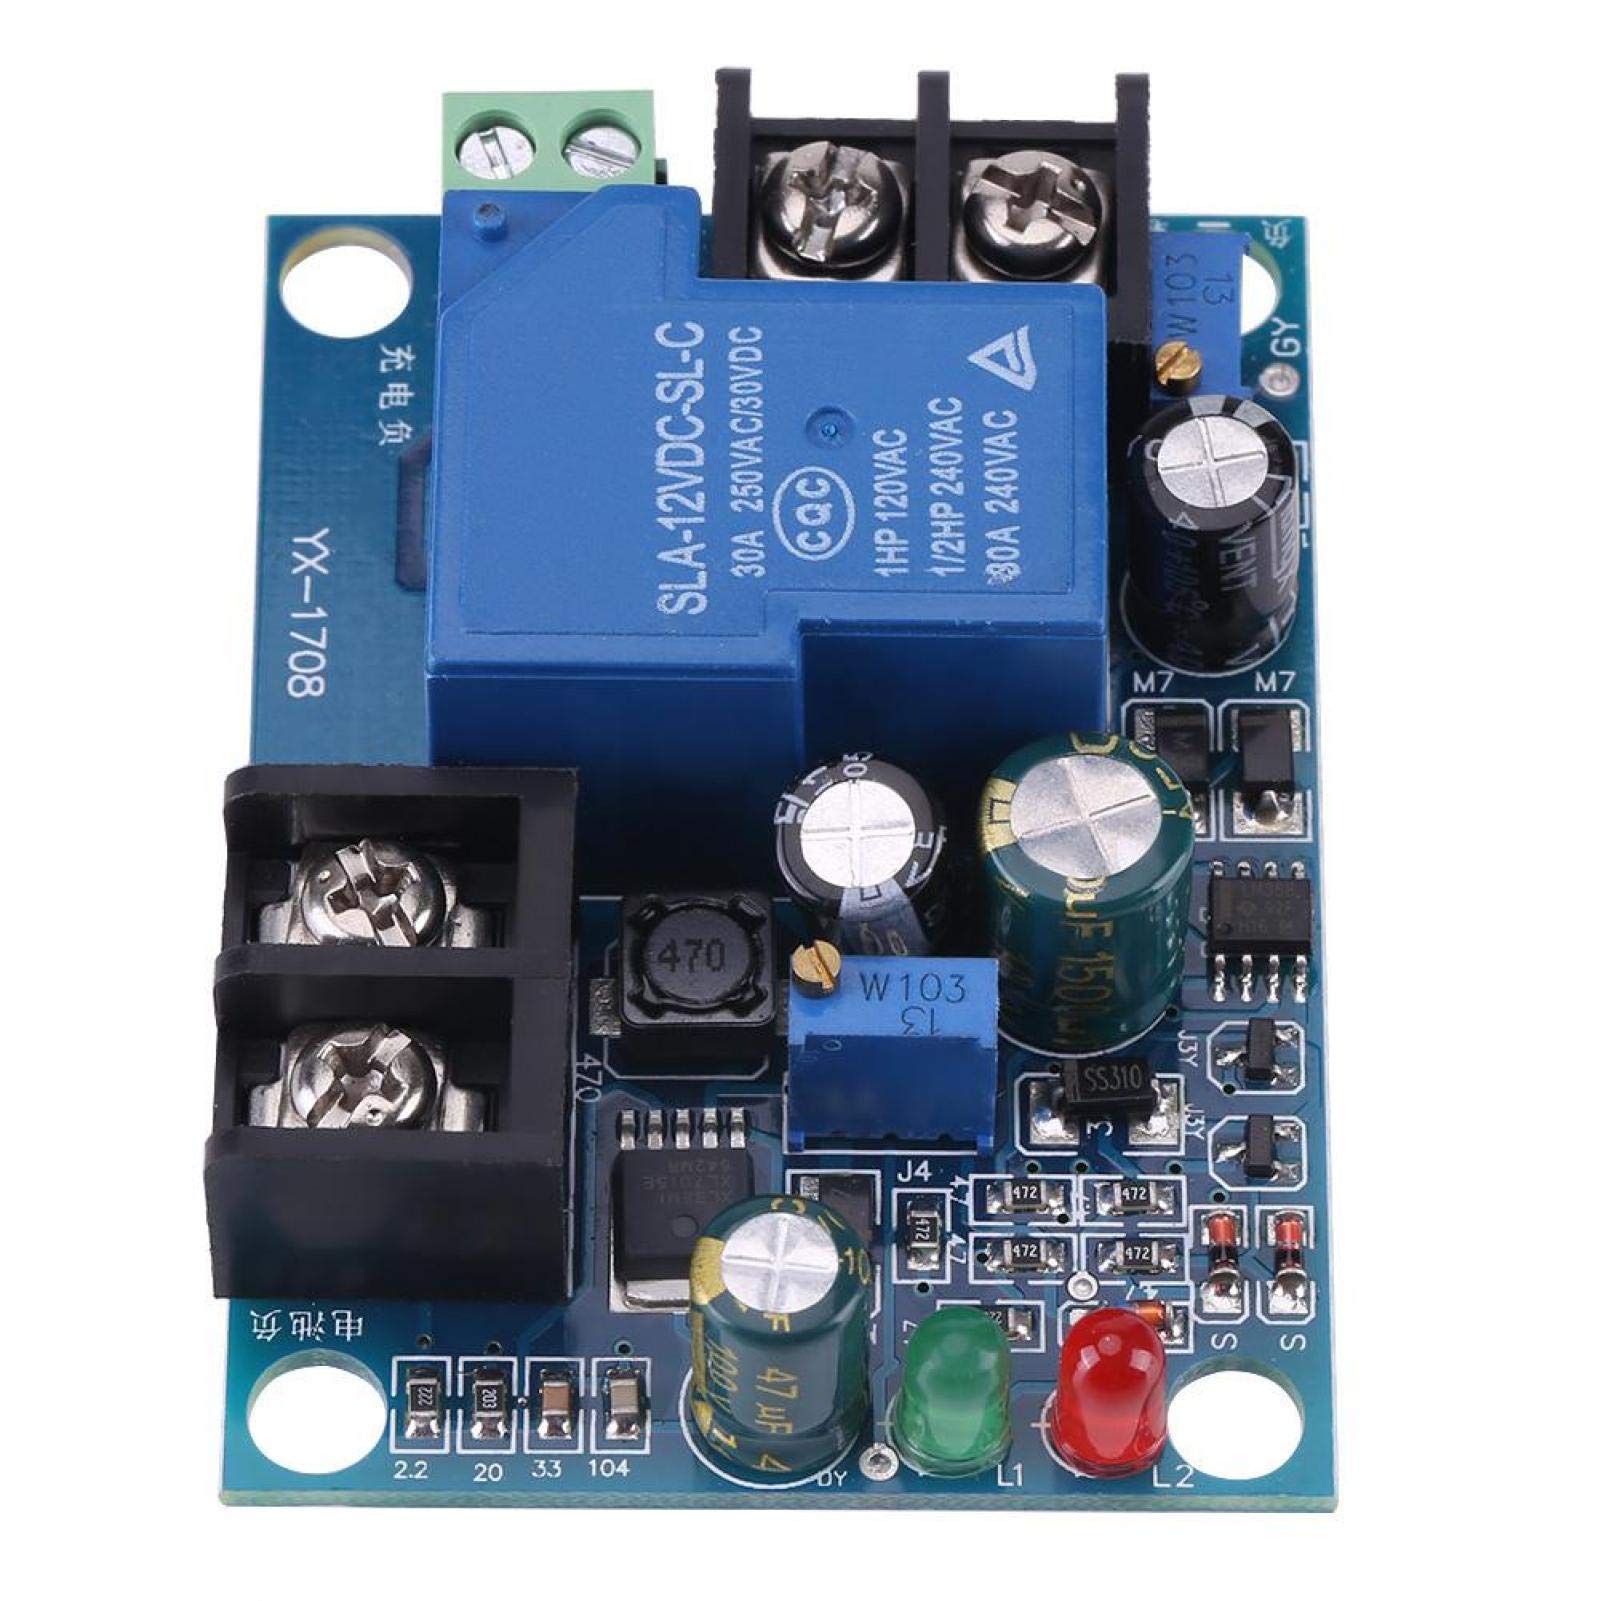
Image 1: Overview of the YX-1708 module showing connections for Battery, Charger, and Load, along with the 30A relay and indicator lights. The power supply indicator illuminates when connected, and the load working indicator turns off during charging.

Image 2: Dimensions of the YX-1708 module, approximately 7cm (2.7 inches) by 5.1cm (2 inches), with a height of 2.3cm (0.9 inches).
5. Specifications
| Feature | Description |
|---|---|
| Model | YX-1708 |
| Battery Type (Optional) | 12V, 24V, 36V, 48V |
| Voltage Deviation | ±0.1V |
| Maximum Load Current | 30A |
| Circuit Board Thickness | 1.6mm (as indicated on diagram) |
| Dimensions (Approx.) | 7cm x 5.1cm x 2.3cm |
| Weight (Approx.) | 60g |
6. Installation and Wiring
Wiring Diagram:
Refer to Image 1 in Section 4 for a visual guide to the connection points.
Connection Steps:
- Identify Terminals: Locate the terminals labeled 'Battery', 'Charger', and 'Load' on the module.
- Connect Battery: Connect your battery to the 'Battery' terminals. Ensure correct polarity (positive to positive, negative to negative).
- Connect Charger: Connect your battery charger to the 'Charger' terminals. Ensure correct polarity.
- Connect Load: Connect your electrical load (device to be powered by the battery) to the 'Load' terminals. Ensure correct polarity.
- Power On: Once all connections are secure, apply power to the charger. The module will automatically begin monitoring the battery voltage.
Note: Always double-check all connections before applying power to prevent short circuits or damage.
7. Operation
Automatic Charging Function:
The YX-1708 module automatically monitors the battery voltage. When the battery voltage drops below a preset threshold (under-voltage), the module will activate the charger to begin charging the battery. Once the battery reaches its full charge voltage (over-voltage), the module will automatically stop charging to prevent overcharging.
Indicator Lights:
- Power Supply Indicator (Green LED): This light illuminates when the module receives power.
- Load Working Indicator (Red LED): This light indicates the status of the load. It will be off when the battery is charging and on when the battery is discharging to power the load.
Forced Start Function:
The module includes a 'forced start' function, primarily for the load. This function allows the load to be activated even if the battery voltage is not within the normal operating range for automatic load activation.

Image 3: The two points indicated by the red line are for activating the forced startup function. Connecting these two points will force the load to start.
- Activating Forced Start: To activate the forced start for the load, temporarily connect the two designated points on the circuit board as shown in Image 3.
- Functionality: This action will force the load to operate. Note that the forced start function is specifically for the load and does not affect the charging process.
8. Maintenance
- Regular Inspection: Periodically check all wiring connections to ensure they are secure and free from corrosion.
- Cleanliness: Keep the module clean and free from dust and debris. Use a soft, dry cloth for cleaning.
- Environmental Conditions: Ensure the module is operating within its specified environmental conditions (temperature, humidity).
- Avoid Physical Damage: Protect the module from impacts or excessive vibrations.
9. Troubleshooting
| Problem | Possible Cause | Solution |
|---|---|---|
| Module not powering on (Green LED off) | No power supply to the module or incorrect wiring. | Check power connections to the 'Charger' terminals and ensure correct polarity. Verify power source is active. |
| Battery not charging | Battery voltage is above the low threshold, charger not connected, or charger malfunction. | Verify battery voltage is below the charging threshold. Check charger connections and ensure the charger is functional. |
| Battery overcharging | Module malfunction or incorrect voltage setting. | Disconnect charger immediately. Verify module functionality. Ensure the module is rated for your battery voltage. |
| Load not receiving power | Battery voltage is too low, load not connected, or load malfunction. | Check battery voltage. Ensure load is correctly connected to 'Load' terminals. Test the load independently. Use the forced start function to test the load connection. |
| Red LED always on/off incorrectly | Module malfunction or incorrect wiring. | Verify all connections. If the issue persists, the module may be faulty. |
10. Warranty and Support
This product is covered by a standard manufacturer's warranty against defects in materials and workmanship. For warranty claims, technical support, or further assistance, please contact your retailer or the manufacturer directly. Please have your purchase information and product model number (YX-1708) available when contacting support.