
1. Introduction
This manual provides detailed instructions for the installation, operation, and maintenance of your KAPUCI Biometric Fingerprint Touch Screen Safe, Model BGX-X1-30PRO. Please read this manual thoroughly before using the safe to ensure proper function and security. Keep this manual for future reference.
2. Important Safety Information
- Do not store the emergency keys inside the safe. Keep them in a secure, separate location.
- Ensure the safe is installed on a stable surface or securely mounted to a wall/floor to prevent tipping or unauthorized removal.
- Avoid exposing the safe to extreme temperatures or high humidity.
- Replace batteries promptly when the low battery indicator appears to prevent lockout.
- Keep the biometric sensor and keypad clean and dry for optimal performance.
3. Package Contents
Verify that all items are present in the package:
- KAPUCI Biometric Fingerprint Touch Screen Safe
- Emergency Keys (2)
- Mounting Hardware (bolts, washers)
- User Manual
- External Battery Box (for emergency power)
4. Product Overview
The KAPUCI BGX-X1-30PRO safe features a modern design with multiple access methods and robust construction.

Figure 4.1: Front view of the KAPUCI Biometric Fingerprint Touch Screen Safe.
Key Features:
- Biometric Fingerprint Sensor: High recognition rate for quick access.
- Digital Touch Screen Keypad: For password entry, including virtual password function.
- Emergency Key Access: Provides a backup opening method.
- Automatic Door Opening: The door opens automatically upon successful authentication.
- Robust Construction: Made from reinforced solid carbon steel with a 5mm thick door, micro door seams, and integrated anti-pry hidden hinges.
- Interior: Double-layer design with full felt lining for shock absorption and moisture resistance. Includes an internal light and a removable tempered glass partition.
- Alarm System: Anti-theft vibration alarm.

Figure 4.2: Construction details highlighting the micro door frame, special steel plate, solid bolt, and integrated hinge.
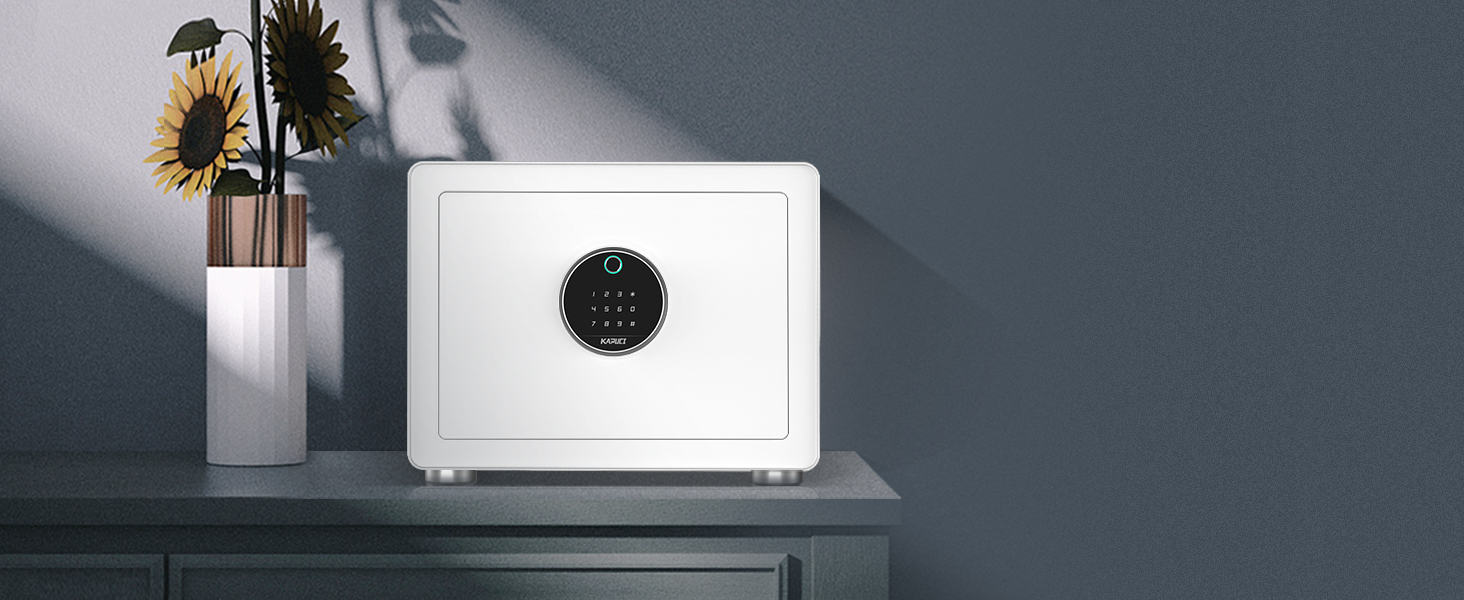
Figure 4.3: Interior features including the removable tempered glass partition and soft lining.
5. Setup
5.1 Battery Installation
- Locate the battery compartment, typically on the inside of the safe door.
- Insert 4 AA batteries (not included) according to the polarity markings.
- Close the battery compartment cover.
5.2 Initial Opening
Upon first use, or if batteries are depleted, use the emergency key:
- Locate the emergency keyhole, usually concealed behind a cover on the keypad panel.
- Insert the emergency key and turn it clockwise while simultaneously turning the handle (if applicable) or pulling the door open.
- Once open, proceed with setting up your fingerprint and password.
5.3 Mounting the Safe
The safe includes pre-drilled mounting holes in the back and mounting hardware for secure installation.
- Choose a suitable location for mounting (e.g., inside a closet, on a shelf, or to a wall).
- Mark the drilling points through the pre-drilled holes on the back of the safe.
- Drill pilot holes at the marked locations.
- Align the safe with the drilled holes and secure it using the provided mounting hardware. Ensure all bolts are tightened firmly.

Figure 5.1: The safe features scratch-proof feet to protect surfaces.
6. Operating Instructions
6.1 Setting Up Fingerprints
The safe can store up to 30 unique fingerprints.
- With the safe door open, press the internal 'SET' button (location may vary, refer to internal diagram if available).
- Place your finger on the biometric sensor. The indicator light will flash.
- Lift and re-place your finger multiple times (typically 4-8 times) from different angles until the indicator light confirms successful registration (e.g., a green light or beep).
- Repeat for additional fingerprints as desired.
6.2 Setting Up Digital Password
The safe supports a digital password of 6-8 digits.
- With the safe door open, press the internal 'SET' button.
- Enter your desired 6-8 digit password on the touch screen keypad.
- Press '#' to confirm.
- Re-enter the same password and press '#' again to verify. The indicator light will confirm successful registration.
6.3 Virtual Password Function
To enhance security against shoulder surfing, you can enter random digits before or after your actual password.
- Press any random digits (up to 12).
- Enter your actual 6-8 digit password.
- Press any random digits (up to 12).
- Press '#' to confirm. The safe will open if the correct password sequence is embedded.

Figure 6.1: Fingerprint verification process and virtual password entry example.
6.4 Opening the Safe
You have three methods to open the safe:
- Fingerprint: Place a registered finger on the biometric sensor. The safe will verify and automatically open.
- Digital Password: Enter your 6-8 digit password (or virtual password sequence) on the touch screen keypad and press '#'. The safe will verify and automatically open.
- Emergency Key: Insert the emergency key into the keyhole and turn it clockwise.

Figure 6.2: The safe door automatically opens for quick access.
6.5 Closing the Safe
Simply push the door shut. The safe will automatically lock.
6.6 Alarm System
The safe is equipped with an anti-theft vibration alarm. If the safe detects significant movement or tampering, the alarm will sound. To disarm the alarm, open the safe using a registered fingerprint or password.
7. Maintenance
7.1 Battery Replacement
When the low battery indicator illuminates, replace all 4 AA batteries promptly. Use the emergency key or external battery box if the batteries are completely depleted and the safe cannot be opened electronically.
7.2 Cleaning
Wipe the exterior of the safe with a soft, damp cloth. Do not use abrasive cleaners or solvents. Keep the biometric sensor and keypad free of dust and debris.
7.3 Emergency Key Storage
Always store the emergency keys in a secure location away from the safe and accessible only to authorized individuals. Do not store them inside the safe.
8. Troubleshooting
| Problem | Possible Cause | Solution |
|---|---|---|
| Safe does not open with fingerprint/password. | Low batteries, incorrect entry, unregistered fingerprint, sensor/keypad dirty. | Replace batteries. Re-enter password carefully. Re-register fingerprint. Clean sensor/keypad. Use emergency key. |
| Alarm sounds unexpectedly. | Safe was moved or vibrated significantly. | Open the safe with a registered fingerprint or password to disarm. Ensure safe is stable. |
| Keypad is unresponsive. | Dead batteries, system error. | Replace batteries. Use the external battery box for temporary power. If issue persists, contact support. |
| Emergency key does not work. | Key not fully inserted, mechanism jammed. | Ensure key is fully inserted and turned firmly. Do not force. Contact support if jammed. |
9. Specifications

Figure 9.1: External and internal dimensions of the safe.
- Model: BGX-X1-30PRO
- Brand: KAPUCI
- Product Dimensions: 11.8"D x 9.5"W x 11.8"H
- Internal Dimensions: Approximately 9.5"H x 13.4"W x 9.5"D (excluding foot height)
- Capacity: 1.28 Cubic Feet
- Item Weight: 33 Pounds
- Material: Alloy Steel, Carbon Steel, Low Carbon Steel
- Door Thickness: 5mm
- Lock Type: Biometric, Electronic Combination Lock, Key
- Power Source: 4 x AA Batteries (not included)
- Special Features: Alarm System, Anti-Theft, Biometric Fingerprint, Removable Shelf, Sensor Light
- Mounting Type: Wall Mount (hardware included)
- Water Resistance Level: Not Water Resistant

Figure 9.2: Illustration of the safe's casing and door thickness for enhanced security.
10. Warranty and Support
KAPUCI products are manufactured to high-quality standards. For warranty information, technical support, or service inquiries, please refer to the warranty card included with your product or contact KAPUCI customer service directly.
Customer Service Contact: Please refer to the contact information provided on the KAPUCI official website or your purchase documentation.