
1. Introduction
Thank you for choosing the iHave Wall Mounted Toothbrush Holder with Automatic Toothpaste Dispenser. This product is designed to organize your bathroom essentials, including toothbrushes, toothpaste, and other toiletries, while saving counter space. It features a large capacity tray, a cosmetic drawer, and magnetic mouthwash cups. Please read this manual carefully before installation and use to ensure proper function and longevity of your product.

Figure 1.1: Overview of the iHave Toothbrush Holder and Toothpaste Dispenser.
2. Safety Information
- Ensure the installation surface is clean, dry, and suitable for adhesion or drilling.
- Do not overload the holder beyond its intended capacity.
- Keep small parts away from children to prevent choking hazards.
- Avoid using abrasive cleaners or harsh chemicals on the product, as this may damage the finish.
- For wall-mounted installation, verify the adhesive has fully bonded for 2 hours before hanging the unit.
3. Package Contents
Please check the package contents to ensure all items are present:
- 1 x iHave Toothbrush Holder Unit with Integrated Toothpaste Dispenser and Cosmetic Drawer
- 2 x Magnetic Mouthwash Cups
- 1 x Non-marking Adhesive Strip
- Optional: Mounting Nails (for uneven, painted, or wallpapered surfaces)
4. Setup and Installation
The iHave Toothbrush Holder offers two installation methods: adhesive mounting or reinforced mounting with nails.
4.1 Adhesive Mounting (Recommended for smooth surfaces)
- Clean the Wall Surface: Thoroughly wipe the desired installation area on the wall with a clean, dry cloth. Ensure the surface is free of dust, grease, and moisture.
- Apply Adhesive Strip: Peel off the protective film from the non-marking adhesive strip. Press the adhesive strip firmly onto the cleaned wall surface. Ensure it is level and free of air bubbles.
- Allow Bonding Time: Allow the adhesive strip to bond to the wall for a minimum of 2 hours. For optimal adhesion, especially in humid environments, waiting longer (e.g., 24 hours) is recommended.
- Hang the Holder: Align the slots on the back of the toothbrush holder unit with the hooks on the adhesive strip. Carefully slide the holder down onto the strip until it is securely seated.

Figure 4.1: Steps for Easy Adhesive Installation.
4.2 Reinforced Mounting with Nails (For uneven, painted, or wallpapered surfaces)
If your wall surface is uneven, painted, or wallpapered, the adhesive strip alone may not provide sufficient hold. In such cases, use the provided nails for reinforcement.
- Follow Steps 1-3 from Adhesive Mounting: Clean the wall, apply the adhesive strip, and allow bonding time.
- Drill and Reinforce: Once the adhesive strip is bonded, use the provided nails to drill through the designated holes on the adhesive strip into the wall. This will provide additional stability and support for the holder.
- Hang the Holder: As with adhesive mounting, align and slide the holder onto the reinforced adhesive strip.
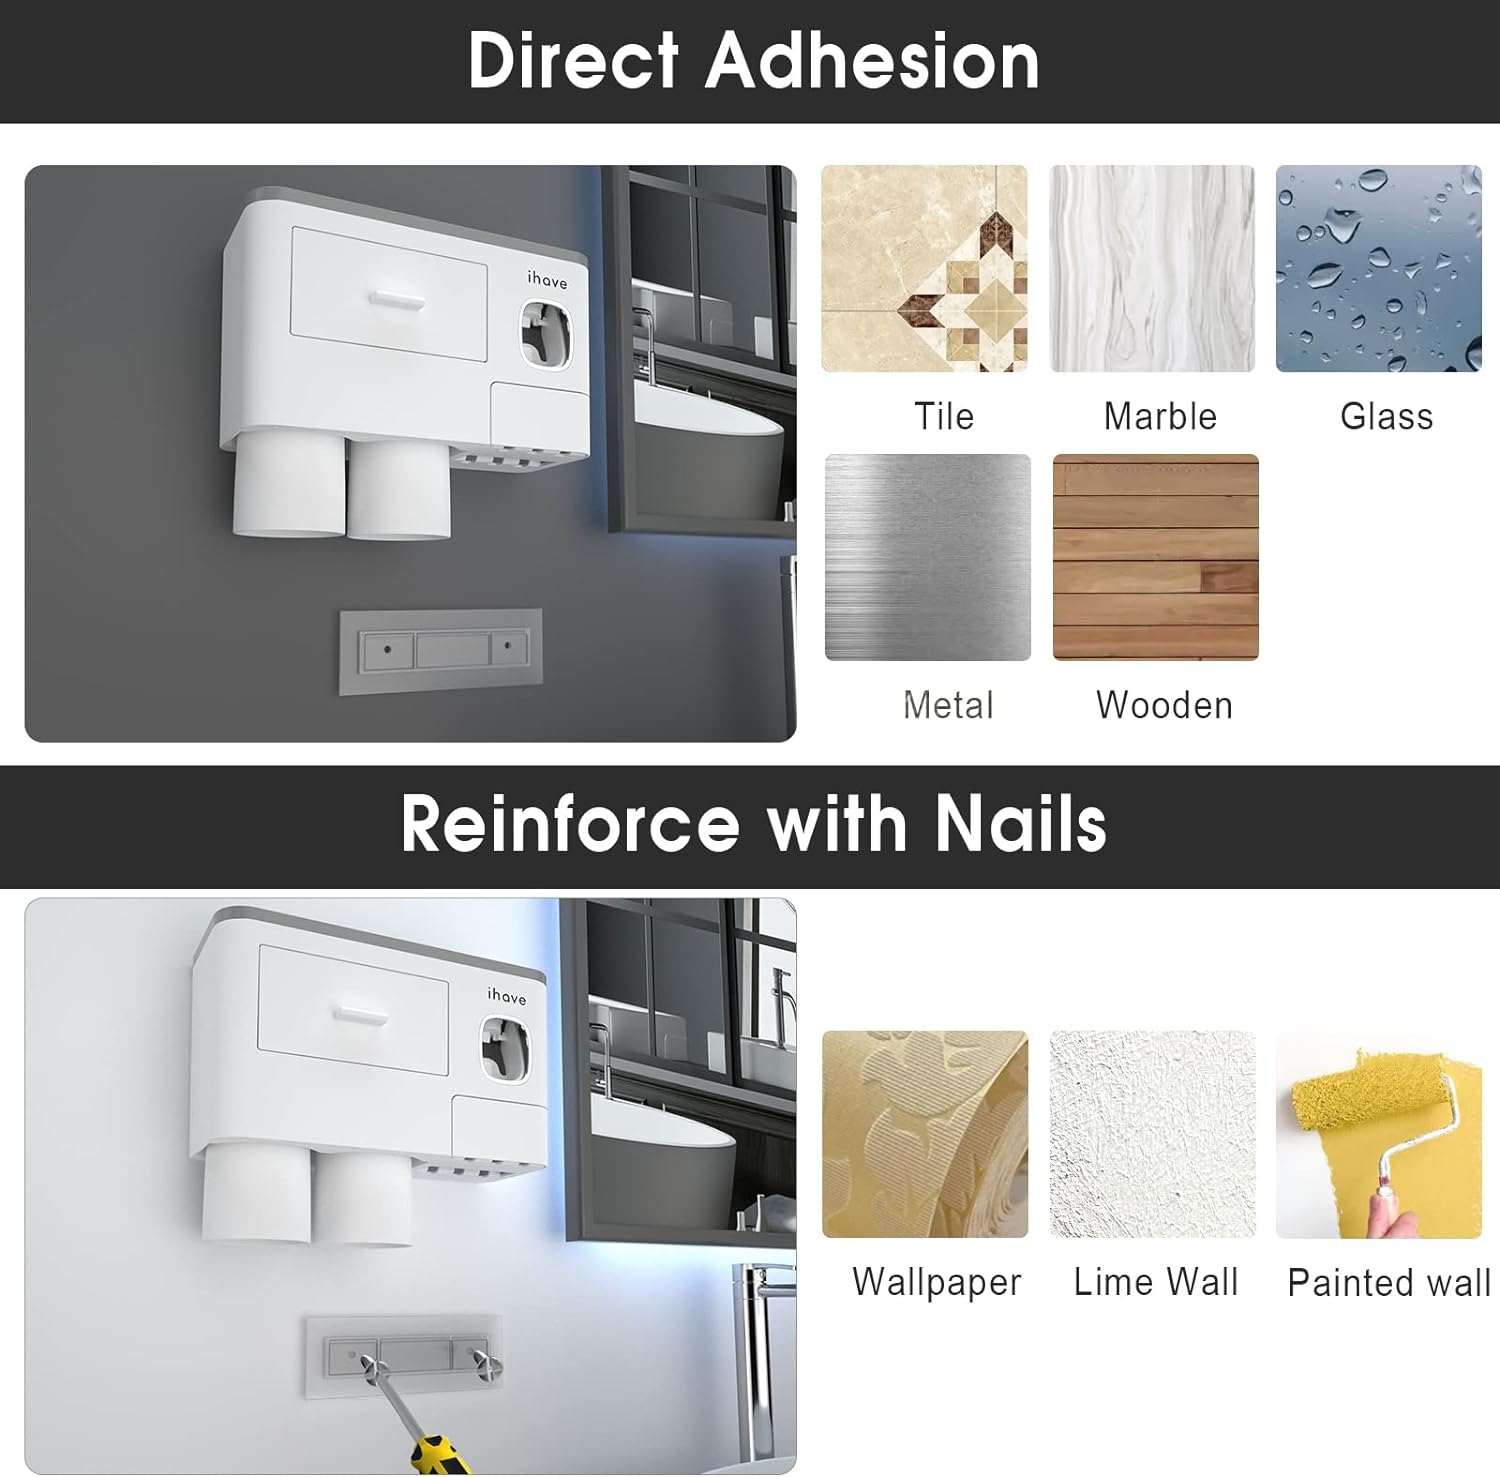
Figure 4.2: Direct Adhesion and Reinforced Mounting Options.
5. Operating Instructions
5.1 Automatic Toothpaste Dispenser
- Insert Toothpaste: Open the top cover of the dispenser. Insert a standard-sized toothpaste tube (with a hole diameter of 0.47 inches or less) into the top opening of the dispenser. Ensure the tube is pushed in firmly to create a seal.
- Prime the Dispenser: For first-time use, or if the toothpaste flow is weak, gently press the internal lever a few times with your toothbrush until toothpaste begins to dispense.
- Dispense Toothpaste: Place your toothbrush head into the dispensing slot and gently push the lever. The dispenser will automatically squeeze the appropriate amount of toothpaste onto your brush.
5.2 Magnetic Mouthwash Cups
The two magnetic cups attach securely to the underside of the holder. They are designed for upside-down draining to prevent water accumulation and maintain hygiene.
- To use, simply pull a cup downwards to detach it.
- After use, rinse the cup and reattach it to the magnetic base on the holder. It will snap into place upside down for quick drying.
5.3 Toothbrush Hanging Slots
The holder includes slots to hang up to six toothbrushes, keeping them organized and allowing them to air dry.
5.4 Storage Tray and Cosmetic Drawer
- The top tray provides ample space for larger items such as lotions, perfumes, or other bathroom accessories.
- The integrated drawer is suitable for storing smaller items like floss, razor heads, or cosmetics, keeping them out of sight and protected from dust.

Figure 5.1: Large Capacity Storage Features.

Figure 5.2: Easy to Use Features and Components.
6. Maintenance and Cleaning
Regular cleaning will ensure the hygiene and longevity of your toothbrush holder.
- General Cleaning: Wipe the exterior of the holder with a soft, damp cloth. For stubborn stains, a mild soap solution can be used. Dry thoroughly.
- Toothpaste Dispenser Cleaning: The toothpaste dispenser can be disassembled for thorough cleaning. Remove the top lid of the dispenser. The internal assembly, including the part you depress with the toothbrush and the vacuum ring, can be removed by pinching and slipping off. Rinse all parts under running water. Ensure all toothpaste residue is removed. Reassemble in the reverse order.
- Magnetic Cups: The magnetic cups should be rinsed with water after each use. Their upside-down design facilitates quick drying and prevents water buildup.
- Drainage Holes: The bottom of the holder features drainage holes to prevent water accumulation and promote ventilation. Ensure these holes remain clear of debris.
- Avoid Abrasives: Do not use abrasive sponges, scouring pads, or harsh chemical cleaners, as these can scratch or damage the product's finish.
7. Troubleshooting
| Problem | Possible Cause | Solution |
|---|---|---|
| Toothpaste not dispensing or weak flow. | Toothpaste tube not fully inserted; air in dispenser; toothpaste too thick; dispenser clogged. | Ensure toothpaste tube is pushed firmly into the dispenser. Prime the dispenser by pressing the internal lever several times. Some thicker toothpaste types may require more force or may not be compatible. Clean the dispenser thoroughly as per Maintenance section. |
| Holder not adhering securely to the wall. | Wall surface not clean or dry; insufficient bonding time; unsuitable wall surface. | Ensure the wall surface is thoroughly cleaned and dried before applying the adhesive strip. Allow the adhesive strip to bond for at least 2 hours (24 hours recommended) before hanging the holder. If the wall is uneven, painted, or wallpapered, use the reinforced mounting method with nails. |
| Magnetic cups fall easily. | Cups not properly aligned; excessive force when detaching/attaching. | Ensure the cups are aligned correctly with the magnetic base when reattaching. Handle cups with care to avoid dislodging them. |
8. Specifications
| Feature | Detail |
|---|---|
| Brand | iHave |
| Model Name | 2 cup toothbrush holder |
| Model Number | YSJ |
| Material | Plastic (ABS) |
| Color | White |
| Product Dimensions (L x W x H) | 9.05" x 4" x 7.5" (23cm x 10.16cm x 19.05cm) |
| Item Weight | 1.47 pounds (0.67 kg) |
| Mounting Type | Wall Mount (Adhesive / Reinforced) |
| Finish Type | Glossy |
| Special Feature | Quick Dry, Automatic Toothpaste Dispenser, Magnetic Cups, Cosmetic Drawer |
| Number of Items | 1 (unit) |
| Number of Compartments | 2 (main storage, drawer) |
| UPC | 762736328024 |

Figure 8.1: Product Dimensions.
9. Warranty and Support
For warranty information and customer support, please refer to the documentation included with your product packaging or visit the official iHave website. You may also contact the seller directly through the platform where the product was purchased for assistance.
Online Support: Visit the iHave Store on Amazon
