
1. Product Overview
The ZKTOOL 20PC Engine Timing Chain Removal Installer Tool Kit is designed for the efficient and precise separation and assembly of timing chains in various automotive engines. This comprehensive kit facilitates the replacement of interior chains, allowing for the installation and feeding of new chains to replace broken ones. It is engineered to press on external lugs and rivets of chains, enabling quick splitting and riveting of timing chains.
1.1 Compatibility
- Mercedes-Benz Engines: M102, M103, M271, M272, M273, M274, M276, 116, 615, 616, 617.
- Mercedes-Benz CDi Diesel Engines: 1.7D, 2.1D, 2.2D, 2.7D, 3.0D, 3.2D, 3.9D, 4.0D.
- Chrysler/Jeep CRD Diesel Engines: 2.2D, 2.7D, 3.0D.
1.2 Kit Components
The kit includes 24 chain breaker riveting tools, designed for various timing chain applications. Key components include:
- Chain breaker and riveting main tools.
- 7 different sizes of forging jaws (e.g., 3mm, 4mm, 5mm).
- Temporary assembly chain links.
- Chain link removal tools.
- Various pins and adapters for different chain types.

This image displays the complete set of tools included in the kit, showing the main chain breaker and riveting tools, various forging jaws, pins, and other accessories. Each component is designed for specific functions in timing chain service.
2. Safety Information
Always prioritize safety when working with automotive tools and engine components. Failure to follow safety precautions can result in serious injury or damage to the vehicle.
- Wear appropriate personal protective equipment (PPE), including safety glasses and gloves.
- Ensure the vehicle is securely supported on jack stands and the engine is cool before beginning work.
- Disconnect the battery to prevent accidental engine cranking.
- Refer to the vehicle manufacturer's service manual for specific procedures and torque specifications.
- Keep the work area clean and well-lit.
- Do not use damaged or modified tools.
3. Setup and Component Identification
Before starting any work, familiarize yourself with the tools and ensure all necessary components are present.
3.1 Unpacking and Inspection
- Carefully open the tool kit case and verify all 20 pieces are present according to the packing list.
- Inspect each tool for any signs of damage or manufacturing defects. Do not use damaged tools.

This image shows the tool kit as it appears when stored in its protective case, highlighting the organization and secure fit of each component.
3.2 Identifying Forging Jaws
The kit includes various forging jaws for different chain sizes. It is crucial to select the correct jaw for the specific timing chain you are working on.
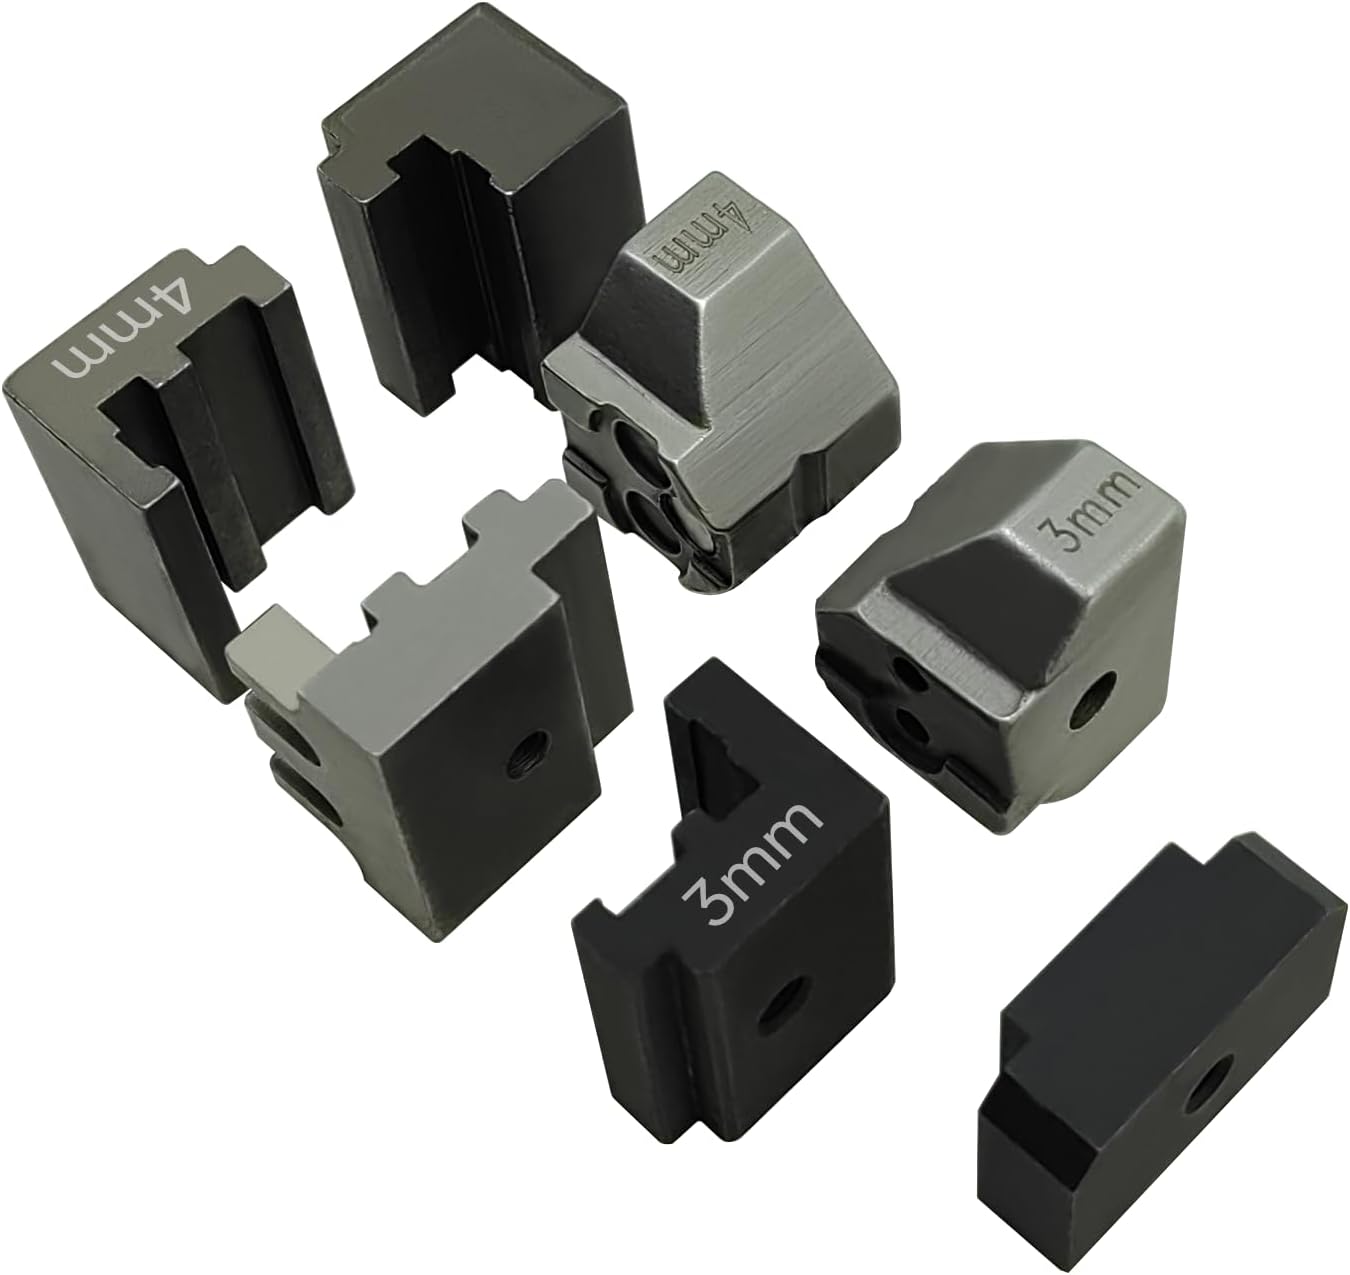
This image provides a detailed view of the various forging jaws, some clearly marked with their sizes (e.g., 3mm, 4mm), which are critical for proper chain separation and riveting.
4. Operating Instructions
This section outlines the general procedures for using the timing chain removal and installation tool kit. Always consult the specific vehicle service manual for detailed engine-specific instructions.
4.1 Timing Chain Separation
- Prepare the Engine: Ensure the engine is at Top Dead Center (TDC) for the cylinder you are working on, or as specified by the vehicle service manual. Remove any covers or components obstructing access to the timing chain.
- Position the Tool: Select the appropriate forging jaw for your timing chain. Position the chain breaker tool over the chain link to be separated. Ensure the pin of the tool aligns correctly with the rivet of the chain link.
- Break the Chain: Slowly turn the handle of the chain breaker tool to press the pin through the chain rivet, effectively separating the chain link. Apply steady pressure.

This image illustrates the chain breaker tool actively separating a timing chain link on an engine, showing the precise alignment required for the operation.
4.2 Timing Chain Assembly and Riveting
- Feed New Chain: If replacing the entire chain, use the temporary assembly chain links to connect the new chain to the old one, then carefully feed the new chain through the engine by rotating the crankshaft manually.
- Connect New Link: Once the new chain is in place, remove the temporary link and position the new master link or chain ends for riveting.
- Rivet the Chain: Use the riveting component of the tool kit with the correct forging jaw. Position the tool over the new chain link and apply steady pressure to rivet the link securely. Ensure the rivet is properly formed and secure.

This image shows the riveting process, where the tool is used to securely join a new timing chain link, demonstrating proper application.

This image provides an overhead perspective of the tool being used on an engine, offering a clearer view of the overall setup during timing chain service.
5. Maintenance
Proper maintenance of your ZKTOOL kit will ensure its longevity and reliable performance.
- Cleaning: After each use, clean all tools thoroughly to remove oil, grease, and debris. Use a clean cloth and a suitable degreaser if necessary.
- Lubrication: Apply a light coat of oil to moving parts and threaded sections of the tools to prevent rust and ensure smooth operation.
- Storage: Store the tools in their original protective case in a dry, clean environment to prevent damage and corrosion.
- Inspection: Periodically inspect all components for wear, cracks, or damage. Replace any worn or damaged parts immediately.
6. Troubleshooting
If you encounter issues while using the ZKTOOL timing chain tool kit, consider the following common problems and solutions.
- Difficulty Breaking Chain:
- Ensure the correct size forging jaw is used.
- Verify the tool pin is perfectly aligned with the chain rivet.
- Apply steady, firm pressure. Do not force the tool if resistance is excessive; re-check alignment.
- Improper Rivet Formation:
- Confirm the correct riveting die and pin are selected for the chain type.
- Ensure the chain link is properly seated in the tool before riveting.
- Apply even pressure during the riveting process.
- Tool Slippage:
- Ensure all components are clean and free of excessive oil or grease.
- Verify that the tool is securely clamped or positioned on the chain.
7. Specifications
| Attribute | Value |
|---|---|
| Brand | ZKTOOL |
| Model Number | ZK049 (M271, M272, M273, M274, M276) |
| Item Weight | 6.29 pounds (approx. 2.85 kg) |
| Product Dimensions (Case) | 9.84 x 7.87 x 2.36 inches (approx. 25 x 20 x 6 cm) |
| Material | High-quality steel and other durable materials |

This image provides a visual representation of the tool kit's case dimensions (270mm length, 210mm width, 60mm height) and its total weight (2.9kg), useful for storage and transport considerations.
8. Warranty and Support
8.1 Warranty Information
ZKTOOL is committed to providing high-quality special tools for automotive repair. While specific warranty details are not provided in this manual, ZKTOOL products are generally backed by a manufacturer's warranty against defects in materials and workmanship. Please retain your proof of purchase for any warranty claims.
8.2 Customer Support
For technical assistance, questions regarding product use, or warranty inquiries, please contact ZKTOOL customer service. Refer to the product packaging or the official ZKTOOL website for the most current contact information.
ZKTOOL is dedicated to innovation, quality, and user-centric design, positioning itself as a trusted partner for professionals worldwide.