1. Introduction
Thank you for choosing the AstroAI Digital Clamp Meter CM2K0R and Multimeter Test Lead Kit. This manual provides essential information for the safe and effective operation, maintenance, and troubleshooting of your device. Please read this manual thoroughly before use and retain it for future reference.
2. Safety Information
To ensure safe operation, always adhere to the following safety precautions:
- DO NOT MEASURE DC CURRENT WITH THE CLAMP JAW. The clamp jaw is designed for AC current measurement only.
- Always inspect the meter and test leads for any damage before use. Do not use if damaged.
- Ensure the function dial is set to the correct range before making any measurements.
- Do not exceed the maximum input values for any range. This meter is rated CAT III 600V.
- Exercise extreme caution when working with live circuits. Avoid contact with bare conductors or terminals.
- Keep fingers behind the probe barriers when testing.
- Replace batteries promptly when the low battery indicator appears.
- Do not operate the meter in explosive gas, vapor, or dusty environments.
3. Package Contents
Verify that all items are present in your package:
- 1 x AstroAI Digital Clamp Meter CM2K0R
- 2 x Heavy Duty Test Probe Handles (Red and Black)
- 2 x Alligator Clips with removable insulation (Red and Black)
- 2 x Extended Range Plunger Mini-Hooks with pass-through banana plugs (Red and Black)
- 2 x PVC Lead Extensions (42-inch, Red and Black)
- 2 x 1.5V AAA Batteries
- 1 x Carrying Case
- 1 x User Manual
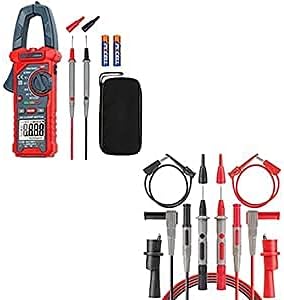
Image 3.1: Overview of the AstroAI Digital Clamp Meter CM2K0R and included Multimeter Test Lead Kit components.
4. Product Overview
4.1 Digital Clamp Meter CM2K0R
The AstroAI CM2K0R is a versatile digital clamp meter designed for measuring AC current, AC/DC voltage, capacitance, resistance, diode, and continuity. It features a large jaw opening for non-contact AC current measurement and a backlit LCD for clear readings.

Image 4.1: Front view of the AstroAI Digital Clamp Meter CM2K0R highlighting its various measurement functions and display.
4.2 Multimeter Test Lead Kit
The included 8-piece test lead kit provides various connectors for diverse testing scenarios, ensuring compatibility with the clamp meter and other test instruments.
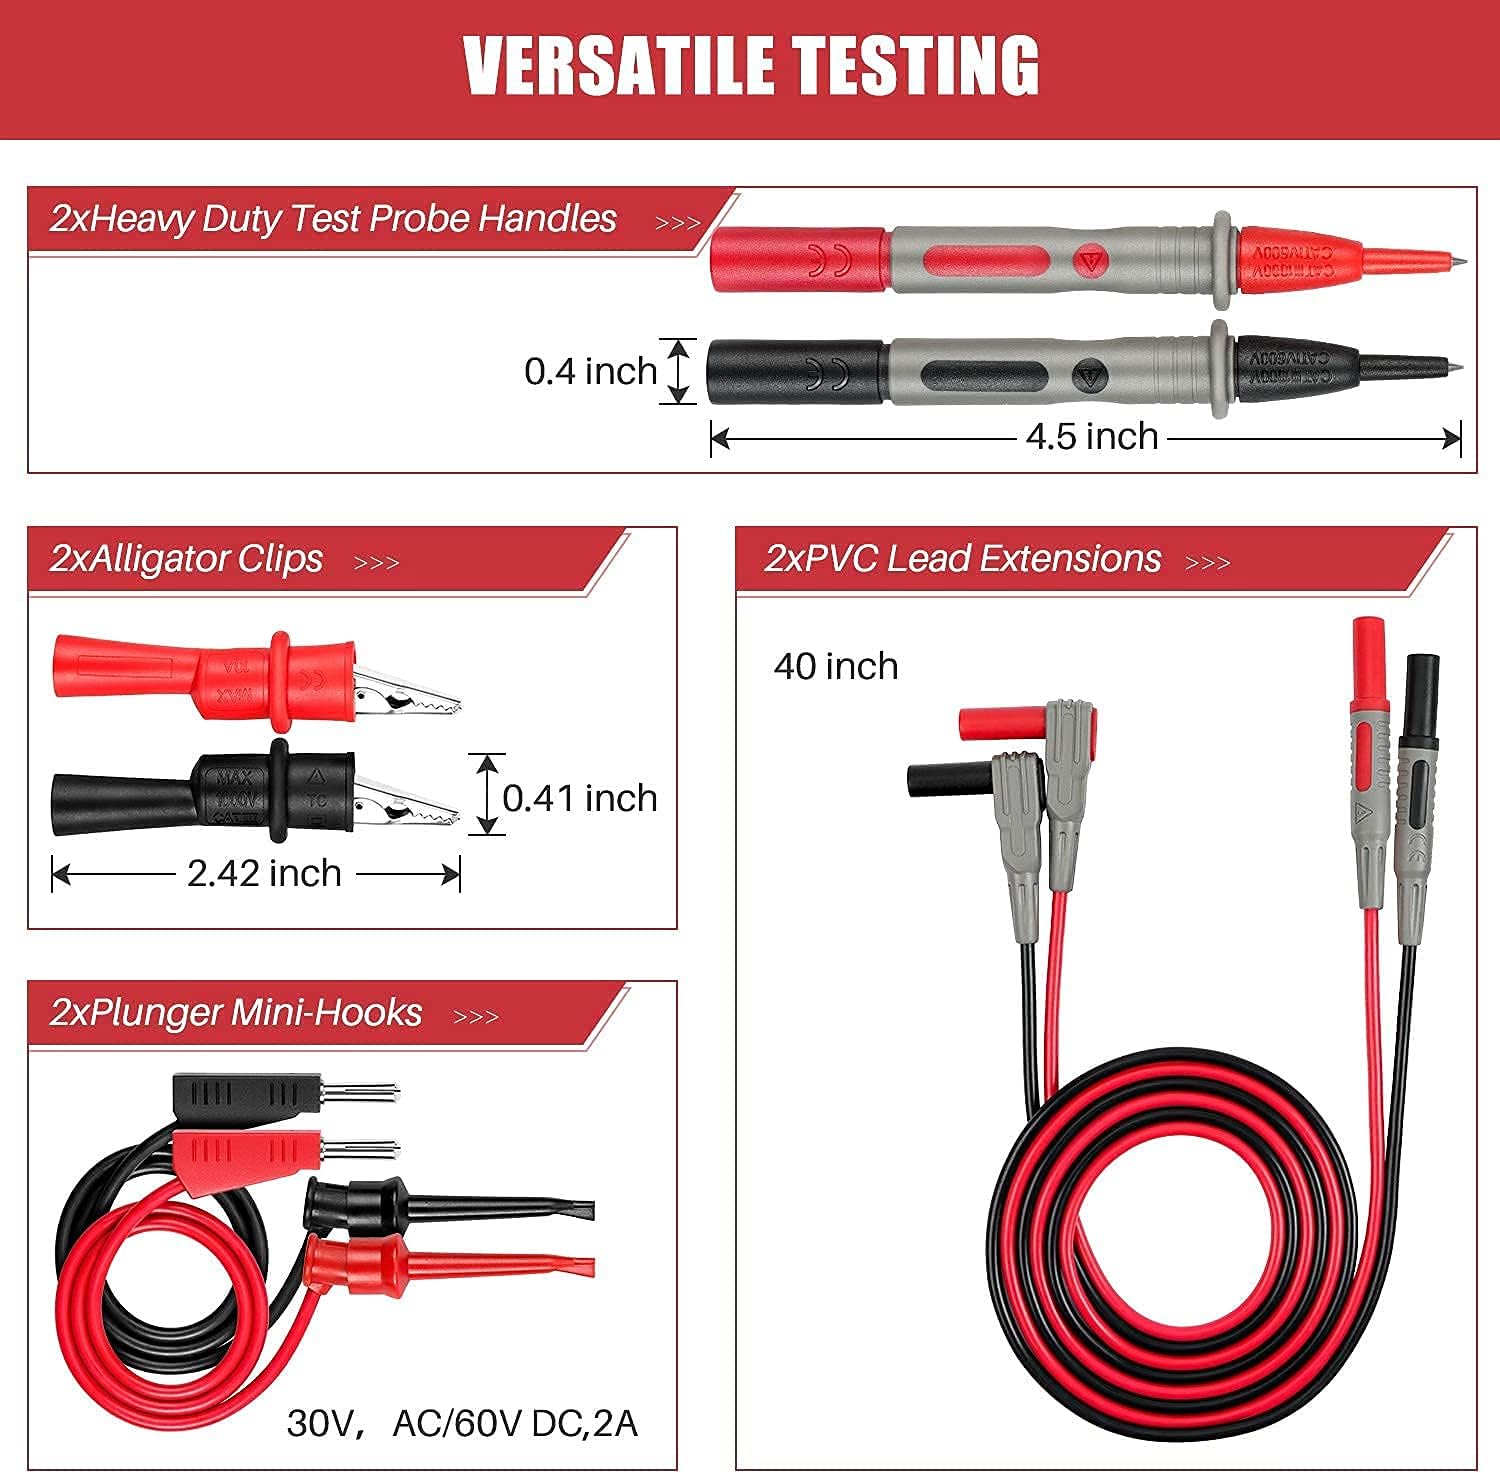
Image 4.2: The complete set of multimeter test leads, including probes, alligator clips, mini-hooks, and lead extensions.

Image 4.3: Illustration of the versatile testing capabilities provided by the different types of test lead connectors.
5. Setup
5.1 Battery Installation
- Locate the battery compartment cover on the back of the clamp meter.
- Use a screwdriver to open the cover.
- Insert two 1.5V AAA batteries, observing the correct polarity (+/-).
- Replace the battery compartment cover and secure it with the screw.
5.2 Connecting Test Leads
For measurements requiring test leads (e.g., voltage, resistance, continuity), insert the red test lead into the 'VΩmA' input jack and the black test lead into the 'COM' input jack. Ensure a secure connection.
6. Operating Instructions
Turn the function dial to the desired measurement mode. Use the 'FUNC' button to cycle through sub-functions if applicable.
6.1 AC Current Measurement (Clamp Jaw)
- Set the function dial to the 'A~' position.
- Press the clamp trigger to open the jaw.
- Enclose only one conductor of the circuit within the clamp jaw.
- Read the AC current value on the LCD.
- Important: Do not attempt to measure DC current with the clamp jaw.
6.2 AC/DC Voltage Measurement
- Insert the test leads into the appropriate jacks (Red to 'VΩmA', Black to 'COM').
- Set the function dial to the 'V~' position for AC Voltage or 'V=' for DC Voltage. Use the 'FUNC' button to switch between AC and DC if needed.
- Connect the test probes in parallel to the circuit or component to be measured.
- Read the voltage value on the LCD.
6.3 Resistance Measurement
- Insert the test leads into the appropriate jacks.
- Set the function dial to the 'Ω' position.
- Ensure the circuit or component is de-energized before measuring resistance.
- Connect the test probes across the component.
- Read the resistance value on the LCD.
6.4 Diode and Continuity Test
- Insert the test leads into the appropriate jacks.
- Set the function dial to the '∔' position. Use the 'FUNC' button to select Diode or Continuity mode.
- For Diode Test: Connect the red probe to the anode and the black probe to the cathode. The forward voltage drop will be displayed. Reverse the probes to check for open circuit.
- For Continuity Test: Connect the probes across the circuit. A continuous beep indicates continuity (low resistance).
6.5 Non-Contact Voltage (NCV) and Live Wire Test
The NCV function allows for detection of AC voltage without direct contact, enhancing safety.

Image 6.1: Demonstrates the Non-Contact Voltage (NCV) testing feature, indicating high and low voltage with visual and audial alarms.
- Set the function dial to the 'NCV/Live' position.
- Bring the top of the clamp meter near the conductor or outlet.
- The meter will emit an audible beep and the NCV indicator light will illuminate if AC voltage is detected. The frequency of beeps and light intensity indicate voltage strength.
- For Live Wire Test: Press the 'NCV/Live' button to switch to Live mode. Insert the red test probe into the live wire socket. The meter will indicate if it's a live wire.
6.6 Special Functions
- Data Hold (HOLD): Press the 'HOLD' button to freeze the current reading on the display. Press again to release.
- MAX/MIN: Press the 'MAX/MIN' button to record the maximum or minimum measured value. Press again to cycle between MAX, MIN, and current reading.
- Backlight and Flashlight: Press the backlight/flashlight button (often marked with a lightbulb icon) to turn on the LCD backlight or the integrated flashlight for improved visibility in dim conditions.
- Auto Shut-off: The meter will automatically power off after a period of inactivity to conserve battery life.
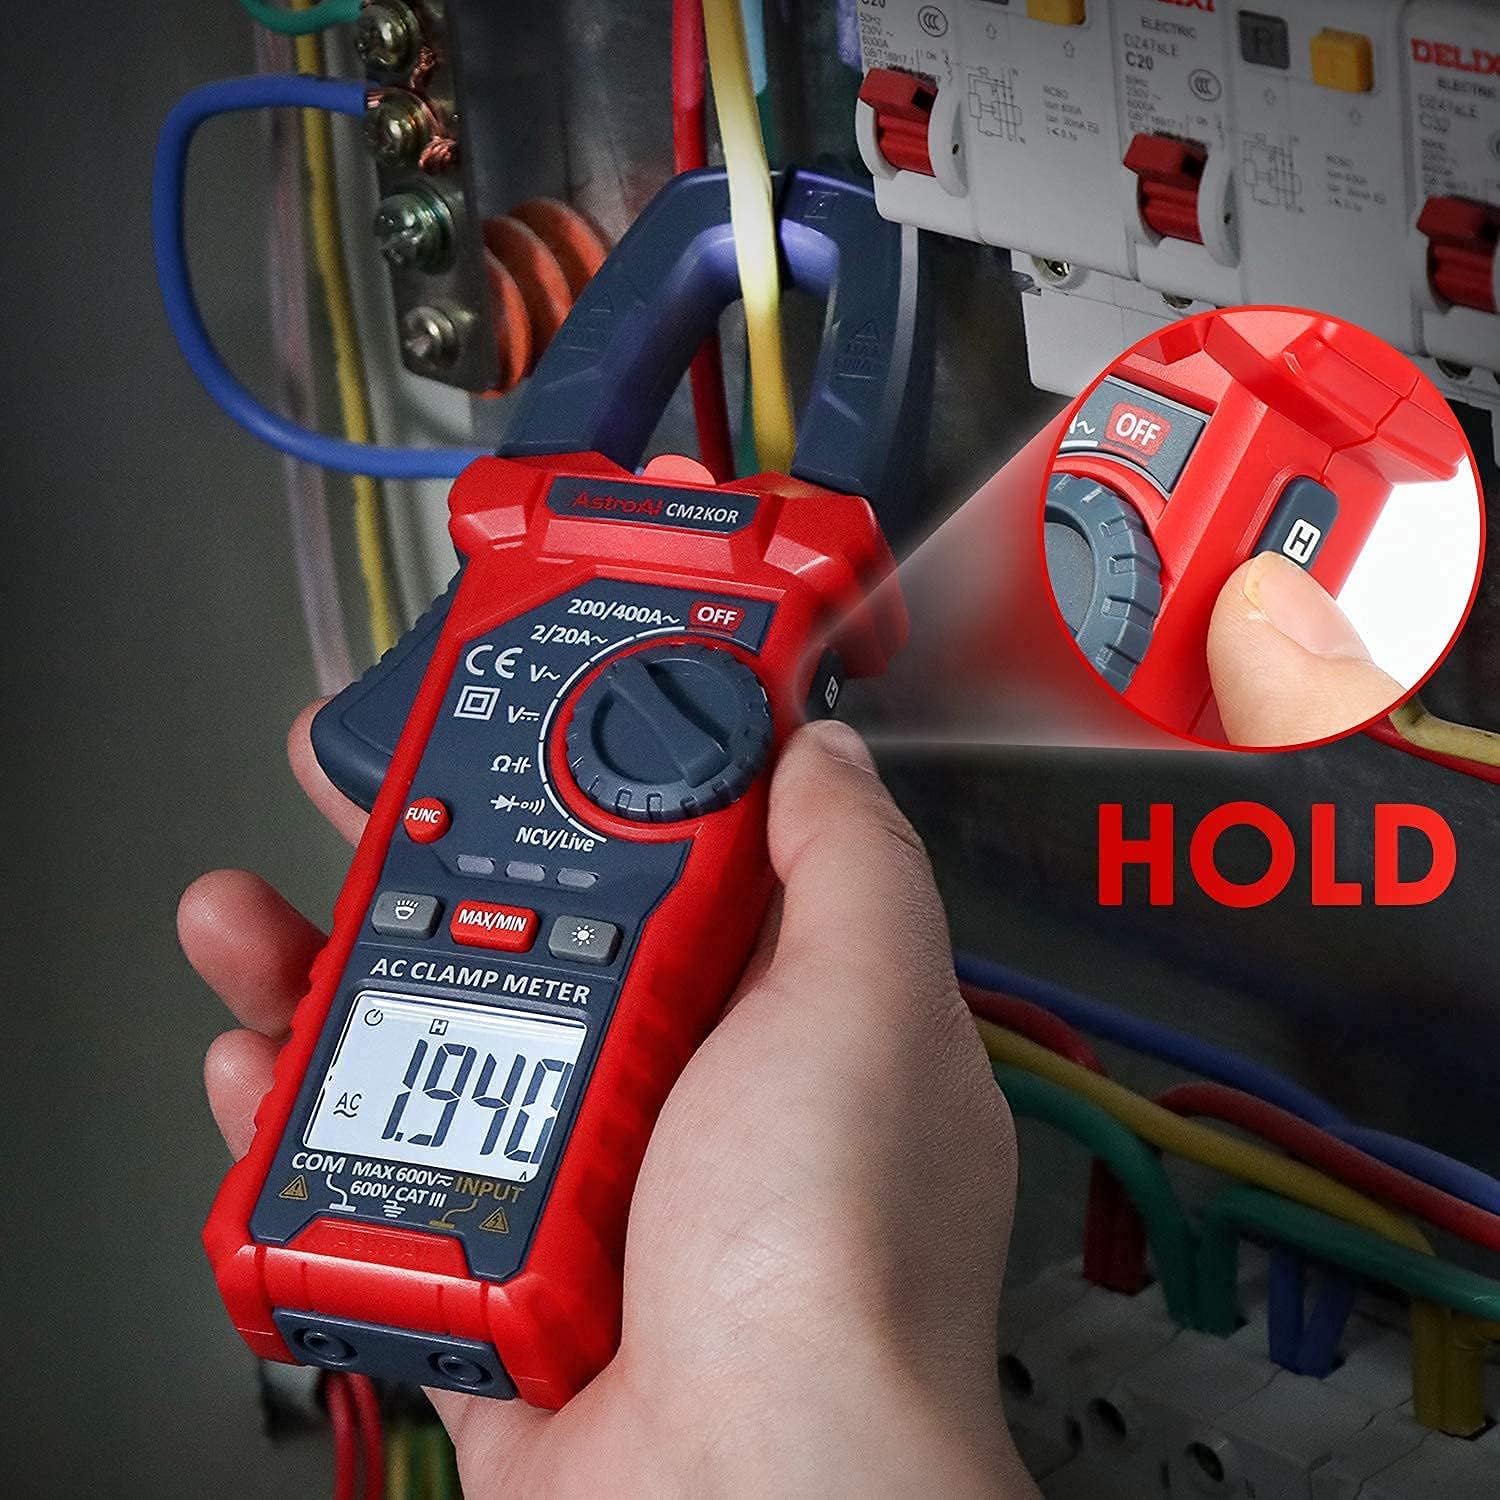
Image 6.2: The 'HOLD' button being pressed to retain the current measurement on the LCD screen.
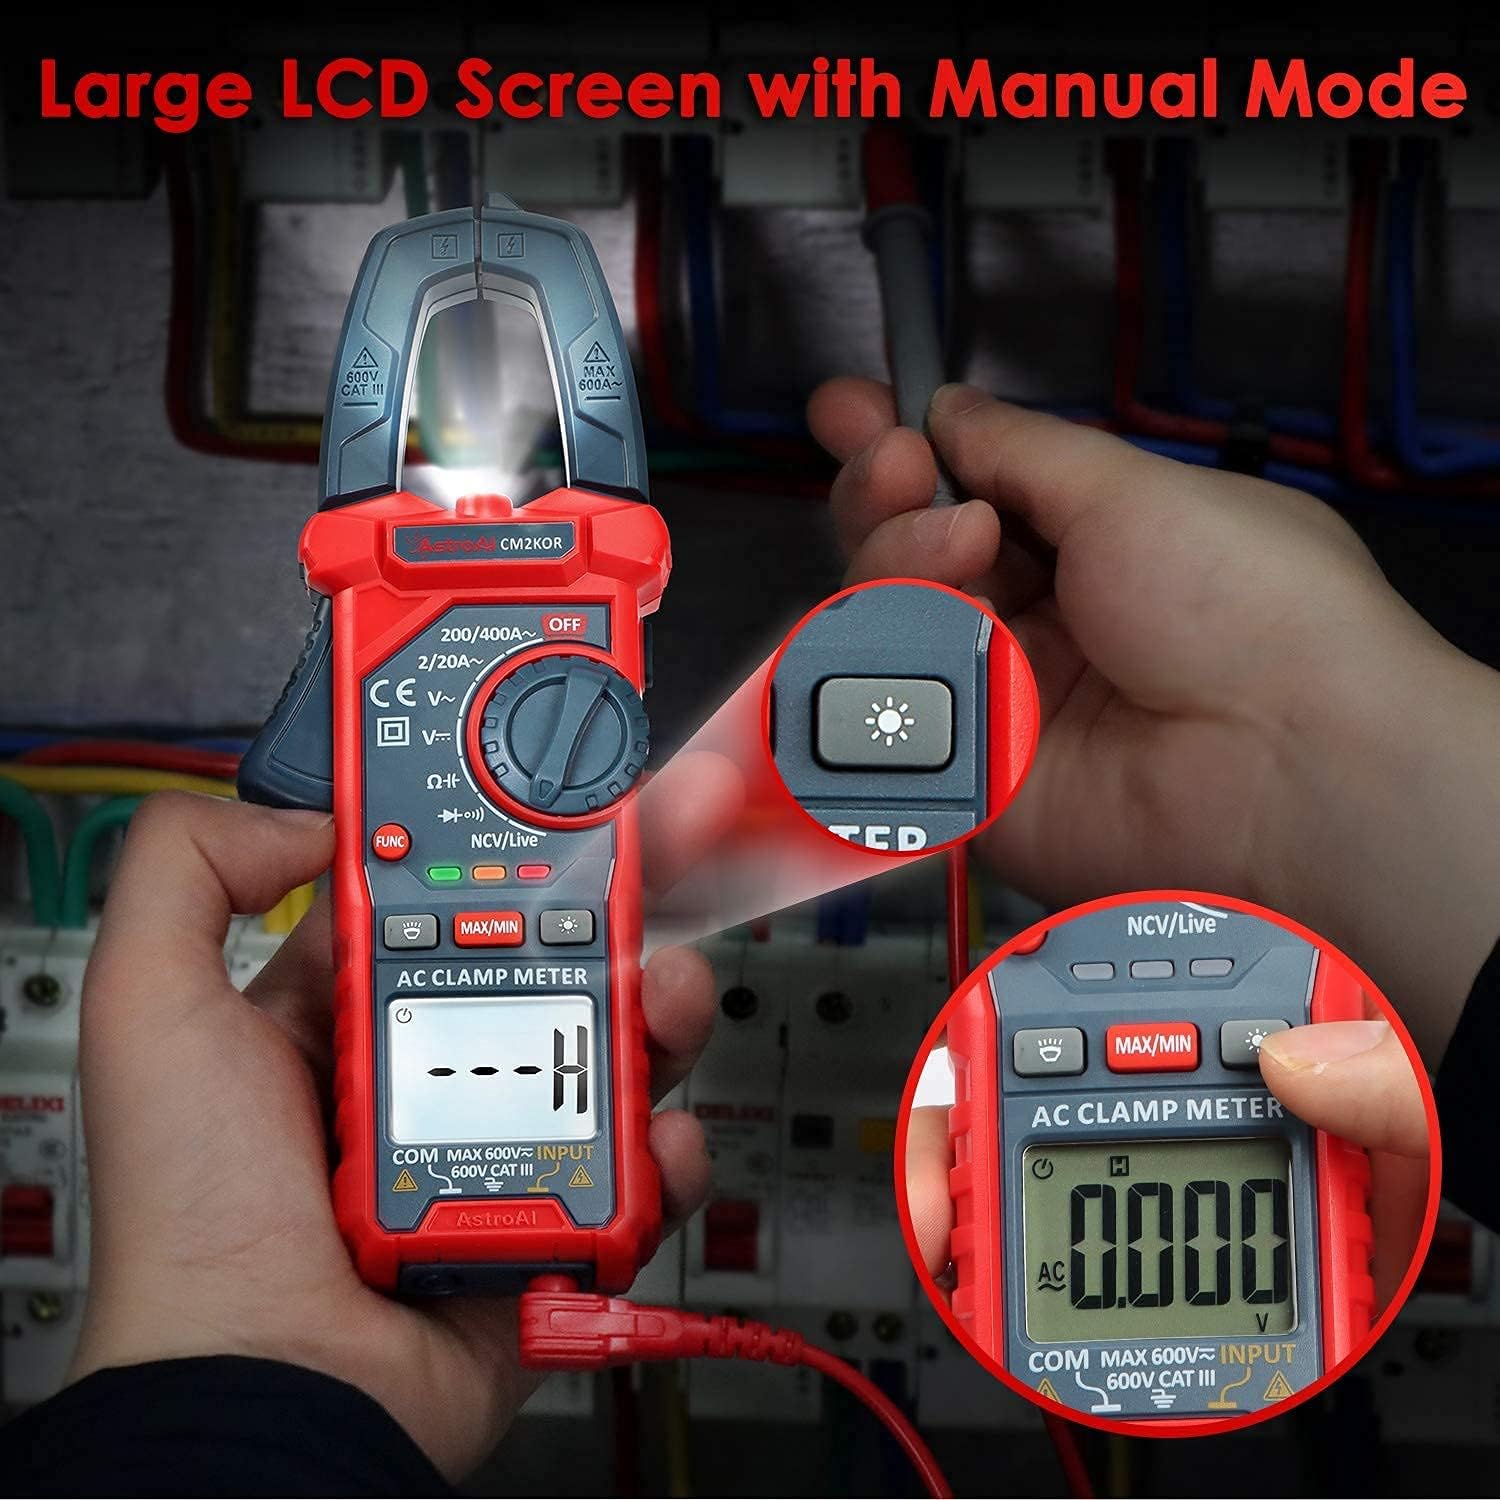
Image 6.3: The large LCD screen with its backlight activated, and the integrated flashlight illuminating the work area.
7. Maintenance
7.1 Cleaning
Wipe the meter and test leads with a damp cloth and mild detergent. Do not use abrasives or solvents. Ensure the device is completely dry before storage or next use.
7.2 Battery Replacement
When the low battery indicator appears on the display, replace the batteries as described in Section 5.1. Always use two new 1.5V AAA batteries.
7.3 Storage
If the meter is not used for an extended period, remove the batteries to prevent leakage. Store the device in its carrying case in a cool, dry place, away from direct sunlight and extreme temperatures.
8. Troubleshooting
| Problem | Possible Cause | Solution |
|---|---|---|
| No display or dim display | Low batteries or incorrect battery installation | Replace batteries; ensure correct polarity. |
| Incorrect readings | Incorrect function selected, poor test lead connection, or exceeding range. | Verify function dial setting; ensure test leads are securely connected; check if measurement is within meter's range. |
| Meter does not respond | Meter is in auto shut-off mode or internal fault. | Turn the dial to OFF and then back ON. If problem persists, contact support. |
9. Specifications
- Brand: AstroAI
- Model: CM2K0R
- Power Source: 2 x 1.5V AAA Batteries
- Measurement Type: Digital Clamp Meter, Multimeter, Voltmeter
- Functions: AC Current (Clamp), AC/DC Voltage, Capacitance, Resistance, Diode, Continuity, Live Wire Test, Non-Contact Voltage (NCV)
- Special Features: Data Hold, Max/Min, Auto Shut-off, Low Battery Indicator, LCD Backlight, Flashlight, Audial and Visual Alarm
- Safety Rating: CAT III 600V
- Jaw Opening: Designed for easy measurement in narrow spaces.
- Test Lead Compatibility: Universal with 0.16" banana plugs or shrouded banana plugs.
10. Warranty and Support
AstroAI products are designed for reliability and performance. For warranty information or technical support, please refer to the warranty card included with your product or visit the official AstroAI website. If you encounter any issues or have questions regarding the operation of your Digital Clamp Meter CM2K0R or Test Lead Kit, please contact AstroAI customer service for assistance.


