
1. Product Overview
The VIKVIZ 8MP Outdoor PTZ IP Camera is a high-performance surveillance solution designed for outdoor environments. It features 4K UltraHD resolution, advanced pan-tilt-zoom capabilities, and intelligent human/vehicle detection for enhanced security monitoring.
- 4K UltraHD PTZ Dome Camera: Offers 4x optical zoom, 0° ~ 355° pan, and 0° ~ 90° tilt for comprehensive coverage. Equipped with a 2.7–12 mm AF lens for wide viewing.
- 164ft IR Night Vision & Built-in Mic: Provides clear night vision up to 164 feet with high-performance infrared array LED lights. The built-in microphone allows for audio recording.
- Smart Detection: Features advanced human/vehicle detection algorithms, reducing false alarms and sending timely notifications to your phone.
- Power Over Ethernet (PoE): Simplifies installation with a single Ethernet cable for both power and data connection.
- H.265+ Coding & IP66/IK10 Protection: Utilizes H.265+ compression for efficient storage and bandwidth usage. The IP66 waterproof and IK10 vandal-proof casing ensures durability in harsh weather conditions.
- High Compatibility: Supports ON-VIF protocol, making it compatible with most third-party NVRs, Blue Iris, iSpy, Web viewer, and Mobile APP Videolink.

Figure 1: VIKVIZ 8MP Outdoor PTZ IP Camera. This image shows the white dome camera mounted on a wall bracket, with a house in the background.
2. What's in the Box
Your VIKVIZ 8MP Outdoor PTZ IP Camera kit includes the following components:
- VIKVIZ 8MP Outdoor PTZ IP Camera
- Mounting Screws and Wall Plugs
- Waterproof Connector Kit
- Quick Start Guide (not shown, but typically included)

Figure 2: What's in the Box. This image displays the camera, a brown cardboard box labeled "HD CAMERA", a set of green wall plugs and screws, and a white waterproof connector.
3. Setup
3.1 Physical Installation and Connection
The camera can be powered via Power over Ethernet (PoE) or a 12V DC power adapter (not included). For PoE, connect the camera directly to a PoE NVR or a PoE switch using an Ethernet cable. For non-PoE setup, connect the camera's network port to your router's LAN port and supply 12V power.

Figure 3: Connection Methods. This diagram illustrates two connection methods: 1) Camera connected to an NVR, then to a router. 2) Camera connected to a PoE switch, then to a router, or directly to a PC/router with power supply.
3.2 Connecting to an NVR (Hikvision Example)
Follow these steps to connect your camera to a Hikvision NVR:
- Supply power to the NVR and turn it on.
- Use a network cable to connect the camera to the PoE port of the NVR.
- Connect the LAN port of the router to the router.
- Use a VGA or HDMI cable to connect the NVR to the monitor.
- Connect the mouse to the NVR.
- Select the NVR device language.
- Enter and confirm the password of the NVR. The default password for activating the camera is the same as that of the NVR.
- Draw and confirm the lock screen pattern.
- Set NVR system time and network configuration.
- Click "IP Channel - Online - Refresh" to find the camera.
- Select the camera and click "Add" to add it to the list.
- If the camera cannot be connected normally, click "Edit" to check whether the protocol and account password are correct. A green logo indicates a successful connection.
- Click "Live" to preview the camera feed.
Video 1: How to connect the camera to Hikvision NVR. This video demonstrates the step-by-step process of connecting the VIKVIZ IP camera to a Hikvision NVR, including physical connections and software configuration.
3.3 Adding IP Camera to Blue Iris
To integrate your VIKVIZ IP Camera with Blue Iris software:
- Connect the camera to your local area network.
- Open the camera search tool (e.g., SearchTools) on your computer to find and remember the camera's IP address.
- Open Blue Iris.
- Right-click on the desktop within Blue Iris, modify the camera name, and click "OK".
- Fill in the camera's IP address and click "Find / Inspect" to connect.
- Fill in the camera's password and select the camera protocol (Generic/ONVIF), then click "OK".
Video 2: How to add IP Camera to Blue Iris. This video guides users through the process of adding the IP camera to Blue Iris software, covering network discovery and configuration.
3.4 Modifying Camera IP Address (Mac Example)
If you need to change the camera's IP address to match your network segment on a Mac:
- Download the camera search tool "SearchTools".
- Open "SearchTools" and check the camera IP.
- Click "System Preferences - Network".
- Modify the camera's IP network segment to be the same as the computer (the first three digits of the IP address are the same as the computer IP).
- Click "Apply" to save the settings. "Connected" indicates successful settings.
- Open "SearchTools" again and search for the camera IP.
- Right-click the camera IP address and click "Goto Web" to access the camera web page.
- Enter the camera account password (default: "admin", password: "123456"), click "login" to log in.
Video 3: How to modify the camera IP or add a network segment to log. This video demonstrates how to adjust network settings on a Mac to ensure the camera's IP address is within the same segment as the computer for proper access.
4. Operating Instructions
4.1 Pan-Tilt-Zoom (PTZ) Control
The camera offers flexible pan, tilt, and optical zoom capabilities. You can control these functions via the mobile app or compatible software like Blue Iris.
- Pan Range: 0° ~ 355°
- Tilt Range: 0° ~ 90°
- Optical Zoom: 4x optical zoom (2.7-12mm lens)

Figure 4: PTZ Movement. This image shows the camera's pan and tilt ranges, with arrows indicating horizontal and vertical movement, and a smartphone screen demonstrating remote control.
Video 4: 8MP Outdoor PTZ IP Camera 4X Optical Zoom Pan Tilt. This video provides a brief demonstration of the camera's pan, tilt, and 4X optical zoom capabilities.
Video 5: 8mp 4X optical zoom display. This short video showcases the camera's 4X optical zoom in action, demonstrating its ability to magnify distant objects.
4.2 Smart Human/Vehicle Detection
The camera's intelligent detection features can differentiate between humans, vehicles, and other moving objects like bugs, leaves, or shadows, minimizing false alarms.

Figure 5: Smart AI Human/Vehicle Detection. This image shows a house with a car and two children playing, with green boxes highlighting detected humans and vehicles, and red crosses indicating ignored elements like bugs and shadows.
Video 6: How the camera sets up motion detection, body detection. This video demonstrates the configuration of motion detection and human body detection settings within the camera's interface.
4.3 Audio Recording and Alerts
The built-in microphone allows for one-way audio recording, providing additional monitoring evidence. The camera can also send email alerts upon detection.

Figure 6: Built-in Microphone. This image shows a person speaking to someone at a door, with the camera mounted above, illustrating the audio recording capability.
Video 7: How does IP Camera Gmail set and send email alerts. This video provides instructions on configuring the IP camera to send email alerts via Gmail, including setting up app passwords for security.
4.4 Remote Access and Viewing
Access your camera feed anytime, anywhere using the mobile app (Videolink, Hik-connect) or PC applications (LMS, iVMS-4200, AJDevTools, SADP) and web browsers (Google Chrome, Microsoft Edge, Firefox).
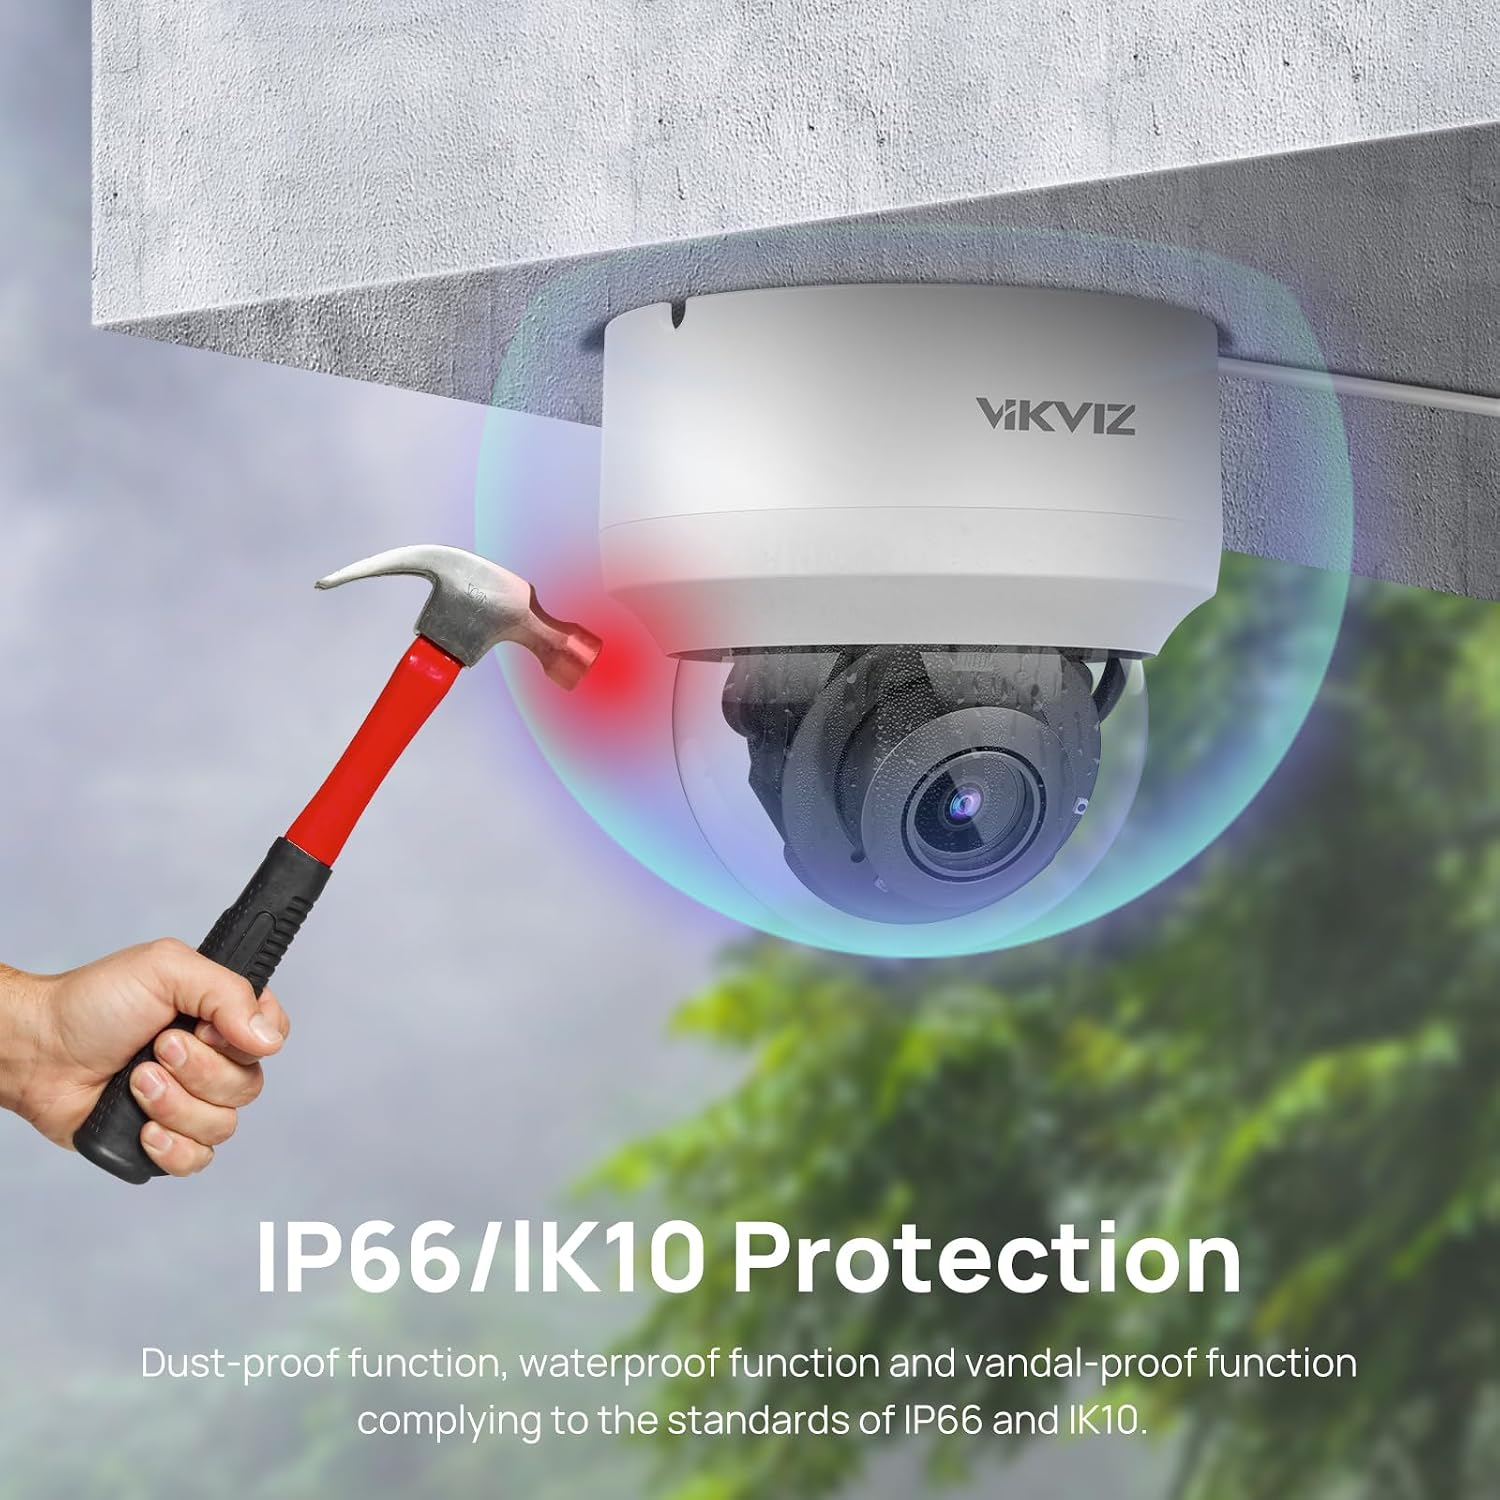
Figure 7: Remote Access. This image shows various devices (smartphone, laptop, desktop, tablet) displaying the camera feed, along with logos of compatible apps and web browsers.
5. Maintenance
The VIKVIZ 8MP Outdoor PTZ IP Camera is designed for durability and minimal maintenance.
- Weatherproof and Vandal-Proof: With an IP66 rating, the camera is protected against dust and powerful water jets. The IK10 rating ensures resistance against significant impacts, making it suitable for outdoor use in various conditions.
- Regular Cleaning: Periodically clean the camera lens with a soft, damp cloth to ensure clear image quality. Avoid abrasive cleaners.
- Firmware Updates: Check the manufacturer's website for any available firmware updates to ensure optimal performance and security.

Figure 8: IP66/IK10 Protection. This image depicts the camera mounted outdoors, with a hammer striking near it, symbolizing its dust-proof, waterproof, and vandal-proof features.
6. Troubleshooting
If you encounter issues with your VIKVIZ IP Camera, refer to the following common troubleshooting tips:
- Camera Not Found on Network:
- Ensure the camera is properly connected to the network (PoE or standard Ethernet with 12V power).
- Verify that the camera's IP address is within the same network segment as your computer or NVR. Use the "SearchTools" utility to discover the camera and modify its IP if necessary (refer to Section 3.4).
- Check all network cables for secure connections.
- No Video Feed:
- Confirm the camera is powered on.
- Ensure the network connection is stable.
- If using an NVR, check the camera's status in the NVR's IP Channel settings. Re-add or edit the camera's settings if the status is red (disconnected).
- Verify that the correct protocol (e.g., ONVIF) and credentials (username/password) are used when adding the camera to software like Blue Iris or an NVR.
- Motion Detection Not Triggering:
- Ensure motion detection is enabled in the camera's web interface or software settings.
- Adjust the sensitivity and threshold settings for motion detection. Higher sensitivity and lower threshold values make it easier to trigger.
- Define the detection area correctly, ensuring the areas you want to monitor are selected.
- Email Alerts Not Received:
- Verify that the SMTP server settings (e.g., smtp.gmail.com, port 465, SSL) are correctly configured in the camera's web interface.
- Ensure the email address and authorization password are correct. For Gmail, you may need to generate an "App password" if 2-Step Verification is enabled.
- Check your spam folder for the alert emails.
7. Specifications
| Feature | Detail |
|---|---|
| Model | 8MP 5X Optical Zoom |
| Video Capture Resolution | 4K (8MP) |
| Effective Still Resolution | 8 MP |
| Optical Zoom | 4x |
| Digital Zoom | 16x |
| Pan Range | 0° ~ 355° |
| Tilt Range | 0° ~ 90° |
| Night Vision Range | 164-168 Feet (IR) |
| Special Features | Human/Vehicle Detection, Built-in Mic, PTZ Technology |
| Connectivity Technology | Wire, Ethernet (PoE) |
| Connectivity Protocol | ONVIF |
| Indoor/Outdoor Usage | Outdoor |
| International Protection Rating | IP66, IK10 |
| Material | Aluminum |
| Power Source | Corded Electric (12V), PoE |
| Voltage | 12 Volts |
| Wattage | 4.2 watts |
| Item Weight | 2 Pounds |
| Product Dimensions | 9 x 8 x 6 inches |
8. Warranty and Support
VIKVIZ is committed to providing quality service and experience. Your VIKVIZ 8MP Outdoor PTZ IP Camera comes with:
- 2 Years Manufacturer Maintenance: Enjoy peace of mind with a two-year warranty covering manufacturing defects.
- Lifetime Technical Support: VIKVIZ offers lifetime technical support for all customers to assist with any setup, operation, or troubleshooting queries.
For further assistance, please visit the official VIKVIZ website or contact customer support.


