
Introduction
Thank you for choosing the ONN Tilting TV Wall Mount. This manual provides essential information for the safe and proper installation, operation, and maintenance of your new TV wall mount. Please read this manual thoroughly before installation and keep it for future reference.
This wall mount is designed to securely hold flat-panel televisions ranging from 32 inches to 47 inches, offering a tilting feature for optimal viewing angles. Its robust construction ensures stability and durability.
Safety Information
WARNING: Failure to read and follow all instructions can result in personal injury, property damage, or voiding of warranty. Improper installation may result in serious injury or death.
- Do not install into drywall alone. The mount must be secured to a wooden stud, concrete, or brick wall.
- Ensure the wall structure can safely support the combined weight of the mount and the television.
- Do not exceed the maximum weight capacity of 88 lbs (40 kg).
- This product is intended for indoor use only.
- Always use an assistant for lifting and positioning the television.
- Verify all connections are secure before use.
- Keep children and pets away during installation.
Package Contents
Please check to ensure all components are present and undamaged. If any parts are missing or defective, contact customer support.
- Wall Plate Assembly
- TV Bracket Arms (2)
- Hardware Kit (various screws, washers, spacers, anchors)
- Instruction Manual
Setup and Installation
Before beginning, ensure you have the necessary tools: stud finder, drill, level, Phillips head screwdriver, tape measure, pencil.
Step 1: Determine Mounting Location
Use a stud finder to locate the center of a wooden stud in your desired mounting location. Mark the stud's edges. For concrete or brick walls, ensure the wall is solid and free of obstructions.
Step 2: Attach Wall Plate to Wall
Position the wall plate at the desired height and use a level to ensure it is perfectly horizontal. Mark the drilling locations through the holes on the wall plate. Drill pilot holes into the stud or use appropriate anchors for concrete/brick. Secure the wall plate to the wall using the provided lag bolts and washers.

Figure 1: Main assembly of the ONN Tilting TV Wall Mount. This image shows the wall plate and the two vertical TV bracket arms.
Step 3: Attach TV Brackets to Television
Carefully place your TV face down on a soft, clean surface. Identify the VESA mounting holes on the back of your TV. Select the appropriate screws, washers, and spacers from the hardware kit that fit your TV's VESA pattern. Attach the two TV bracket arms to the back of your television, ensuring they are centered and securely fastened. The hooks on the bracket arms should face downwards.

Figure 2: Close-up view of the TV bracket arm, highlighting the tilting adjustment knob. This knob allows for fine-tuning the tilt angle of the television once mounted.

Figure 3: Detailed view of the safety latch mechanism located at the bottom of the TV bracket arm. This latch secures the TV to the wall plate and can be pulled to release the TV for removal.
Step 4: Mount Television to Wall Plate
With an assistant, carefully lift the television with the attached brackets. Hook the top of the TV bracket arms onto the top edge of the wall plate. Gently lower the TV until the brackets fully engage with the wall plate. Ensure the safety latches at the bottom of the TV brackets click into place, securing the TV to the mount.
Step 5: Adjust Tilt Angle
The mount allows for a tilt adjustment range of +12° to -12°. To adjust the tilt, loosen the tilting knobs on both TV bracket arms (refer to Figure 2). Tilt the TV to your desired viewing angle, then tighten the knobs firmly to secure the position.
Operating
Once installed, the ONN Tilting TV Wall Mount allows for easy adjustment of your television's vertical viewing angle. Simply loosen the two tilting knobs located on the side of each TV bracket arm, adjust the screen to your preferred angle (up to 12 degrees up or down), and then re-tighten the knobs to lock the position. This feature helps reduce glare and optimize your viewing experience.
Maintenance
Regular maintenance ensures the longevity and safe operation of your TV wall mount.
- Cleaning: Use a soft, dry cloth to wipe down the mount. Avoid abrasive cleaners or solvents.
- Periodic Checks: Periodically check all screws and bolts to ensure they remain tight and secure. Over time, vibrations or movement can cause fasteners to loosen.
- Damage Inspection: Inspect the mount for any signs of damage or wear. If any damage is observed, discontinue use and contact customer support.
Troubleshooting
| Problem | Possible Cause | Solution |
|---|---|---|
| TV is not level after installation. | Wall plate not level during installation. | Remove TV, re-level wall plate, and re-install. Ensure a level is used during installation. |
| Difficulty tilting the TV. | Tilting knobs are too tight. | Loosen the tilting knobs slightly to allow for movement. Re-tighten once the desired angle is achieved. |
| Mount feels unstable. | Improper installation or loose fasteners. | Immediately remove TV. Re-check all mounting points and fasteners. Ensure the mount is secured to a solid stud or appropriate anchors. Do not exceed weight capacity. |
Specifications
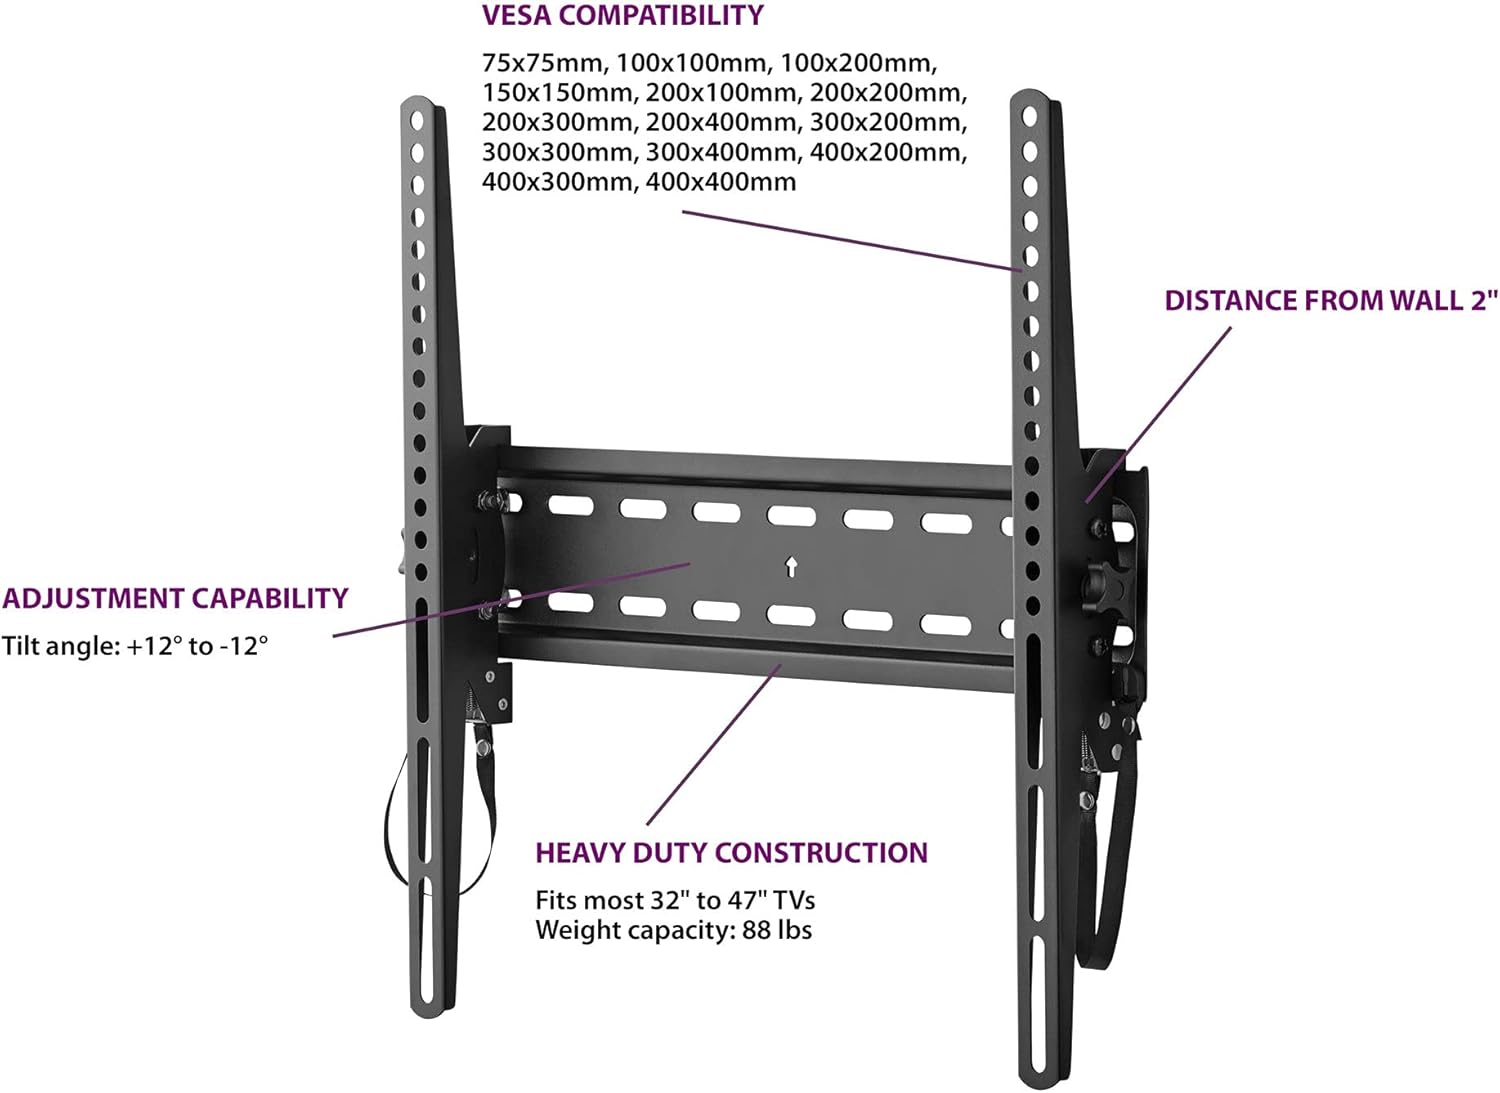
Figure 4: Technical specifications diagram for the ONN Tilting TV Wall Mount, detailing VESA compatibility, tilt adjustment, weight capacity, and distance from the wall.
- Model: B097KP7RT5
- Brand: ONN
- Compatible TV Sizes: 32" - 47"
- Maximum Weight Capacity: 88 lbs (40 kg)
- Movement Type: Tilt
- Tilt Angle: +12° to -12°
- Distance from Wall: Approximately 2 inches
- VESA Compatibility: 75x75mm, 100x100mm, 100x200mm, 150x150mm, 200x100mm, 200x200mm, 200x300mm, 200x400mm, 300x300mm, 300x400mm, 400x200mm, 400x300mm, 400x400mm
- Color: Black
- Item Weight: 3.99 pounds
- Package Dimensions: 18.7 x 4.6 x 2.4 inches
- UPC: 681131308427
Warranty and Support
For warranty information or technical support, please contact the retailer or the manufacturer directly. Keep your purchase receipt as proof of purchase.
For further assistance, please visit the ONN official website or contact their customer service department.