
GoolRC FS-X6B
GoolRC Flysky FS-X6B Receiver Instruction Manual
Model: FS-X6B
1. Product Overview
The GoolRC Flysky FS-X6B is a compact and versatile 6-channel receiver designed specifically for FPV Racing Quadcopters. Its small size and mounting hole configuration make it ideal for integration with popular flight controllers such as CC3D, F3, and F4.
This receiver supports two-way transmission, enabling real-time detection of the drone's battery voltage. It offers multiple signal output types including PWM, I.BUS, and PPM, providing flexibility for various setups. Equipped with a dual-antenna design and an electromagnetic shielding cover, the FS-X6B ensures magnificent and reliable signal reception.
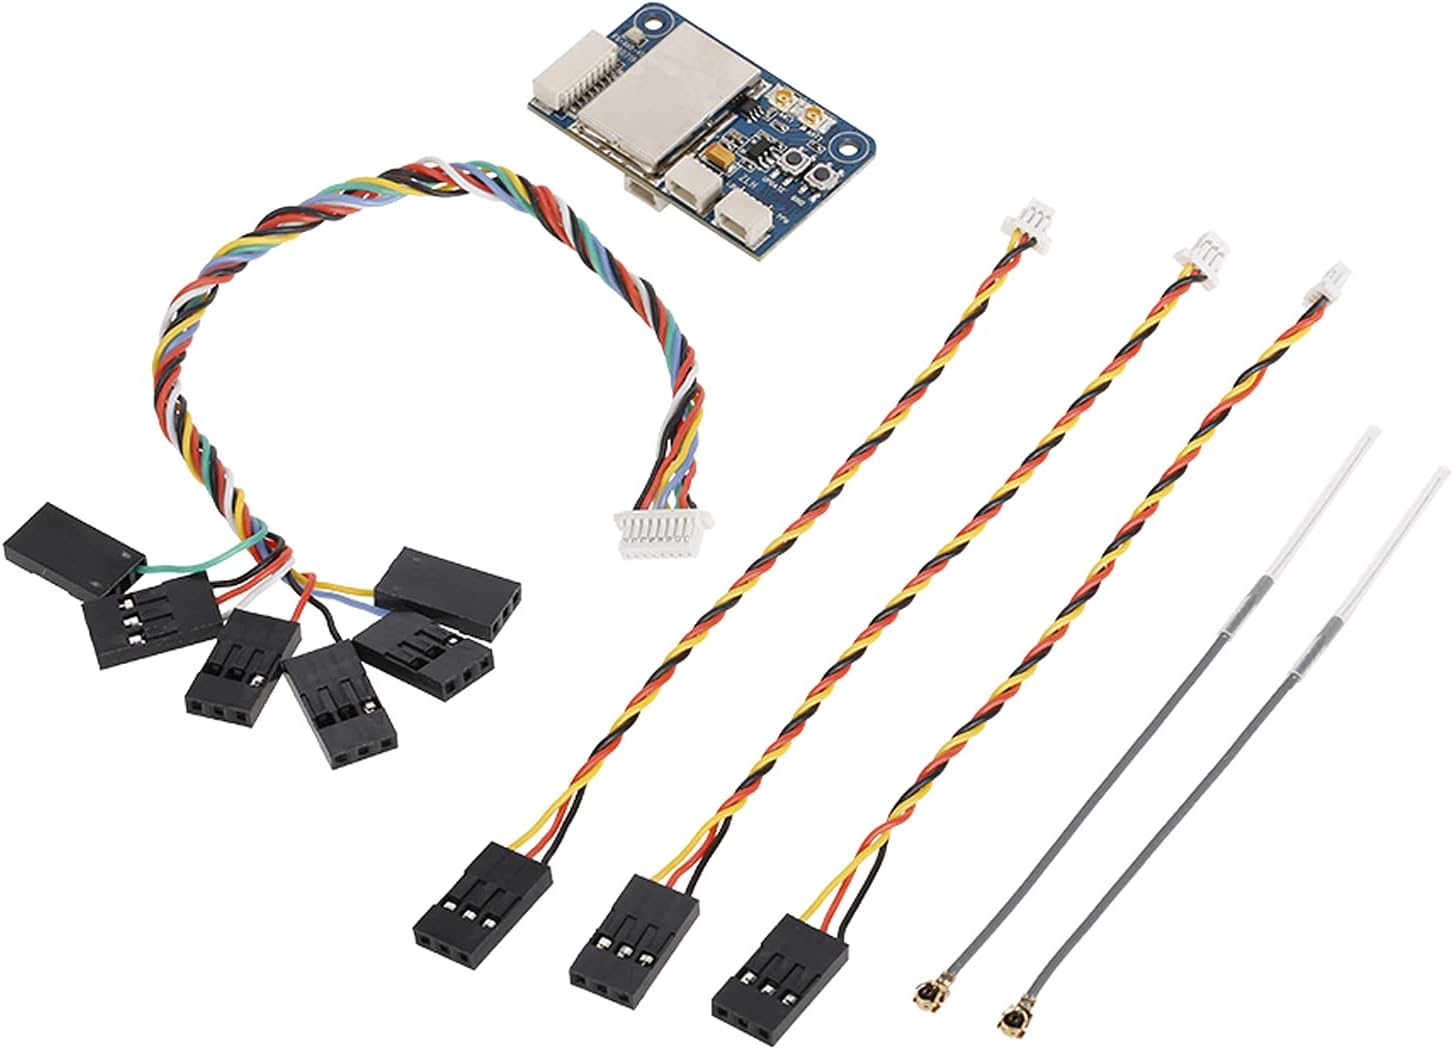
Image 1.1: The FS-X6B receiver along with its accompanying cables and antennas, as supplied in the package.
2. Key Features
- Wide Compatibility: Compatible with a range of Flysky FS series RC transmitters, including FS-i10, FS-i8, FS-i6, FS-i6s, FS-i6x, FS-i4, and FS-i4x.
- Two-Way Transmission: Features two-way communication capability, allowing the receiver to detect and transmit the drone's battery voltage back to the transmitter.
- Advanced Protocol: Utilizes the AFHDS 2A protocol for robust and reliable communication.
- Dual Omnidirectional Antennas: Equipped with dual antennas for superior signal reception and enhanced noise reduction.
- Electromagnetic Shielding: Incorporates an electromagnetic shielding cover to improve signal integrity and overall performance.
- Multiple Signal Outputs: Supports 6-channel PWM, 18-channel I.BUS, and 8-channel PPM signal outputs, offering versatile connectivity options.
3. Specifications
| Model | FS-X6B |
| Frequency | 2.4Ghz |
| Mode | AFHDS 2A |
| Range | 500 ~ 1500m (in the air) |
| Signal Type | PWM, I.BUS, PPM |
| Channels | 6CH PWM, 18CH I.BUS, 8CH PPM |
| Input Voltage | 4-8.4V |
| Voltage Detection | 1-4S |
| Suitable for | 130, 210, 250 wheelbase FPV Racing Quadcopter |
| Item Size | 36 * 22 * 7.5mm (1.4 x 0.9 x 0.3 inches) |
| Item Weight | 4.9g (0.173 ounces) |
| Item Model Number | YQO1277583788315JO |

Image 3.1: Summary of key specifications for the FlySky FS-X6B receiver.

Image 3.2: Detailed dimensions of the FS-X6B receiver, showing length and width measurements.
4. Package Contents
Upon opening the package, you should find the following items:
- 1 x FS-X6B Receiver
- 2 x Antennas
- 4 x Cables
5. Setup and Installation
Proper setup is crucial for optimal performance of your FS-X6B receiver. Follow these steps for installation and binding:
5.1 Component Identification

Image 5.1: Labeled diagram indicating the various connectors and features on the FS-X6B receiver board, including PWM, I.BUS, PPM, Voltage Detector, Antennas, and Electromagnetic shielding cover.
5.2 Connecting the Receiver
- Power Connection: Connect the receiver to a stable power source within the specified input voltage range of 4-8.4V.
- Signal Output: Connect the receiver to your flight controller using the appropriate signal type (PWM, I.BUS, or PPM). Refer to your flight controller's manual for specific wiring diagrams.
- Voltage Detection: If you wish to utilize the two-way transmission for battery voltage detection, connect the voltage detection cable to the designated port on the receiver and to the battery or a voltage sensing pad on your drone. The receiver supports 1-4S voltage detection.
- Antenna Placement: Securely attach both antennas to the receiver. For best signal reception, ensure the antennas are positioned at a 90-degree angle to each other and are clear of carbon fiber or metal obstructions.
5.3 Binding Process
To establish communication between the FS-X6B receiver and your Flysky transmitter, a binding process is required. While specific steps may vary slightly depending on your transmitter model, the general procedure is as follows:
- Ensure both your transmitter and receiver are powered off.
- Connect a bind plug (often included with transmitters or receivers) to the B/VCC port on the FS-X6B receiver.
- Power on the receiver. The receiver's LED indicator should start flashing rapidly, indicating it is in binding mode.
- While holding the bind button on your Flysky transmitter (or following its specific binding procedure), power on the transmitter.
- The receiver's LED should turn solid, indicating a successful bind.
- Power off both the receiver and transmitter. Remove the bind plug from the receiver.
- Power on the transmitter first, then the receiver. The receiver's LED should immediately turn solid, confirming the bind is active.
If the binding is unsuccessful, repeat the steps. Ensure your transmitter is set to the AFHDS 2A protocol if it has multiple options.
6. Operating Instructions
Once the FS-X6B receiver is successfully bound to your Flysky transmitter and connected to your FPV racing drone, operation is straightforward:
- Power On Sequence: Always power on your transmitter first, then power on the drone (and thus the receiver). When powering off, disconnect the drone's battery first, then power off the transmitter.
- Signal Reception: The receiver will automatically establish a connection with the bound transmitter. The solid LED on the receiver indicates a stable connection.
- Control Input: The receiver translates the control signals from your transmitter into commands for the flight controller, allowing you to control your drone.
- Battery Voltage Telemetry: If the voltage detection cable is connected, your transmitter (if it supports telemetry display) will show the real-time battery voltage of your drone. Monitor this value to ensure safe flight times and prevent over-discharging.
7. Maintenance
To ensure the longevity and reliable performance of your FS-X6B receiver, consider the following maintenance tips:
- Handle with Care: The receiver is a delicate electronic component. Avoid dropping it or subjecting it to strong impacts.
- Keep Dry: Protect the receiver from moisture and water exposure, as this can cause irreparable damage to the electronics.
- Cleanliness: Keep the receiver free from dust, dirt, and debris. Use a soft, dry brush or compressed air for cleaning if necessary.
- Antenna Integrity: Regularly inspect the antennas for any signs of damage (e.g., kinks, cuts). Damaged antennas can significantly reduce signal range and reliability.
- Secure Mounting: Ensure the receiver is securely mounted within your drone to prevent vibrations or movement from damaging connections or the unit itself.
8. Troubleshooting
If you encounter issues with your FS-X6B receiver, refer to the following common problems and solutions:
| Problem | Possible Cause | Solution |
|---|---|---|
| Receiver LED not solid after binding attempt | Binding failed; incorrect procedure; transmitter not in bind mode; incompatible protocol. | Review Section 5.3 (Binding Process) and repeat carefully. Ensure transmitter is set to AFHDS 2A. Check transmitter manual for specific binding instructions. |
| No control response from drone | Receiver not bound; incorrect wiring to flight controller; flight controller not configured correctly. | Verify receiver is bound (solid LED). Check all wiring connections between receiver and flight controller. Ensure flight controller firmware and settings are correctly configured for the chosen signal type (PWM/I.BUS/PPM). |
| Short range or signal loss | Damaged antennas; poor antenna placement; interference; low transmitter battery. | Inspect antennas for damage and replace if necessary. Ensure antennas are positioned correctly (90-degree angle, away from carbon/metal). Avoid flying in areas with high RF interference. Check transmitter battery level. |
| No battery voltage telemetry displayed | Voltage detection cable not connected or faulty; transmitter does not support telemetry display. | Ensure the voltage detection cable is securely connected to both the receiver and the drone's battery/voltage pad. Confirm your Flysky transmitter model supports telemetry display. |
9. Warranty and Support
For warranty information, technical support, or service inquiries regarding your GoolRC Flysky FS-X6B Receiver, please contact the seller or manufacturer directly. Refer to your purchase documentation for specific contact details and warranty terms.
You may also visit the official GoolRC store for additional product information and support resources: GoolRC Amazon Store
Ask a question about this manual
Ask about setup, troubleshooting, compatibility, parts, safety, or missing instructions. Manuals+ will review the question and use this page’s manual context to help answer it.