
Introduction
Thank you for choosing the Bergen ZB-01 Ice Maker. This appliance is designed to provide a convenient and efficient way to produce ice cubes for your household needs. With a capacity of 10-12 kilograms of ice per 24 hours and a 1.8-liter water tank, it is ideal for daily use. This manual provides essential information for the safe operation, maintenance, and troubleshooting of your ice maker.
Important Safety Instructions
To reduce the risk of fire, electric shock, or injury when using your ice maker, follow these basic precautions:
- Read all instructions before use.
- Do not touch the evaporator or ice basket when the unit is operating.
- Do not immerse the appliance, power cord, or plug in water or other liquids.
- Supervise children closely when the appliance is in use.
- Unplug the ice maker from the outlet when not in use or before cleaning.
- Do not operate any appliance with a damaged cord or plug, or after the appliance malfunctions or has been damaged in any manner. Contact qualified service personnel for examination, repair, or adjustment.
- Do not use outdoors.
- Do not place the appliance on or near a hot gas or electric burner, or in a heated oven.
- Ensure proper ventilation for the appliance. Maintain a minimum of 5 inches of space around the sides and back for proper air circulation.
- Use only potable water for ice production.
- Do not store explosive substances such as aerosol cans with a flammable propellant in this appliance.
Product Overview
Familiarize yourself with the components of your Bergen ZB-01 Ice Maker.


Key Components:
- Control Panel: Buttons for power, ice size selection, and indicator lights.
- Ice Viewing Window: Transparent lid to monitor ice production.
- Ice Basket: Removable basket for collecting produced ice.
- Water Reservoir: Tank for holding water to be converted into ice.
- Drain Plug: Located at the bottom for draining water.
- Air Vents: Located on the sides and back for heat dissipation.
Setup
- Unpacking: Carefully remove the ice maker from its packaging. Remove all packing materials, including any tape or protective film.
- Placement: Place the ice maker on a flat, stable surface away from direct sunlight and heat sources (like stoves, furnaces, or radiators). Ensure there is at least 5 inches (12.7 cm) of space around the sides and back for proper ventilation.
- Initial Cleaning: Before first use, clean the interior of the ice maker. Refer to the "Maintenance and Cleaning" section for detailed instructions.
- Power Connection: Ensure the voltage and frequency of the power supply match the specifications on the appliance's rating label. Plug the power cord into a grounded electrical outlet.
Operating Instructions
- Fill Water Reservoir: Open the lid and fill the water reservoir with potable water up to the MAX fill line. Do not overfill.
- Power On: Press the "POWER" button on the control panel to turn on the ice maker.
- Select Ice Size: The Bergen ZB-01 offers 3 ice sizes. Press the "SELECT" button to choose your desired ice cube size (Small, Medium, Large). The corresponding indicator light will illuminate.
- Ice Production: The ice maker will begin the ice-making cycle. The first batch of ice may take approximately 10 minutes. Subsequent cycles will be faster.
- Ice Collection: Once ice cubes are formed, they will be released into the ice basket. The "ICE FULL" indicator light will illuminate when the ice basket is full, and the machine will pause operation. Remove ice to resume production.
- Low Water Alarm: If the water level in the reservoir is too low, the "ADD WATER" indicator light will illuminate, and the machine will stop making ice. Add more water to the reservoir to continue operation.
- Turning Off: Press the "POWER" button to turn off the ice maker.
Note: The ice maker does not have a refrigeration function for storing ice. For long-term storage, transfer ice cubes to a freezer.
Maintenance and Cleaning
Regular cleaning ensures optimal performance and hygiene of your ice maker.
- Daily Cleaning:
- Unplug the appliance.
- Remove the ice basket.
- Drain any remaining water from the reservoir by removing the drain plug at the bottom.
- Wipe the interior with a soft cloth dampened with warm water and a mild detergent. Rinse thoroughly.
- Dry all surfaces completely before reassembling.
- Monthly Cleaning (or as needed):
- Prepare a cleaning solution of water and vinegar (1:1 ratio) or a commercial ice maker cleaner.
- Pour the solution into the water reservoir.
- Run a few ice-making cycles (without consuming the ice) to circulate the cleaning solution.
- Drain the solution completely.
- Rinse the reservoir and interior thoroughly with clean water several times to remove any residue or odor.
- Dry completely.
- Exterior Cleaning: Wipe the exterior with a soft, damp cloth. Do not use abrasive cleaners or solvents.
Troubleshooting
If you encounter issues with your ice maker, refer to the following table for common problems and solutions.
| Problem | Possible Cause | Solution |
|---|---|---|
| Ice maker not turning on. | No power supply; power cord not plugged in; fuse blown or circuit breaker tripped. | Check power outlet and plug connection. Reset circuit breaker if necessary. |
| No ice production or very little ice. | Low water level; "ADD WATER" indicator on; ambient temperature too high; air vents blocked. | Add water to the reservoir. Ensure proper ventilation around the unit. Operate in a cooler environment. |
| "ICE FULL" indicator is on, but basket is not full. | Ice sensor is dirty or obstructed. | Clean the ice sensor. Ensure ice cubes are not blocking the sensor. |
| Ice cubes are too small or clumpy. | Water temperature too high; ambient temperature too high; insufficient water. | Use colder water. Ensure proper ventilation. Add more water if needed. |
| Unusual noise during operation. | Unit not level; internal components vibrating. | Ensure the unit is on a flat, stable surface. This is usually normal operation noise. |
If the problem persists after attempting these solutions, please contact customer support.
Specifications
| Feature | Detail |
|---|---|
| Brand | Bergen |
| Model Name | ZB-01 |
| Color | Silver Metallic |
| Ice Making Capacity | 10-12 kg / 24 hours |
| Ice Making Water Tank Capacity | 1.8 Liters |
| Ice Bin Capacity | 600 Grams |
| Ice Making Power | 150 Watts |
| Voltage | 110/220V, 50/60Hz |
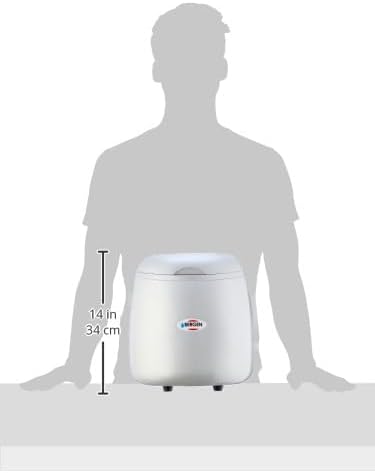
| Product Dimensions (D x W x H) | 34.5 x 34 x 41.5 cm (approx. 13.6 x 13.4 x 16.3 inches) |
| Item Weight | 11.1 Kilograms |
| Ice Shape | Bullet-shaped ice |
| Ice Sizes | 3 options for choice |
| Alarms | Full ice basket alarm, Low water alarm |
Warranty and Support
For warranty information or technical support, please refer to the documentation provided with your purchase or contact Bergen customer service. Keep your proof of purchase for any warranty claims.