
1. Introduction
Thank you for choosing the Dayton Audio MX12-22 12-inch Max-X High Excursion Dual Voice Coil Subwoofer. This subwoofer is engineered for exceptional low-frequency performance and high sound pressure levels. Its design focuses on durability, efficiency, and maximum displacement, making it suitable for both home audio and car audio systems. This manual provides essential information for the proper installation, operation, and maintenance of your subwoofer.
Key features of the MX12-22 include:
- ±18.8 mm Klippel verified excursion for excellent displacement.
- Rigid and durable seamless dish cone.
- Custom-tooled surround for extended throw and maximized cone surface area.
- Extensive venting for voice coil cooling, ensuring high power handling.
- Dual spiders to maintain linear excursion and reduce distortion.
2. Safety Information
Please read and understand all safety instructions before installing and operating your subwoofer. Failure to follow these guidelines may result in damage to the product, property, or personal injury.
- Power Handling: Ensure that the amplifier used is appropriately matched to the subwoofer's power handling capabilities. Overpowering can cause permanent damage.
- Wiring: Always use appropriate gauge wiring for connections. Incorrect wiring can lead to poor performance or damage.
- Mounting: Securely mount the subwoofer in a suitable enclosure. Loose mounting can cause vibration, noise, and potential damage.
- Ventilation: Ensure adequate ventilation around the subwoofer and amplifier to prevent overheating.
- Hearing Protection: Prolonged exposure to high sound pressure levels can cause permanent hearing damage. Use caution when adjusting volume levels.
- Moisture: This product is not waterproof. Avoid exposure to water or excessive moisture.
3. Package Contents
Carefully unpack your Dayton Audio MX12-22 subwoofer and verify that all components are present and undamaged. If any items are missing or damaged, contact your retailer immediately.
- Dayton Audio MX12-22 12-inch Subwoofer
- Mounting Hole Diameter Information (typically integrated into the subwoofer frame)
- Entry / Exit Diameter Information (typically integrated into the subwoofer frame)
4. Setup and Installation
Proper installation is crucial for optimal performance and longevity of your subwoofer. Consult a professional installer if you are unsure about any steps.
4.1 Enclosure Requirements
The MX12-22 is optimized for use in compact enclosures. Refer to the subwoofer's Thiele-Small parameters (available on the product page or manufacturer's website) for specific enclosure design recommendations (sealed or ported) to achieve desired performance characteristics.
4.2 Mounting the Subwoofer
- Ensure the enclosure has a cutout diameter that matches the subwoofer's mounting diameter.
- Position the subwoofer into the cutout.
- Align the mounting holes on the subwoofer frame with the pre-drilled holes on the enclosure.
- Secure the subwoofer using appropriate screws, ensuring even pressure around the frame. Do not overtighten.
4.3 Wiring the Dual Voice Coils (DVC)
The MX12-22 features dual voice coils, offering flexible wiring options to match your amplifier's impedance requirements. Each voice coil has a nominal impedance of 2 Ohms.

Image 1: Dayton Audio MX12-22 Subwoofer showing the dual terminal connections.
Description: This image displays the Dayton Audio MX12-22 subwoofer from an angled perspective, highlighting the robust frame and the dual push-terminal connections for the voice coils. The terminals are clearly marked for positive and negative connections, indicating the dual voice coil design.
Common wiring configurations:
- Series Wiring (4 Ohms): Connect the positive terminal of one voice coil to the negative terminal of the other voice coil. Connect the remaining positive and negative terminals to the amplifier. This results in a 4 Ohm load.
- Parallel Wiring (1 Ohm): Connect the positive terminals of both voice coils together. Connect the negative terminals of both voice coils together. Connect these combined positive and negative connections to the amplifier. This results in a 1 Ohm load.
Always verify the final impedance with a multimeter before connecting to an amplifier to prevent damage to your equipment.
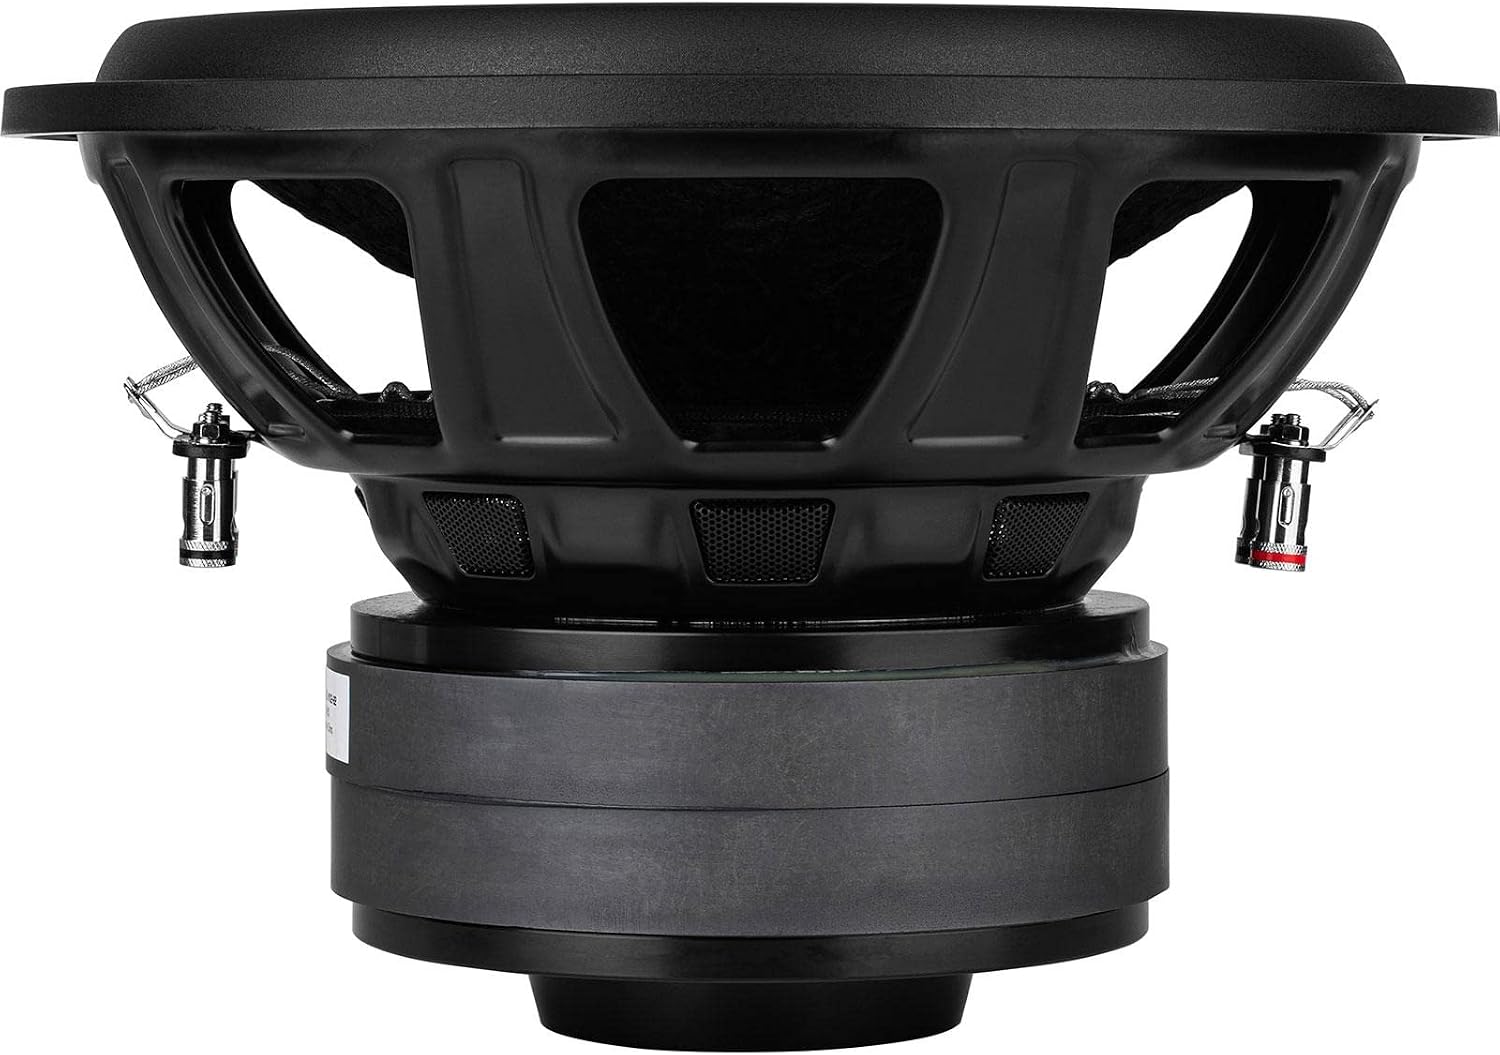
Image 2: Side profile of the Dayton Audio MX12-22 Subwoofer.
Description: This image provides a side view of the MX12-22 subwoofer, showcasing the depth of the motor structure and the robust basket design. The large surround and cone are also visible, emphasizing the high excursion capabilities.
5. Operating the Subwoofer
Once installed and wired correctly, your subwoofer is ready for operation. Follow these guidelines for optimal performance and longevity.
5.1 Break-in Period
Allow for a break-in period of approximately 20-50 hours of moderate use before operating the subwoofer at high volumes. This allows the suspension components (surround and spider) to loosen and reach their optimal compliance, improving overall performance and extending lifespan.
5.2 Amplifier Settings
Properly configure your amplifier and head unit settings:
- Gain: Set the amplifier gain correctly to match the output voltage of your head unit. Avoid setting the gain too high, as this can introduce distortion and damage the subwoofer.
- Low-Pass Filter (LPF): Use the LPF to ensure the subwoofer only reproduces low frequencies. A typical crossover point is between 60 Hz and 100 Hz, depending on your other speakers.
- Subsonic Filter (HPF): If your amplifier or head unit has a subsonic filter, engage it to protect the subwoofer from playing frequencies below its resonant frequency, especially in ported enclosures.
- Bass Boost: Use bass boost sparingly, if at all. Excessive bass boost can lead to clipping and damage.

Image 3: Bottom view of the Dayton Audio MX12-22 Subwoofer.
Description: This image shows the bottom of the MX12-22 subwoofer, revealing the large magnet structure and the vented pole piece. The robust construction of the motor assembly is evident, designed for high power handling and excursion.
6. Maintenance
The Dayton Audio MX12-22 subwoofer requires minimal maintenance to ensure long-lasting performance.
- Cleaning: Use a soft, dry cloth to gently wipe down the cone and surround. Avoid using harsh chemicals or abrasive cleaners.
- Inspection: Periodically inspect the subwoofer for any signs of damage, such as tears in the surround or cone, or loose connections.
- Environment: Keep the subwoofer in a clean, dry environment, away from direct sunlight and extreme temperatures.

Image 4: Top view of the Dayton Audio MX12-22 Subwoofer cone.
Description: This image presents a direct top-down view of the MX12-22 subwoofer's cone and surround. The seamless dish cone design is clearly visible, along with the mounting holes around the perimeter of the frame.
7. Troubleshooting
If you experience issues with your subwoofer, refer to the following common problems and solutions:
- No Sound:
- Check all wiring connections (amplifier, subwoofer, head unit) for proper contact and polarity.
- Ensure the amplifier is powered on and not in protection mode.
- Verify the audio source is active and volume is turned up.
- Distorted Sound:
- Reduce amplifier gain or head unit volume.
- Check for proper crossover settings (LPF).
- Ensure the subwoofer is not bottoming out (mechanical noise from excessive excursion).
- Inspect the cone and surround for any physical damage.
- Weak Bass:
- Verify amplifier gain is set correctly.
- Check subwoofer wiring for correct impedance match with the amplifier.
- Ensure the enclosure is sealed properly (if applicable) and free of air leaks.
- Confirm correct phase setting on the amplifier or head unit.
- Subwoofer Overheating:
- Reduce volume or amplifier gain.
- Ensure adequate ventilation around the subwoofer and amplifier.
- Check for proper impedance match; an impedance too low for the amplifier can cause overheating.

Image 5: Rear view of the Dayton Audio MX12-22 Subwoofer.
Description: This image shows the rear of the MX12-22 subwoofer, providing a clear view of the magnet assembly and the vented pole piece. The overall robust construction of the driver is highlighted from this angle.
8. Specifications
The following table outlines the key specifications for the Dayton Audio MX12-22 subwoofer:
| Specification | Value |
|---|---|
| Model Name | MX12-22 |
| Speaker Type | Subwoofer |
| Subwoofer Diameter | 12 Inches |
| Voice Coil Configuration | Dual Voice Coil (DVC) |
| Nominal Impedance (per coil) | 2 Ohms |
| Material | Steel (basket) |
| Item Weight | 27.1 Pounds |
| Product Dimensions | 15.5 x 15.5 x 11.5 inches |
| Connectivity Technology | Wired |
| Recommended Uses | Home Audio Systems, Car Audio Systems |
| Manufacturer | Dayton Audio |
9. Warranty Information
The Dayton Audio MX12-22 subwoofer comes with a Limited Warranty. Please refer to the warranty documentation provided with your purchase or visit the Dayton Audio website for specific terms and conditions regarding coverage, duration, and claims procedures.
10. Support
For technical assistance, troubleshooting, or further information regarding your Dayton Audio MX12-22 subwoofer, please visit the official Dayton Audio website or contact their customer support. You can also find additional resources and product details on the Dayton Audio Store on Amazon.


