
1. Introduction
The Ortur Laser Master 2 LU1-4 is a versatile CNC laser engraving and cutting machine designed for precision work on various materials. Equipped with a 32-bit motherboard, it offers enhanced speed and accuracy for both hobbyists and professionals. This manual provides essential information for the safe and effective operation, setup, and maintenance of your device.
2. Safety Information
Operating a laser engraver requires strict adherence to safety protocols to prevent injury and damage. Always prioritize safety.
- Eye Protection: Always wear appropriate laser safety goggles when the laser is active. While the device features an eye-protection design, direct viewing of the laser beam should be avoided.
- Unauthorized Movement Detection: The main board includes a G-sensor. If the machine detects unauthorized movement during operation, the laser beam will automatically stop to prevent accidents.
- Connection Interruption Safety: In the event of a computer system stop or USB cable disconnection, which causes the laser engraver to cease movement, the laser beam will automatically stop to mitigate fire risks.
- Motor Stop Safety: If the laser engraver is under control but the user forgets to operate it, and the motor stops moving while the laser beam remains active, an additional safety mechanism will cut off the laser to prevent fire.
- Ventilation: Ensure adequate ventilation in your workspace to dissipate fumes and smoke produced during engraving and cutting.
- Flammable Materials: Exercise extreme caution when working with flammable materials. Never leave the machine unattended during operation.
3. Product Overview
3.1 Key Features
- Advanced Motherboard: Equipped with a 32-bit motherboard and 32Bits MCU, capable of preprocessing 32 instructions for smoother and faster operation.
- High Speed: Supports up to 921600 baud rate and engraving speeds of up to 3000mm/min.
- Engraving Area: Generous carving area of X: 390MM x Y: 410MM.
- LU1-4 Laser Module: Features an electric power of 20W and a laser power of 5.5W, with a wavelength of 445 ± 5nm. It has a fixed focus with a default focal length of 29MM.
- Wide Compatibility: Compatible with various engraving software including LaserGRBL (Windows) and LightBurn (Windows, Mac, Linux).
- Supported File Formats: Accepts NC, BMP, JPG, PNG, DXF, and other common file formats.
3.2 Components
The Ortur Laser Master 2 LU1-4 comes with the main engraving unit and essential accessories for operation.

The image displays the Ortur Laser Master 2 LU1-4 laser engraver unit, along with essential accessories such as safety goggles, wrenches, material samples, cable ties, and a cleaning brush.

This image shows the Ortur Laser Master 2 LU1-4 laser engraver with its dimensions (500mm width, 570mm depth) and icons highlighting key features: 32-bit motherboard, 3 safety protections, 390x410 engraving area, longer service life, safe circuit system, and faster engraving speed.
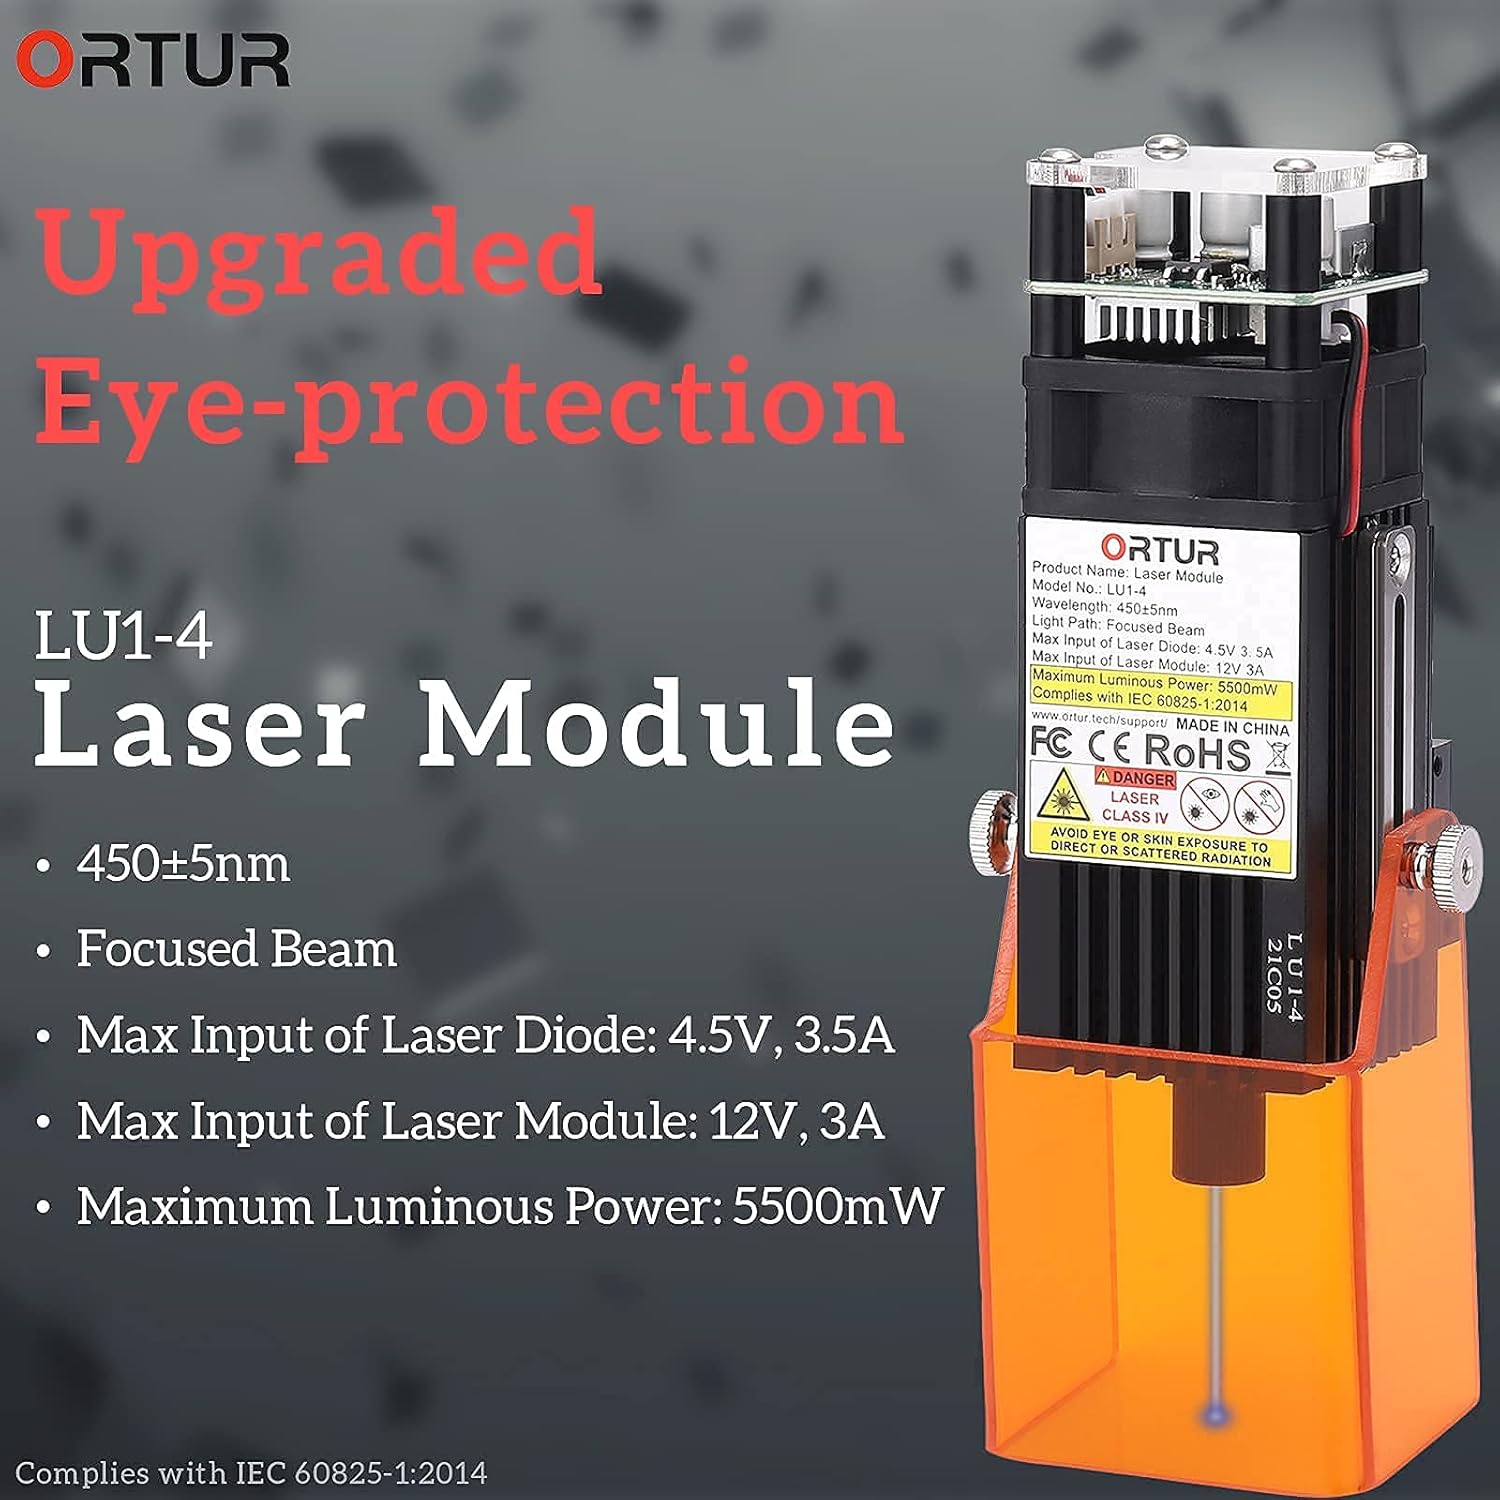
A close-up view of the LU1-4 laser module, detailing its specifications: 450±5nm wavelength, focused beam, Max Input of Laser Diode: 4.5V, 3.5A, Max Input of Laser Module: 12V, 3A, and Maximum Luminous Power: 5500mW. It also notes compliance with IEC 60825-1:2014.

This image shows the specialized 32-bit motherboard of the Ortur Laser Master 2, designed for smoother and faster carving operations, capable of pre-processing 32 instructions.
4. Setup
Follow these general steps to set up your Ortur Laser Master 2 LU1-4:
- Unpack Components: Carefully remove all components from the packaging and verify against the packing list.
- Assemble Frame: Follow the assembly instructions provided in the separate assembly guide to construct the machine frame.
- Install Laser Module: Securely attach the LU1-4 laser module to the gantry according to the assembly instructions.
- Connect Power: Connect the provided 12V 3A power adapter to the machine and a suitable power outlet.
- Connect to Computer: Use a USB cable to connect the engraver to your computer.
- Install Software: Download and install compatible engraving software such as LaserGRBL or LightBurn. Software can be downloaded from ortur.tech/olm2/.
- Initial Calibration: Perform initial calibration and focus adjustments as guided by the software and specific laser module instructions.
5. Operating Instructions
5.1 Software Compatibility
The Ortur Laser Master 2 is compatible with:
- LaserGRBL: For Windows operating systems.
- LightBurn: For Windows, Mac OS, and Linux operating systems.
5.2 Supported File Formats
The machine supports various input formats including NC, BMP, JPG, PNG, and DXF.
5.3 Engraving Process
Once the machine is set up and software is installed, follow these steps for engraving or cutting:
- Prepare Material: Select your desired material (e.g., wood, metal, stone, glass) and ensure it is clean and properly secured.
- Place Material: Position the material within the 390x410mm carving area on the machine bed.
- Load Design: Open your chosen design file in the engraving software.
- Adjust Settings: Configure laser settings such as power, speed, and number of passes based on the material and desired effect.
- Initiate Operation: Start the engraving or cutting process from the software.
- Monitor: Continuously monitor the operation. Ensure safety goggles are worn or the eye protection design is effectively utilized.

The image illustrates the 'New Eye Protection Design' feature of the Ortur Laser Master 2, allowing users to observe laser engraving without requiring additional safety goggles, though wearing them is always recommended for direct viewing.
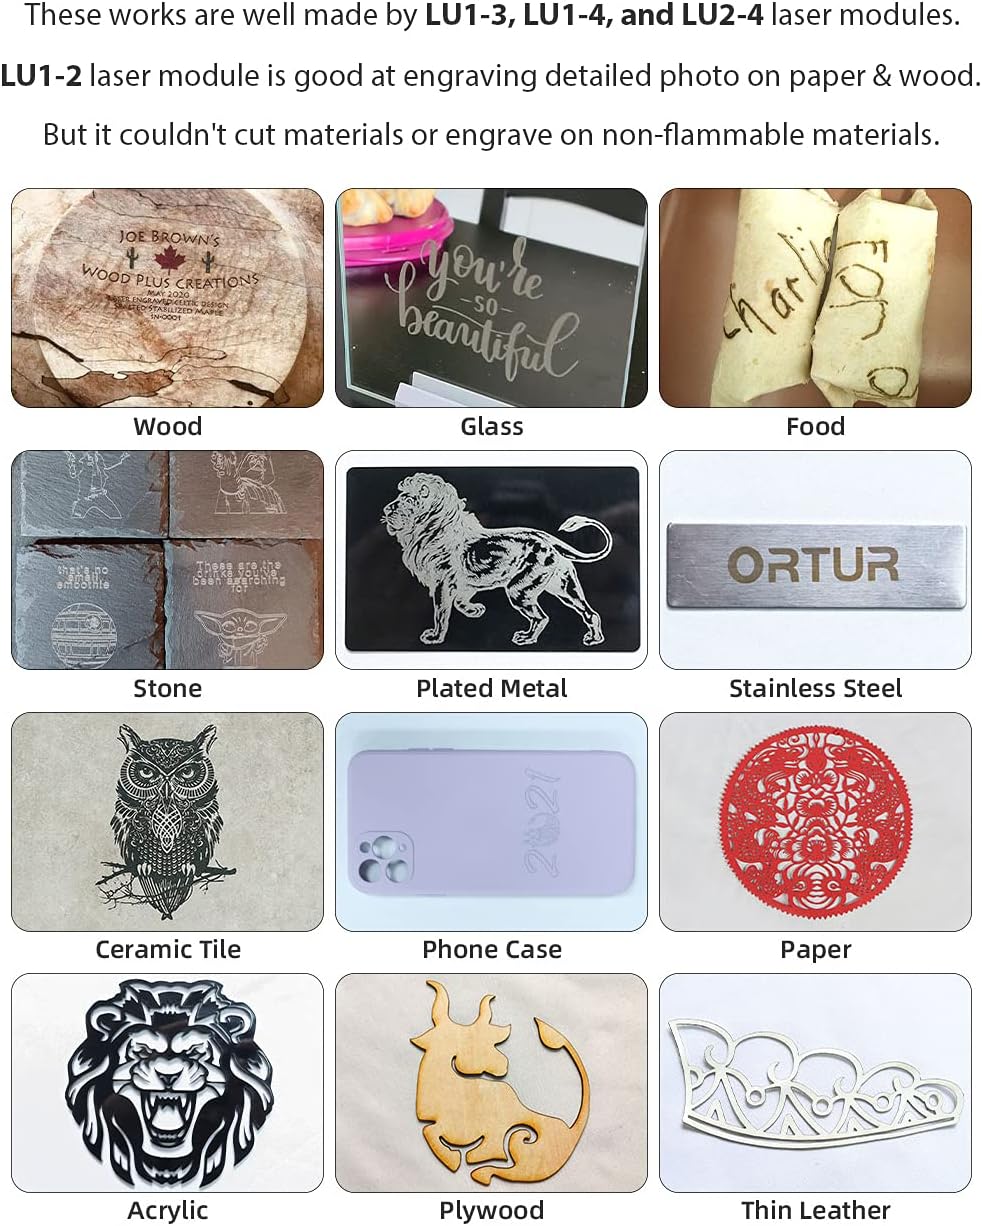
This image showcases various materials successfully engraved by the Ortur Laser Master 2, including wood, glass, food, stone, plated metal, stainless steel, ceramic tile, phone cases, paper, acrylic, plywood, and thin leather. It highlights the versatility of the LU1-3, LU1-4, and LU2-4 laser modules, noting that the LU1-2 is suitable for detailed photos on paper and wood but not for cutting or engraving non-flammable materials.
6. Maintenance
Regular maintenance ensures optimal performance and longevity of your laser engraver:
- Clean Laser Lens: Periodically clean the laser lens with a suitable lens cleaning solution and cloth to maintain engraving quality.
- Clean Machine Frame: Keep the machine frame, rails, and moving parts free from dust and debris.
- Check Connections: Regularly inspect all electrical and USB connections for secure fit.
- Ensure Ventilation: Maintain clear airflow around the machine to prevent overheating and ensure efficient smoke extraction.
7. Troubleshooting
Refer to this section for common issues and their potential solutions:
- Laser Not Firing:
- Check if the machine is powered on and all cables are securely connected.
- Verify laser power settings in the software.
- Ensure the laser module is properly seated.
- Poor Engraving Quality:
- Adjust the laser focus. The LU1-4 has a fixed focus, ensure material height is correct.
- Clean the laser lens.
- Experiment with different speed and power settings for the material.
- Machine Not Connecting to Computer:
- Ensure the USB cable is functional and securely connected.
- Check if the necessary drivers are installed on your computer.
- Restart both the machine and the computer.
- Machine Stops Unexpectedly:
- Review the safety features mentioned in Section 2. An unexpected movement or connection loss can trigger a safety stop.
- Check for any obstructions in the machine's movement path.
8. Technical Specifications
| Feature | Specification |
|---|---|
| Motherboard | 32 bits motherboard with 32Bits MCU |
| Firmware | Ortur Laser Master Firmware |
| OS Compatibility | Windows (LaserGRBL), MAC OS and Linux (LightBurn) |
| Adapter Power | 36W, 12V 3A |
| Machine Power (LU1-4) | 20W |
| Laser Module Power (LU1-4) | 5000mW-5500mW |
| Laser Wave Length | 445 ± 5nm |
| Laser Focus (LU1-4) | Fixed focus |
| Default Focal Length (LU1-4) | 29MM |
| Input Format | NC, BMP, JPG, PNG, DXF, etc. |
| Carving Area | X: 390MM x Y: 410MM |
| Carving Speed | 3000MM / Min and less |
| Image Size | No Limit (Pixel accuracy adjustable, default 300 PPI, ~0.81um pixel precision) |
| Model Number | ORTUR Laser Master 2 |
| ASIN | B096X28B1R |
9. Warranty and Support
Ortur is committed to providing comprehensive pre-sales and after-sales services for its customers.
For pre-sale consultations or general inquiries, please contact us via email: support_ortur@163.com.
For technical support and troubleshooting assistance, please visit our dedicated support portal: ortur.tech/support. Additional product information and resources can be found at: ortur.tech/olm2.


