1. Introduction
This manual provides detailed instructions for the setup, operation, and maintenance of your Kinhank Super Console X. This retro video game console is designed to deliver a comprehensive gaming experience with a vast library of pre-installed games and support for various emulators. It features 4K HD output and connectivity options for an enhanced user experience.

Image 1.1: Kinhank Super Console X with accessories and display.
2. Package Contents
Verify that all items listed below are included in your package:
- 1 x Super Console X Unit
- 2 x Wireless Game Controllers
- 1 x TF Card (256GB pre-installed)
- 1 x USB HUB
- 1 x Power Supply Adapter
- 1 x HD Cable

Image 2.1: Contents of the Super Console X package.
3. Product Overview
The Super Console X is a compact gaming system designed for ease of use and broad compatibility. It features multiple ports for connectivity and expansion.
3.1. Console Layout and Dimensions

Image 3.1: Super Console X port layout and dimensions.
- Dimensions: Approximately 100mm x 100mm x 22mm
- Ports: AV, SPDIF, Ethernet, HDMI, DCIN (Power), USB (x2), TF Card Slot
3.2. Key Features
- Processor: Upgraded S905X chip for smooth emulation.
- Output: Supports 4K (1080P/720P) HD output.
- Storage: Includes a 256GB TF card with over 117,000 pre-installed games.
- Connectivity: Built-in WiFi and LAN support for network access.
- Multiplayer: Supports up to 5 players simultaneously.
- Language Support: Over 26 languages available.

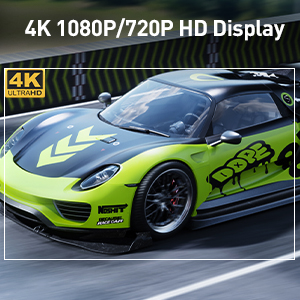
Image 3.2: S905M Chip and 4K HD Display capability.
4. Setup Instructions
Follow these steps to set up your Super Console X:
- Connect to TV: Connect the console to your TV or monitor using the provided HD cable. Insert one end into the HDMI port on the console and the other into an available HDMI input on your display.
- Power Connection: Connect the power supply adapter to the DCIN port on the console, then plug the adapter into a power outlet.
- Insert TF Card: Ensure the TF card is properly inserted into the TF card slot on the side of the console.
- Connect Controllers:
- Insert the USB receiver for the wireless controllers into one of the USB ports on the console.
- Insert two 1.5V AAA standard batteries into each controller. The red indicator light on the controller will flash, indicating it is searching for pairing.
- Once connected, the first controller's red light will become solid. The second controller's light will turn solid yellow upon successful pairing.
- Power On: Press the power button on the console. Select the correct HDMI input on your TV.

Image 4.1: Connecting the console for 4K HD output.
5. Operating Instructions
5.1. Navigating the System
Upon startup, the console will boot into the game system interface. Use the directional pad and action buttons on your controller to navigate through the menus and select games.

Image 5.1: Gaming experience with the Super Console X.
5.2. Playing Games
- Select an emulator from the main menu.
- Browse the list of games available for that emulator.
- Select a game to launch it.
- To exit a game or access the in-game menu, refer to the specific emulator's hotkey combinations (often a combination of SELECT + START).
5.3. Saving Game Progress
The console supports saving game progress. Specific methods may vary by emulator, but generally, you can access a save/load state menu within the emulator's options.
5.4. Multiplayer Gaming
The Super Console X supports up to 5 players. Ensure all controllers are paired correctly as described in Section 4. Refer to individual game settings for multiplayer options.

Image 5.2: Multiplayer gaming with the Super Console X.
5.5. Dual System Functionality
The console features a dual system, allowing easy switching between the game emulation system (EmuELEC 3.9) and an Android 7.1 system for other applications.
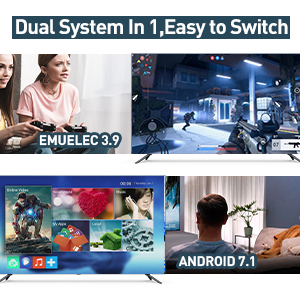
Image 5.3: Dual system interface (EmuELEC and Android).
5.6. Language Selection
The system supports over 26 languages. You can change the language setting through the system menu to suit your preference.

Image 5.4: Multi-language support.
6. Connectivity
6.1. Network Connection (LAN/WiFi)
The console supports both wired (Ethernet) and wireless (WiFi) network connections. This allows for downloading additional games or accessing online features if available.
- Wired: Connect an Ethernet cable to the LAN port on the console.
- Wireless: Navigate to the network settings in the system menu to connect to a WiFi network.

Image 6.1: Connectivity options: LAN, WiFi, TF Card, and Controller support.
6.2. Controller Support
The console supports various controller types, including USB, 2.4G wireless, and Bluetooth controllers. The included controllers are 2.4G wireless.
- 2.4G Wireless Controllers: Use the provided USB receiver for the included controllers.
- USB Controllers: Plug any compatible USB controller into the console's USB ports.
- Bluetooth Controllers: Pair compatible Bluetooth controllers through the system settings.
Important: Avoid hot-plugging and unplugging controllers frequently to prevent damage.
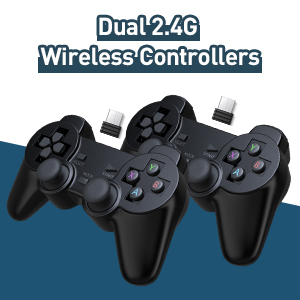
Image 6.2: Dual 2.4G Wireless Controllers.
7. Maintenance
To ensure the longevity and optimal performance of your Super Console X, follow these maintenance guidelines:
- Keep the console in a clean, dry environment, away from direct sunlight and extreme temperatures.
- Avoid spilling liquids on the console or controllers.
- Clean the console and controllers with a soft, dry cloth. Do not use abrasive cleaners or solvents.
- Ensure proper ventilation around the console to prevent overheating.
- When not in use for extended periods, disconnect the power adapter.
8. Troubleshooting
This section addresses common issues you might encounter with your Super Console X.
- Q1: What to do if the product doesn't work when hooked up?
- Remove the TF card and then restart the device to check if it can enter the Android system.
- If the product can enter the Android system, the problem can usually be solved by restoring the system.
- If system recovery does not resolve the issue, contact customer support for a new TF card.
- Q2: How to fix the no sound problem?
Access Retroarch settings and check the sound options. Also, in the foreground, click on start to review sound options.
- Q3: How to solve the problem that the controller is not recognized?
- To test the USB port, plug a mouse into it. If the mouse lights up red, the port is functional.
- To test the handle, plug it into a computer to see if it is recognized.
- To change the mode of the joystick, press and hold the MOOD button.
- Avoid hot-plugging and unplugging controllers.
- Q4: How to solve the emulator crash problem?
Many games can be opened by multiple emulators. If one emulator does not run a game well or crashes, try changing emulators. Refer to the instruction manual for specific setting steps (this manual section covers general steps, but specific emulator settings might be in-game).
- Q5: How to use the handle correctly?
- Insert two 1.5V AAA standard batteries into the battery compartment of the controller. The controller will automatically enter search mode, indicated by a flashing red light. Ensure the USB receiver is connected to the console before powering on.
- When the first gamepad connects successfully, the flashing red light will turn into a solid red light.
- When the second gamepad connects successfully, the flashing red light will turn into a solid yellow light.
9. Specifications
| Feature | Detail |
|---|---|
| Model Number | Super Console X |
| Manufacturer | Kinhank |
| Product Dimensions | 3.94 x 3.94 x 0.79 inches |
| Item Weight | 1.65 pounds |
| Storage | 256GB TF Card (pre-installed) |
| Output | 4K (1080P/720P) HD |
| Connectivity | WiFi, LAN, USB, 2.4G Wireless, Bluetooth (via USB adapter) |
| Max Players | 5 |
10. Warranty and Support
Kinhank is committed to providing support for its products. If you encounter any issues during use, please contact customer service. Refer to your purchase documentation for specific warranty details.
For assistance, please reach out to the seller or manufacturer directly.


