1. Introduction
This manual provides essential information for the safe and efficient operation of your PowMr 5000W Solar Inverter. This pure sine wave hybrid inverter charger is designed to convert 48V DC power to 110V/120V AC power, featuring a built-in 80A MPPT charge controller and compatibility with 48V Lead-Acid and Lithium batteries. Please read this manual thoroughly before installation and operation.

Figure 1.1: Front view of the PowMr 5000W Solar Inverter, showcasing its sleek design and integrated display.
2. Safety Information
WARNING: This inverter generates high voltage. Improper installation or operation can result in serious injury or death. Always follow safety precautions.
- Ensure all connections are secure and correct before powering on the unit.
- Do not attempt to disassemble or repair the inverter yourself. Refer to qualified service personnel.
- Install the inverter in a well-ventilated area, away from flammable materials and direct sunlight.
- Always wear appropriate personal protective equipment (PPE) when working with electrical systems.
- Ensure proper grounding of the inverter.
3. Product Overview
The PowMr 5000W Solar Inverter integrates multiple functions to provide a comprehensive power solution. Key features include a pure sine wave output, an 80A MPPT solar charge controller, and compatibility with various battery types.

Figure 3.1: Overview of the 5KW 48Vdc to 110Vac Solar Inverter highlighting its 80A MPPT Solar Charge Controller, 5500W Max Input Power, 120-500VDC PV operation voltage range, and compatibility with LiFePO4, Sealed, GEL, Flooded, and AGM batteries.

Figure 3.2: Labeled diagram of the inverter's components, including LCD Buttons, Mounting Holes, LCD Screen, LED Indicators, AC Input Breaker, Dry Contact Port, RS485 Communication Port, USB Debugging Port (Internal Use), AC Input Terminal, AC Output Terminal, Cooling Fans, PV Input Terminal, Main On/Off Power Switch, Battery Input Terminal, and Grounding Lug.
3.1. LCD Display and Indicators
The inverter features an LCD display for real-time monitoring of system data and operational status. LED indicators provide quick visual feedback on the inverter's status.
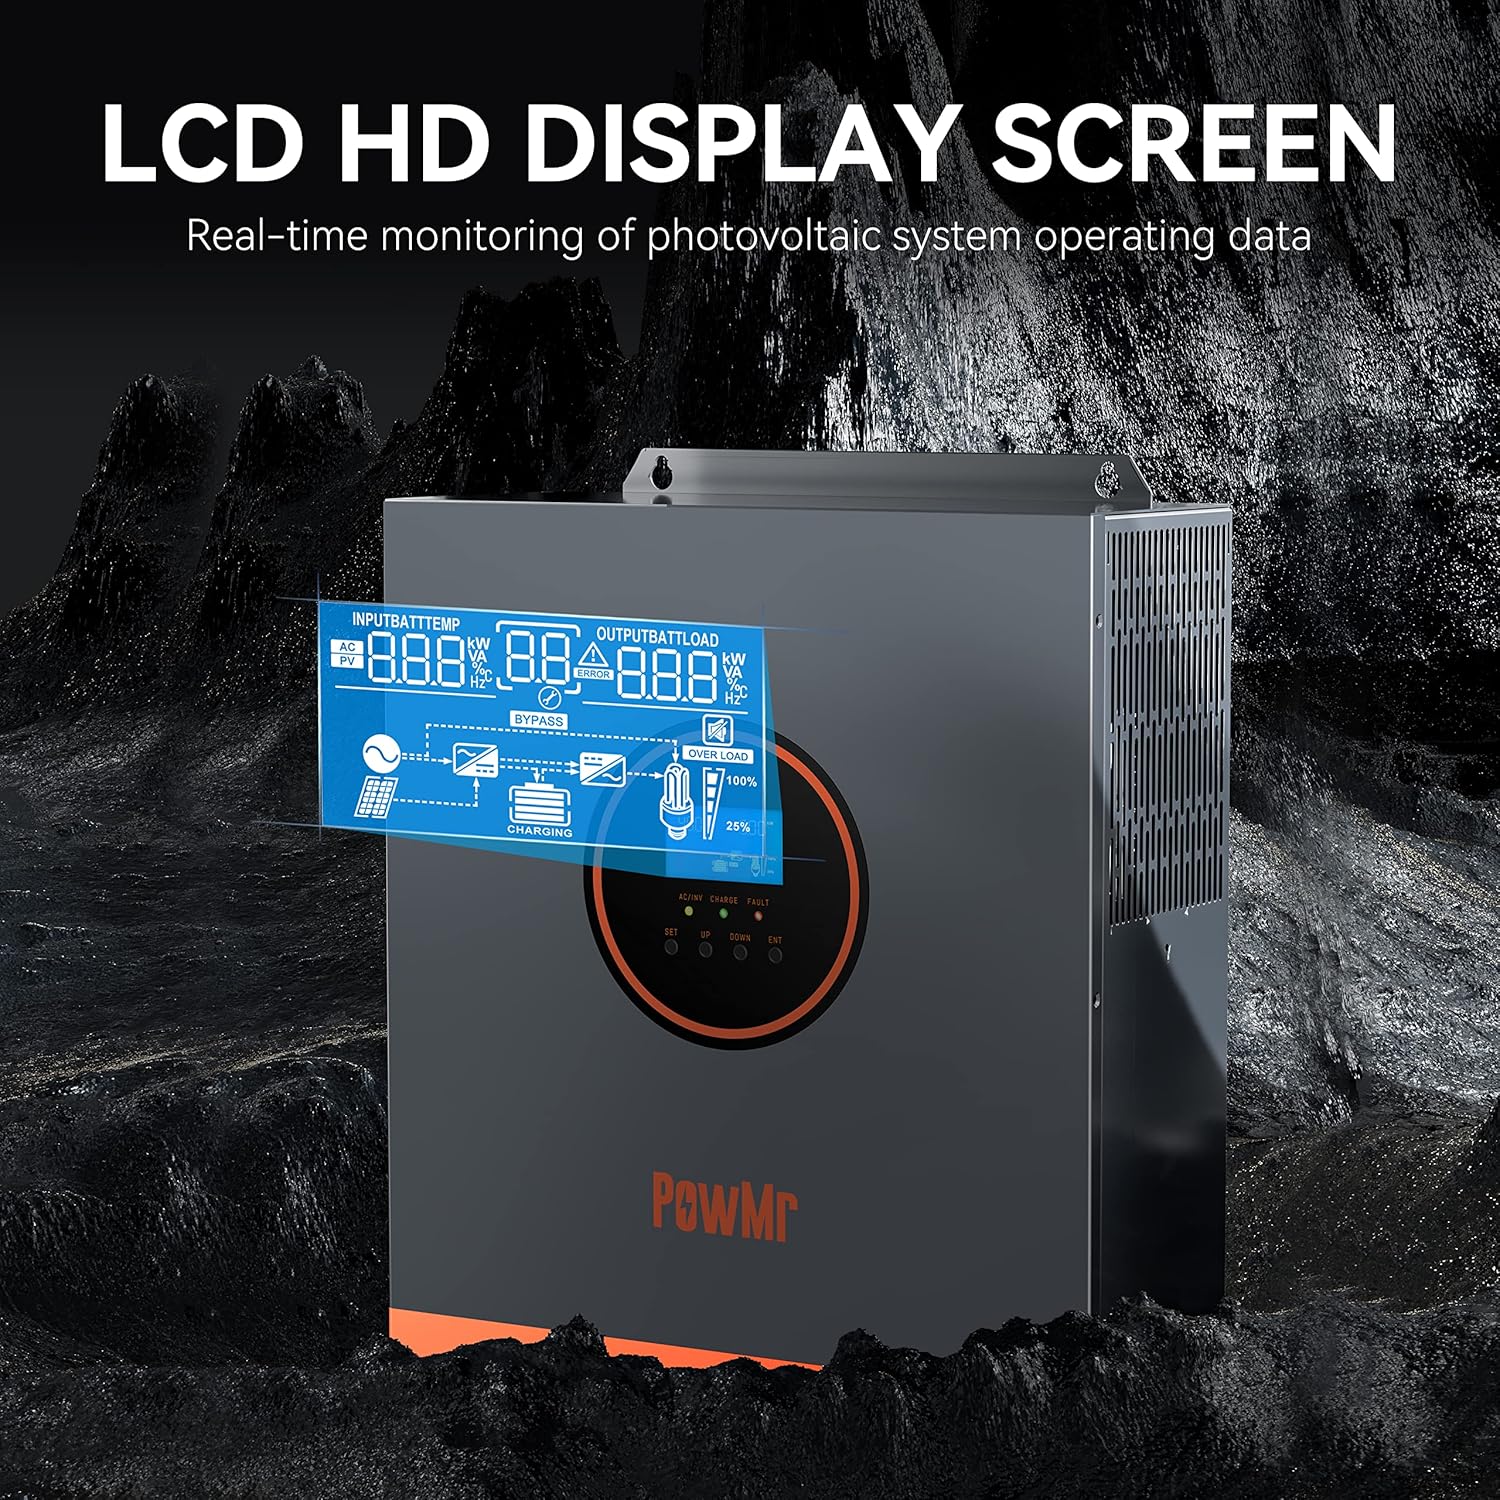
Figure 3.3: Close-up of the LCD HD Display Screen, showing real-time monitoring of photovoltaic system operating data such as input/output voltage, battery charge, and load percentage.
3.2. Cooling System
The inverter is equipped with smart variable speed fans that adjust their rotation speed based on ambient temperature and environmental conditions to ensure optimal cooling and performance.

Figure 3.4: Illustration of the Smart Variable Speed Fan system, demonstrating how the fans adjust to maintain optimal operating temperature.
4. Setup and Installation
Proper installation is crucial for the inverter's performance and safety. Follow these steps carefully.
4.1. Mounting
Select a suitable location for mounting the inverter. It should be a dry, well-ventilated area, protected from direct sunlight and moisture. Ensure there is sufficient clearance around the unit for airflow.
4.2. Wiring Diagram
Refer to the wiring diagram for correct connection of solar panels, batteries, AC input (utility/generator), and AC output (loads).

Figure 4.1: Detailed wiring diagram showing connections for AC input (generator or utility), AC output, PV input from solar panels, and battery connection. Includes specifications for AC input voltage, frequency, max AC bypass current, max AC charge current, AC wire gauge, PV input power, voltage, current, and battery type/capacity.
4.3. Battery Connection
Connect the 48V battery bank to the inverter's battery terminals. Ensure correct polarity. The inverter supports 48V Lead-Acid and Lithium batteries. Recommended battery capacity is 200AH.
4.4. PV Connection
Connect your solar panels to the PV input terminals. Ensure the total open circuit voltage (VOC) does not exceed 500V and the maximum PV input power is 5500W. Start-up voltage must be greater than 150V.
4.5. AC Input/Output Connection
Connect the AC input from your utility grid or generator, and the AC output to your household or office loads. Ensure all wiring adheres to local electrical codes.
5. Operating Instructions
Once installed, the inverter can be configured and operated through its LCD display and various modes.
5.1. Initial Startup
After all connections are made and verified, switch on the main power switch. The inverter will perform a self-test and the LCD display will illuminate.
5.2. Setting Parameters
The inverter offers various programmable parameters, including input/output voltage range, battery charging current, battery type, and charging/discharging priority. Navigate through the LCD menu using the buttons to adjust settings according to your system requirements.
5.3. Charging and Output Modes
The inverter supports four charging modes and three output modes for flexible power management.

Figure 5.1: Illustration of the four safe charging modes (Solar Charging, Utility Charge, Solar Priority, Solar+Utility Charging) and three output modes (PV Priority, Utility Priority, Inverter Priority).
5.4. Monitoring via SmartESS App
The inverter can be monitored and controlled remotely via the SmartESS App. A Wi-Fi/GPRS data acquisition module (sold separately) is required for this functionality.

Figure 5.2: Depiction of the SmartESS App interface for monitoring and control, with options to download from App Store and Google Play. A QR code for the optional Wi-Fi/GPRS module is also shown (Q2721100111238).
For a demonstration of the inverter's operation and robust build, please watch the following video:
Video 5.1: A user demonstrates the PowMr 5000W Solar Inverter, highlighting its robust construction and capabilities for powering various loads, including multiple video game machines. The video emphasizes its protective features for batteries and solar panels, and the importance of adjusting default settings to specific needs. It also advises against using it for inductive loads without proper calculation.
6. Maintenance
Regular maintenance ensures the longevity and optimal performance of your inverter.
- Routine Checks: Periodically inspect all wiring connections for tightness and signs of corrosion.
- Cleaning: Keep the inverter's ventilation openings clear of dust and debris. Use a dry, soft cloth for cleaning the exterior. Do not use liquid cleaners.
- Battery Care: Monitor battery health and ensure they are maintained according to the battery manufacturer's guidelines.
7. Troubleshooting
This section provides solutions for common issues you might encounter.
| Problem | Possible Cause | Solution |
|---|---|---|
| Inverter not turning on | No battery connection; Battery voltage too low; Main switch off | Check battery connections; Charge battery; Turn on main switch |
| No AC output | Overload; Short circuit; High temperature | Reduce load; Check for short circuits; Ensure proper ventilation |
| PV input not charging | Insufficient solar input; PV voltage too low/high; MPPT fault | Check solar panel connections; Verify PV voltage within range; Contact support if MPPT fault persists |
| Error code displayed | Specific system fault | Refer to the fault code list in the full manual (if available) or contact customer support. |
If the problem persists after attempting the solutions above, please contact PowMr customer support.
8. Specifications
Detailed technical specifications for the PowMr 5000W Solar Inverter.
| Parameter | Value |
|---|---|
| Model Name | 5000W |
| Wattage | 5500 watts |
| Power Source | Battery Powered |
| AC Input Voltage Range | 90-140V |
| AC Output Voltage | 100/105/110Vac ±5% |
| Frequency | 60 Hz |
| Max Input Power (PV) | 5500W |
| PV Voltage Range | 120-500Vdc |
| Max Input Solar Current | 16A |
| Max Charge Current | 80A |
| Item Weight | 27.9 pounds |
| Package Dimensions | 20 x 16.3 x 7.9 inches |
9. Warranty and Support
PowMr products are designed for reliability and performance. For warranty information and technical support, please refer to the official PowMr website or contact their customer service directly. Keep your purchase receipt as proof of purchase for warranty claims.
For further assistance, visit the PowMr Store on Amazon.


