
Introduction
This manual provides detailed instructions for the installation, operation, and maintenance of your new Mintu Refrigerator Icemaker Replacement. This unit is designed to replace the original icemaker in various Amana and Kenmore refrigerator models, restoring ice production functionality. Please read this manual thoroughly before beginning installation to ensure proper and safe operation.
Safety Information
WARNING: To reduce the risk of electric shock, fire, or injury to persons, read all instructions before installing or servicing this icemaker.
- Always disconnect power to the refrigerator before attempting any installation, repair, or maintenance.
- Wear appropriate personal protective equipment, such as gloves, during installation.
- Ensure all connections are secure and properly insulated.
- If you are unsure about any part of the installation process, consult a qualified appliance technician.
Package Contents
Verify that all components are present before beginning installation:
- Icemaker Assembly
- Mounting Bracket
- Mounting Screw

Figure 1: The complete Mintu Refrigerator Icemaker Assembly, showing the ice mold and shut-off arm.

Figure 2: Included mounting bracket and screw for securing the icemaker.
Setup and Installation
Follow these steps carefully to install your new icemaker:
- Disconnect Power: Unplug the refrigerator from the wall outlet or turn off the circuit breaker supplying power to the refrigerator.
- Access Icemaker Compartment: Open the freezer door and locate the existing icemaker or the designated area for icemaker installation. You may need to remove shelves or the ice bucket.
- Remove Old Icemaker (if applicable):
- Carefully disconnect the electrical harness from the old icemaker.
- Unscrew any mounting screws or clips holding the old icemaker in place.
- Remove the old icemaker from the freezer compartment.
- Install Mounting Bracket: If your refrigerator did not previously have an icemaker, or if the old bracket is damaged, install the new mounting bracket using the provided screw. Ensure it is securely fastened to the freezer wall.
- Connect Electrical Harness: Carefully align the electrical connector on the new Mintu icemaker with the refrigerator's wiring harness. Push firmly until it clicks into place.
- Mount New Icemaker: Slide the new icemaker assembly onto the mounting bracket. Ensure it is seated correctly and securely. Some models may require additional screws to secure the icemaker to the bracket or freezer wall.
- Check Water Line: Verify that the water fill tube is properly aligned to dispense water into the icemaker's fill cup.
- Restore Power: Plug the refrigerator back into the wall outlet or turn on the circuit breaker.
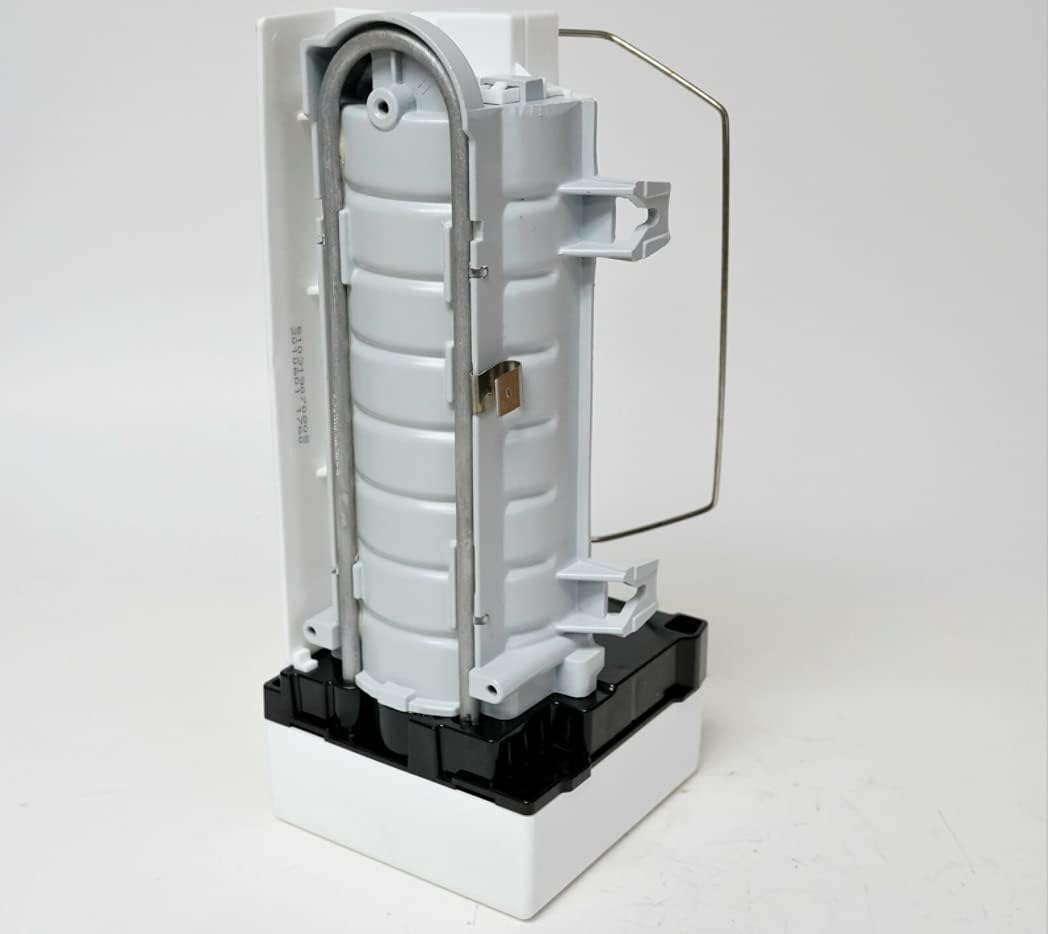
Figure 3: Rear view of the icemaker, highlighting the water inlet area where the refrigerator's fill tube should align.

Figure 4: The icemaker's control module. Do not manually rotate the gear as indicated by the label.
Operating Instructions
After installation and power restoration:
- Initial Operation: The icemaker will typically begin its first cycle within 1-2 hours after the freezer reaches its operating temperature and the water supply is connected and turned on.
- First Batch of Ice: Discard the first 2-3 batches of ice to ensure any impurities from the new system are flushed out.
- Ice Production Rate: Full ice production may take up to 24 hours to stabilize.
- Shut-off Arm: The metal shut-off arm controls ice production. When the ice bucket is full, the arm will be pushed up, stopping ice production. Lowering the arm will resume production.
Maintenance
Regular maintenance ensures optimal performance:
- Cleaning: Periodically clean the ice bucket and the icemaker's ice mold with warm, soapy water. Rinse thoroughly and dry before returning to the freezer.
- Water Filter: If your refrigerator has a water filter, ensure it is replaced regularly according to the refrigerator manufacturer's recommendations to maintain water quality and icemaker efficiency.
- Water Line Check: Occasionally inspect the water supply line for kinks or leaks.
Troubleshooting
| Problem | Possible Cause | Solution |
|---|---|---|
| Icemaker not producing ice. |
|
|
| Small or hollow ice cubes. |
|
|
| Icemaker making unusual noises. |
|
|
Specifications
- Brand: Mintu
- Product Type: Refrigerator Icemaker Replacement
- Compatible Refrigerator Models: Amana AFD2535DEQ, Amana AFD2535DES, Amana AFD2535DEW, Amana AFD2535FES, Amana ARB8057CSL, Amana ARB8057CSR, Amana ARB9059CS, Amana ARSE66ZBC, Amana ASD2620HRB, Amana DRS2660BW, Amana PARB8057CS0, Amana PARB8057CS1, Amana PDRS2660BW0, Kenmore 25326092100, 25326093100, 25331133300, etc. (Refer to product listing for a comprehensive list of compatible models.)
- UPC: 017015804981
- ASIN: B0963P2HCJ
Warranty and Support
For warranty information or technical support, please refer to the original purchase documentation or contact Mintu customer service through the retailer where the product was purchased. Keep your proof of purchase for any warranty claims.