
Introduction
This manual provides detailed instructions for the installation, operation, and maintenance of your new Mintu Refrigerator Icemaker Replacement. This icemaker is designed to be compatible with various Kenmore refrigerator models, including those listed in the specifications. Please read these instructions carefully before beginning installation to ensure proper function and safety.
Safety Information
- Disconnect Power: Always disconnect power to the refrigerator before attempting any installation or maintenance. Failure to do so can result in electric shock or injury.
- Water Supply: Ensure the water supply to the refrigerator is turned off before disconnecting any water lines.
- Wear Protective Gear: Wear appropriate protective gear, such as gloves, to prevent injury from sharp edges or components.
- Professional Assistance: If you are unsure about any step, consult a qualified appliance technician.
Package Contents
Verify that all components are present before beginning installation:
- Mintu Refrigerator Icemaker Assembly
- Mounting Bracket (if separate)
- Mounting Screw(s)
Setup and Installation
Follow these steps carefully to replace your refrigerator icemaker:
- Prepare the Refrigerator:
- Unplug the refrigerator from the electrical outlet.
- Turn off the water supply valve to the refrigerator.
- Remove the ice bucket from the freezer compartment.
- Remove the Old Icemaker:
- Locate the screws or clips holding the old icemaker in place. These are typically on the side or top of the icemaker assembly.
- Carefully remove the screws or release the clips.
- Gently pull the old icemaker forward to disconnect it from the electrical harness.
- Disconnect any water lines if applicable (some models have a direct water fill tube).
- Remove the old icemaker from the freezer.
- Install the New Icemaker:

Image 1: Front view of the Mintu Refrigerator Icemaker Replacement, showing the ice mold and the metal shut-off arm.
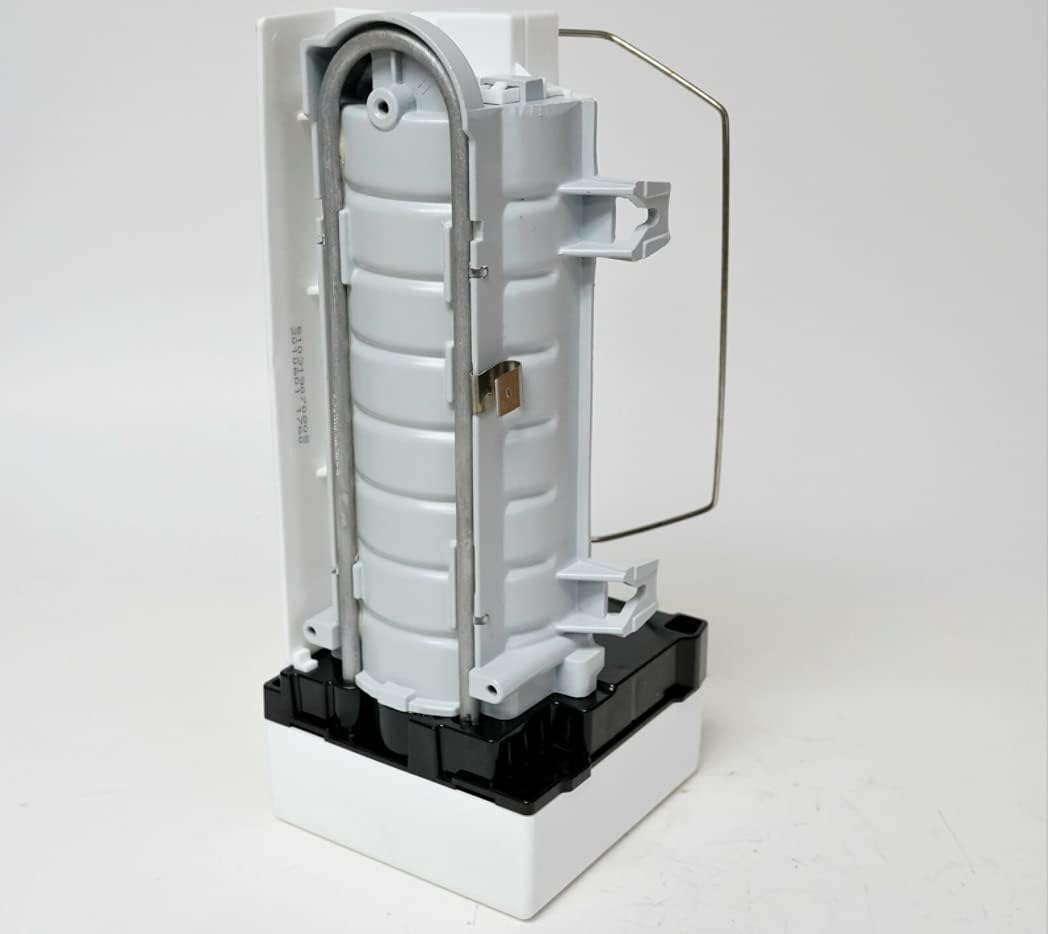
Image 2: Rear view of the Mintu Refrigerator Icemaker Replacement, highlighting the motor housing and the electrical connection port.

Image 3: A white plastic mounting bracket and a single hex-head screw, used for securing the icemaker.
- Connect the electrical harness from the refrigerator to the new icemaker (refer to Image 2 for the connection port). Ensure it clicks securely into place.
- If your model uses a separate mounting bracket (Image 3), attach it to the icemaker or the freezer wall as per your refrigerator's design.
- Slide the new icemaker into position, aligning it with the mounting points.
- Secure the icemaker with the screws or clips removed earlier. Ensure it is firmly attached and does not wobble.
- Reconnect any water lines if they were disconnected.
- Final Steps:
- Turn on the water supply valve to the refrigerator. Check for any leaks around the water connections.
- Plug the refrigerator back into the electrical outlet.
- Replace the ice bucket.
Operating Instructions
After installation, the icemaker will begin producing ice. The first few batches of ice may be smaller or have an unusual taste. It is recommended to discard the first 2-3 batches of ice to ensure optimal taste and quality.
- Initial Ice Production: It may take 12-24 hours for the icemaker to produce its first full batch of ice, as the water lines need to fill and the freezer needs to reach the correct temperature.
- Shut-off Arm: The metal shut-off arm (visible in Image 1) automatically stops ice production when the ice bucket is full. Lowering the arm will resume ice production, while raising it will stop it.
Maintenance
- Cleaning: Periodically clean the ice bucket with mild soap and water. Do not use abrasive cleaners.
- Water Filter: Ensure your refrigerator's water filter is replaced regularly according to the manufacturer's recommendations to maintain ice quality.
- Inspection: Occasionally inspect the icemaker for any signs of wear or damage.
Troubleshooting
| Problem | Possible Cause | Solution |
|---|---|---|
| No ice production |
|
|
| Small or hollow ice cubes |
|
|
| Ice tastes bad |
|
|
Specifications
- Brand: Mintu
- Model Numbers: ABB2522FEW, ABB2527DEW
- Compatible Kenmore Models: 596.76593600, 596.76533500, 596.76584600, 596.69312010, 596.79872990, 596.69313010, 596.58395890, 59669312010, 59679872990, 59669313010, 59658395890, 59676584600, and many others listed in product description.
- Part Number: ABB2522FEW, ABB2527DEW
- UPC: 017015804950
Warranty and Support
For warranty information or technical support, please refer to the documentation provided with your purchase or contact Mintu customer service. Keep your purchase receipt for warranty claims.
For additional support, you may visit the Mintu Store on Amazon.