
1. Introduction
This manual provides detailed instructions for the proper installation, operation, and maintenance of your Dynascan M-79V VHF Radio. Please read this manual thoroughly before using the radio to ensure optimal performance and safety. The Dynascan M-79V is a compact VHF transceiver designed for reliable communication within the 136-174 MHz frequency range.
2. Package Contents
Upon unpacking, please verify that all items listed below are present and in good condition. If any items are missing or damaged, contact your dealer immediately.
- Dynascan M-79V VHF Radio Unit
- Microphone
- Power Line (DC power cable)
- Support Mount (Mounting Bracket)
- Mounting Hardware (Screws, nuts, washers)
- User Manual (This document)
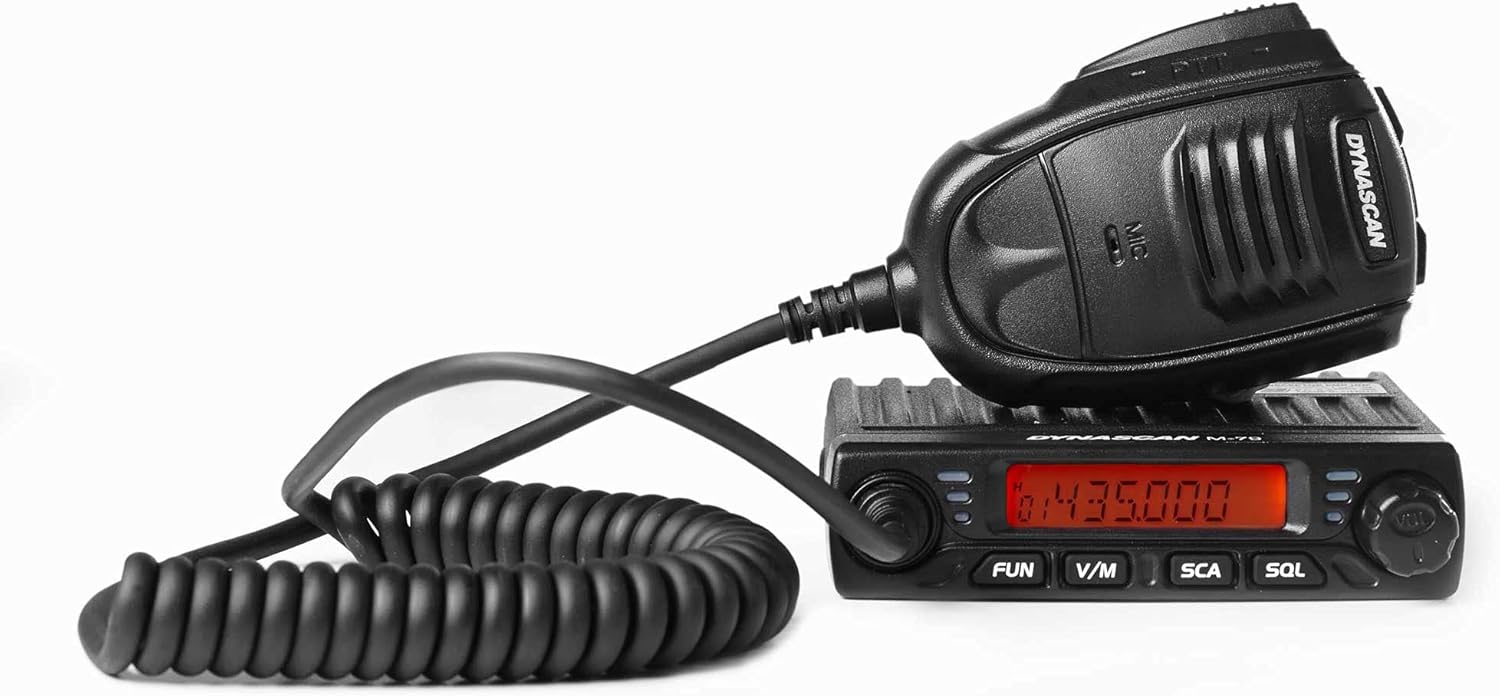
Figure 2.1: Dynascan M-79V VHF Radio unit with connected microphone.

Figure 2.2: All included components: radio unit, microphone, power cable, mounting bracket, and hardware.

Figure 2.3: Detailed view of the mounting bracket and associated hardware.
3. Product Overview
The Dynascan M-79V features a compact design with essential controls for efficient operation.
3.1 Front Panel Controls

Figure 3.1: Front panel of the Dynascan M-79V radio.
- LCD Display: Shows frequency, channel number, and various status indicators.
- Power/Volume Knob: Turns the radio on/off and adjusts audio volume.
- Channel Selector Knob: Used to select channels or adjust frequency.
- FUN Button: Activates function menu or special features.
- V/M Button: Toggles between VFO (Frequency) mode and Memory (Channel) mode.
- SCA Button: Initiates or stops scanning.
- SQL Button: Adjusts the squelch level.
3.2 Rear Panel Connections
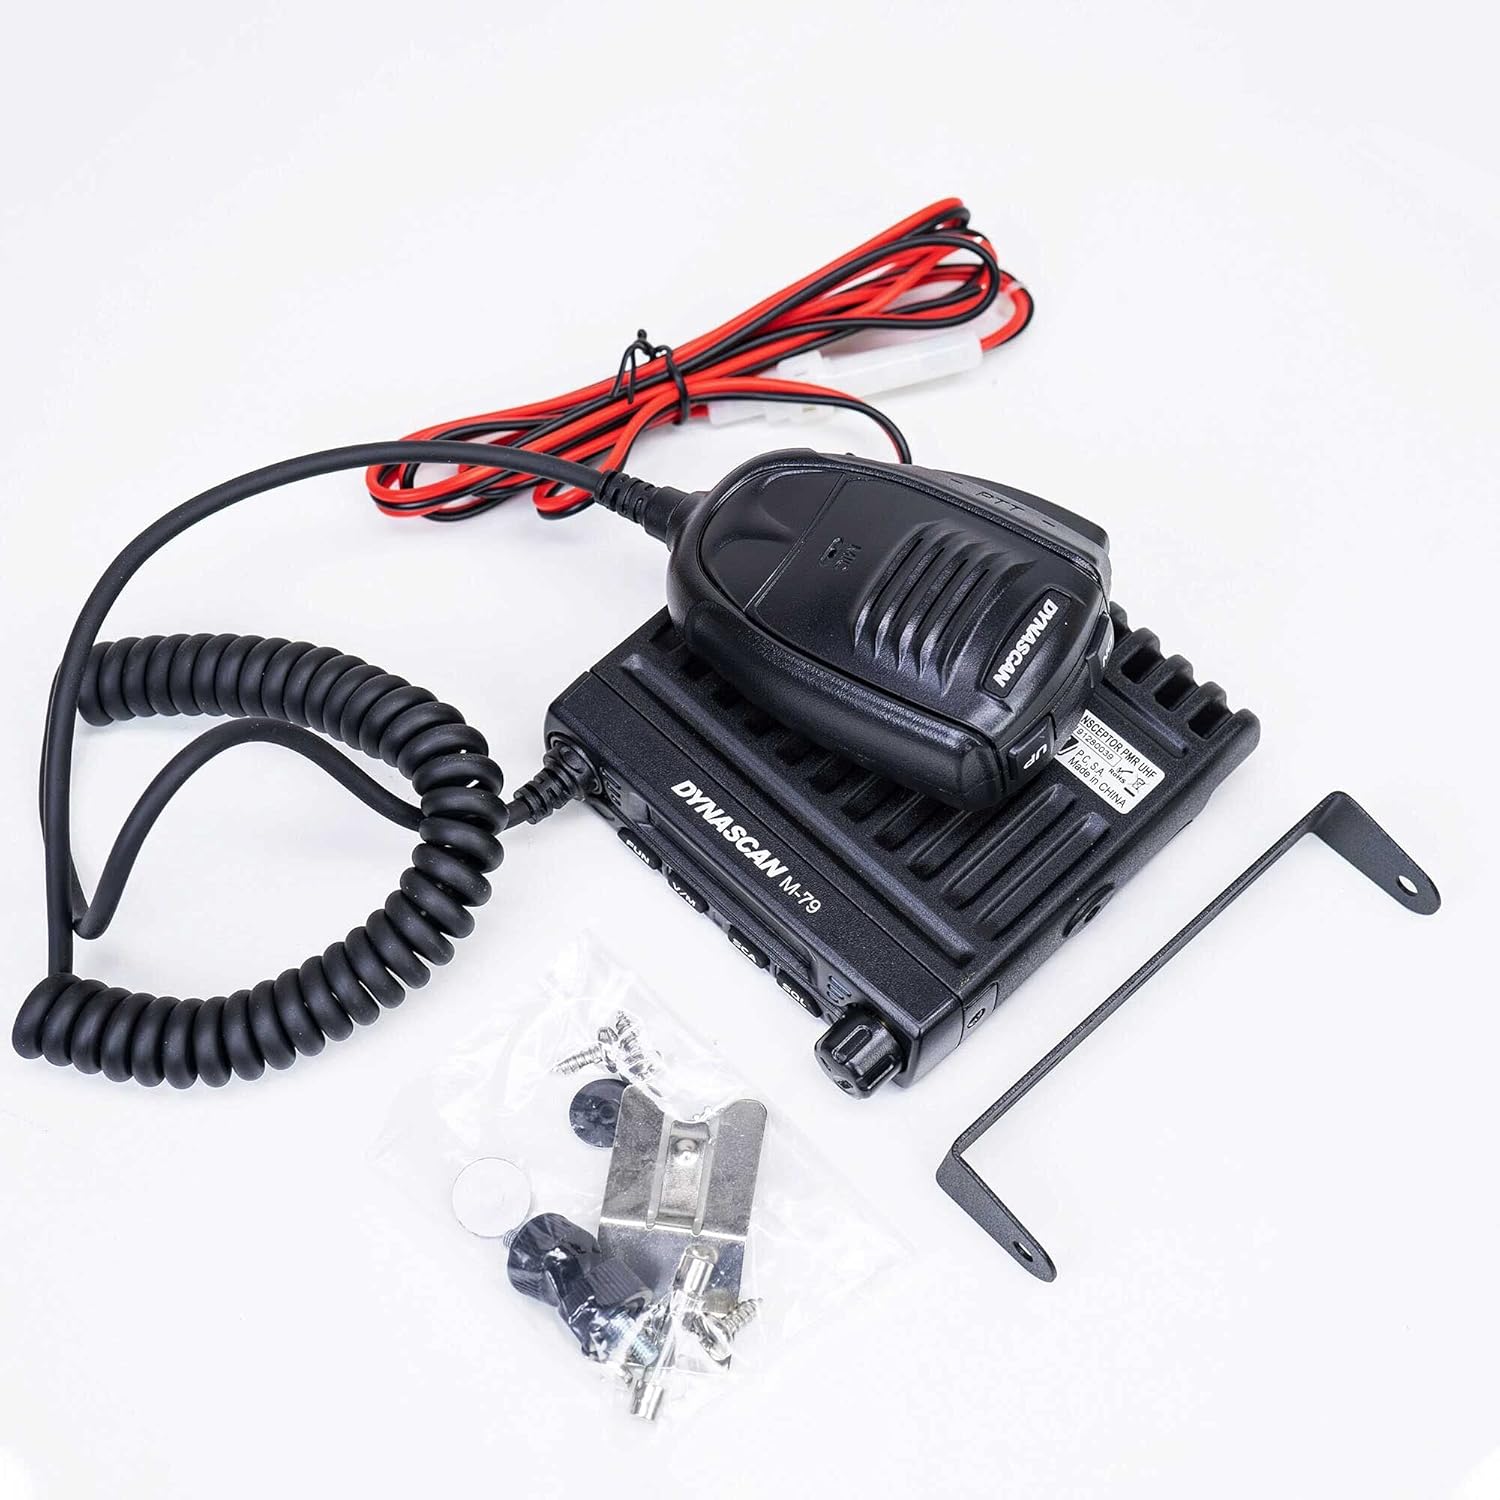
Figure 3.2: Rear panel connections of the Dynascan M-79V radio.
- ANT Connector: Connects to the VHF antenna (SO-239 type).
- DC Power Input: Connects to the 13.8V DC power source.
- EXT.SP Jack: For connecting an optional external speaker.
3.3 Microphone

Figure 3.3: Dynascan M-79V microphone with PTT button and coiled cable.
- PTT (Push-To-Talk) Button: Press to transmit, release to receive.
- Microphone Element: For voice input.
4. Setup
4.1 Mounting the Radio
- Select a secure and convenient location for mounting the radio, ensuring adequate ventilation.
- Use the provided mounting bracket as a template to mark drilling locations.
- Drill pilot holes and secure the mounting bracket using the supplied screws.
- Attach the radio to the bracket using the thumb screws.
4.2 Antenna Connection
Connect a suitable VHF antenna (136-174 MHz) with a 50 Ohm impedance to the ANT connector on the rear panel. Ensure the connection is tight to prevent signal loss and potential damage.
4.3 Power Connection
Connect the supplied DC power cable to the 13.8V DC power input on the rear of the radio. Connect the other end of the power cable to a stable 13.8V DC power supply capable of providing sufficient current (refer to specifications for current draw). Observe correct polarity: red wire to positive (+), black wire to negative (-). Incorrect polarity can damage the radio.
4.4 Microphone Connection
Plug the microphone connector into the microphone jack on the front panel of the radio.
5. Operating Instructions
5.1 Power On/Off and Volume Adjustment
- To power on the radio, rotate the Power/Volume knob clockwise.
- Continue rotating clockwise to increase the volume.
- Rotate counter-clockwise to decrease the volume.
- To power off, rotate the knob fully counter-clockwise until it clicks.
5.2 Frequency and Channel Selection
- VFO Mode (Frequency Mode): Press the V/M button to enter VFO mode. Use the Channel Selector knob to adjust the frequency. The frequency step can be configured in the menu.
- Memory Mode (Channel Mode): Press the V/M button to enter Memory mode. Use the Channel Selector knob to select a programmed channel.
5.3 Squelch Adjustment (SQL)
The squelch function mutes the speaker when no signal is present, eliminating background noise.
- Press the SQL button.
- Use the Channel Selector knob to adjust the squelch level. A lower number opens the squelch more easily (more sensitive), while a higher number requires a stronger signal to open (less sensitive).
- Press SQL again or wait a few seconds to exit squelch adjustment.
5.4 Scanning (SCA)
The scan function allows the radio to automatically search for active signals across frequencies or programmed channels.
- Press the SCA button to start scanning.
- The radio will stop on an active signal.
- Press SCA again to stop scanning.
5.5 Transmission
To transmit, ensure you are on a clear frequency or channel.
- Press and hold the PTT button on the microphone.
- Speak clearly into the microphone.
- Release the PTT button to return to receive mode.
5.6 Advanced Features (via FUN button)
The FUN button accesses various advanced settings and features. Consult the full user manual for detailed instructions on programming and using these functions.
- Scrambler: Encrypts your voice for private communication.
- Talk Around: Allows direct radio-to-radio communication on a repeater output frequency.
- Timeout Timer (TOT): Limits transmission duration to prevent accidental long transmissions.
- Busy Channel Lockout (BCL): Prevents transmission on an occupied channel.
- CTCSS/DCS: Sub-audible tones for selective calling.
- Mic Gain: Adjusts microphone sensitivity.
6. Maintenance
6.1 General Care
- Keep the radio dry. If it gets wet, wipe it dry immediately.
- Do not expose the radio to extreme temperatures.
- Avoid dropping or subjecting the radio to severe impacts.
- Clean the radio's exterior with a soft, damp cloth. Do not use harsh chemicals or solvents.
6.2 Antenna and Power Cable Inspection
Regularly inspect the antenna and power cable for any signs of damage, fraying, or corrosion. Damaged cables or antennas can impair performance and pose safety risks.
7. Troubleshooting
| Problem | Possible Cause | Solution |
|---|---|---|
| Radio does not power on. |
|
|
| No reception or weak signals. |
|
|
| Cannot transmit. |
|
|
8. Specifications
| Frequency Range | 136 - 174 MHz (VHF) |
| Programmable Channels | 199 Channels |
| Frequency Steps | 2.5 / 5 / 6.25 / 10 / 12.5 / 20 / 25 / 30 / 50 KHz |
| Power Supply | 13.8V DC |
| Antenna Impedance | 50 Ohm |
| Output Power | 17W, 10W, 5W (Selectable) |
| Dimensions (W x H x D) | 10.5 x 10.5 x 2.5 cm (approx.) |
| Weight | 435 grams (radio unit only) / 640 grams (item weight) |
| Special Features | Scrambler, Talk Around, Scan, Timeout Timer (TOT), Busy Channel Lockout (BCL), Squelch, CTCSS/DCS, Mic Gain |
9. Warranty and Support
For warranty information, please refer to the warranty card included with your purchase or contact your authorized Dynascan dealer. For technical support or service inquiries, please contact your point of purchase or visit the official Dynascan website for contact details.
Note: Specifications are subject to change without notice.


