
1. Introduction
Thank you for choosing the EMOS Select ES5001 Radio Weather Station. This device provides comprehensive weather information, including indoor and outdoor temperature, humidity, barometric pressure, and a weather forecast. It features a color touch screen for easy interaction and a wireless outdoor sensor with a range of up to 100 meters.
Package Contents
- EMOS Select ES5001 Weather Station (Main Unit)
- Wireless Outdoor Sensor
- Power Adapter for Main Unit
- User Manual (this document)
Note: 2x AAA batteries for the outdoor sensor and 3x AAA batteries for the main unit (backup) are not included and must be purchased separately.
2. Safety Information
- Read all instructions carefully before use.
- Keep the device away from water and high humidity.
- Do not expose the main unit to direct sunlight or extreme temperatures.
- Use only the provided power adapter for the main unit.
- Do not attempt to disassemble or repair the device yourself. Contact qualified service personnel.
- Dispose of batteries responsibly according to local regulations.
- Keep batteries out of reach of children.
3. Setup
3.1 Battery Installation
Outdoor Sensor:
- Open the battery compartment cover on the back of the outdoor sensor.
- Insert 2x AAA batteries, observing the correct polarity (+/-).
- Close the battery compartment cover securely.
Main Unit (Backup Power):
- Open the battery compartment cover on the back of the main unit.
- Insert 3x AAA batteries, observing the correct polarity (+/-).
- Close the battery compartment cover securely. These batteries provide backup power in case of a power outage.
3.2 Power Connection
Connect the provided power adapter to the main unit's power input port and then plug it into a standard electrical outlet. The display will illuminate.
3.3 Initial Synchronization
Once both the main unit and the outdoor sensor have power, they will automatically attempt to synchronize. Place the outdoor sensor within close proximity to the main unit during the initial setup. The outdoor temperature and humidity readings should appear on the main unit's display within a few minutes. If synchronization fails, refer to the troubleshooting section.
3.4 Outdoor Sensor Placement
For accurate readings, place the outdoor sensor in a shaded area, protected from direct sunlight and rain. Ensure it is within the 100-meter wireless range of the main unit and away from large metal objects or electrical interference sources. The sensor is water-resistant (IPX4) but should not be submerged.

Image: The outdoor sensor is designed to be water-resistant with an IPX4 rating, suitable for outdoor placement.

Image: The outdoor sensor offers a wireless range of up to 100 meters from the main unit, allowing flexible placement.
4. Operation
4.1 Display Overview
The EMOS Select ES5001 features a clear, color touch screen display that presents various weather metrics and time information. The display is designed for readability from multiple angles.

Image: Detailed view of the weather station's clear interface, highlighting different data sections such as outdoor/indoor temperature and humidity, pressure trend, time, date, and moon phase.
4.2 Touch Screen Controls
The main unit is operated via touch-sensitive buttons located on the display. Specific icons correspond to different functions such as settings, alarm, and unit selection.

Image: A hand demonstrates interaction with the touch-sensitive buttons on the display, which offers a wide 160-degree viewing angle.
4.3 Basic Settings (Time, Date, Units)
The radio clock automatically sets the time and date via RF signal. Manual adjustments can be made through the settings menu if needed. To access settings, touch the gear icon on the display. You can typically adjust:
- Time Zone
- 12/24 hour format
- Date format (DD/MM or MM/DD)
- Temperature units (°C/°F)
- Pressure units (hPa/inHg)
4.4 Weather Forecast
The weather station features a self-learning weather forecast function. After approximately 14 days of continuous operation, the station will have collected enough data to provide a more accurate 24-hour weather forecast with up to 75% accuracy. The forecast is indicated by graphical icons on the display.

Image: Illustrates the 24-hour weather forecast feature, highlighting the self-learning capability that becomes active after 14 days, along with moon phase and barometer functions.
4.5 Alarm Function
The weather station includes an alarm clock function. To set the alarm, navigate to the alarm settings via the touch screen interface. You can set a specific alarm time and activate/deactivate it.
4.6 Moon Phase Display
The display shows the current moon phase, providing additional astronomical information.
4.7 Barometric Pressure and Trend
The integrated barometer measures atmospheric pressure. The display shows the current pressure and a trend indicator, allowing you to observe changes in pressure over time, which can help in predicting weather changes.
5. Maintenance
5.1 Cleaning
Wipe the main unit and outdoor sensor with a soft, damp cloth. Do not use abrasive cleaners or solvents, as these may damage the surfaces or electronic components.
5.2 Battery Replacement
Replace batteries in the outdoor sensor when the low battery indicator appears on the main unit's display. For the main unit, replace backup batteries periodically or when the unit fails to retain settings during a power outage. Always use new batteries of the specified type (AAA) and ensure correct polarity.
6. Troubleshooting
| Problem | Possible Cause | Solution |
|---|---|---|
| No display on main unit | Power adapter not connected or faulty; backup batteries depleted. | Ensure power adapter is securely connected and plugged in. Check backup batteries and replace if necessary. |
| Outdoor readings not displayed | Outdoor sensor batteries depleted; sensor out of range; interference; synchronization failed. | Replace outdoor sensor batteries. Move sensor closer to the main unit. Avoid placing near large metal objects or electronics. Re-synchronize by removing and reinserting batteries in both units. |
| Inaccurate weather forecast | Learning phase not complete; local weather conditions vary significantly. | Allow 14 days for the self-learning function to optimize. Forecasts are general and may not always match hyper-local conditions. |
| Time/Date incorrect | RF signal interference; incorrect time zone setting. | Move unit away from potential interference sources. Manually set the correct time zone in settings. |
| Touch screen unresponsive | Temporary software glitch. | Disconnect power adapter and remove backup batteries for a few minutes, then reconnect. |
7. Specifications
- Model: ES5001
- Display Type: Color Touch Screen
- Power Source (Main Unit): AC Adapter (included), 3x AAA batteries (backup, not included)
- Power Source (Outdoor Sensor): 2x AAA batteries (not included)
- Wireless Range: Up to 100 meters (open air)
- Temperature Accuracy: ±1 °C
- Outdoor Temperature Range: -50 °C to +70 °C
- Humidity Range: 1% to 99%
- Special Features: Alarm, Clock, Wireless Connectivity, Barometer, Moon Phase, Weather Forecast
- Material: Glass, Plastic
- Color: Black
- Dimensions (Main Unit): Approximately 192 mm (width) x 127 mm (height) x 65 mm (depth)
- Dimensions (Outdoor Sensor): Approximately 62 mm (width) x 100 mm (height)
- Water Resistance (Outdoor Sensor): IPX4
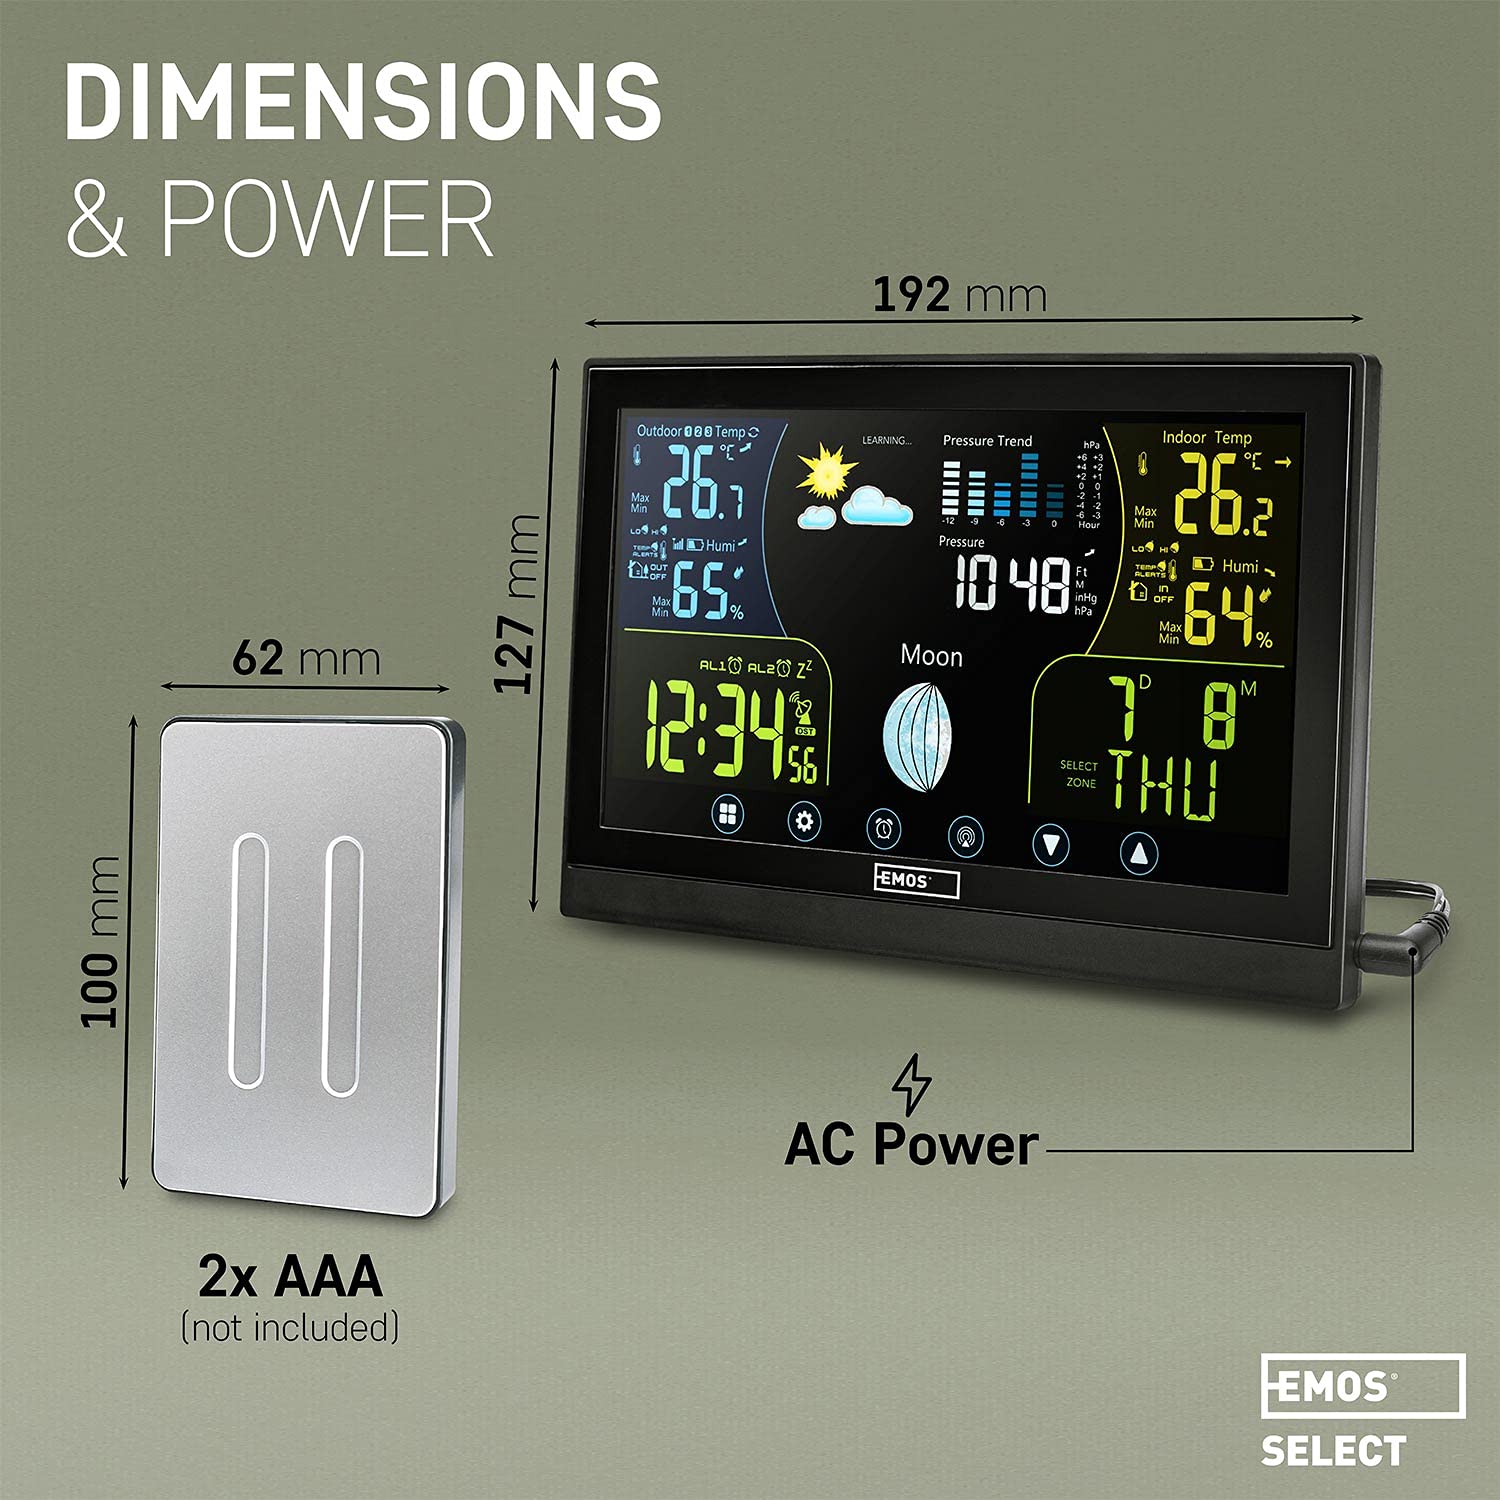
Image: Visual representation of the main unit and outdoor sensor dimensions, indicating power sources for each component.
8. Warranty & Support
EMOS provides a standard manufacturer's warranty for this product. Please refer to the warranty card included in your package or visit the official EMOS website for detailed warranty terms and conditions. For technical support, troubleshooting assistance, or to inquire about spare parts, please contact EMOS customer service through their official channels.
