
1. Introduction
Thank you for purchasing the HOWORK 800W 9.5QT Stand Mixer. This appliance is designed to simplify your baking and cooking tasks with its powerful motor, large capacity bowl, and versatile attachments. Please read this manual carefully before use to ensure safe and efficient operation. Keep this manual for future reference.

Image 1: HOWORK 800W 9.5QT Stand Mixer.
2. Important Safety Instructions
- Read all instructions before using the appliance.
- Do not immerse the motor unit in water or other liquids.
- Unplug from outlet when not in use, before putting on or taking off parts, and before cleaning.
- Avoid contact with moving parts. Keep hands, hair, and clothing, as well as spatulas and other utensils, away from beaters during operation to reduce the risk of injury to persons and/or damage to the mixer.
- Do not operate any appliance with a damaged cord or plug, or after the appliance malfunctions or has been dropped or damaged in any manner.
- The use of attachments not recommended or sold by the manufacturer may cause fire, electric shock, or injury.
- Do not use outdoors.
- Do not let cord hang over edge of table or counter.
- Do not let cord contact hot surfaces, including the stove.
- Always operate the mixer on a dry, stable, and level surface.
- Ensure the tilt-head is securely locked down before operation.
3. Package Contents
Your HOWORK Stand Mixer package includes the following items:
- HOWORK Stand Mixer Main Unit
- 9.5QT Stainless Steel Mixing Bowl
- Dough Hook (Teflon Coated Aluminum)
- Flat Beater (Teflon Coated Aluminum)
- Egg Whisk (Stainless Steel)
- Splash Guard
- Scraper
- Egg Separator
- Instruction Manual

Image 2: All 6 accessories supplied with the mixer.
4. Product Features
- Powerful 800W Motor: Equipped with a high-quality pure copper motor for efficient mixing.
- Large 9.5QT Stainless Steel Bowl: Provides ample capacity for large batches of ingredients.
- 10+P Speed Settings: Offers precise control for various recipes, from gentle stirring to fast whipping, plus a pulse function.
- Tilt-Head Design: Allows for easy access to install/uninstall the mixing bowl and attachments.
- Versatile Attachments: Includes a dough hook for kneading, a flat beater for mixing, and an egg whisk for aerating.
- Durable Metal Body: Ensures stability and longevity.
- Low Noise Operation: Designed to operate quietly, typically below 75dB.
- Safety Protection: Features overheat and overload protection for safe use.
- Non-Slip Suction Feet: Provides stability on the countertop during operation.
- Built-in Radiator and Smart Hall IC Sensor: Enhances motor durability and performance.

Image 3: Internal components and features of the mixer.

Image 4: Close-up views of the speed control, attachments, non-slip feet, and tilt lock.
5. Setup
- Placement: Place the mixer on a dry, stable, and level countertop. Ensure there is enough space around the mixer for ventilation.
- Lift the Tilt-Head: Push the tilt-head lock lever (located on the side of the mixer) upwards and gently lift the motor head until it locks into the upright position.
- Attach the Mixing Bowl: Place the 9.5QT stainless steel mixing bowl onto the base, aligning the tabs on the bowl with the slots on the base. Turn the bowl clockwise until it locks securely into place.
- Install an Attachment: Select the desired attachment (dough hook, flat beater, or egg whisk). Insert the attachment shaft into the attachment port on the underside of the motor head. Rotate the attachment slightly until it clicks into place.
- Lower the Tilt-Head: Push the tilt-head lock lever upwards again and gently lower the motor head until it clicks into the locked-down position. Ensure it is fully locked before proceeding.
- Attach Splash Guard (Optional): If desired, place the splash guard over the mixing bowl.
- Connect Power: Plug the power cord into a suitable electrical outlet.
Video 1: Demonstrates the setup process, including attaching the bowl and accessories, and lowering the tilt-head.
6. Operating Instructions
The HOWORK Stand Mixer features 10 speed settings plus a pulse (P) function, allowing you to achieve optimal results for various recipes.
Speed Control Guide:
| Speed Setting | Recommended Use | Attachment |
|---|---|---|
| P (Pulse) | Short bursts of maximum power for quick mixing or incorporating ingredients. | All attachments |
| 1-2 (Stir/Slow Mix) | For mixing dry ingredients, combining wet and dry ingredients, or starting heavy mixtures. | Flat Beater, Dough Hook |
| 3-4 (Mix/Beat) | For mixing batters, creaming butter and sugar, or mashing potatoes. | Flat Beater |
| 5-6 (Beat/Cream) | For beating eggs, mixing light batters, or preparing frosting. | Flat Beater, Whisk |
| 7-8 (Whip/Aerating) | For whipping cream, egg whites, or light mixtures. | Whisk |
| 9-10 (Fast Whip) | For rapidly whipping large quantities of cream or egg whites to stiff peaks. | Whisk |
General Operation:
- Ensure the mixer is properly assembled and plugged in.
- Add ingredients to the mixing bowl.
- Turn the speed control knob to the desired setting. Start at a lower speed and gradually increase to prevent splashing.
- Monitor the mixing process. Use the tilt-head feature to scrape down the sides of the bowl if necessary (always turn off and unplug before doing so).
- When finished, turn the speed control knob to '0' (off) and unplug the mixer.
- Lift the tilt-head, remove the attachment, and then remove the mixing bowl.

Image 5: Attachments and their recommended uses.
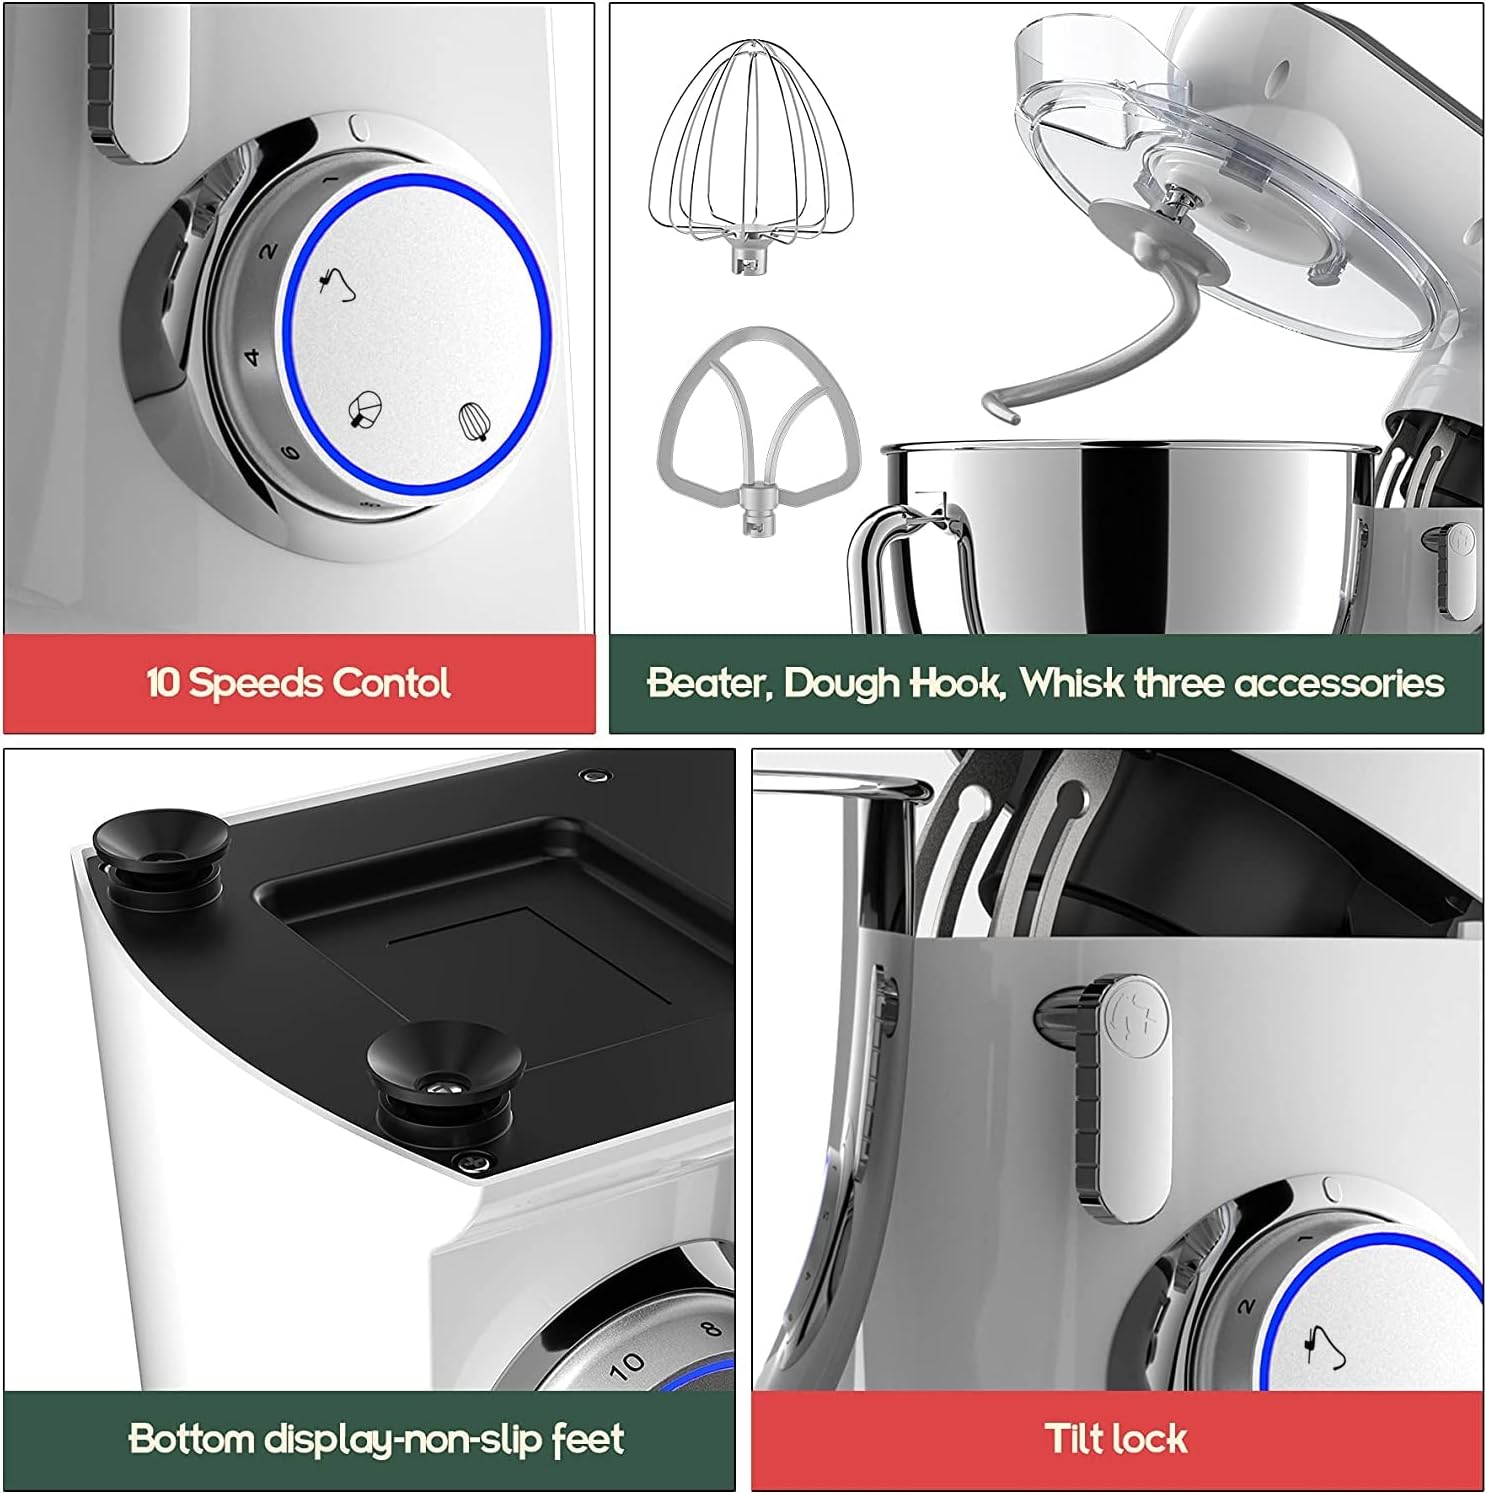
Image 6: Mixer in operation with the dough hook.

Image 7: Mixer in operation with the whisk.

Image 8: Mixer in operation with the flat beater.
7. Maintenance and Cleaning
Proper cleaning and maintenance will extend the life of your HOWORK Stand Mixer.
Cleaning the Main Unit:
- Always unplug the mixer before cleaning.
- Wipe the exterior of the motor unit with a damp cloth. Do not use abrasive cleaners or immerse the motor unit in water.
- Ensure all parts are completely dry before storing or re-using.
Cleaning the Bowl and Attachments:
- The stainless steel mixing bowl, dough hook, flat beater, and egg whisk are dishwasher safe.
- Alternatively, wash them in warm, soapy water, then rinse thoroughly and dry.
- The splash guard, scraper, and egg separator can be washed by hand with warm, soapy water.
8. Troubleshooting
If you encounter any issues with your mixer, please refer to the following troubleshooting guide:
| Problem | Possible Cause | Solution |
|---|---|---|
| Mixer does not turn on. | Not plugged in, power outlet issue, tilt-head not locked, or overheat protection activated. | Check power cord connection. Test outlet with another appliance. Ensure tilt-head is fully locked down. Allow mixer to cool down if it was recently used for a long period. |
| Attachment not mixing properly. | Attachment not fully inserted or incorrect attachment for the task. | Ensure attachment is securely clicked into place. Refer to the 'Operating Instructions' for recommended attachment usage. |
| Mixer is excessively noisy or vibrating. | Unstable surface, bowl not locked, or heavy load. | Place mixer on a stable, level surface. Ensure mixing bowl is securely locked. Reduce the amount of ingredients if overloading. |
| Motor stops during operation. | Overload protection activated. | Turn off the mixer and unplug it. Remove some ingredients if the load is too heavy. Allow the mixer to cool down for at least 15-20 minutes before restarting. |
9. Specifications
- Brand: HOWORK
- Model: 800W 9.5QT Stand Mixer
- Power: 800W
- Bowl Capacity: 9.5 Quarts
- Material: Metal body, Stainless Steel bowl, Teflon Coated Aluminum attachments (Dough Hook, Flat Beater)
- Speed Settings: 10 speeds + Pulse (P)
- Product Dimensions: 10.6"D x 17"W x 13.5"H (26.9cm D x 43.2cm W x 34.3cm H)
- Item Weight: 19.66 pounds (8.92 kg)
- Special Features: Dishwasher Safe Jars (attachments/bowl), Removable Bowl, Tilt-Head Design, Overheat/Overload Protection, Non-Slip Feet.
10. Warranty and Support
Specific warranty information is not provided in the product details. For warranty claims, technical support, or any questions regarding your HOWORK Stand Mixer, please contact the retailer or manufacturer directly through their official customer service channels. Keep your purchase receipt as proof of purchase.