1. Introduction
Thank you for choosing the Nilight 12AWG 2-Lead LED Light Bar Wiring Harness Kit. This manual provides essential information for the safe and efficient installation, operation, and maintenance of your wiring harness. Please read these instructions carefully before use and retain them for future reference.
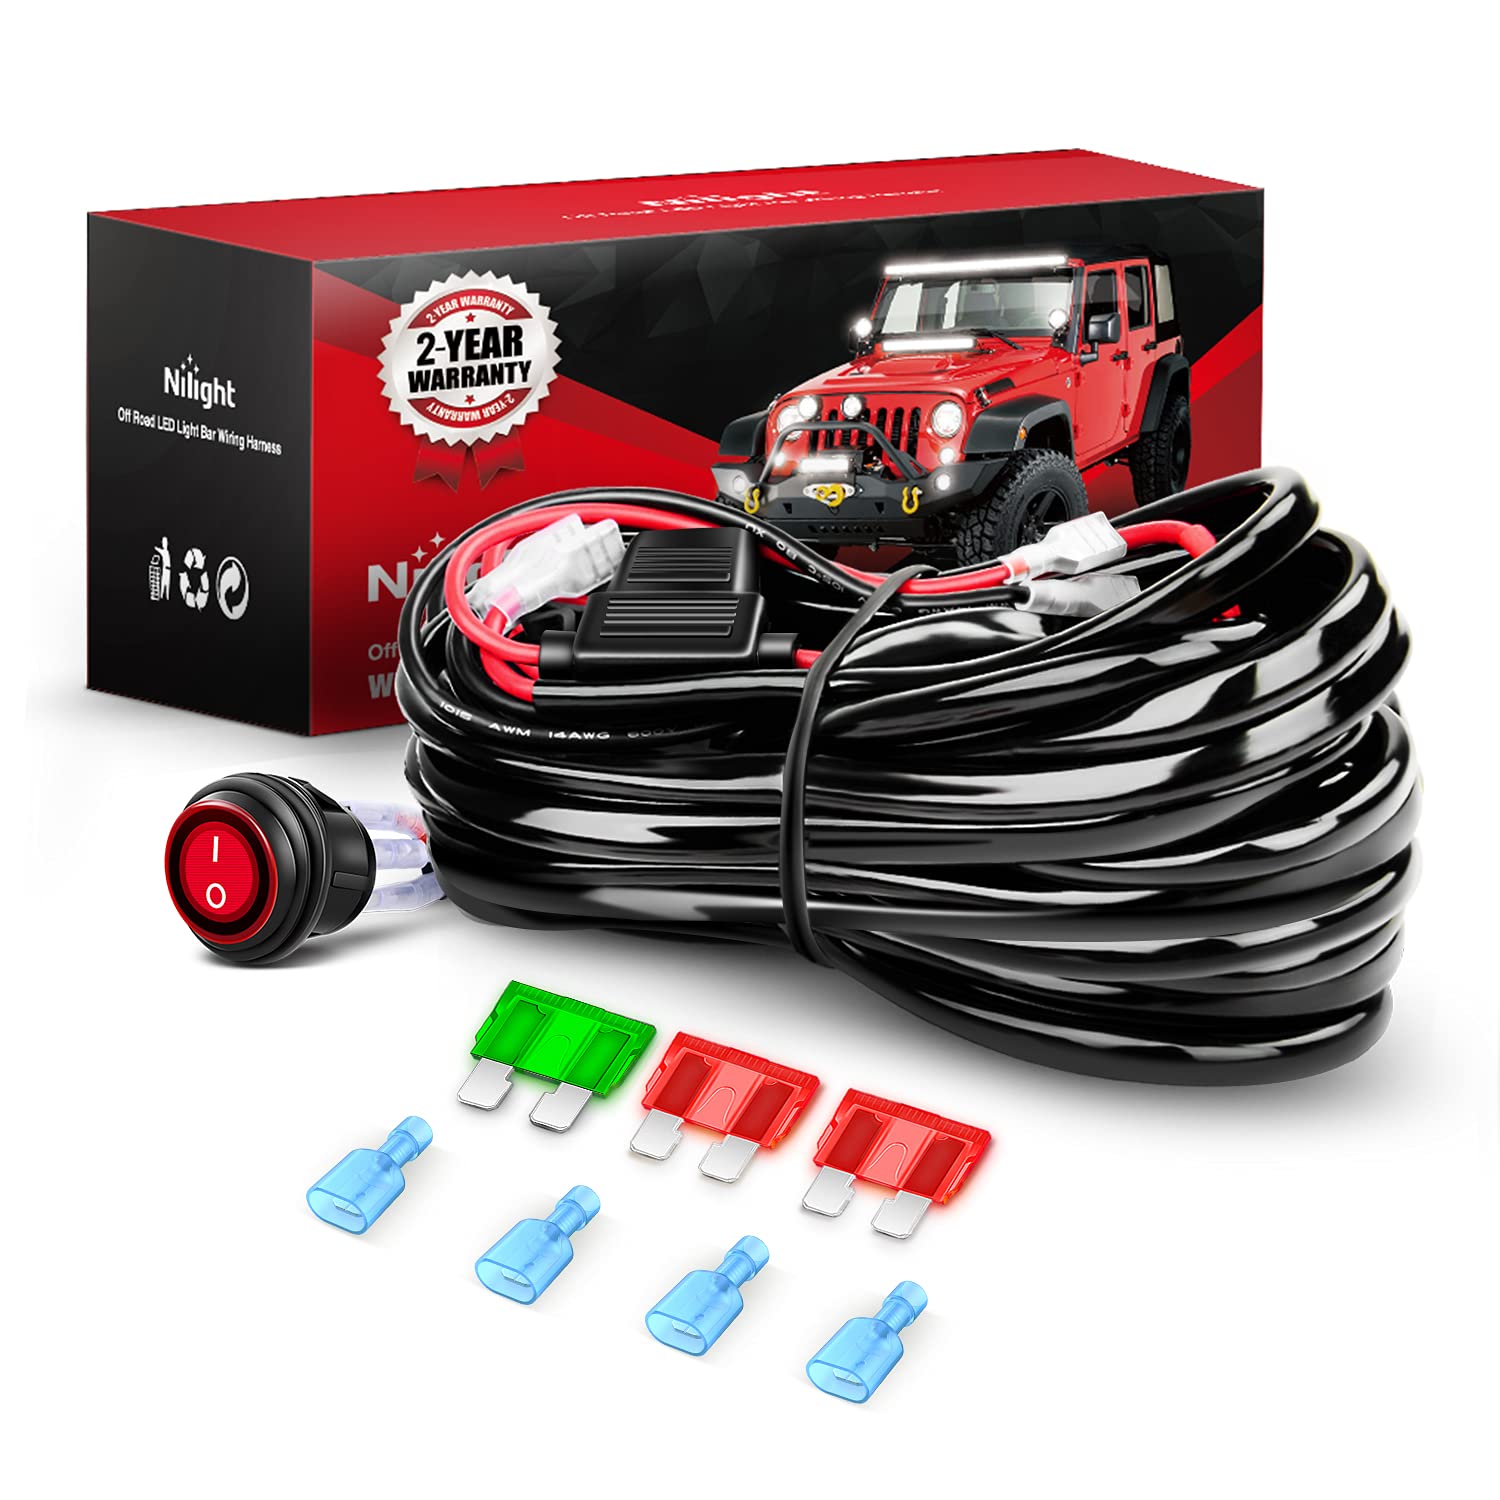
Figure 1: Nilight 12AWG 2-Lead LED Light Bar Wiring Harness Kit components.
2. Product Overview
2.1 Components Included
- 1 x 10-foot Wiring Harness (12AWG)
- 2 x Sets of Light Output Connectors
- 1 x Power Relay (40A)
- 1 x Inline Blade Fuse Holder with Fuse (30A/40A)
- 1 x 3-Pin On/Off Rocker Switch with Red Indicator Light
- 3 x Extra Blade Fuses (for option)
2.2 Key Features
- Dual Lead Design: Equipped with two sets of light output connectors, allowing for the connection of two separate lighting fixtures with a combined wattage of less than 450W.
- Robust Protection: Features a power relay and an inline blade fuse to provide primary defense against overcurrent and short circuits, ensuring system safety.
- Illuminated Rocker Switch: A 3-pin on/off rocker switch with a red indicator light for clear operational status. Tested for over 5,000 presses for durability.
- Wide Compatibility: Suitable for nearly all 12V battery-powered vehicles, including Jeeps, ATVs, UTVs, cars, motorcycles, ships, yachts, and trailers.
- Premium Wiring: Constructed with 12AWG copper wires and high-quality PVC insulation for efficient current transfer and protection against temperature extremes.

Figure 2: Illustration of premium 12AWG copper wires with high-quality PVC insulation.
3. Safety Information
WARNING: Improper installation can lead to electrical shock, fire, or damage to your vehicle and the wiring harness. Always follow these safety guidelines.
- Always disconnect the vehicle's battery before beginning any electrical installation.
- Ensure all connections are secure and properly insulated to prevent short circuits.
- Do not exceed the maximum wattage rating of 450W for connected lighting fixtures.
- Route wires away from hot surfaces, moving parts, and sharp edges.
- Use appropriate personal protective equipment (PPE) such as safety glasses and gloves during installation.
- If you are unsure about any part of the installation process, consult a qualified automotive electrician.
4. Setup and Installation
Follow these steps to install your Nilight LED Light Bar Wiring Harness Kit:
4.1 Installation Diagram

Figure 3: Detailed wiring diagram for the Nilight 12AWG 2-Lead LED Light Bar Wiring Harness.
4.2 Step-by-Step Installation
- Prepare for Installation: Ensure the vehicle's ignition is off and disconnect the negative terminal of the battery to prevent accidental short circuits.
- Connect to Power Supply: Connect the red wire (positive) from the harness to the positive terminal of your vehicle's battery. Connect the black wire (negative) to the negative terminal or a suitable ground point on the vehicle chassis.

Figure 4: Connecting the wiring harness to the vehicle's power supply.
- Mount the Relay: Find a suitable, dry location in the engine bay to mount the power relay. Ensure it is away from excessive heat and moisture. Secure it using appropriate fasteners.

Figure 5: Mounting the power relay securely.
- Install the Switch: Determine a convenient location for the 3-pin rocker switch inside the vehicle cabin. Drill a 20.8mm (approximately 0.82 inches) hole for the switch. Connect the switch wires to the harness and insert the switch into the drilled hole.

Figure 6: The 3-pin illuminated rocker switch and its dimensions.

Figure 7: Example of switch installation in a vehicle interior.
- Connect Lighting Fixtures: Route the two output leads to your LED light bars. Connect the positive and negative wires from each light bar to the corresponding connectors on the harness. Ensure connections are tight and secure.

Figure 8: Connecting two LED light bars to the dual lead wiring harness.

Figure 9: Close-up view of light bar connections.
- Secure Wiring: Use cable ties or clips to secure all wiring, preventing it from dangling, rubbing against sharp edges, or interfering with moving parts.
- Reconnect Battery and Test: Reconnect the negative terminal of the vehicle's battery. Turn on the ignition and test the functionality of your LED light bars using the installed rocker switch.
5. Operating Instructions
Operating the Nilight LED Light Bar Wiring Harness is straightforward:
- To turn on the connected LED light bars, press the 'I' side of the rocker switch. The red indicator light on the switch will illuminate.
- To turn off the connected LED light bars, press the 'O' side of the rocker switch. The red indicator light will turn off.

Figure 10: Examples of the wiring harness in various vehicle applications.
6. Maintenance
Regular maintenance ensures the longevity and reliable performance of your wiring harness:
- Inspect Connections: Periodically check all electrical connections for tightness and corrosion. Clean any corroded terminals.
- Check Wiring: Inspect the wiring for any signs of wear, fraying, or damage. Replace the harness if significant damage is found.
- Fuse Inspection: The inline blade fuse protects the circuit. If the lights stop working, check the fuse. If blown, replace it with a fuse of the same amperage (30A or 40A). Do not use a fuse with a higher amperage rating.

Figure 11: The inline blade fuse holder and included spare fuses.
- Keep Clean: Keep the relay and fuse holder free from dirt and debris. The fuse holder is water-resistant, but excessive exposure to water should be avoided.
7. Troubleshooting
If you encounter issues with your wiring harness, refer to the following common problems and solutions:
| Problem | Possible Cause | Solution |
|---|---|---|
| Lights do not turn on. | Blown fuse. | Check and replace the inline blade fuse. Ensure the replacement fuse has the correct amperage rating. |
| Lights do not turn on. | Loose or incorrect wiring connections. | Verify all connections (battery, relay, switch, lights) are secure and correctly wired according to the diagram. |
| Lights do not turn on. | Faulty switch or relay. | Test the switch and relay for continuity. Replace if found defective. |
| Lights flicker or are dim. | Poor ground connection or insufficient power. | Ensure the ground connection is clean and secure. Check battery voltage. |
| Switch indicator light does not illuminate. | Faulty switch or wiring to the switch. | Check switch wiring and test the switch. |
8. Specifications
| Feature | Specification |
|---|---|
| Model Number | 10044W |
| Harness Length | 10 Feet |
| Max Wattage | 450W |
| Wire Gauge | 12 AWG |
| Number of Leads | 2 |
| Fuse Type | Blade Fuse (30A/40A) |
| Number of Fuses Included | 4 (1 pre-installed, 3 spare) |
| Switch Type | 3-Pin Rocker Switch |
| Operating Voltage | 12V DC |
| Wire Material | Copper |
| Insulation Material | PVC |
| Connector Type | Spade Connector |
9. Warranty and Support
9.1 Warranty Information
The Nilight 12AWG 2-Lead LED Light Bar Wiring Harness Kit comes with a 2-year warranty from the date of purchase. This warranty covers defects in materials and workmanship under normal use. It does not cover damage resulting from improper installation, misuse, accidents, or unauthorized modifications.
9.2 Customer Support
For technical assistance, warranty claims, or any questions regarding your Nilight product, please contact Nilight customer service through their official website or the retailer where the product was purchased. Please have your model number (10044W) and proof of purchase ready when contacting support.


