
1. Introduction
Thank you for choosing the Walfront Dual-Sided Sharpening Stone. This manual provides essential information for the safe and effective use of your new sharpening tool. This sharpening stone features two distinct grit surfaces: a 400-grit side for repairing dull or damaged edges, and a 1500-grit side for fine honing and polishing, ensuring your knives achieve a razor-sharp finish. Please read these instructions carefully before use and retain them for future reference.

Image 1.1: The Walfront Dual-Sided Sharpening Stone, showing its two distinct surfaces.
2. Safety Information
- Always handle sharp objects with extreme care.
- Keep the sharpening stone and sharpened knives out of reach of children.
- Use a stable, non-slip surface for sharpening to prevent accidents.
- Maintain a firm grip on the knife handle during the sharpening process.
- Avoid touching the blade edge directly with your fingers.
- Wear cut-resistant gloves if desired for added protection.
3. Setup
Before using the sharpening stone, it must be properly prepared.
- Soak the Stone: Submerge the entire sharpening stone in water for 5-10 minutes until no more air bubbles appear. This ensures the stone is saturated and ready for use. The stone should remain wet throughout the sharpening process.
- Stabilize the Stone: Place the soaked stone on a stable, non-slip surface. A damp cloth or a dedicated sharpening stone holder can prevent it from sliding during use.
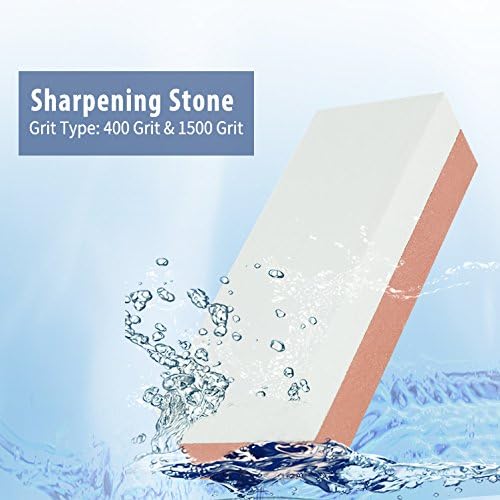
Image 3.1: The sharpening stone being soaked in water, a crucial step before use.
4. Operating Instructions
Follow these steps to sharpen your knives effectively:
4.1. Using the 400-Grit Side (Coarse)
The 400-grit side (often the darker or coarser side) is used for dull or damaged blades, or to establish a new edge.
- Identify the Angle: Determine the existing angle of your knife's edge. A common angle for kitchen knives is 15-20 degrees per side. Maintain this angle consistently throughout the sharpening process.
- Sharpening Motion: Place the blade edge against the 400-grit side of the stone at the correct angle. Using light to moderate pressure, push the blade away from you across the stone, moving from the heel to the tip of the blade. Then, pull the blade towards you, again moving from heel to tip.
- Alternate Sides: Sharpen one side of the blade until a burr (a slight curl of metal) forms on the opposite side. Then, flip the knife and sharpen the other side until a burr forms on the first side. Repeat this process, reducing pressure with each pass, until the burr is very fine.

Image 4.1: Demonstrating the sharpening motion on the coarse grit side of the stone.
4.2. Using the 1500-Grit Side (Fine)
The 1500-grit side (often the lighter or finer side) is used for refining the edge and achieving a polished, razor-sharp finish.
- Transition: Once you have a consistent, fine burr from the 400-grit side, switch to the 1500-grit side. Ensure the stone is still wet.
- Refining Motion: Repeat the same sharpening motion as with the 400-grit side, but use much lighter pressure. The goal here is to remove the burr and polish the edge.
- Stropping: Perform alternating passes on each side of the blade, reducing pressure with each pass. Finish with very light, almost weightless strokes to remove any remaining burr and achieve a mirror-like finish.

Image 4.2: A knife blade positioned on the fine grit side for honing.
4.3. Testing Sharpness
Carefully test the sharpness of your blade. A common test is to try slicing a piece of paper held vertically. A truly sharp knife will slice through it cleanly without tearing.
5. Maintenance
Proper care will extend the life of your sharpening stone.
- Cleaning: After each use, rinse the sharpening stone thoroughly under running water to remove any metal particles and slurry. You can use a soft brush to gently scrub the surface.
- Drying: Allow the stone to air dry completely in a well-ventilated area before storing. Do not store it wet, as this can lead to mold or damage.
- Storage: Store the dry sharpening stone in a cool, dry place, away from direct sunlight or extreme temperatures.
- Flattening: Over time, the stone's surface may become uneven, especially the coarser grit. If this occurs, you can flatten it using a flattening stone or a piece of sandpaper on a flat surface.
6. Troubleshooting
- Knife not getting sharp:
- Ensure the stone is adequately soaked and wet during sharpening.
- Verify you are maintaining a consistent sharpening angle.
- Check for a burr formation on the opposite side of the blade. If no burr forms, you may need more passes or more pressure on the coarse grit.
- Ensure you are progressing from the coarse (400-grit) to the fine (1500-grit) side.
- Stone feels clogged or ineffective:
- Rinse the stone thoroughly to remove accumulated metal particles and slurry.
- If the surface is uneven, consider flattening the stone as described in the Maintenance section.
7. Specifications
| Feature | Detail |
|---|---|
| Brand | Walfront |
| Material | Sharpening Stone (Corundum) |
| Grit Type | Dual-Sided: 400 Grit (Coarse) & 1500 Grit (Fine) |
| Color | Green/Red (Corundum colors) |
| Product Dimensions | Approximately 20cm (L) x 10cm (W) x 10cm (H) |

Image 7.1: The sharpening stone with approximate dimensions for reference.
8. Warranty and Support
For any questions, concerns, or support regarding your Walfront Dual-Sided Sharpening Stone, please refer to the retailer's return policy or contact Walfront customer service through their official channels. Please retain your proof of purchase for warranty claims, if applicable.
For more information about Walfront products, you may visit the Walfront Store on Amazon.