
VEVOR Vacuum Pump 12CFM
VEVOR Vacuum Pump 12 CFM 1 HP Double Stage User Manual
Model: Vacuum Pump 12CFM
Introduction
This manual provides essential information for the safe and efficient operation, maintenance, and troubleshooting of your VEVOR 12 CFM 1 HP Double Stage Vacuum Pump. Please read this manual thoroughly before operating the unit to ensure proper usage and to prevent damage or injury.
The VEVOR vacuum pump is designed for various applications including household air conditioning, automobile maintenance, vacuum packaging, refrigerator vacuum, and industrial uses. Its robust construction and intelligent features ensure reliable performance.
Product Features
- Durable Material: Constructed from heavy-duty aluminum alloy for excellent heat dissipation, durability, and sturdiness. Features a strong copper motor for stable operation and a composite rubber base for extended machine life.
- No Flow Back Design: Engineered to prevent oil from flowing back into the chamber, thus avoiding contamination of the container and tubes. The oil fill port is conveniently accessible from the front or either side for easier oil addition.
- Viewable Oil Window: Equipped with an oil viewing window for easy monitoring of oil levels and quality, helping to prevent oil deficiency. An oil drain valve at the bottom allows for faster and more complete draining.
- Intelligent Radiator: The vacuum pump incorporates a self-cooling mechanism to prevent burnout if an obstruction occurs. Built-in thermal protection further safeguards the machine and extends its operational lifespan.
- Wide Application & Portability: Features an ergonomic grip handle for superior comfort and easy portability. Suitable for a broad range of applications including household air conditioning, automotive repair, vacuum packaging, and industrial vacuum evacuation.
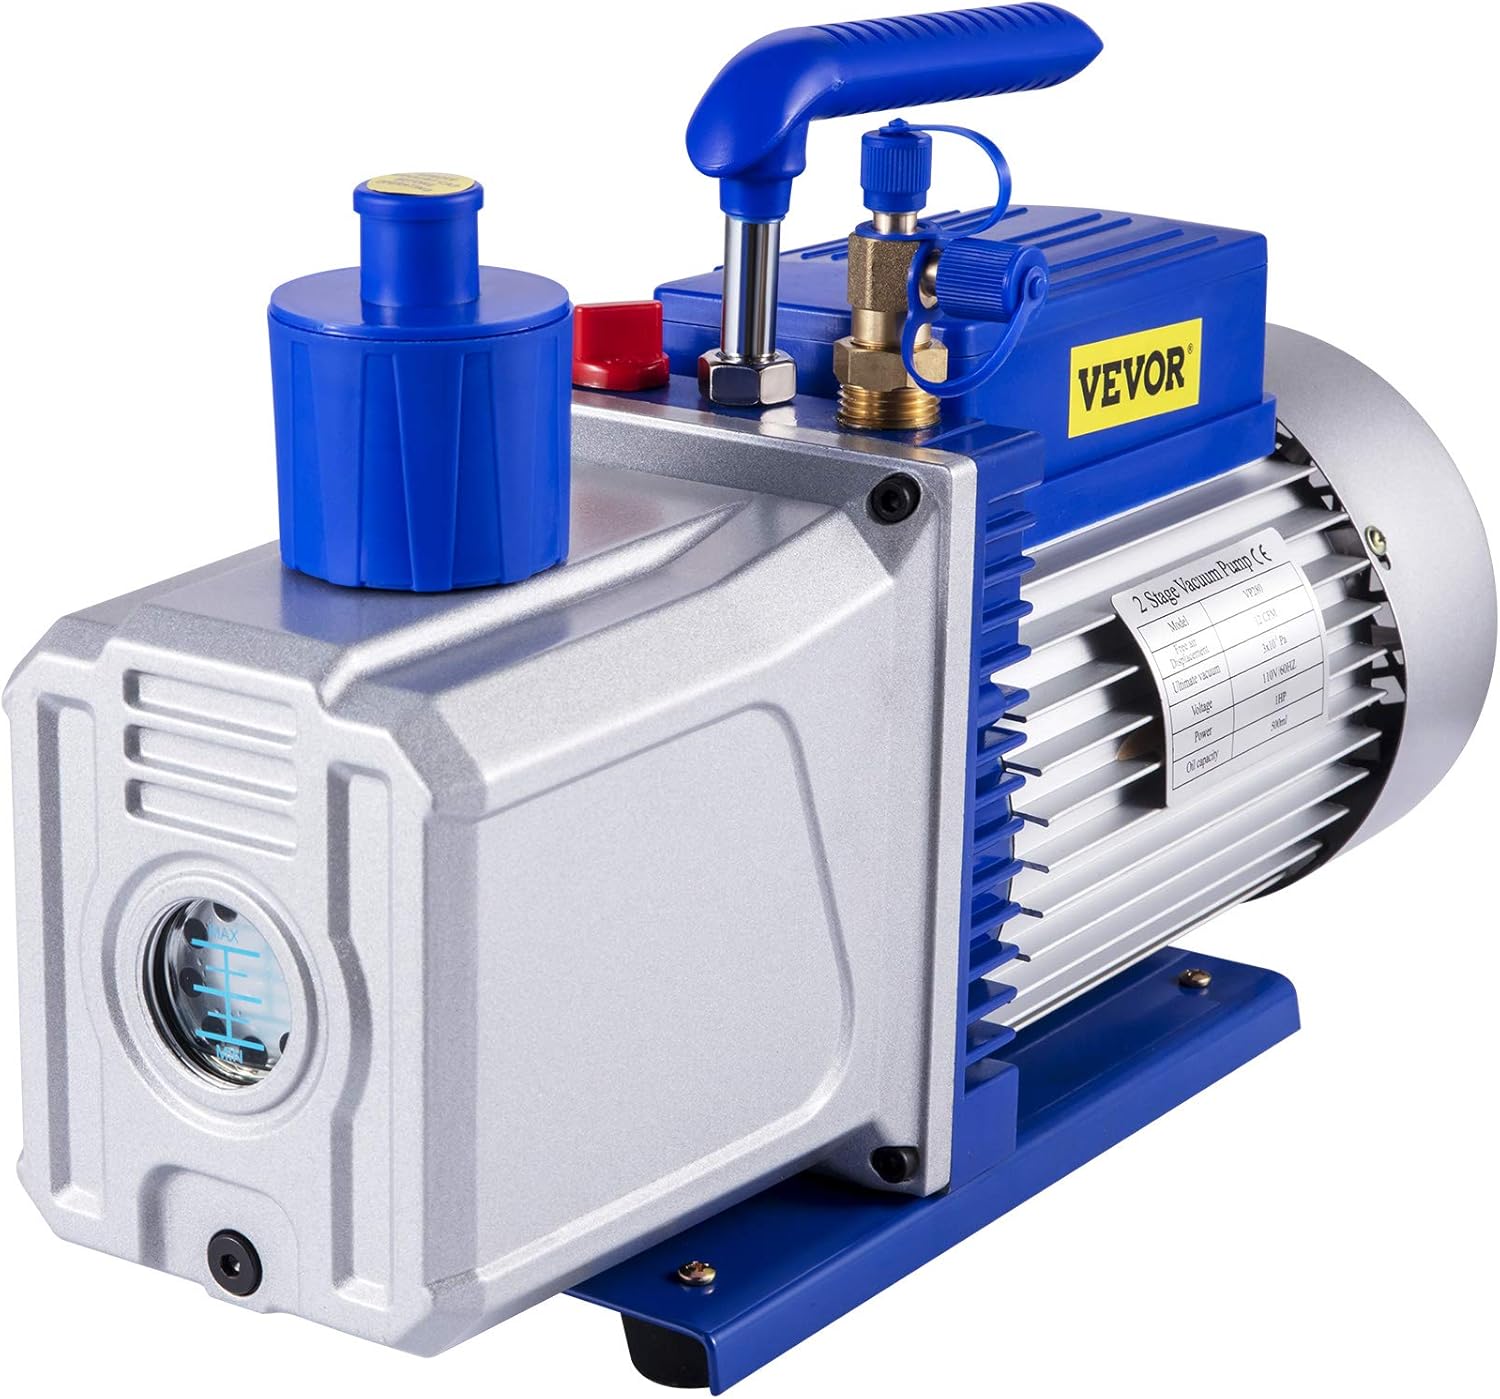
Image: The VEVOR 12 CFM Double Stage Vacuum Pump, showcasing its compact design and robust construction.

Image: Diagram illustrating the stable construction of the vacuum pump, highlighting the copper motor, robust die-cast aluminum housing, and shock-proof, wear-resistant base.

Image: Close-up view of the vacuum pump's top, detailing the inlet port, oil drain hole, and gas exhaust, emphasizing the "No Oil Flow Back" design.

Image: Front view of the vacuum pump showing the large oil sight glass, which allows for easy monitoring of lubricant levels to prevent shortage.

Image: Illustration of the vacuum pump's quick heat dissipation system, highlighting the built-in thermal protection and enlarged mesh heat-sink window for better cooling.

Image: A hand holding the ergonomic handle of the vacuum pump, demonstrating its compact and portable design for easy transport.

Image: Collage showing various applications of the VEVOR vacuum pump, including lab equipment, vacuum packing, refrigerator maintenance, and auto repair industry.
What's in the Box
Upon unpacking, please verify that all components listed below are present and undamaged.
- 1 x Rotary Vane Vacuum Pump (12CFM Two-Stage)
Specifications
| Manufacturer | VEVOR |
|---|---|
| Brand | VEVOR |
| Model | Vacuum Pump 12CFM |
| Item Weight | 37 pounds |
| Product Dimensions | 19.7 x 13 x 8.7 inches |
| Item Model Number | Vacuum Pump 12 CFM |
| Manufacturer Part Number | Vacuum pump 12CFM |
| ASIN | B093KZLGH5 |
| Date First Available | July 29, 2021 |

Image: Diagram showing the dimensions of the VEVOR Vacuum Pump, including length, width, and height measurements.
Setup
- Unpacking: Carefully remove the vacuum pump and all accessories from the packaging. Inspect for any signs of damage during transit.
- Placement: Place the pump on a stable, level surface in a well-ventilated area. Ensure there is adequate space around the pump for air circulation and heat dissipation.
- Oil Filling: Before first use, or if the oil level is low, add appropriate vacuum pump oil through the oil fill port. Use the oil sight glass to ensure the oil level is between the MIN and MAX marks. Do not overfill.
- Electrical Connection: Ensure the power switch is in the "OFF" position. Connect the power cord to a grounded 110V AC power outlet. Verify that the voltage matches the pump's requirements.
- Hose Connection: Connect the appropriate vacuum hose to the inlet port of the pump. Ensure all connections are tight to prevent leaks.
Operating Instructions
- Pre-Operation Check:
- Confirm oil level is correct.
- Ensure all connections are secure.
- Verify the power supply is correct.
- Starting the Pump: Flip the power switch to the "ON" position. The pump should start running smoothly.
- Vacuum Evacuation: Allow the pump to run until the desired vacuum level is achieved. Monitor the vacuum gauge (if connected) and the oil sight glass during operation.
- Shutting Down:
- Close the valve on the vacuum system to isolate the pump.
- Flip the power switch to the "OFF" position.
- Disconnect the vacuum hose from the pump.
- Post-Operation: If the pump will not be used for an extended period, drain the oil and store the pump in a dry, clean environment.
Maintenance
Regular maintenance is crucial for the longevity and optimal performance of your vacuum pump.
- Oil Change: Change the vacuum pump oil regularly, especially if it appears cloudy, discolored, or contaminated. The frequency depends on usage and application. For heavy use, change oil more frequently.
- Oil Draining: To drain oil, place a suitable container under the oil drain valve and open the valve. Once drained, close the valve and refill with new, clean vacuum pump oil.
- Cleaning: Keep the exterior of the pump clean and free from dust and debris. Ensure the heat dissipation fins are not obstructed to maintain efficient cooling.
- Storage: When storing the pump for extended periods, ensure it is clean, dry, and filled with fresh oil. Store in a cool, dry place away from direct sunlight and extreme temperatures.
Troubleshooting
| Problem | Possible Cause | Solution |
|---|---|---|
| Pump does not start or hums | No power, incorrect voltage, motor seized, thermal overload activated. | Check power connection and outlet. Verify voltage. Allow pump to cool if thermal protection activated. If motor is seized, contact customer support. |
| Poor vacuum performance | Low oil level, contaminated oil, leaks in system/hoses, worn pump components. | Check and refill/replace oil. Inspect all connections and hoses for leaks. If problem persists, internal components may need service. |
| Excessive noise or vibration | Low oil, contaminated oil, loose components, pump not level. | Check and replace oil. Ensure pump is on a stable, level surface. Inspect for loose parts. |
| Oil spitting from exhaust | Overfilled oil, contaminated oil, rapid pressure changes. | Check oil level and drain if overfilled. Change contaminated oil. Operate pump more slowly during initial evacuation. |
Warranty and Support
VEVOR is committed to providing high-quality products and excellent customer service. For warranty information, technical support, or service inquiries, please contact VEVOR customer service through their official website or the retailer where the product was purchased.
You can visit the official VEVOR store for more information: VEVOR Official Store
Related documentsVacuum Pump 12CFM


Ask a question about this manual
Ask about setup, troubleshooting, compatibility, parts, safety, or missing instructions. Manuals+ will review the question and use this page’s manual context to help answer it.