
1. Introduction
This manual provides instructions for the installation and care of your Spigen AlignMaster Tempered Glass Screen Protector. This product is designed to protect your device's screen from scratches and impacts while maintaining touch sensitivity and clarity.
2. Compatibility
The Spigen AlignMaster Tempered Glass Screen Protector (Model AGL03012) is compatible with the following Samsung Galaxy models:
- Samsung Galaxy A52 5G
- Samsung Galaxy A52 4G
- Samsung Galaxy A52s 5G
Important: Please verify your phone model before installation to ensure proper fit.

Figure 2.1: Compatibility check for Samsung Galaxy A52 series.
3. Package Contents
Your Spigen AlignMaster package typically includes:
- 2x Spigen AlignMaster Tempered Glass Screen Protectors
- 1x AlignMaster Installation Frame
- Cleaning kit (wet wipe, microfiber cloth, dust removal sticker)
- Squeegee for bubble removal
4. Installation Guide
The AlignMaster kit is designed for a precise and bubble-free installation. Follow these steps carefully:
- Prepare Your Workspace: Ensure you are in a clean, dust-free environment with good lighting. Wash your hands thoroughly.
- Clean the Screen:
- Use the provided wet wipe to thoroughly clean your phone's screen, removing all smudges and oils.
- Dry the screen completely with the microfiber cloth.
- Use the dust removal sticker to pick up any remaining dust particles. Ensure the screen is perfectly clean before proceeding.
- Attach the Installation Frame:
- Place the AlignMaster installation frame onto your phone. It is designed to fit snugly and guide the screen protector into the correct position.
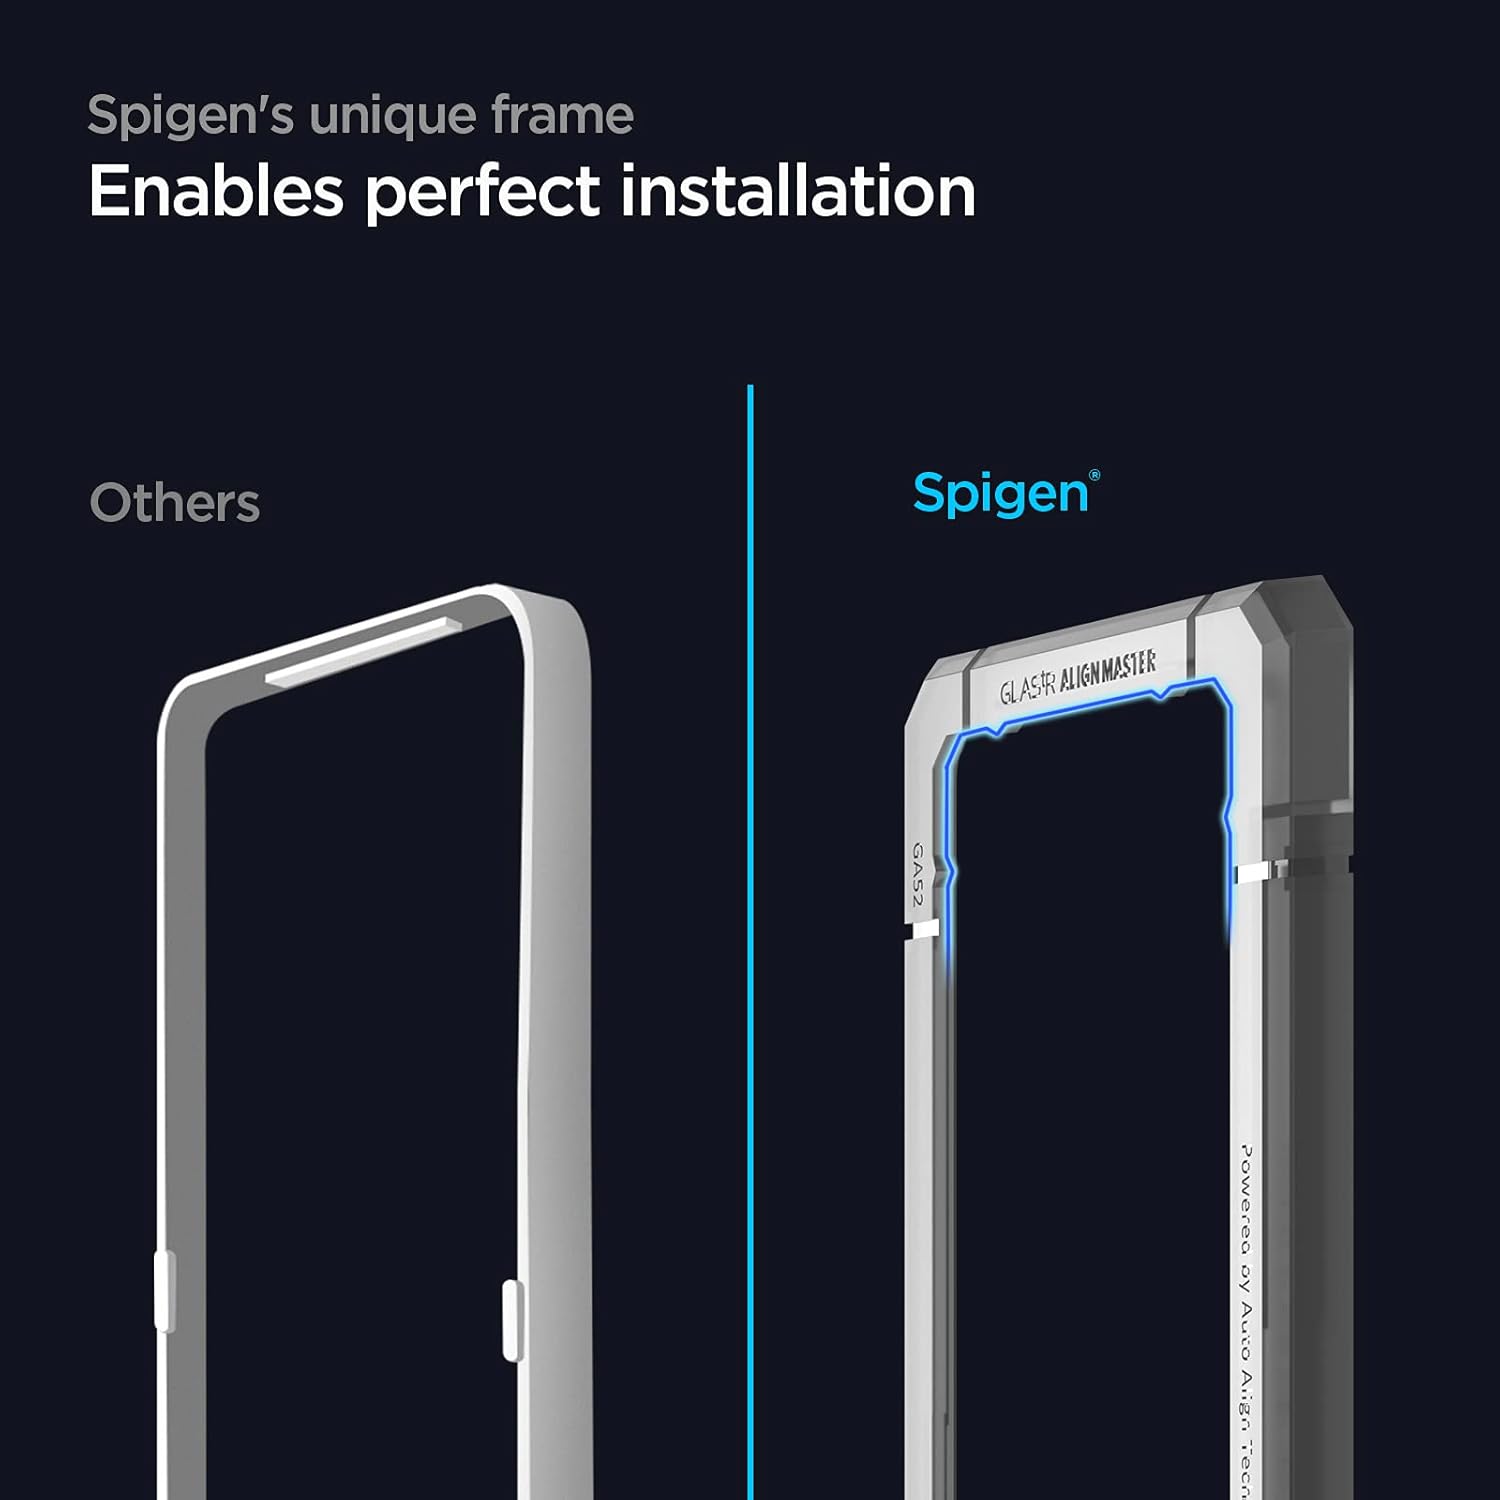
Figure 4.1: Using the Smart Installer for precise alignment.
- Apply the Screen Protector:
- Carefully peel off the protective film from the adhesive side of the tempered glass screen protector. Avoid touching the adhesive.
- Align the screen protector with the top edge of the installation frame. Gently lower the protector onto the screen. The frame will ensure perfect alignment.
- Once the protector makes contact with the screen, it will begin to adhere automatically.
- Remove Air Bubbles:
- If any small air bubbles remain, use the provided squeegee to gently push them towards the edges of the screen.
- Start from the center and work your way outwards.
- Remove the Installation Frame:
- Once the screen protector is fully adhered and free of bubbles, carefully remove the AlignMaster installation frame.
- Final Cleaning:
- Wipe the newly installed screen protector with the microfiber cloth to remove any fingerprints or smudges.

Figure 4.2: Spigen's unique frame ensures perfect installation.
5. Usage and Features
5.1. Daily Protection
This tempered glass screen protector provides 9H hardness, offering robust protection against daily scratches, minor impacts, and abrasions. It acts as a sacrificial layer to safeguard your phone's original screen.

Figure 5.1: Screen protector offering daily protection.
5.2. Touch Responsiveness
The ultra-thin design ensures that your screen's original touch sensitivity is maintained, providing a smooth and responsive user experience.

Figure 5.2: Maintaining original touch responsiveness.
5.3. Crystal Clear Display
Enjoy the untainted clarity of your device's display. The high-transparency glass ensures vibrant colors and sharp details are preserved.

Figure 5.3: Crystal clear display quality.
5.4. Case Compatibility
This screen protector is designed to be compatible with all Spigen cases, ensuring a seamless fit and comprehensive protection for your device.

Figure 5.4: Flawless fit with Spigen cases.
6. Maintenance
To maintain the clarity and effectiveness of your screen protector:
- Regularly wipe the screen with a soft, lint-free cloth to remove fingerprints and smudges.
- For stubborn marks, use a screen cleaner specifically designed for electronics. Avoid harsh chemicals or abrasive materials.
- The oleophobic coating helps resist fingerprints, but occasional cleaning is still recommended.
7. Troubleshooting
7.1. Air Bubbles After Installation
- Small Bubbles: Minor bubbles often disappear within 24-48 hours as the adhesive fully settles.
- Persistent Bubbles: Use the provided squeegee or a credit card wrapped in a microfiber cloth to gently push bubbles towards the nearest edge. Apply firm, even pressure.
- Dust Particles: If a bubble is caused by a dust particle, it may be necessary to carefully lift a corner of the protector (using a dust removal sticker or tape) to remove the dust, then reapply. This should be done with extreme caution to avoid damaging the adhesive or introducing more dust.
7.2. Fingerprint Scanner Issues
Some users may experience reduced fingerprint scanner sensitivity after installing a screen protector.
- Re-register Fingerprints: After installing the screen protector, it is highly recommended to delete your existing fingerprints and re-register them. This allows the device to learn your fingerprint with the screen protector in place.
- Apply Pressure: When registering or using the fingerprint scanner, ensure you apply firm and consistent pressure.
8. Specifications
| Model Number | AGL03012 |
| Material | Tempered Glass |
| Hardness | 9H |
| Compatible Devices | Samsung Galaxy A52, A52 4G, A52 5G, A52s 5G |
| Special Features | AlignMaster Installation Frame, Oleophobic Coating, Case Compatible |
| Items per Unit | 2 Screen Protectors |
| Dimensions (L x W) | 15.3 cm x 6.9 cm (approximate) |
9. Warranty and Support
For warranty information or technical support, please refer to the official Spigen website or contact their customer service directly. Details are typically available on the product packaging or on the Spigen support page.
