1. Introduction
Thank you for choosing the Gateman Digital Door Lock. This manual provides essential information for the safe and efficient operation of your WNR-IS110 or WNR-IS120 digital door lock. Please read this manual thoroughly before installation and use, and keep it for future reference.
The Gateman WNR-IS110 and WNR-IS120 models offer advanced security features and convenient access methods. The WNR-IS110 primarily uses password authentication, while the WNR-IS120 supports both password and card key authentication.
3. Package Contents
Please verify that all components are present in the package:
- Gateman Digital Door Lock Unit (Exterior and Interior)
- Mortise Lock Body
- Strike Plate
- Mounting Hardware (Screws, Spindles, etc.)
- User Manual
- Card Keys (for WNR-IS120 model only)
- Emergency Keys (if applicable)
If any items are missing or damaged, please contact your retailer or Gateman customer support.
5. Operating Instructions
This section details the various methods for operating your Gateman Digital Door Lock.
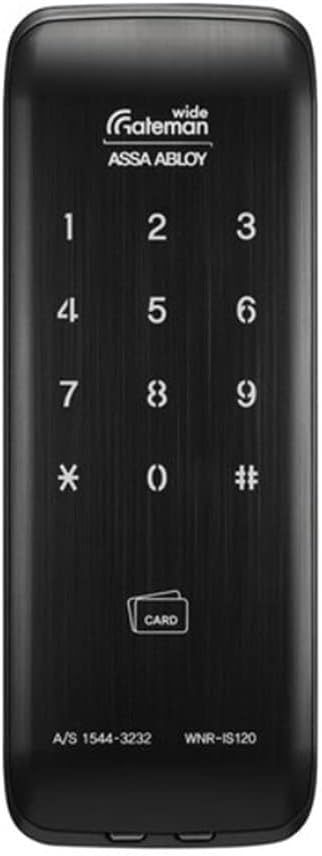
Figure 5.1: Front view of the Gateman WNR-IS120 Digital Door Lock, showing the numeric keypad (1-9, *, 0, #) and the 'CARD' icon for card key authentication. The model number WNR-IS120 is visible at the bottom right.
5.1 Initial Setup and Master Password Registration
Upon first power-up, you will need to register a master password. This password is used for managing other settings and user access.
- Open the battery cover on the interior unit.
- Press the [Registration] button (usually located near the battery compartment).
- On the exterior keypad, enter your desired 4 to 10 digit master password.
- Press the [#] button to confirm.
- The lock will emit a confirmation sound.
Note: Keep your master password confidential.
5.2 Opening the Door (Password)
To unlock the door using a password:
- Touch the keypad to activate it.
- Enter your registered password (4 to 10 digits).
- Press the [#] button.
- The lock will unlock. Turn the handle to open the door.
Tip: Use the "Relief Imaginary Function" by entering random numbers before or after your actual password to prevent exposure. For example, if your password is 1234, you can enter 567123489#.
5.3 Opening the Door (Card Key - WNR-IS120 only)
To unlock the door using a registered card key:
- Place your registered card key on the card reader area (indicated by the 'CARD' icon).
- The lock will unlock. Turn the handle to open the door.
5.3.1 Registering Card Keys
- Open the battery cover on the interior unit.
- Press the [Registration] button.
- Place each card key you wish to register on the card reader area. The lock will beep for each successful registration.
- Press the [Registration] button again to exit registration mode.
5.3.2 Deleting Lost Card Keys
If a card key is lost, you can delete it by re-registering all remaining valid card keys. The lost key will automatically be removed from the system.
- Open the battery cover on the interior unit.
- Press the [Registration] button.
- Place ALL remaining valid card keys on the card reader area, one by one.
- Press the [Registration] button again to exit registration mode.
5.4 Locking the Door
5.4.1 Automatic Locking
The lock is set to automatically lock after the door is closed. Ensure this feature is enabled in settings (refer to advanced settings in the full manual if available).
5.4.2 Manual Locking (Exterior)
To manually lock from the exterior, simply touch the keypad or press the [#] button after closing the door.
5.4.3 Manual Locking (Interior)
To manually lock from the interior, press the [Close] button or turn the thumb-turn (if applicable).
5.5 Forced Locking Function
5.5.1 Internal Forced Locking (Privacy Mode)
When activated, this function prevents the lock from being opened from the exterior using passwords or card keys. Ideal for when all family members are home.
- From the interior, press and hold the [Internal Forced Lock] button (or equivalent) for 3 seconds.
- The lock will confirm activation.
- To deactivate, simply open the door from the inside or deactivate via the interior unit.
5.5.2 External Forced Locking (Security Mode)
When activated, this function triggers an intrusion warning sound if the door is opened from the inside. Useful when leaving for extended periods (holidays, vacation).
- From the exterior, after closing the door, press and hold the [External Forced Lock] button (or equivalent) for 3 seconds.
- The lock will confirm activation.
- To deactivate, unlock the door normally from the exterior using a valid password or card key.
6. Maintenance
6.1 Cleaning
- Wipe the lock's surface with a soft, dry cloth.
- Do not use water, alcohol, or chemical cleaners, as they may damage the surface or internal components.
- The "Secure Palm Touch" feature helps minimize fingerprint residue on the keypad.
6.2 Battery Replacement
The lock will provide a low battery warning (audible alarm or indicator light) when batteries need replacement. Replace all batteries simultaneously with new ones of the same type.
- Open the battery cover on the interior unit.
- Remove all old batteries.
- Insert new AA alkaline batteries, ensuring correct polarity (+/-).
- Close the battery cover.
Note: If batteries are completely depleted, you may use a 9V battery for emergency power on the exterior unit (contact points usually located at the bottom of the exterior unit) to enter your password and open the door.
9. Warranty and Support
Gateman products are designed for durability and reliability. For specific warranty terms and conditions, please refer to the warranty card included with your product or visit the official Gateman website.
Customer Support
If you encounter any issues or have questions regarding your Gateman Digital Door Lock, please contact customer support. When contacting support, please have your model number (WNR-IS110 or WNR-IS120) and purchase information ready.
Contact Information (Example - please refer to product packaging for official contact details):
- Phone: A/S 1544-3232
- Website: www.gateman.co.kr
- Email: Refer to official website for contact form or email address.
For protection plans, consider options available at the time of purchase, such as 3-Year or 4-Year Protection Plans.


