
Introduction
This manual provides detailed instructions for the safe and effective use of the Elitech LD-100+ Refrigerant Leak Detector. The LD-100+ is an advanced halogen gas leak detector designed for identifying leaks in various refrigeration systems. It features a high-precision heated diode sensor and supports a wide range of refrigerants.
Product Overview
Key Features
- High-precision heated diode sensor for extended life.
- Detects R11, R22, R404a, R410a, R600a, R1234yf, and all halogenated refrigerants including CFCs, HFCs, HCFCs, HCs, HFOs, and blends.
- Two detection modes: Automatic and Manual, suitable for various environments.
- Fast response: Warms up in 30 seconds, responds in 3 seconds.
- Three adjustable sensitivity levels with a maximum sensitivity of 0.11 oz/yr.
- New pump-suction structure for increased sensitivity and anti-water absorption.
- Meets CE and EN14624 safety standards.
Product Components
The image below illustrates the main components of the Elitech LD-100+ Refrigerant Leak Detector.
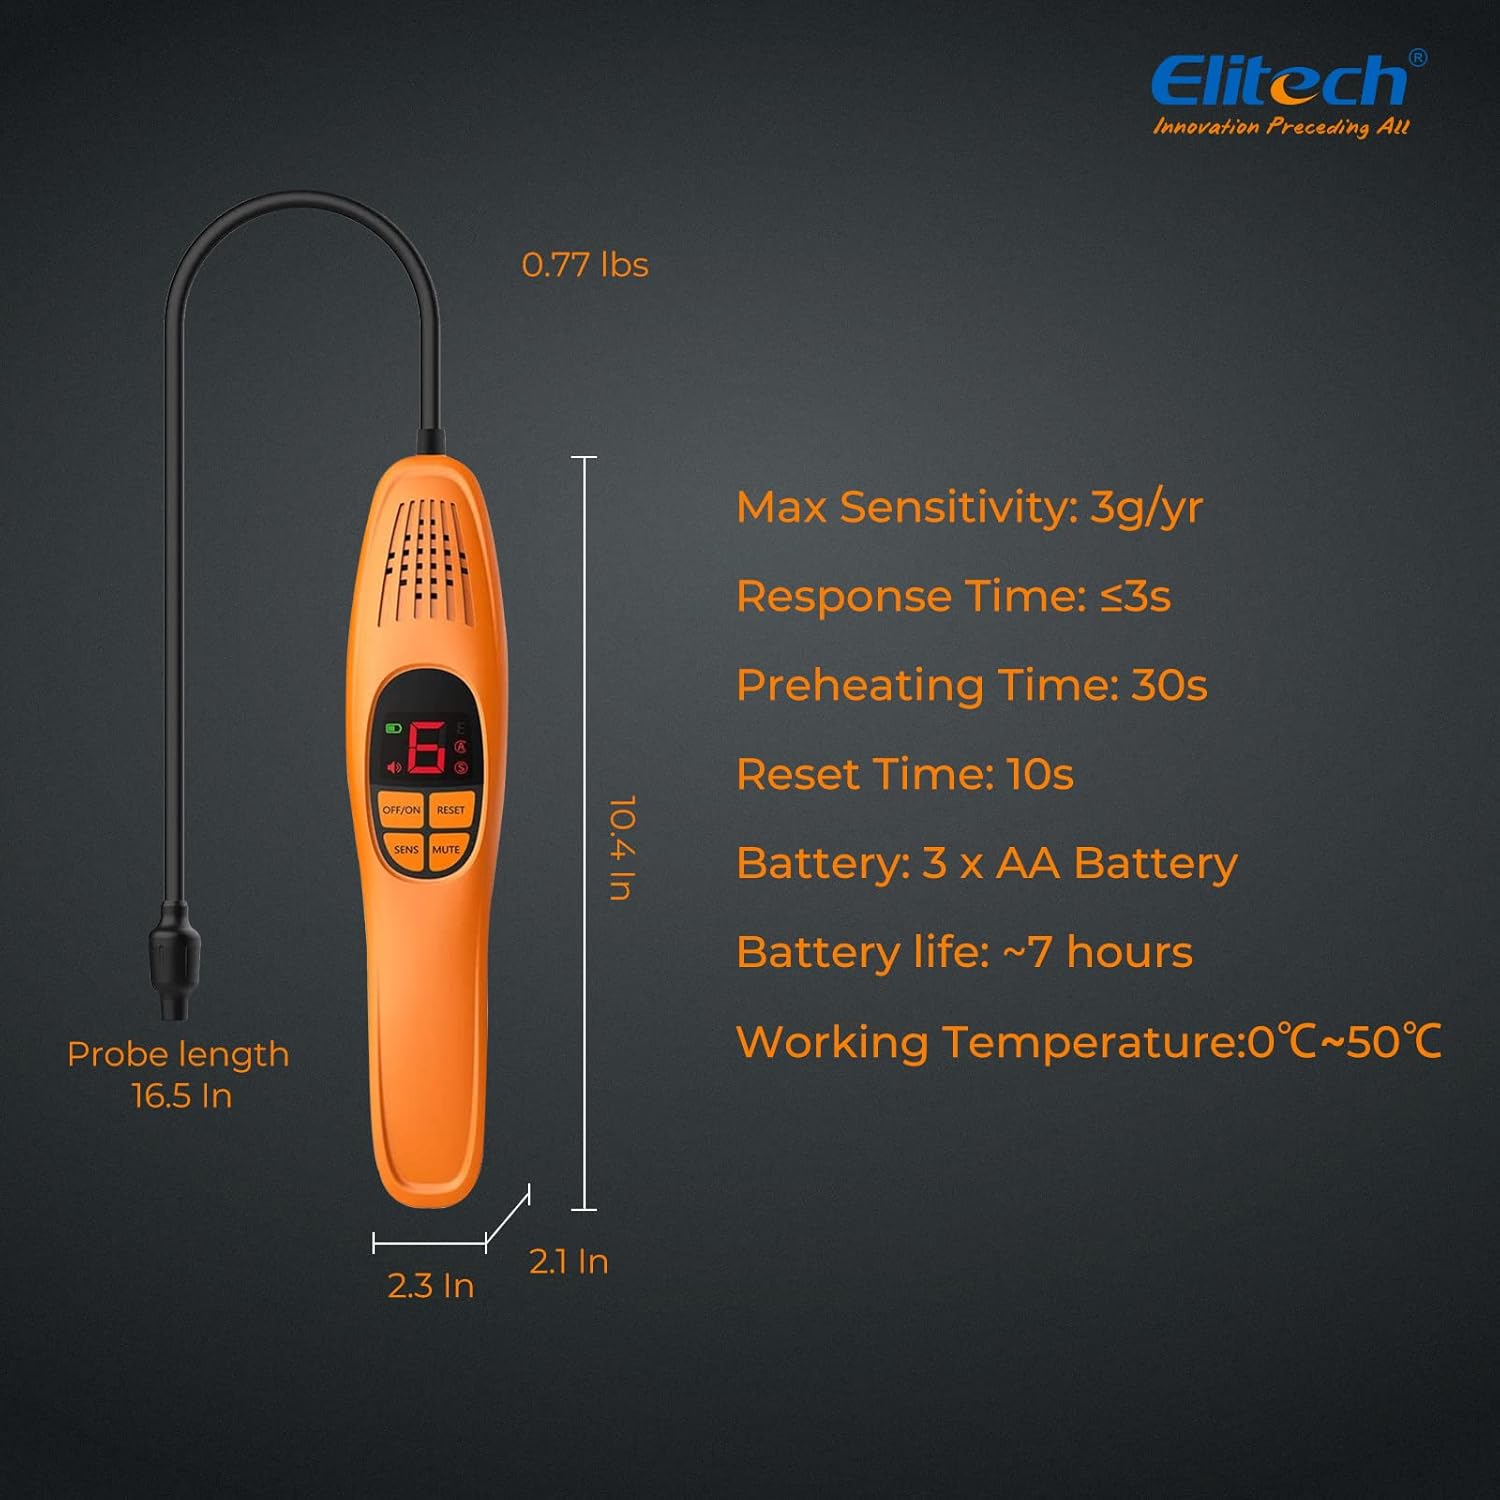
Image: Labeled diagram of the LD-100+ showing the flexible probe, sensor, battery icon, buzzer icon, alarm icon, auto reset icon, sensitivity icon, auto reset button, On/Off button, mute button, sensitivity button, and battery base.
Supported Refrigerant Types
The LD-100+ is capable of detecting a wide range of refrigerants, including:

Image: Visual list of detectable refrigerants including HFCs (R134a, R410a, R407C, R417A, R404A, R507, R23, R508A, R508B, R152A, R32), HCFCs (R22, R123, R124, R141b, R142b, R402A, R402B, R408A, R409A), CFCs (R11, R12, R13, R502, R503), PFCs (PFC-14, PFC-116, PFC-218), HFO (R-1234YF), and HCs (R50, R170, R290, R600, R600A, R1150, R1270).
Setup
Unpacking and Initial Inspection
Carefully remove the leak detector and all accessories from the packaging. Inspect the device for any signs of damage. The packing list typically includes:
- 1 x Leak Detector with Heated Diode Gas Sensor
- 3 x AA Batteries
- 1 x Packing Case
- 1 x User Manual

Image: The Elitech LD-100+ leak detector, its packaging, and included accessories such as batteries and user manual.
Battery Installation
The LD-100+ requires 3 AA batteries (included). Open the battery compartment located at the base of the device and insert the batteries, ensuring correct polarity. Close the compartment securely.

Image: Diagram showing the dimensions of the LD-100+ (10.4 inches length, 2.3 x 2.1 inches body, 16.5 inches probe length) and battery specifications (3 x AA Battery, ~7 hours battery life).
Operating Instructions
Familiarize yourself with the control panel before operation.

Image: Close-up of the LD-100+ control panel showing the digital display, battery indicator, alarm indicator, and buttons for OFF/ON, RESET, SENS (Sensitivity), and MUTE.
Power On/Off
Press the OFF/ON button to power the device on or off. The device will undergo a brief warm-up period (approximately 30 seconds) before it is ready for use.
Sensitivity Adjustment
The LD-100+ offers three adjustable sensitivity levels to adapt to different leak detection scenarios. Press the SENS button to cycle through the sensitivity levels: High (Red), Medium (Orange), and Low (Green). Higher sensitivity is suitable for detecting very small leaks, while lower sensitivity helps pinpoint larger leaks without false alarms from ambient refrigerant.
Detection Modes (Automatic & Manual Reset)
The device supports both automatic and manual reset modes:
- Automatic Reset: Indicated by an 'A' icon on the display. In this mode, the detector automatically sets the current ambient refrigerant concentration as the reference point. This is useful for general scanning.
- Manual Reset: To enter manual reset mode, long-press the RESET button. The device will take the current ambient concentration as the reference point. This mode is particularly useful for finding the exact leak point in an environment where there are already significant refrigerant concentrations.
Mute Function
Press the MUTE button to toggle the audible alarm on or off. The visual alarm will remain active regardless of the mute setting.
Leak Detection Procedure
- Power on the device and allow it to warm up.
- Select the appropriate sensitivity level using the SENS button.
- Move the probe slowly (approximately 1 inch per second) around the suspected leak area.
- When a leak is detected, the device will alarm (audibly and visually), and the display will show an increasing concentration reading.
- To pinpoint the exact leak location, use the manual reset mode to re-zero the device in the vicinity of the leak, then move the probe closer to isolate the source.

Image: An overview of the LD-100+ features, highlighting 3 sensitivity levels, 1 year sensor life, audible & visual alarm, anti-water absorption probe, 2 reset modes (Auto & Manual), and detectable HFCs/HCs.

Image: Illustrates the IP65 waterproof level and the new suction structure design of the LD-100+, which enhances sensitivity and prevents water absorption.
Maintenance
Sensor Replacement
The heated diode sensor has a limited lifespan and may need replacement if the device consistently provides inaccurate readings or fails to detect refrigerants. Refer to the video below for instructions on how to replace the sensor.
Video: This video demonstrates how to replace the heated diode sensor on the Elitech LD-100+ Refrigerant Leak Detector. It shows the process of unscrewing the old sensor and installing a new one.
Cleaning
Wipe the device with a soft, dry cloth. Do not use abrasive cleaners or solvents. Ensure the sensor tip is free from debris for optimal performance.
Storage
Store the leak detector in its protective case in a cool, dry place when not in use. Remove batteries if storing for extended periods to prevent leakage.
Troubleshooting
Device Alarms Continuously or Fails to Detect Refrigerant
If your leak detector is constantly alarming or not detecting refrigerant as expected, consider the following:
- High Refrigerant Concentration in Environment: The ambient refrigerant concentration might be too high, leading to false alarms. Try moving to a clean air environment and resetting the device.
- Sensor Issues: The sensor may be faulty or at the end of its lifespan. Consider replacing the heated diode sensor as shown in the maintenance section.
The following video provides guidance on self-checking your leak detector for these issues:
Video: This video explains common reasons why the leak detector might alarm continuously or not detect refrigerant, and suggests self-check methods including using the reset button and considering sensor replacement.
If problems persist after performing these checks, please contact Elitech customer support with photos and videos of the issue for further assistance.
Specifications
| Attribute | Value |
|---|---|
| Brand | Elitech |
| Model | LD-100+ |
| Power Source | Battery Powered (3 x AA Lithium Metal batteries included) |
| Item Weight | 12.32 ounces |
| Product Dimensions | 2.3 x 2.1 x 10.1 inches |
| Alarm Type | Audible |
| Operating Humidity | 80 percent |
| Upper Temperature Rating | 52 Degrees Celsius |
| Sensor Type | Heated diode |
| Max Sensitivity | 0.11 oz/yr (3g/yr) |
| Response Time | ≤3s |
| Preheating Time | 30s |
| Reset Time | 10s |
| Battery Life | ~7 hours |
| Working Temperature | 0°C ~ 50°C |
Warranty and Support
Warranty Information
The Elitech LD-100+ Refrigerant Leak Detector comes with a manufacturer's warranty for 365 days from the date of purchase. Please retain your proof of purchase for warranty claims.
Customer Support
For technical assistance, troubleshooting, or any product-related inquiries, Elitech offers 24/7 US Technician Support via email and phone. Please refer to the contact information provided with your product or on the official Elitech website.


