
1. Introduction
Thank you for choosing upHere NT1206-6 ARGB 120mm PC Cooling Fans. This manual provides detailed instructions for the installation, operation, and maintenance of your new cooling fans. Please read this manual thoroughly before installation and keep it for future reference.

Image: Overview of the upHere NT1206-6 ARGB 120mm PC Cooling Fans and included remote control.
2. Safety Information
- Ensure your computer is powered off and unplugged from the wall outlet before installation.
- Handle components with care to avoid damage.
- Do not attempt to modify the product. Unauthorized modifications may void your warranty and pose safety risks.
- Keep out of reach of children.
3. Package Contents
Verify that all components are present in your package:
- upHere NT1206-6 ARGB 120mm PC Cooling Fans (6 units)
- Fan Hub/Controller
- Wireless RF Remote Control
- Mounting Screws
- Cables for power and ARGB synchronization
4. Product Features
- Wireless RF Remote Control: A wireless remote is included for convenient operation. It allows adjustment of fan speed (Slow/Medium/High), lighting effects, brightness, and LED speed without opening the PC case.
- Motherboard ARGB Synchronization: Control fan lighting via 5V addressable RGB motherboards. Compatible with software such as ASUS Aura Sync, Gigabyte RGB Fusion, and MSI Mystic Light Sync.
- Anti-Vibration Design: The fan frame features 8 shock-absorbing rubber pads on both sides. These pads ensure stable operation within the computer case and reduce noise generated by fan-to-case contact.
- High-Quality Fan Blades: The 120mm fan blades are designed for low-noise operation while maintaining optimal performance.
- Optimized Fan Frame: An improved fan frame structure reduces turbulent airflow noise and enhances cooling efficiency.

Image: Illustration of optimal cooling airflow provided by the fan.
5. Setup and Installation
Follow these steps to install your upHere ARGB cooling fans:
- Prepare your PC: Power off your computer and unplug it from the power source. Open your PC case.
- Mount the Fans: Position the fans in your desired locations (e.g., front, top, rear, bottom of the case). Secure each fan using the provided mounting screws. Ensure the airflow direction is correct for your cooling setup.
- Connect to Fan Hub: Connect each fan's 6-pin cable to the fan hub/controller. The hub typically has numbered ports for multiple fans.
- Power the Hub: Connect the fan hub to your power supply unit (PSU) using the SATA power connector.
- ARGB Synchronization (Optional): If you wish to synchronize the fan lighting with your motherboard's ARGB software, connect the hub's 5V ARGB cable to a compatible 3-pin 5V ARGB header on your motherboard. Do NOT connect to a 12V RGB header, as this will damage the LEDs.
- Cable Management: Route all cables neatly to ensure proper airflow and a clean build.
- Close PC Case: Once all connections are secure, close your PC case and reconnect the power.

Image: Wiring diagram for connecting upHere ARGB fans to the controller and motherboard.

Image: Example of upHere NT1206-6 fans installed within a computer case.
6. Operating Instructions
Your upHere ARGB fans can be controlled via the included wireless RF remote or through your motherboard's ARGB software (if connected).
6.1. Using the Wireless RF Remote Control
The remote control allows you to adjust fan speed, lighting effects, brightness, and LED speed without opening your PC case. Ensure the remote has a working battery.

Image: Layout and functions of the upHere ARGB fan remote controller.
- On/Off: Power the fans and lights on or off.
- Auto: Activates automatic cycling through 366 LED modes.
- M+/M-: Cycles through different lighting modes.
- S+/S-: Adjusts the speed of dynamic lighting effects.
- Brightness +/-: Adjusts the brightness of the static LED colors.
- R/G/B/W: Selects static red, green, blue, or white colors.
- Color Buttons: 12 individual color switch buttons to change light effects.
- FAN+/FAN-: Adjusts fan speed (Slow, Medium, High).
- M/B (Motherboard Sync): Switches control between the remote and motherboard ARGB software. Press to enable or disable motherboard synchronization.
6.2. Motherboard ARGB Software Control
If you have connected the hub to a 5V ARGB header on your motherboard and enabled motherboard sync via the remote, you can control the lighting effects using your motherboard's proprietary software (e.g., ASUS Aura Sync, Gigabyte RGB Fusion, MSI Mystic Light Sync). Refer to your motherboard manual for specific software instructions.
7. Maintenance
Regular maintenance helps ensure optimal performance and longevity of your fans:
- Dust Cleaning: Periodically clean the fan blades and frame to remove dust buildup. Use compressed air or a soft brush. Ensure the PC is powered off and unplugged before cleaning.
- Cable Check: Occasionally check all cable connections to ensure they are secure.
- Avoid Liquids: Do not use liquid cleaners directly on the fans or electronic components.
8. Troubleshooting
| Issue | Possible Cause | Solution |
|---|---|---|
| Fans not spinning | No power to hub; Loose connection; Faulty fan/hub | Check SATA power connection to hub. Ensure all fan cables are securely connected to the hub. Test individual fans if possible. |
| Lights not working | No power to hub; Loose ARGB connection; Remote battery dead; Motherboard sync enabled but no software control | Check SATA power. Ensure ARGB cable is connected to 5V header. Replace remote battery. Toggle M/B button on remote to switch control. |
| Lights displaying incorrect colors | Incorrect ARGB header connection (e.g., 12V instead of 5V); Software conflict | Ensure connection is to a 5V ARGB header only. Restart PC and ARGB software. |
| Fans are noisy | Dust buildup; Loose mounting; High fan speed setting | Clean fans. Ensure fans are securely mounted with rubber pads. Reduce fan speed via remote or software. |
9. Specifications
| Specification | Value |
|---|---|
| Model Number | NT1206-6 |
| Product Dimensions (L x W x H) | 12 x 2.5 x 12 cm |
| Weight | 940 grams (total for 6 fans) |
| Brand | upHere |
| Power Connector Type | 6-pin (fan to hub), SATA (hub to PSU) |
| Voltage | 5 Volts (ARGB), 12 Volts (Fan Motor) |
| Cooling Method | Air |
| Compatible Devices | PC Motherboards, Fan Controllers |
| Noise Level | 27 Decibels (max) |
| Material | Plastic, Rubber (anti-vibration pads) |
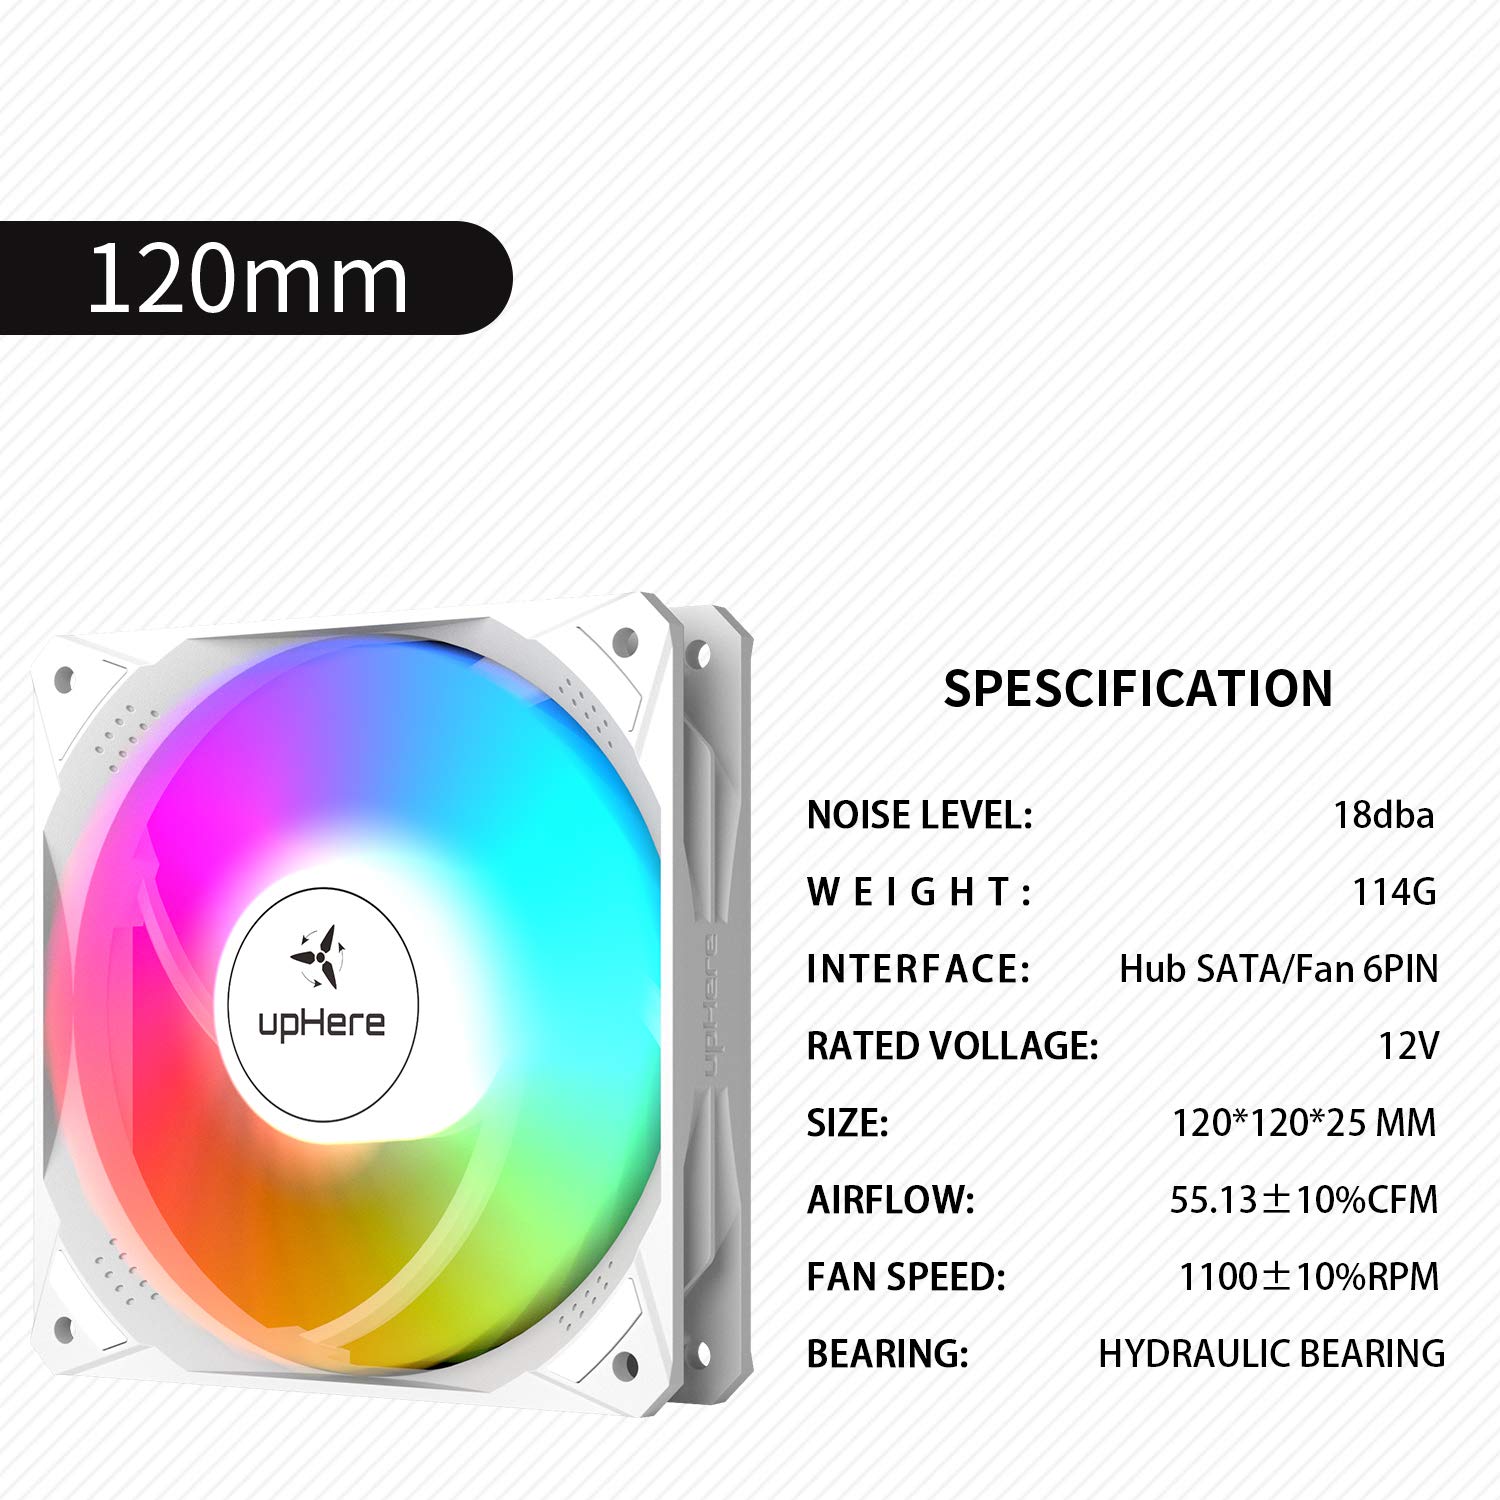
Image: Visual representation of fan specifications.
10. Warranty and Support
upHere products are manufactured to high-quality standards. For warranty information, technical support, or any inquiries regarding your product, please refer to the warranty card included in your package or visit the official upHere website. You may also contact your retailer for assistance.