
Introduction
Thank you for choosing the FAMICOZY HU-XI-201 Digital Alarm Clock. This compact and easy-to-use alarm clock features a large, clear red LED display, automatic brightness adjustment, and a crescendo alarm. This manual provides detailed instructions for setting up and operating your new alarm clock.
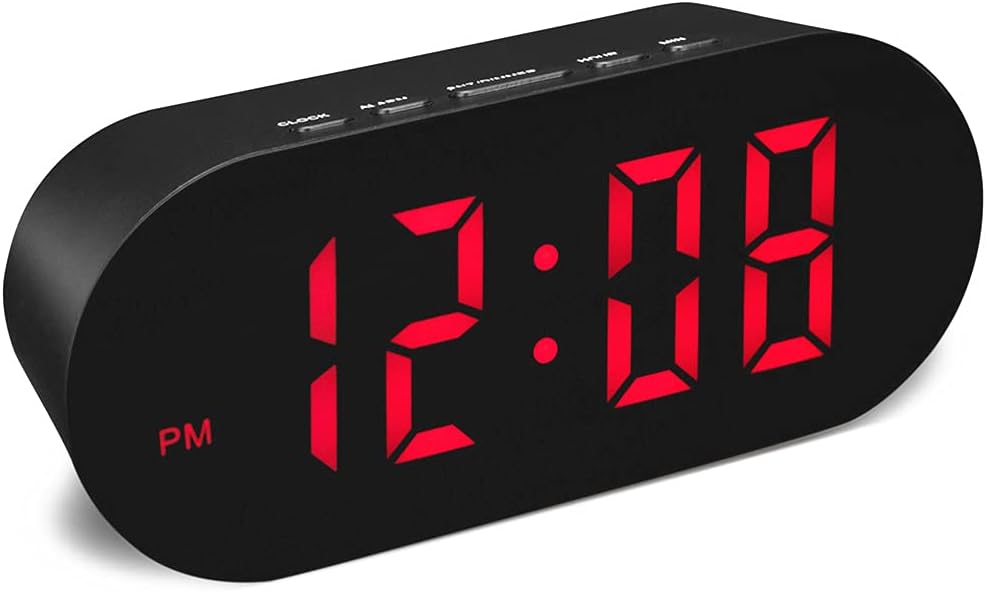
Figure 1: Front view of the FAMICOZY HU-XI-201 Digital Alarm Clock.
Package Contents
- FAMICOZY HU-XI-201 Digital Alarm Clock
- AC Power Adapter (1.5m cord)
- User Manual (this document)
Product Overview

Figure 2: Top view showing control buttons.
The clock features intuitive buttons located on the top for easy access:
- CLOCK Button: Used to enter time setting mode.
- ALARM Button: Used to enter alarm setting mode.
- SNZ/DIMMER Button: Activates snooze during an alarm; adjusts display brightness.
- HOUR Button: Adjusts the hour during time/alarm setting.
- MIN Button: Adjusts the minute during time/alarm setting.
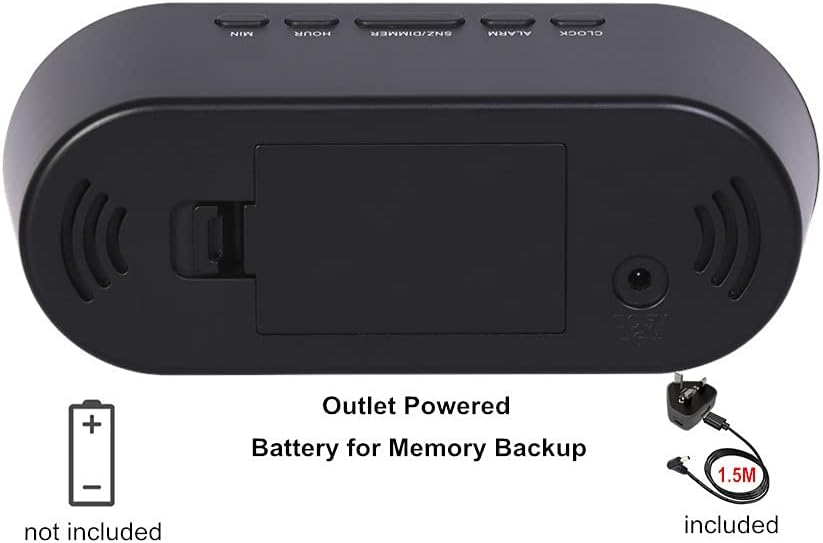
Figure 3: Rear view with power input and battery compartment.
The rear of the clock includes the DC power input and a battery compartment for backup power.
Setup
1. Power Connection
- Connect the provided AC power adapter to the DC input port on the back of the alarm clock.
- Plug the adapter into a standard electrical outlet. The display will light up.

Figure 4: Connecting the alarm clock to power.
2. Battery Backup (Optional)
For memory backup during power outages or when moving the clock, install 3 AAA batteries (not included) into the battery compartment on the back of the unit. In battery mode, the display will only light up for 10 seconds when a button is pressed, but the time and alarm functions will continue to operate.
Figure 5: Battery compartment for memory backup.
Operating Instructions
1. Setting the Time
- Press and hold the CLOCK button for 3 seconds. The hour digits will flash.
- Press the HOUR button to adjust the hour.
- Press the MIN button to adjust the minute.
- Press the CLOCK button again to confirm and exit time setting mode.
- To switch between 12-hour and 24-hour format, press the CLOCK button once (short press) when not in setting mode.

Figure 6: 12-hour and 24-hour time display options.
2. Setting the Alarm
- Press and hold the ALARM button for 3 seconds. The alarm hour digits will flash.
- Press the HOUR button to adjust the alarm hour.
- Press the MIN button to adjust the alarm minute.
- Press the ALARM button again to confirm and exit alarm setting mode.
- To activate or deactivate the alarm, short press the ALARM button. An alarm icon will appear on the display when the alarm is active.

Figure 7: The crescendo alarm starts softly and gradually increases in volume.
The alarm features a crescendo sound, starting quietly and gradually increasing in volume over two minutes to gently wake you. The maximum volume is approximately 80 decibels.
3. Snooze Function
When the alarm sounds, press the SNZ/DIMMER button to activate the snooze function. The alarm will pause for 5 minutes and then sound again.

Figure 8: Activating the snooze function.
To turn off the alarm completely, press any other button (CLOCK, ALARM, HOUR, MIN) while the alarm is sounding or snoozing.
4. Display Brightness Adjustment
The clock offers both automatic and manual brightness control.
Automatic Brightness
The display automatically adjusts its brightness based on the time of day:
- 07:00 - 17:59: Brightest setting.
- 18:00 - 21:59: Medium brightness.
- 22:00 - 06:59: Dimmest setting to avoid disturbing sleep.

Figure 9: Automatic brightness adjustment schedule.
Manual Brightness Adjustment
You can manually override the automatic brightness settings. Short press the SNZ/DIMMER button repeatedly to cycle through 6 levels of brightness (Off, Dim, Low, Medium, High, Full).
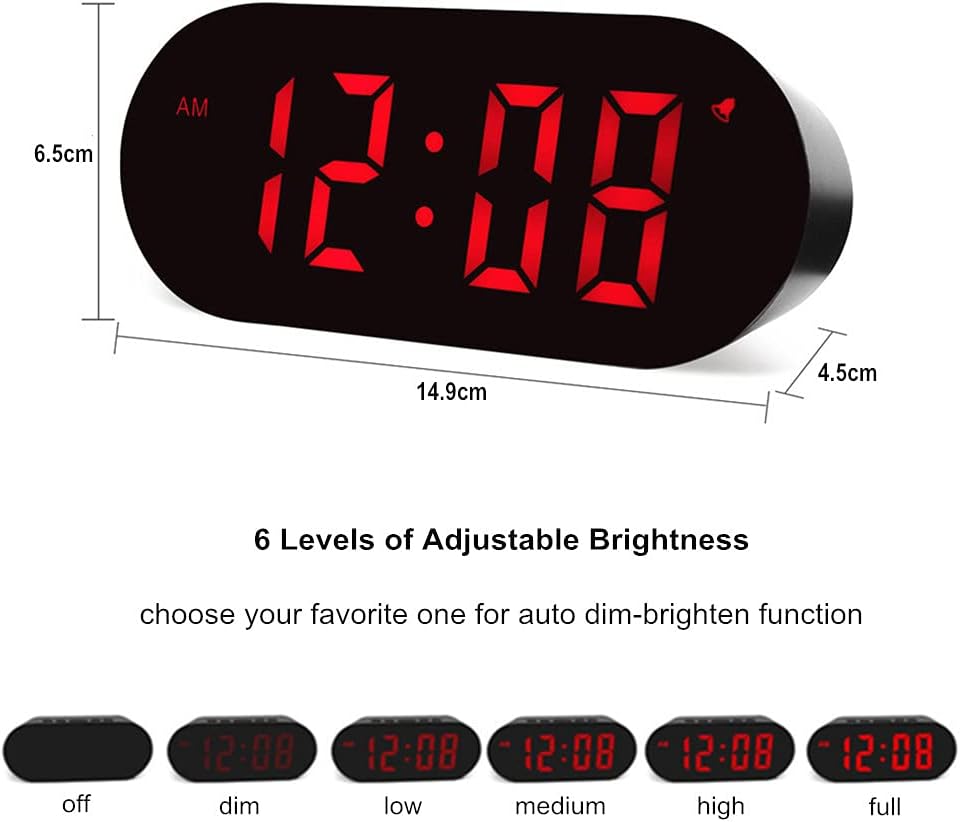
Figure 10: Six levels of adjustable brightness.
Maintenance
- Clean the clock with a soft, dry cloth. Do not use abrasive cleaners or solvents.
- Keep the clock away from direct sunlight, extreme temperatures, and high humidity.
- Ensure proper ventilation around the unit.
- If not using the clock for an extended period, remove the backup batteries to prevent leakage.
Troubleshooting
| Problem | Possible Cause | Solution |
|---|---|---|
| Display is blank. | No power or power outage. | Ensure the AC adapter is securely plugged in. Check the power outlet. If using battery backup, press any button to temporarily light up the display. |
| Alarm does not sound. | Alarm is not set or deactivated. | Verify the alarm time is set correctly and the alarm icon is visible on the display. |
| Time/Alarm cannot be set. | Not in setting mode. | Press and hold the CLOCK or ALARM button for 3 seconds to enter setting mode. |
| Display is too bright/dim. | Brightness setting needs adjustment. | Short press the SNZ/DIMMER button to cycle through brightness levels. |
Specifications
| Feature | Detail |
|---|---|
| Brand | FAMICOZY |
| Model Number | HU-XI-201 |
| Color | Black |
| Dimensions (L x W x H) | 14.9 x 4.5 x 6.5 cm |
| Weight | 200 grams |
| Material | Plastic |
| Display Type | Digital LED (Red) |
| Power Source | AC Cable (Adapter Included) |
| Battery Backup | 3 x AAA batteries (not included) |
| Special Features | Adjustable Brightness, Automatic Dimmer, Crescendo Alarm, Snooze Function |
Warranty and Support
For warranty information or technical support, please refer to the product packaging or contact FAMICOZY customer service through the retailer where the product was purchased. Please have your model number (HU-XI-201) available when contacting support.