
Pro Chaser PC210368
Pro Chaser XT675 Carburetor Instruction Manual
Model: PC210368
1. Introduction
This manual provides essential information for the installation, operation, maintenance, and troubleshooting of your Pro Chaser XT675 Carburetor, Model PC210368. This carburetor is designed as a replacement part for specific Toro Recycler Lawn Mowers equipped with Kohler XT675, XT650, XT6.5, XT6.75 series engines.
Proper installation and maintenance are crucial for optimal engine performance and longevity. Please read this manual thoroughly before proceeding with any installation or service.
2. Compatibility
The Pro Chaser PC210368 Carburetor is compatible with the following models and engine specifications:
- Toro Recycler Lawn Mower Models: 20371, 20377, 20378, 20171 (22-inch models)
- Kohler Engine Series: XT675, XT650, XT6.5, XT6.75 (6.5hp, 6.75hp, 149cc engines)
- Specific Kohler Engine Models: XT650-2027, XT650-2029, XT650-2031, XT650-3018, XT650-3028, XT650-3030, XT650-3034, XT675-0041, XT675-2034, XT675-2037, XT675-2044, XT675-2070, XT675-2075, XT675-3035, XT675-3038, XT675-3043, XT675-3045, XT675-3066, XT675-3071, XT675-3076, XT675-3085, XT675-3086
- Replaces Kohler Part Numbers: 14 853 68-S, 1485368S, 14 853 68, 1485368, 14 853 55-S
Important Note on Similar Models: There are two similar carburetor models (PC210368 and PC148355) that replace Kohler XT-675/XT650/XT6.5/XT6.75 engines. It is critical to verify the linkage type on your original carburetor before installation. The PC210368 model features a fixed hole connection for the top linkage, as shown in the image below. The PC148355 model has a sliding track connection.

3. Package Contents
Your Pro Chaser XT675 Carburetor package (Model PC210368) includes the following components:
- 1 x Carburetor (Model PC210368)
- 3 x Mounting Gaskets
- 1 x Fuel Hose
- 1 x Air Filter
- 1 x Spark Plug
- 1 x Shut Off Valve
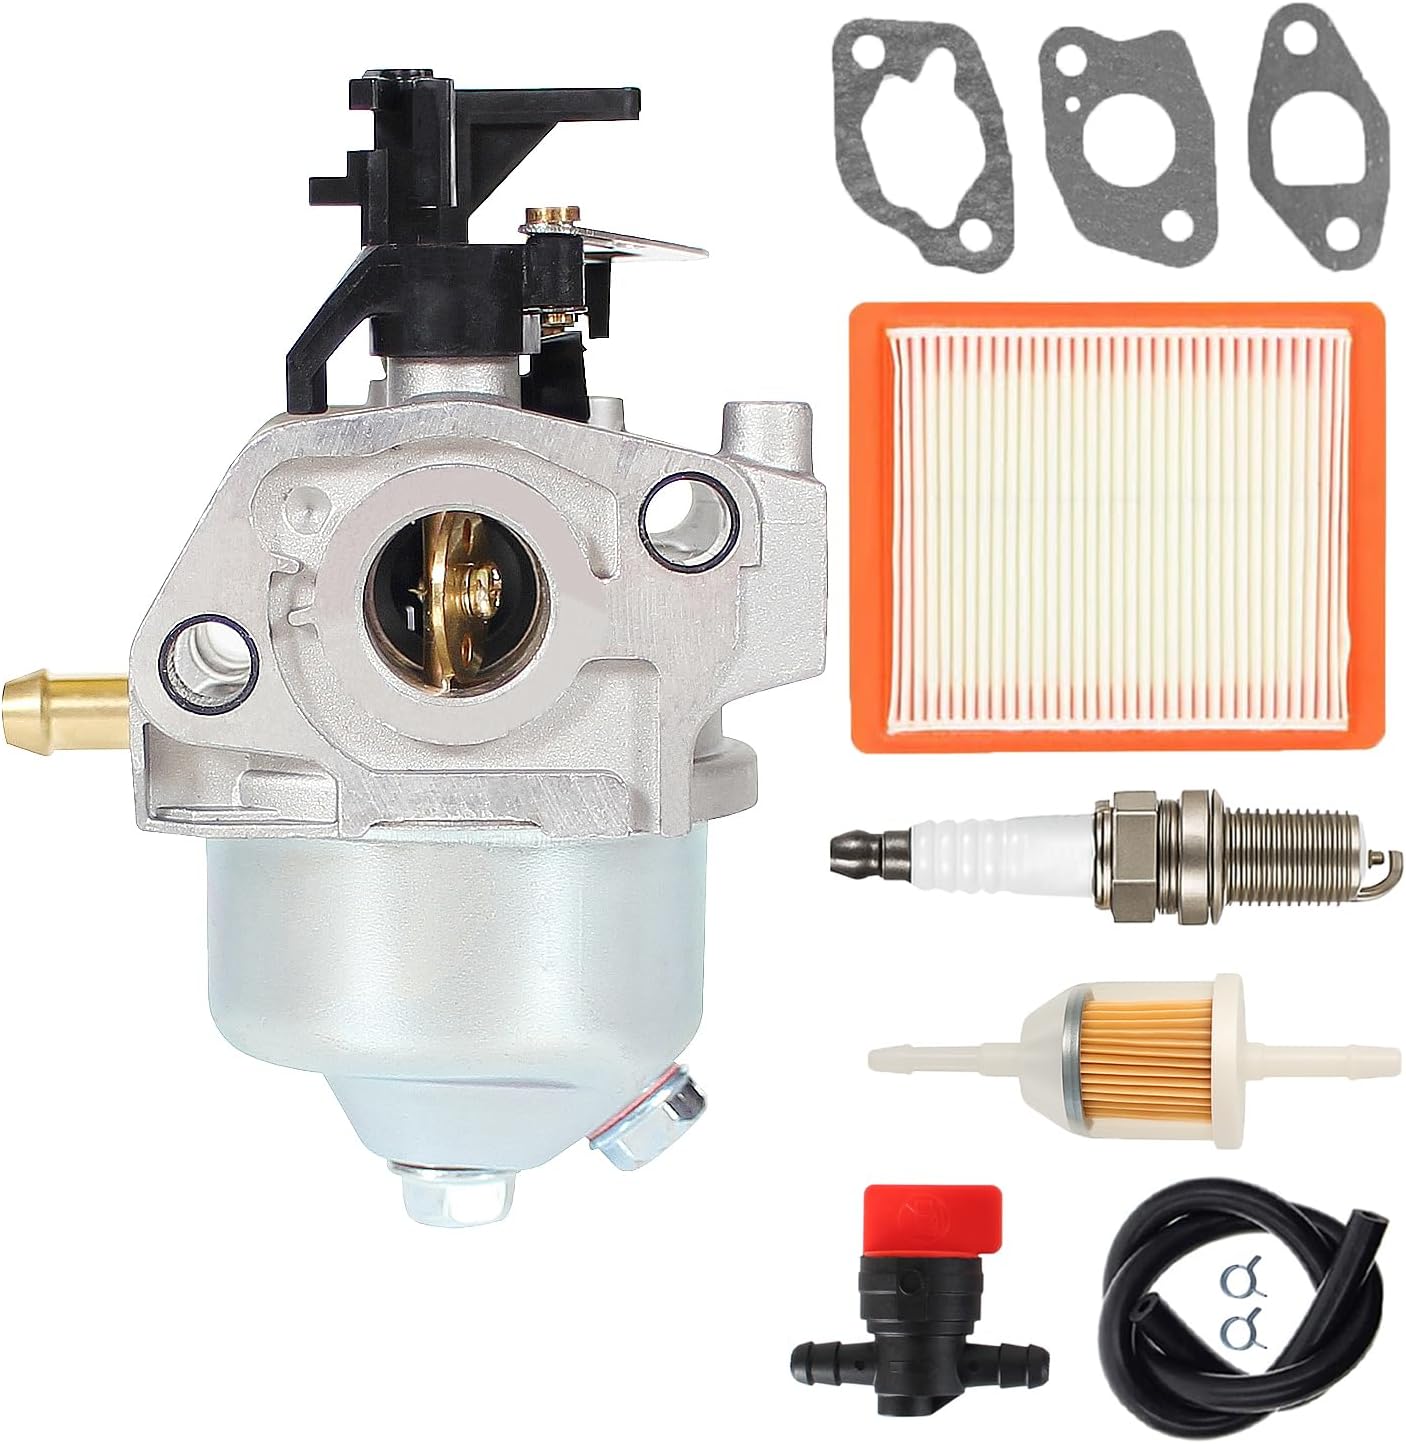
4. Setup and Installation
Safety First: Before beginning any work on your lawn mower, ensure the engine is cool, the spark plug wire is disconnected to prevent accidental starting, and the fuel tank is drained or the fuel line is clamped off to prevent spills.
- Preparation: Gather necessary tools (wrenches, screwdrivers, pliers, fuel line clamps). Ensure you are working in a well-ventilated area.
- Remove Air Filter Assembly: Disconnect and remove the existing air filter housing and air filter.
- Disconnect Fuel Line: Carefully disconnect the fuel line from the old carburetor. Be prepared for residual fuel to spill.
- Disconnect Linkages: Note the routing and connection points of all throttle and choke linkages to the old carburetor. Disconnect them. Taking photos can be helpful.
- Remove Old Carburetor: Unbolt the old carburetor from the engine. Remove any old gaskets.
- Install New Gaskets: Place the new mounting gaskets in their correct positions between the engine, carburetor, and air filter housing.
- Install New Carburetor: Mount the new Pro Chaser PC210368 carburetor onto the engine, ensuring the fixed hole connection for the top linkage is correctly aligned. Secure with bolts, but do not overtighten.
- Reconnect Linkages: Reattach all throttle and choke linkages to the new carburetor in the same manner as they were removed. Verify smooth operation.
- Install New Fuel Line and Shut-Off Valve: Replace the old fuel hose with the new one provided. Install the new shut-off valve in an accessible location in the fuel line. Install the new fuel filter, ensuring the 'IN' and 'OUT' directions are correct. Secure all connections with clamps.
- Install New Air Filter and Spark Plug: Insert the new air filter into the air filter housing. Replace the old spark plug with the new one provided.
- Final Checks: Double-check all connections, ensuring they are secure and free of leaks. Reconnect the spark plug wire.


5. Operating Principles
The carburetor is a vital component responsible for mixing air and fuel in the correct proportions for combustion in the engine. It atomizes fuel and mixes it with air, then regulates the flow of this mixture into the engine's cylinders. The XT675 carburetor is designed to provide the optimal air-fuel ratio for your Kohler engine, ensuring efficient starting and smooth operation.
Once installed, the carburetor operates automatically based on engine demand, controlled by the throttle and choke linkages. No manual adjustments are typically required for this replacement unit under normal operating conditions.
6. Maintenance
Regular maintenance helps ensure the longevity and performance of your carburetor and engine.
- Fuel Quality: Always use fresh, clean gasoline. Stale or contaminated fuel can clog carburetor passages. Consider using a fuel stabilizer, especially during storage.
- Fuel Filter: Regularly inspect and replace the fuel filter (included in this kit) to prevent debris from reaching the carburetor.
- Air Filter: Clean or replace the air filter (included in this kit) as recommended by your lawn mower's manufacturer. A dirty air filter restricts airflow, leading to a rich fuel mixture and poor engine performance.
- Spark Plug: Inspect and replace the spark plug (included in this kit) periodically to ensure proper ignition.
- Storage: Before long-term storage, run the engine until it runs out of fuel, or drain the fuel tank and carburetor bowl to prevent fuel degradation and gumming.
7. Troubleshooting
If you encounter issues after installing the new carburetor, consider the following common problems and solutions:
| Problem | Possible Cause | Solution |
|---|---|---|
| Engine will not start or starts with difficulty |
|
|
| Engine runs rough or stalls |
|
|
| Fuel leaks from carburetor |
|
|
If troubleshooting steps do not resolve the issue, it is recommended to consult a qualified small engine technician.
8. Specifications
- Brand: Pro Chaser
- Model: PC210368
- Vehicle Service Type: Lawn Mower
- Flange Type: Bolt On
- Item Weight: Approximately 12 ounces
- Package Dimensions: Approximately 4.65 x 4.02 x 3.27 inches
- Manufacturer Part Number: PC148355 (Note: This refers to the manufacturer's internal part number, while PC210368 is the specific model variant for this listing)
- UPC: 723258010897
9. Warranty and Support
For information regarding warranty coverage or technical support, please contact the seller or manufacturer directly through your purchase platform. Keep your purchase receipt or order number handy for faster service.
Ask a question about this manual
Ask about setup, troubleshooting, compatibility, parts, safety, or missing instructions. Manuals+ will review the question and use this page’s manual context to help answer it.