
Introduction
This manual provides essential instructions for the safe and effective operation, setup, and maintenance of your RIDGID 18V Digital Inflator, Model R87044. Please read this manual thoroughly before first use and retain it for future reference. Note that the battery and charger are sold separately and are not included with this unit.
Important Safety Information
Always observe basic safety precautions when using electrical tools to reduce the risk of fire, electric shock, and personal injury.
- Read All Instructions: Familiarize yourself with the tool's operation and limitations, as well as potential hazards.
- Use Eye Protection: Always wear safety glasses with side shields marked to comply with ANSI Z87.1.
- Avoid Accidental Starting: Ensure the switch is in the OFF position before inserting the battery pack.
- Do Not Overinflate: Follow recommended pressure ratings for items being inflated. Overinflation can cause bursting and serious injury.
- Inspect Before Use: Before using the inflator, carefully check that it will operate properly and perform its intended function.
- Store Idle Tools: When not in use, store the inflator in a dry, secure place out of reach of children.
- Maintain Tool with Care: Keep the inflator clean for best and safest performance. Follow instructions for lubricating and changing accessories.
Product Features
The RIDGID 18V Digital Inflator (Model R87044) is designed for efficient and precise inflation tasks. Key features include:
- Fast inflation capability for various items, including truck tires.
- Rotating Digital Dial for easy pressure setting and monitoring.
- Quick Connect Air Chuck for secure attachment to inflation valves.
- Integrated On-Board Hose Wrap for convenient hose storage and management.
- Manual Inflation Override function, allowing users to inflate to a desired pressure by holding the trigger.
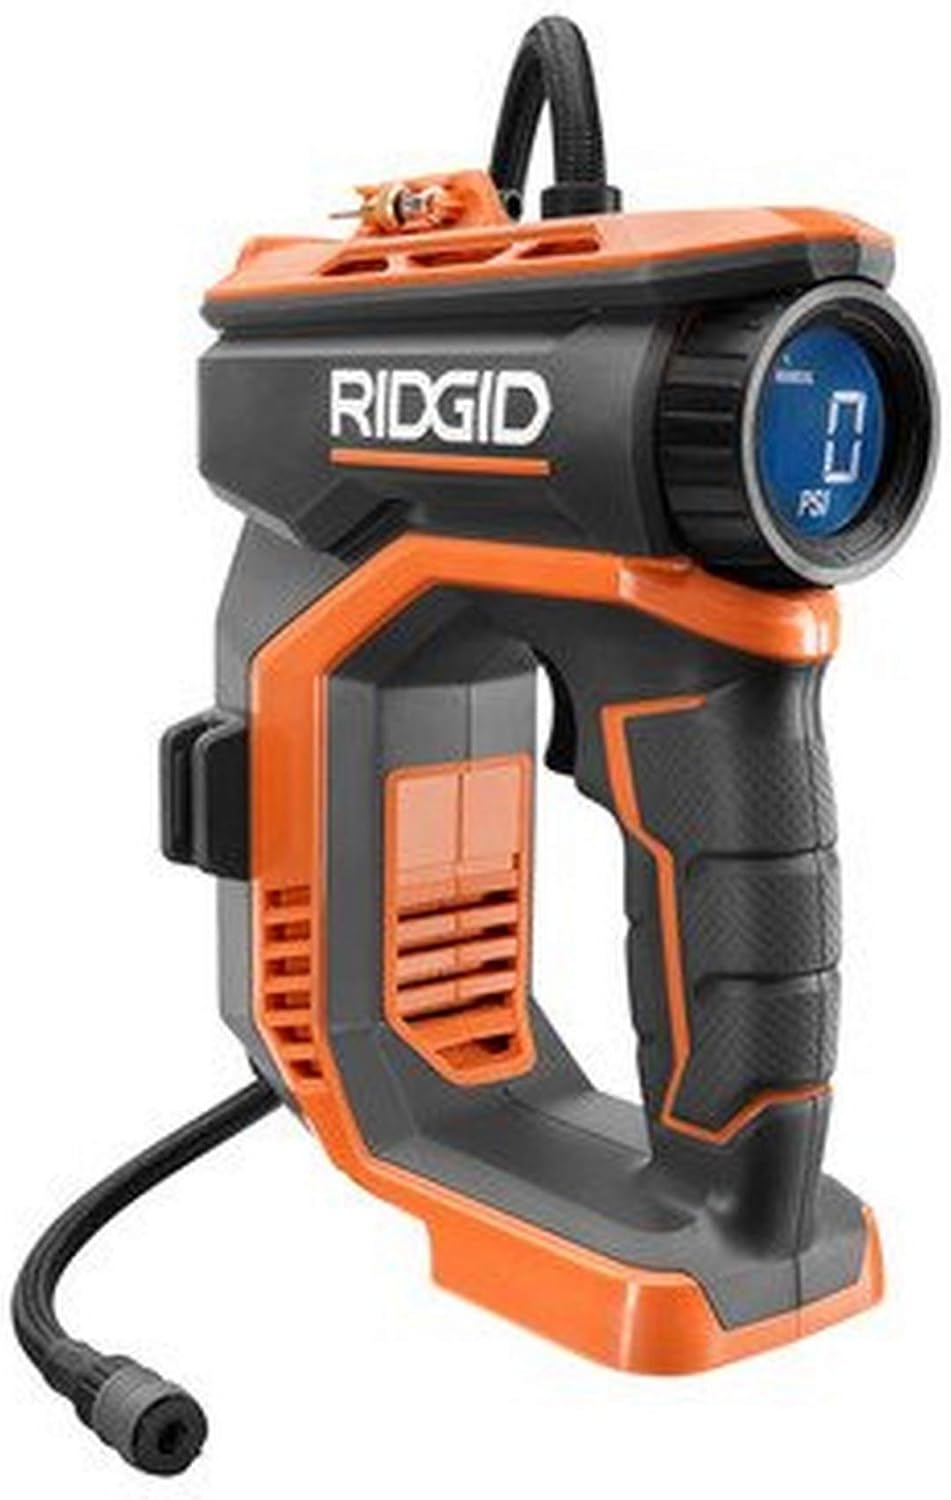
Image: Front view of the RIDGID 18V Digital Inflator, showcasing the digital display and ergonomic handle.
Setup
- Battery Installation:
Ensure the inflator is turned off. Align the 18V RIDGID battery pack (sold separately) with the battery port on the base of the inflator. Slide the battery pack into place until it clicks securely. To remove, press the release latch and slide the battery out.
- Hose Connection:
The inflator comes with an integrated hose. Unwind the hose from the on-board hose wrap. Ensure the quick-connect air chuck is free from debris.

Image: Side view of the RIDGID 18V Digital Inflator, highlighting the integrated hose wrap for storage.
Operating Instructions
- Powering On:
Press the power button to turn on the inflator. The digital display will illuminate, showing the current pressure reading or a default setting.
- Setting Desired Pressure:
Use the rotating digital dial to adjust the target pressure (PSI). The display will show the set pressure. The inflator will automatically stop when this pressure is reached.

Image: Close-up view of the digital display on the RIDGID 18V Digital Inflator, showing the PSI reading and manual indicator.
- Connecting to Item:
Attach the quick-connect air chuck firmly to the valve stem of the item you wish to inflate (e.g., tire, sports ball). Ensure a secure connection to prevent air leakage.

Image: The RIDGID 18V Digital Inflator being used to inflate a car tire, demonstrating the quick-connect air chuck.
- Initiating Inflation:
Once the desired pressure is set and the chuck is connected, press the trigger to begin inflation. The inflator will automatically shut off when the set pressure is achieved.
- Manual Inflation Override:
For continuous inflation beyond a set point or without a specific target, hold down the trigger. The inflator will continue to operate as long as the trigger is depressed. Release the trigger to stop.
- Hose Storage:
After use, disconnect the air chuck and carefully wrap the hose around the integrated on-board hose wrap for tidy storage.
Maintenance
- Cleaning: Keep the inflator's air vents clear of dust and debris. Use a clean, dry cloth to wipe down the exterior. Do not use solvents or harsh chemicals.
- Storage: Store the inflator in a dry, secure location away from direct sunlight and extreme temperatures. Remove the battery pack if storing for extended periods.
- Hose Inspection: Periodically inspect the air hose and chuck for any signs of wear, cracks, or damage. Replace if necessary.
Troubleshooting
| Problem | Possible Cause | Solution |
|---|---|---|
| Inflator does not turn on. | Battery not installed correctly or discharged. | Ensure battery is fully seated. Charge or replace battery. |
| Inflator runs but no air comes out. | Hose or chuck is blocked or damaged. | Inspect hose and chuck for obstructions or damage. Clear or replace. |
| Air leaks from connection. | Chuck not securely attached or valve stem is faulty. | Re-attach chuck firmly. Inspect valve stem for damage. |
| Inflator does not reach set pressure. | Significant air leak or item capacity exceeds inflator capability. | Check for leaks. Ensure the item's pressure requirement is within the inflator's 150 PSI limit. |
Specifications
| Feature | Detail |
|---|---|
| Brand | RIDGID |
| Model Name | R87044 |
| Power Source | Battery Powered (18V) |
| Maximum Pressure | 150 PSI |
| Air Flow Capacity | 150 Liters Per Minute |
| Hose Length | 20 Inches |
| Item Weight | 3.3 Pounds |
| Material | Acrylonitrile Butadiene Styrene |
| Operation Mode | Automatic |
Warranty and Support
For warranty information, please refer to the documentation included with your purchase or visit the official RIDGID website. For technical support or service inquiries, please contact RIDGID customer service.
You can find more information and contact details on the RIDGID Store on Amazon.