
NewAir NEC500WH00
NewAir Evaporative Cooler User Manual
Model: NEC500WH00
Brand: NewAir
Introduction
Thank you for choosing the NewAir Evaporative Cooler. This appliance is designed to provide efficient and eco-friendly cooling, particularly effective in dry climates. By converting hot, dry air into a cool, refreshing breeze, it offers a comfortable environment for your home or office. This manual provides essential information for the safe and effective operation, maintenance, and troubleshooting of your evaporative cooler.
Please read this manual thoroughly before use and retain it for future reference.
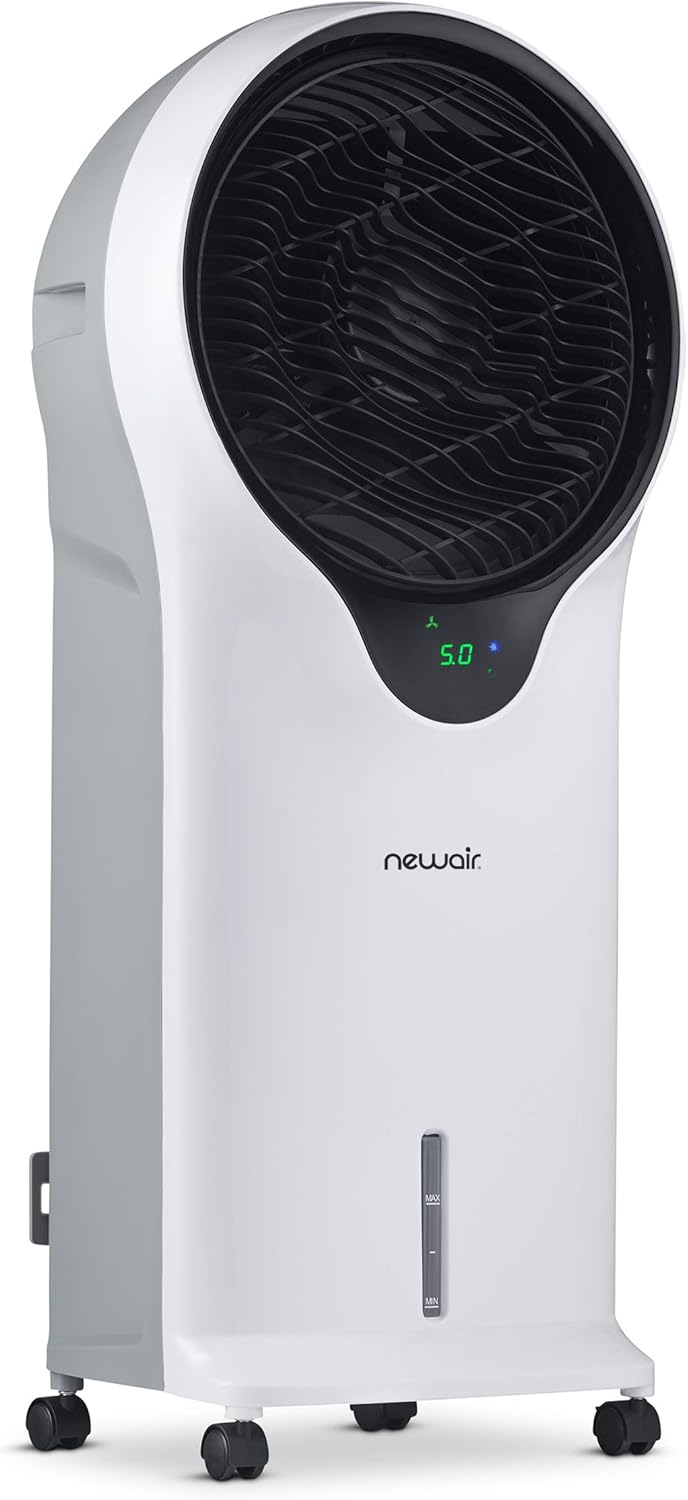
Figure 1: NewAir Evaporative Cooler (Model NEC500WH00)
The NewAir Evaporative Cooler is a freestanding unit with a sleek white design, featuring a large fan opening and a visible water level indicator at the bottom. It is equipped with easy-glide wheels for portability.
Important Safety Information
To reduce the risk of fire, electric shock, or injury, always follow these basic precautions:
- Read all instructions before using the appliance.
- Ensure the power supply matches the voltage specified on the rating label.
- Do not operate the cooler with a damaged cord or plug.
- Keep the appliance away from heat sources and direct sunlight.
- Always unplug the cooler before cleaning, filling, or performing any maintenance.
- Do not immerse the unit, cord, or plug in water or other liquids.
- Supervise children and pets when the appliance is in use.
- Use only on a flat, stable surface to prevent tipping.
- This appliance is designed for residential use only.
Product Components
- Main Evaporative Cooler Unit
- Remote Control
- Ice Packs (2 included)
- Caster Wheels (pre-installed or require attachment)
- Removable Water Tank (1.45 Gallons capacity)
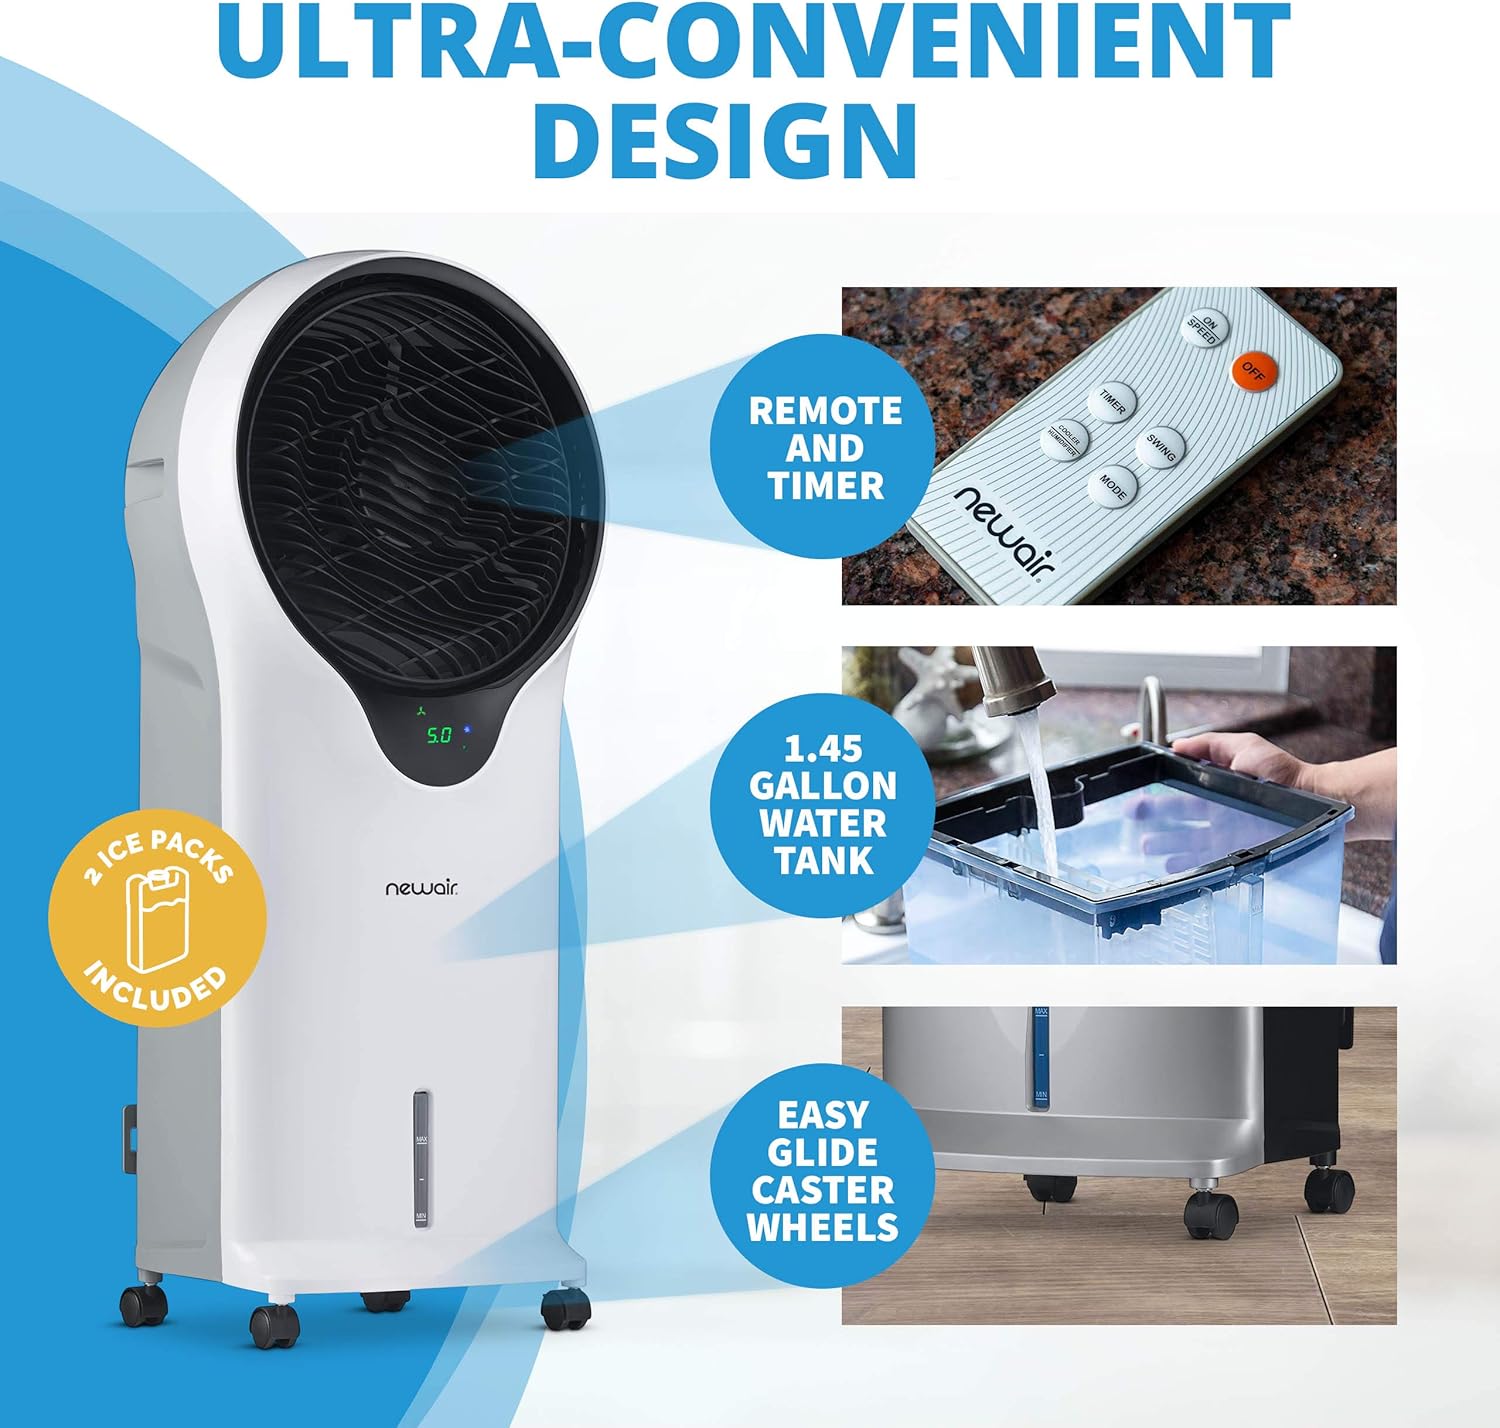
Figure 2: Key Features of the Evaporative Cooler
This image highlights the remote control, the 1.45-gallon removable water tank, and the easy-glide caster wheels, all designed for user convenience.
Setup
- Unpacking: Carefully remove the evaporative cooler and all accessories from the packaging. Retain packaging for future storage or transport.
- Attaching Caster Wheels: If not pre-installed, insert the caster wheels into the designated slots at the bottom of the unit until they click securely into place. Ensure all four wheels are firmly attached for stable movement.
- Placement: Position the cooler on a firm, level surface. For optimal performance, especially in dry climates, place the unit in an area where it can draw in hot, dry air and distribute cool, moist air. This unit is ideal for areas up to 250 sq. ft.
- Filling the Water Tank:
- Pull out the removable 1.45-gallon water tank from the back or side of the unit.
- Fill the tank with clean, cool water. Do not exceed the 'MAX' fill line.
- For enhanced cooling, place the included ice packs (after freezing) into the water tank.
- Carefully slide the water tank back into the unit until it is fully seated.
Note: The water level indicator may be difficult to read due to lack of contrast. Ensure the tank is properly filled without overfilling.
- Power Connection: Plug the power cord into a standard 120V AC electrical outlet.

Figure 3: Climate Suitability for Evaporative Coolers
Evaporative coolers are most effective in dry climates (Zone A). They can be used in less ideal conditions (Zone B) but are not recommended for humid climates (Zone C) where traditional air conditioners are more suitable.
Operating Instructions
- Power On/Off: Press the Power button on the control panel or remote control to turn the unit on or off.
- Fan Speed Adjustment: Use the Speed button to cycle through the 3 available fan speeds (Low, Medium, High). The display will indicate the current speed.
- Oscillation: Press the Oscillation button to activate or deactivate the enhanced oscillation feature, which helps distribute cool air more widely throughout the room.
- Timer Function: Use the Timer button to set an automatic shut-off time. The timer can be set for up to 12 hours.
- Cooling Mode: Ensure the water tank is filled for the evaporative cooling function to operate. The unit utilizes CycloneCirculation™ technology to move cold air, creating a wind chill effect.

Figure 4: CycloneCirculation™ Technology
The CycloneCirculation™ technology ensures optimal airflow, creating a wind chill effect that feels cooler on the skin by continuously moving air from the pads to the farthest corners of your living area.
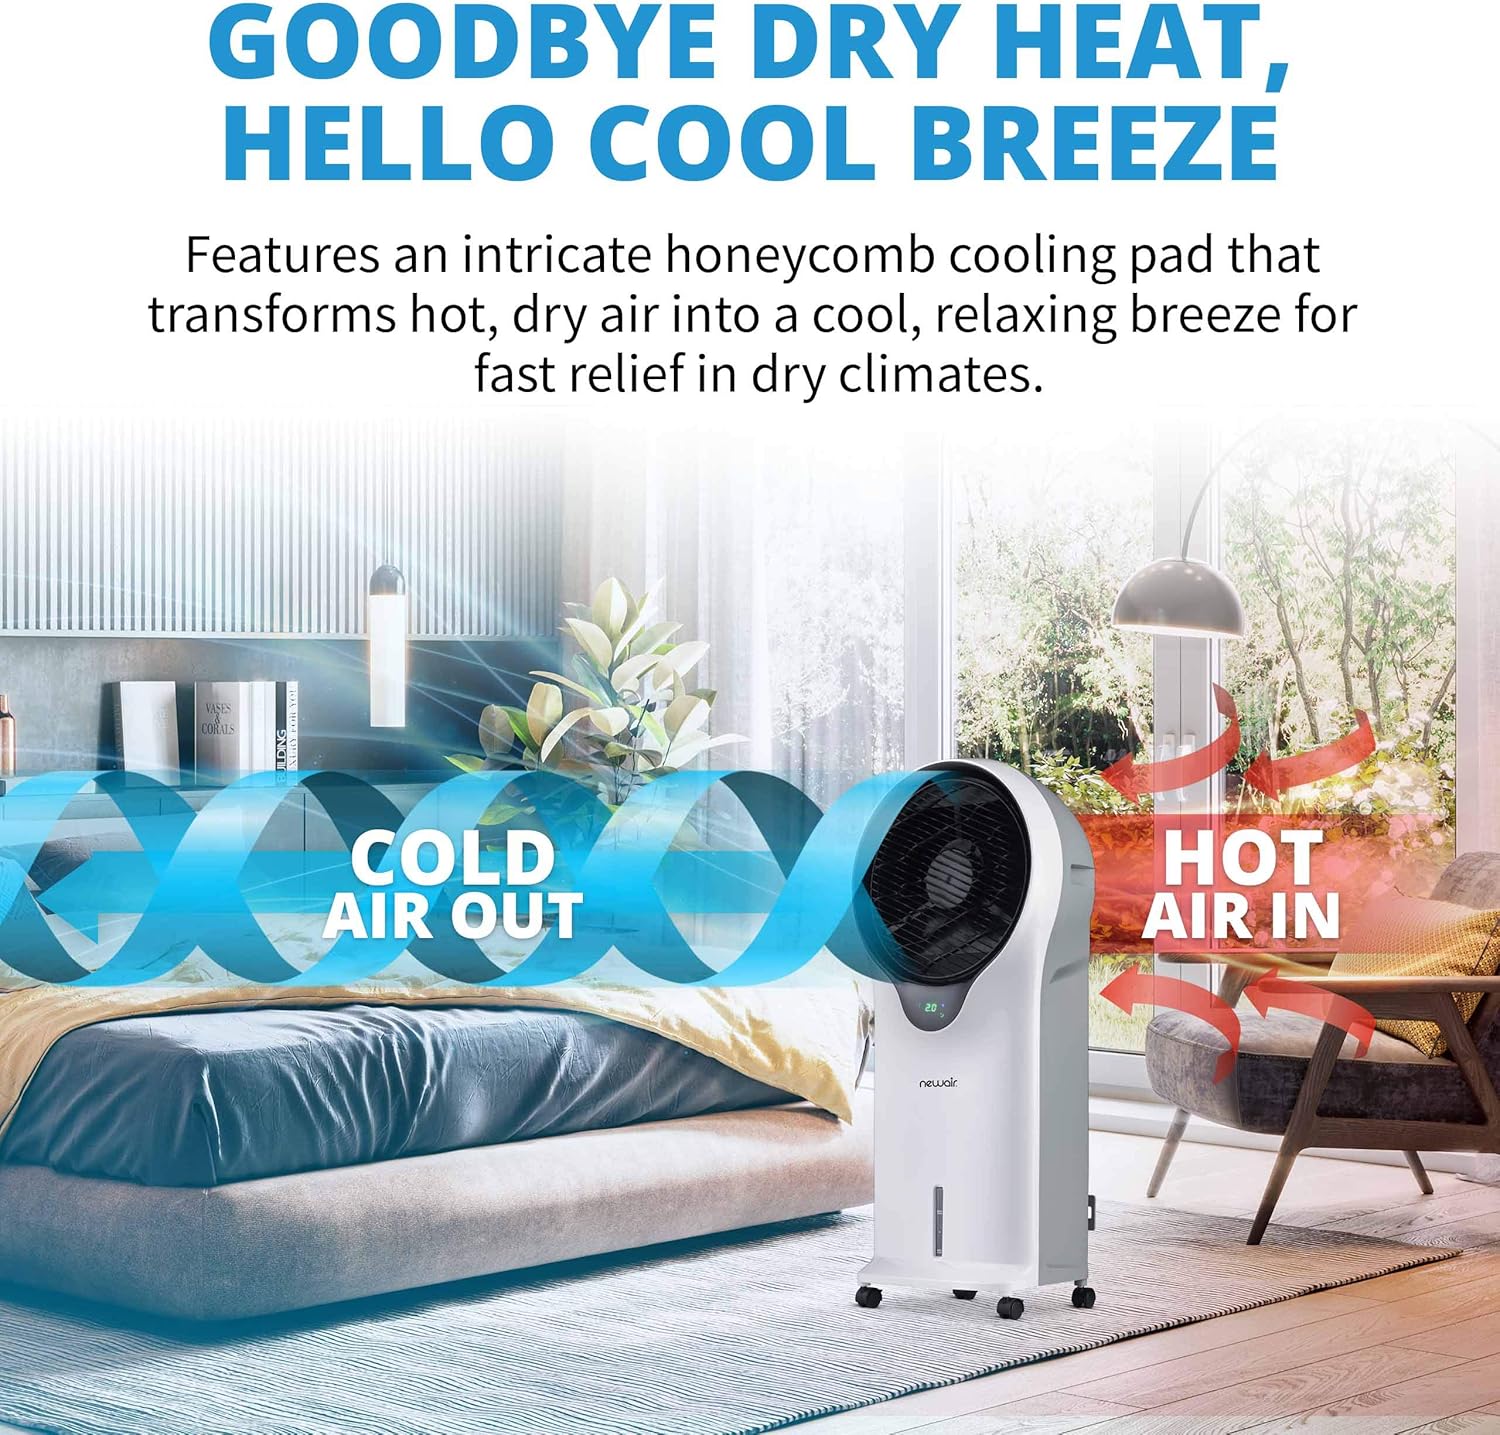
Figure 5: Evaporative Cooling Process
This diagram illustrates how the evaporative cooler draws in hot, dry air, passes it over a moist honeycomb cooling pad, and releases cool, refreshing air into the room.
Maintenance
Regular maintenance ensures optimal performance and longevity of your evaporative cooler.
- Water Tank Cleaning:
- Unplug the unit before cleaning.
- Remove the water tank and empty any remaining water.
- Clean the tank regularly (e.g., weekly) with a mild detergent and water to prevent mold and mildew growth. Rinse thoroughly.
- Ensure the tank is completely dry before reinserting if storing the unit.
- Honeycomb Pad Cleaning:
- Refer to the unit's specific instructions for accessing and removing the honeycomb cooling pad.
- Gently rinse the pad under running water to remove dust and mineral deposits. Do not use harsh chemicals.
- Allow the pad to air dry completely before reinserting.
- Exterior Cleaning: Wipe the exterior surfaces of the unit with a soft, damp cloth. Do not use abrasive cleaners or solvents.
- Storage: When not in use for extended periods, empty and clean the water tank and cooling pad. Store the unit in a cool, dry place, preferably in its original packaging.
Troubleshooting
If you experience issues with your evaporative cooler, consult the following table:
| Problem | Possible Cause | Solution |
|---|---|---|
| Unit does not turn on | No power supply; Power cord not plugged in; Unit is off. | Check power outlet; Ensure cord is securely plugged in; Press Power button. |
| No cooling effect | Water tank empty; Cooling pad dry; High humidity in room. | Fill water tank; Ensure cooling pad is wet; Use in dry climates for best results. |
| Weak airflow | Fan speed set too low; Air intake/outlet blocked. | Increase fan speed; Clear any obstructions. |
| Unpleasant odor | Stagnant water or mold in tank/pad. | Clean water tank and cooling pad thoroughly. Replace water frequently. |
| Wheels not rolling smoothly | Debris in wheels; Manufacturing defect. | Clean wheels; Contact customer support if issue persists. |
| Water pump failure | Pump malfunction. | Contact customer support for replacement parts or service. |
Specifications
| Feature | Detail |
|---|---|
| Brand | NewAir |
| Model Name | NEC500WH00 |
| Mounting Type | Freestanding |
| Color | White |
| Air Flow Capacity | 470 Cubic Feet Per Minute (CFM) |
| Controls Type | Remote |
| Reservoir Capacity | 1.45 Gallons |
| Floor Area Coverage | Up to 250 Square Feet |
| Noise Level | 66 dB |
| Product Dimensions (D x W x H) | 11.1" x 16.1" x 35" |
| Item Weight | 16.1 pounds |
| Voltage | 120 Volts |
| Amperage | 0.92 Amps |
| Included Components | Remote Control, Ice Packs |

Figure 6: Product Dimensions
This image provides a visual representation of the cooler's dimensions, showing its height, width, and depth.
Warranty Information
This NewAir Evaporative Cooler is covered by a one-year warranty from the date of purchase. This warranty covers defects in materials and workmanship under normal use. Please retain your proof of purchase for warranty claims.

Figure 7: Warranty and Returns
NewAir offers a 30-day hassle-free product return policy and a 1-year warranty for this product, ensuring customer confidence.
Customer Support
For technical assistance, warranty claims, or general inquiries, please visit the official NewAir website or contact their customer service department. Contact information can typically be found on the manufacturer's website or on the product packaging.
Online Resources: www.newair.com
Ask a question about this manual
Ask about setup, troubleshooting, compatibility, parts, safety, or missing instructions. Manuals+ will review the question and use this page’s manual context to help answer it.