
IPOW ZWP01
IPOW Grow Tent Kit Complete System User Manual
Model: ZWP01
1. Introduction
Thank you for choosing the IPOW Grow Tent Kit Complete System. This manual provides detailed instructions for the setup, operation, maintenance, and troubleshooting of your grow tent kit. Please read this manual thoroughly before assembly and operation to ensure proper use and optimal performance.
This complete system includes a 24" x 24" x 55" grow tent, an LED grow light, and a 4" ventilation kit. The ventilation kit comprises a 4" inline duct fan, a carbon filter, flexible ducting, duct clamps, a thermometer/hygrometer, a timer, grow bags, and adjustable rope hangers.
2. Safety Information
Always follow basic safety precautions when using electrical appliances and handling equipment. Failure to do so may result in injury or damage to the product.
- Ensure all electrical connections are secure and meet local electrical codes.
- Do not operate the grow light or fan with damaged cords or plugs.
- Keep water and other liquids away from electrical components.
- Do not block ventilation openings.
- Always unplug components before cleaning or performing maintenance.
- Keep out of reach of children and pets.
3. Package Contents
Verify that all components listed below are present in your package:
- 1 x Grow Tent (24" x 24" x 55")
- 1 x LED Grow Light (VS1000, 100W)
- 1 x 4" Inline Duct Fan
- 1 x Carbon Filter
- 1 x Flexible Ducting (8ft)
- 3 x Duct Clamps
- 1 x Thermometer and Hygrometer
- 1 x Timer
- 4 x 5 Gallon Grow Bags
- 2 x Adjustable Rope Hangers
- 1 x Trellis Net

Figure 3.1: All components included in the IPOW Grow Tent Kit. This image displays the grow tent, LED grow light, inline fan, carbon filter, ducting, grow bags, trellis net, thermometer/hygrometer, timer, and rope hangers.

Figure 3.2: A visual representation of the complete grow tent kit, highlighting the main components such as the tent, LED grow light, timer, dimmer controller, 4" ducting, 4" inline fan, 4" carbon filter, grow bags, trellis net, rope hangers, ducting clamps, and temperature/humidity monitor.
4. Setup and Assembly
Follow these steps to assemble your IPOW Grow Tent Kit:
4.1. Grow Tent Assembly
- Unpack all tent frame poles and connectors.
- Assemble the base frame using the appropriate poles and corner connectors.
- Attach the vertical poles to the base frame.
- Place the tent fabric over the assembled frame, ensuring the zippers are aligned.
- Zip up the tent fabric around the frame.
- Install the roof poles and top connectors to complete the tent structure.
- Insert the waterproof floor tray at the bottom of the tent.

Figure 4.1: Diagram illustrating the step-by-step assembly of the grow tent frame, showing the connection of poles and corner pieces to form the complete structure.
4.2. LED Grow Light Installation
- Attach the adjustable rope hangers to the top corners of the grow light.
- Hang the grow light from the support bars inside the tent using the rope hangers. Adjust the height as needed for your plants.
- Connect the power cord to the grow light and route it through one of the tent's cable ports.
- Connect the dimmer controller to the grow light.

Figure 4.2: Detailed view of the LED grow light, showing its full spectrum output, 240 diodes, 60,000-hour lifespan, and strong heat dissipation. The spectrum graph illustrates light intensity across different wavelengths, and the diode breakdown indicates the number and type of LEDs for warm white, red, and cold white light.
4.3. Ventilation System Setup
The ventilation system is crucial for air circulation and odor control. There are several configurations for the inline fan and carbon filter:
- Option 1: Fan and Filter Inside the Grow Tent: Connect the carbon filter directly to the inline fan. Use ducting to connect the fan's exhaust to an exhaust port on the tent.
- Option 2: Fan Outside, Filter Inside the Grow Tent: Connect the carbon filter to a short piece of ducting, then to an intake port on the tent. Connect the inline fan to the outside of this ducting, and then route exhaust ducting from the fan to an exhaust port.
- Option 3: Fan Inside, Filter Outside the Grow Tent: Connect the carbon filter to an exhaust port on the tent. Connect the inline fan inside the tent to the carbon filter. Route exhaust ducting from the fan to an outside exhaust point.
Use the provided duct clamps to secure all ducting connections to prevent air leaks.

Figure 4.3: Diagram illustrating the airflow through the inline fan, highlighting its low noise operation, reduced power consumption, and longer lifespan. Red arrows indicate air intake, and blue arrows indicate air exhaust.
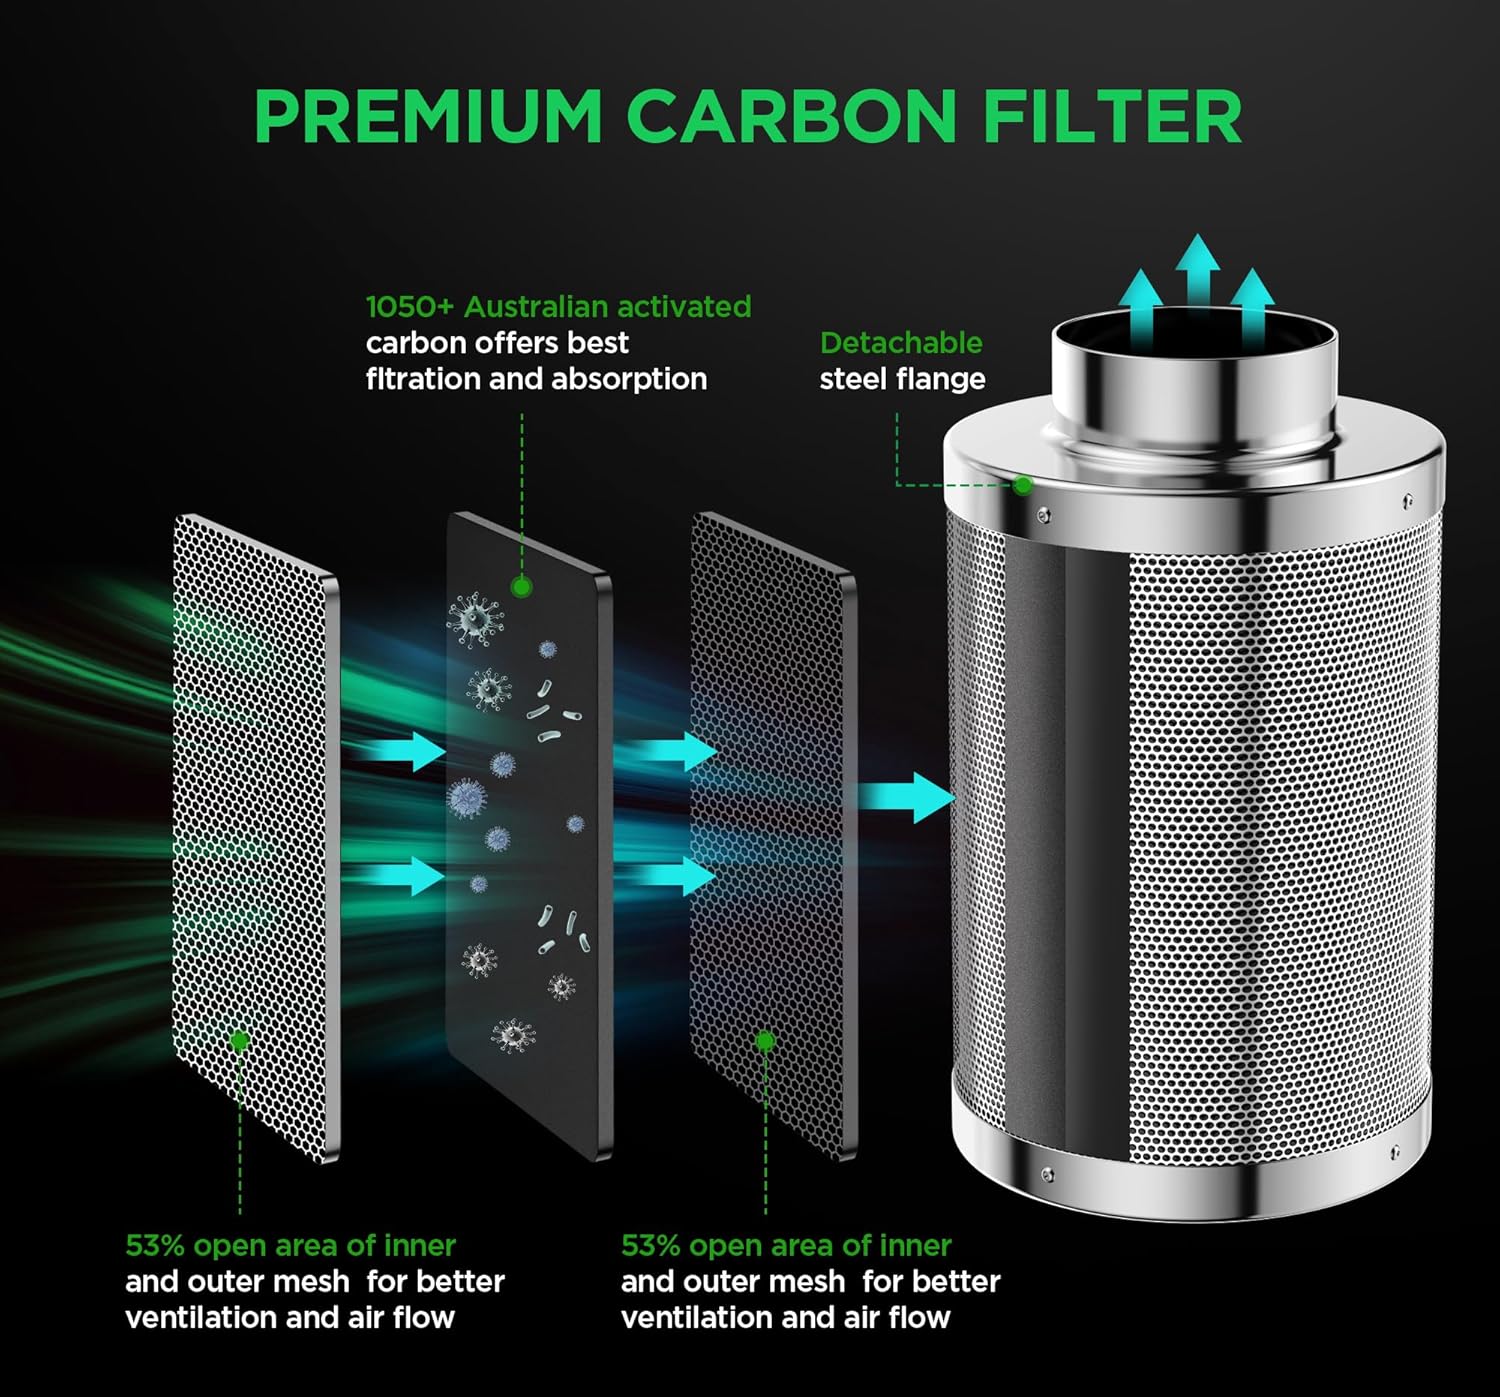
Figure 4.4: Cross-section diagram of the premium carbon filter, showing the layers of filtration. It highlights the 1050+ Australian activated carbon for best filtration and absorption, and the 53% open area of inner and outer mesh for better ventilation and airflow. The detachable steel flange is also shown.

Figure 4.5: Three common configurations for the grow tent ventilation system: 1) Fan and Filter inside the grow tent, 2) Fan outside, Filter inside the grow tent, and 3) Fan inside, Filter outside the grow tent. Each diagram shows the placement of the fan, filter, and ducting relative to the grow tent.
4.4. Thermometer/Hygrometer and Timer Setup
- Place the thermometer/hygrometer inside the tent to monitor temperature and humidity.
- Plug the grow light and/or fan into the timer. Set the timer according to your desired light and ventilation cycles.
5. Operating Instructions
5.1. Grow Light Operation
- Plug the grow light into the timer, and the timer into a power outlet.
- Use the dimmer controller to adjust the light intensity based on the plant's growth stage and needs.
- Refer to the timer's instructions for setting specific on/off schedules.
5.2. Ventilation System Operation
- Plug the inline fan into a power outlet, or into the timer if you wish to automate its operation.
- Ensure the carbon filter is properly connected to manage odors.
- Monitor the temperature and humidity inside the tent using the provided meter and adjust fan speed or ventilation as necessary to maintain optimal conditions.
5.3. Environmental Control
- Maintain appropriate temperature and humidity levels for your specific plants.
- Ensure adequate air circulation within the tent to prevent stagnant air and promote healthy growth.
6. Maintenance
6.1. Grow Tent Cleaning
- Regularly wipe down the interior reflective mylar with a damp cloth to maintain reflectivity.
- Clean the waterproof floor tray as needed to prevent water buildup and mold.
- Inspect zippers for smooth operation and lubricate if necessary.

Figure 6.1: Close-up view of the smooth heavy-duty zipper on the grow tent, designed for seamless operation and quick access to plants.
Figure 6.2: Diagram illustrating the three-layer thickened design of the grow tent material, ensuring no light leakage. The layers consist of 2000D Oxford Nylon Fabric, 420G Lightproof PE Material, and 100% Reflective Mylar.
6.2. Carbon Filter Maintenance
- The carbon filter will eventually lose its effectiveness. Replace the carbon filter when odors are no longer effectively removed.
- Do not wash the carbon filter as this can damage the activated carbon.
6.3. Inline Fan Maintenance
- Periodically check the fan blades for dust and debris buildup. Clean gently with a soft brush or compressed air if necessary.
- Ensure the fan is unplugged before any cleaning.
7. Troubleshooting
| Problem | Possible Cause | Solution |
|---|---|---|
| Grow light not turning on | Power cord loose, timer not set correctly, dimmer set to minimum, faulty light. | Check power connections. Verify timer settings. Increase dimmer setting. Contact support if light is faulty. |
| Fan not operating or loud noise | Power issue, obstruction in fan, loose ducting, fan malfunction. | Check power. Inspect fan for obstructions. Secure ducting. Contact support if fan is faulty. |
| Unwanted odors in grow area | Carbon filter exhausted, improper filter connection, insufficient airflow. | Replace carbon filter. Ensure filter is properly sealed. Increase fan speed or improve ventilation. |
| High temperature/humidity in tent | Insufficient ventilation, light too close to plants, high ambient room temperature. | Increase fan speed. Adjust light height. Improve room ventilation or use external cooling/dehumidification. |
| Light leakage from tent | Zippers not fully closed, small holes in fabric, unsealed ports. | Ensure all zippers are fully closed. Inspect fabric for damage and repair if necessary. Seal unused ports. |
8. Product Specifications
- Model: ZWP01
- Grow Tent Dimensions: 24"L x 24"W x 55"H (60cm x 60cm x 140cm)
- Grow Tent Material: Heavy duty 600D Oxford Cloth exterior, 100% Reflective Mylar interior, Lightproof PE Material
- Frame Material: Alloy Steel
- LED Grow Light: VS1000, 100W, Full Spectrum, 240 Diodes, Dimmable
- Inline Fan: 4 Inch, 190CFM
- Carbon Filter: 4 Inch, 1050+ Australian Activated Carbon
- Item Weight: Approximately 34.4 pounds (15.63 kg)
- Chamber Volume: 17 Cubic Feet
9. Warranty and Support
IPOW provides a standard warranty for this product. Please refer to the warranty card included in your package or visit the official IPOW website for detailed warranty terms and conditions.
For technical support, replacement parts, or any questions regarding your IPOW Grow Tent Kit, please contact IPOW customer service. Contact information can typically be found on the product packaging or the official IPOW website.
We are committed to providing excellent customer service support before and after your purchase.
Ask a question about this manual
Ask about setup, troubleshooting, compatibility, parts, safety, or missing instructions. Manuals+ will review the question and use this page’s manual context to help answer it.