
1. Introduction
This manual provides detailed instructions for the safe and effective use of your Remax SD-02 Compact Digital Camera. Please read this manual thoroughly before using the camera and keep it for future reference. The Remax SD-02 is a compact digital camera designed for ease of use, featuring a 12-megapixel sensor, 4x optical zoom, and a 1.8-inch LCD screen.
2. Package Contents
Verify that all items listed below are included in your camera package. If any items are missing or damaged, please contact your retailer.
- Remax SD-02 Compact Digital Camera
- USB Cable
- Wrist Strap
- User Manual (this document)
- Battery
- Protective Casing (if included in specific bundle)
- Mounting Accessories (if included in specific bundle)

Image 2.1: Contents of the Remax SD-02 camera package, showing the camera unit, USB cable, battery, and various mounting accessories and protective cases.
3. Product Overview
Familiarize yourself with the main components of your Remax SD-02 camera.
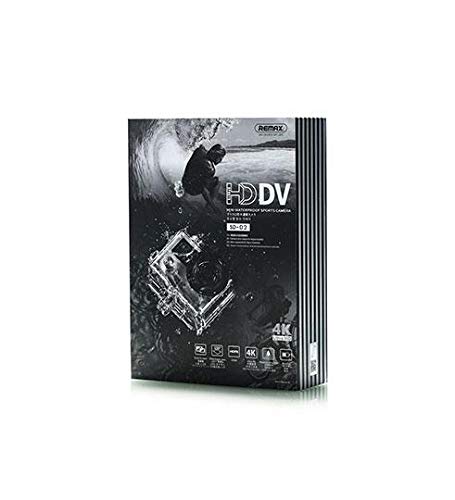
Image 3.1: Front and rear views of the Remax SD-02 camera. The front features the camera lens, power/mode button, and branding. The rear displays the 1.8-inch LCD screen.
3.1 Front View
- Lens: Captures images and videos.
- Power/Mode Button: Press and hold to power on/off. Press briefly to switch between shooting modes (Photo, Video, Playback).
- Indicator Light: Shows camera status (e.g., recording, charging).
3.2 Rear View
- 1.8-inch LCD Screen: Displays live view, menus, and playback.
- Up/Down Buttons: Navigate menus, zoom in/out (in certain modes).
- OK/Shutter Button: Confirms selections, takes photos, starts/stops video recording.
- Menu Button: Accesses camera settings.
3.3 Side/Bottom View (General)
- Micro USB Port: For charging and data transfer.
- MicroSD Card Slot: Insert your memory card here.
- Battery Compartment: Houses the removable battery.
4. Setup
4.1 Charging the Battery
- Open the battery compartment cover.
- Insert the battery, ensuring correct polarity.
- Close the battery compartment cover securely.
- Connect the camera to a USB power source (e.g., computer, wall adapter) using the provided USB cable.
- The indicator light will illuminate during charging and turn off when fully charged.
4.2 Inserting a MicroSD Card
A MicroSD card (not included) is required to store photos and videos. The camera supports cards up to a certain capacity (refer to specifications for details).
- Locate the MicroSD card slot on the side of the camera.
- Insert the MicroSD card with the gold contacts facing down, until it clicks into place.
- To remove, gently push the card until it springs out.
Note: It is recommended to format the MicroSD card in the camera before first use to ensure optimal performance.
5. Operating Instructions
5.1 Powering On/Off
- To Power On: Press and hold the Power/Mode button for approximately 3 seconds.
- To Power Off: Press and hold the Power/Mode button for approximately 3 seconds.
5.2 Switching Modes
Briefly press the Power/Mode button to cycle through the available modes: Photo Mode, Video Mode, and Playback Mode.
5.3 Taking Photos
- Switch to Photo Mode. The camera icon will appear on the screen.
- Frame your shot using the LCD screen.
- Press the OK/Shutter button to take a photo.
5.4 Recording Videos
- Switch to Video Mode. The video camera icon will appear on the screen.
- Press the OK/Shutter button to start recording. A red recording indicator will typically flash.
- Press the OK/Shutter button again to stop recording.
5.5 Playback
- Switch to Playback Mode.
- Use the Up/Down buttons to navigate through your photos and videos.
- Press the OK/Shutter button to view a photo or play a video.
5.6 Accessing Settings
- In any mode, press the Menu button to access camera settings.
- Use the Up/Down buttons to navigate through menu options.
- Press the OK/Shutter button to select an option.
- Press the Menu button again to exit the menu.
6. Maintenance
6.1 Cleaning the Camera
- Use a soft, lint-free cloth to clean the camera body.
- For the lens, use a specialized lens cleaning cloth and solution. Avoid touching the lens with your fingers.
- Do not use strong detergents or solvents.
6.2 Battery Care
- Store the battery in a cool, dry place when not in use.
- Avoid exposing the battery to extreme temperatures.
- Do not disassemble or short-circuit the battery.
6.3 Storage
When storing the camera for extended periods, remove the battery and store the camera in a dry, dust-free environment, preferably in its original packaging or a protective case.
7. Troubleshooting
| Problem | Possible Cause | Solution |
|---|---|---|
| Camera does not power on. | Battery is depleted or incorrectly inserted. | Charge the battery. Ensure the battery is inserted with correct polarity. |
| Cannot take photos/videos. | No MicroSD card, card full, or card error. | Insert a MicroSD card. Delete unnecessary files or replace the card. Format the card. |
| Images are blurry. | Lens is dirty. Insufficient light. Camera shake. | Clean the lens. Ensure adequate lighting. Hold the camera steady. |
| Camera freezes. | Software glitch. | Remove and reinsert the battery to reset the camera. |
If the problem persists after trying these solutions, please contact customer support.
8. Specifications
| Feature | Detail |
|---|---|
| Brand | Remax |
| Model Name | SD-02 |
| Image Sensor Resolution | 12 Megapixels |
| Effective Still Resolution | 12 Megapixels |
| Optical Zoom | 4x |
| Display Type | LCD |
| Screen Size | 1.8 inches |
| Touch Screen | No |
| Interchangeable Lens | No |
| Form Factor | Compact |
| Exposure Control Type | Automatic |
| Minimum Expanded ISO | 100 |
| File Format | RAW (for images, video format not specified but typically AVI/MOV) |
| Color | Silver |
| Shipping Dimensions | 23.4 x 16.8 x 6.2 cm; 680 grams |
9. Warranty and Support
9.1 Warranty Information
This product is covered by a limited warranty from the date of purchase. Please refer to the warranty card included in your package for specific terms and conditions. Keep your purchase receipt as proof of purchase for warranty claims.
9.2 Customer Support
For technical assistance, troubleshooting, or warranty inquiries, please contact Remax customer support. Contact details can typically be found on the manufacturer's official website or on the product packaging.
Online Support: Visit the official Remax website for FAQs, software updates, and support resources.
Email Support: Refer to your warranty card or product packaging for the customer service email address.