
Introduction
This manual provides instructions for the safe and efficient operation of your GreenLife Digital Rice Cooker. This appliance is designed for cooking various grains, including white rice, brown rice, quinoa, and steel-cut oats, with convenient one-touch presets and advanced fuzzy logic technology.
The GreenLife Digital Rice Cooker features a compact design, a removable nonstick ceramic pot, and an automatic keep-warm function. Please read all instructions carefully before first use and retain this manual for future reference.
Important Safeguards
When using electrical appliances, basic safety precautions should always be followed, including the following:
- Read all instructions.
- Do not touch hot surfaces. Use handles or knobs.
- To protect against electrical shock, do not immerse cord, plugs, or the appliance in water or other liquid.
- Close supervision is necessary when any appliance is used by or near children.
- Unplug from outlet when not in use and before cleaning. Allow to cool before putting on or taking off parts.
- Do not operate any appliance with a damaged cord or plug or after the appliance malfunctions or has been damaged in any manner.
- The use of accessory attachments not recommended by the appliance manufacturer may cause injuries.
- Do not use outdoors.
- Do not let cord hang over edge of table or counter, or touch hot surfaces.
- Do not place on or near a hot gas or electric burner, or in a heated oven.
- Extreme caution must be used when moving an appliance containing hot oil or other hot liquids.
- Always attach plug to appliance first, then plug cord into the wall outlet. To disconnect, turn any control to “off,” then remove plug from wall outlet.
- Do not use appliance for other than intended use.
Product Overview
Components
The GreenLife Digital Rice Cooker includes the main unit, a removable nonstick ceramic inner pot, a measuring cup, and a rice paddle.

Image: GreenLife Digital Rice Cooker with its main unit, removable nonstick pot, rice paddle, and measuring cup. Dimensions are indicated as 8.23" x 7.44" x 7.36".
Key Features
- Easy One-Touch Cooking: Presets for White Rice, Brown Rice, Quinoa, and Steel Cut Oats.
- Compact 4-Cup Capacity: Ideal for individuals or small families.
- Toxin-Free Ceramic Nonstick: PFAS, PFOA, lead, and cadmium-free coating for easy release and cleanup.
- Dishwasher-Safe Bowl: Removable inner pot for convenient cleaning.
- Smart Fuzzy Logic Technology: Automatically adjusts cooking time and temperature.
- User-Friendly Interface: Bright LED display with intuitive controls.
- Convenient Delay Timer: Customizable cooking start time.
- Safe Cool-Touch Exterior: Heat-resistant housing.

Image: The open rice cooker showing the control panel with buttons for White Rice, Brown Rice, Quinoa, Steel Cut Oats, Keep Warm/Stop, Delay Timer, and Menu. Cooked rice is visible in the nonstick pot.
Setup
- Unpack: Carefully remove all packaging materials and any promotional labels from the rice cooker.
- Wash Components: Wash the removable inner pot, measuring cup, and rice paddle with warm, soapy water. Rinse thoroughly and dry.
- Wipe Exterior: Wipe the exterior of the rice cooker with a damp cloth. Do not immerse the main unit in water.
- Placement: Place the rice cooker on a stable, level, heat-resistant surface away from direct sunlight and heat sources. Ensure adequate ventilation around the unit.
- Insert Inner Pot: Place the clean, dry inner pot into the main unit. Ensure it is seated correctly.
Operating Instructions
General Cooking Steps
- Measure Ingredients: Use the provided measuring cup to measure your desired amount of rice or grains. Refer to the 'Rice Chart' below for recommended quantities.
- Rinse (Optional): For best results with rice, rinse it under cold water until the water runs clear.
- Add to Pot: Place the measured rice or grains into the removable nonstick inner pot.
- Add Water: Add the appropriate amount of water according to the 'Rice Chart' or the water lines inside the inner pot.
- Close Lid: Close the lid securely.
- Select Preset: Plug in the rice cooker. Press the desired preset button (White Rice, Brown Rice, Quinoa, or Steel Cut Oats). The cooker will automatically begin the cooking cycle.
- Keep Warm: Once cooking is complete, the unit will automatically switch to 'Keep Warm' mode.

Image: A visual guide demonstrating the cooking process: pouring rice into the pot, adding water, selecting a preset on the control panel, and the final result of cooked rice.
Rice Chart
The cups referenced in this chart are with the included measuring cup (1 Rice Measuring Cup = 2/3 U.S. Cup).

Image: A table providing cooking guidelines for different grains. For White Rice: 1 cup uncooked to Line 1 water, 25 min default cook time (20-60 min range); 2 cups uncooked to Line 2 water. For Brown Rice: 1 cup uncooked to Line 1 water, 50 min default cook time (45-90 min range); 1 1/2 cups uncooked to Line 1 1/2 water. For Quinoa: 1/2 cup uncooked to Line 1 water, 30 min default cook time (20-40 min range). For Steel Cut Oats: 1 cup uncooked to Line 2 1/2 water, 25 min default cook time (20-40 min range).
Delay Timer Function
The delay timer allows you to set a customized start time for cooking. This is useful for preparing meals in advance.
- Prepare ingredients as per general cooking steps.
- Press the 'Delay Timer' button.
- Use the '+' and '-' buttons to adjust the desired delay time.
- Press the desired preset button to confirm. The cooker will start cooking after the set delay time.
Automatic Keep Warm
After the cooking cycle is complete, the rice cooker will automatically switch to 'Keep Warm' mode. This function maintains the temperature of the cooked food until you are ready to serve. The 'Keep Warm' indicator light will illuminate.

Image: A hand interacting with the control panel, specifically highlighting the 'Keep Warm' button and the digital display showing a time, indicating the function is active or being set.
Cleaning and Maintenance
Proper cleaning and maintenance ensure the longevity and performance of your rice cooker.
- Unplug and Cool: Always unplug the rice cooker from the power outlet and allow it to cool completely before cleaning.
- Remove Inner Pot: Carefully remove the inner pot from the main unit.
- Wash Removable Parts: The inner pot, measuring cup, and rice paddle are dishwasher safe. Alternatively, wash them by hand with warm, soapy water and a non-abrasive sponge. Rinse thoroughly and dry completely.
- Clean Exterior: Wipe the exterior of the main unit with a damp cloth. Do not use abrasive cleaners or scouring pads. Never immerse the main unit in water or any other liquid.
- Clean Inner Lid: The inner lid may accumulate condensation or food residue. Wipe it clean with a damp cloth.
- Storage: Ensure all parts are dry before reassembling and storing the rice cooker in a cool, dry place.
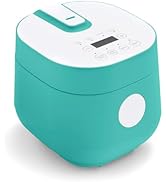
Image: A person washing the removable inner pot of the rice cooker under a faucet, demonstrating its easy cleanup.
Troubleshooting
| Problem | Possible Cause | Solution |
|---|---|---|
| Rice is too hard/undercooked | Not enough water; incorrect grain-to-water ratio; lid not properly sealed. | Ensure correct water level according to the Rice Chart. Check that the lid is closed securely. |
| Rice is too soft/mushy | Too much water; incorrect grain-to-water ratio. | Reduce water slightly for future cooking. Ensure correct water level according to the Rice Chart. |
| Cooker does not turn on | Not plugged in; power outage; faulty outlet. | Check if the power cord is securely plugged into a working outlet. Try a different outlet. |
| Food sticks to the pot | Inner pot not clean; coating damaged; insufficient water. | Ensure the inner pot is clean before use. Use the recommended water ratio. Avoid using metal utensils. |
| Steam leaks from lid | Lid not properly closed; seal damaged. | Ensure the lid is closed tightly. Check the lid seal for any damage or misalignment. |
Specifications
- Brand: GreenLife
- Model Name: Go Grains! Rice & Grain Cooker
- Model Number: CC004429-001
- Capacity: 4 Cups (cooked) / 2 Cups (uncooked)
- Product Dimensions: 7.44"D x 8.23"W x 7.36"H
- Power Source: Corded Electric
- Voltage: 110 Volts
- Wattage: 240 watts
- Material: Ceramic (inner pot), Plastic (lid)
- Special Features: Advanced Fuzzy Logic, Automatic Keep Warm, Easy Clean, Non-Stick, Timer
- Included Components: Inner Pot, Measuring Cup, Rice Cooker, Rice Paddle
- Product Care Instructions: Dishwasher Safe Parts, Wipe with Damp Cloth
- Item Weight: 3.97 Pounds
- UPC: 885837024920
Warranty and Support
For warranty information or product support, please refer to the GreenLife official website or contact their customer service directly. Keep your purchase receipt for warranty claims.
Online Support: Visit the GreenLife Store on Amazon for product information and support resources.


