
1. Introduction
Thank you for choosing the Uleway GSM Foldable Mobile Phone. This device is specifically designed with ease of use in mind, featuring large buttons, clear displays, and essential functions for seniors and users who prefer simplicity. This manual provides detailed instructions to help you set up, operate, and maintain your new phone.

Image 1.1: The Uleway GSM Foldable Mobile Phone in both closed and open positions, showcasing its compact design and large keypad.
2. Product Overview
2.1 Key Features
- Contract-Free Operation: Compatible with GSM networks (850/900/1800/1900 MHz) and SIM cards from various operators. Note: Does not support 3G or 4G SIM cards.
- Senior-Friendly Design: Features large fonts, big keys, and an improved loudspeaker for enhanced usability.
- SOS Emergency Button: Dedicated button for quick calls or SMS to pre-set emergency contacts.
- Dual Batteries: Includes two 900 mAh batteries for extended talk time (up to 240 minutes) and standby (up to 150 hours).
- Dual Displays: Features a 2.4-inch main color screen and a 1.77-inch external color screen.
- Memory Expansion: Supports up to 32GB external memory via Micro SD card (not included).
- Multimedia Functions: Includes camera, audio player, video player, Bluetooth, FM radio, calculator, alarm clock, and calendar.
- Multi-language Support: Available in Spanish, English, French, Italian, and German.
2.2 Package Contents
Upon opening the package, please verify that all the following items are included:
- 1 x Uleway Foldable Mobile Phone
- 1 x Micro USB Charger
- 2 x 900 mAh Lithium-ion Batteries
- 1 x SIM Card Adapter
- 1 x User Manual (in multiple languages)
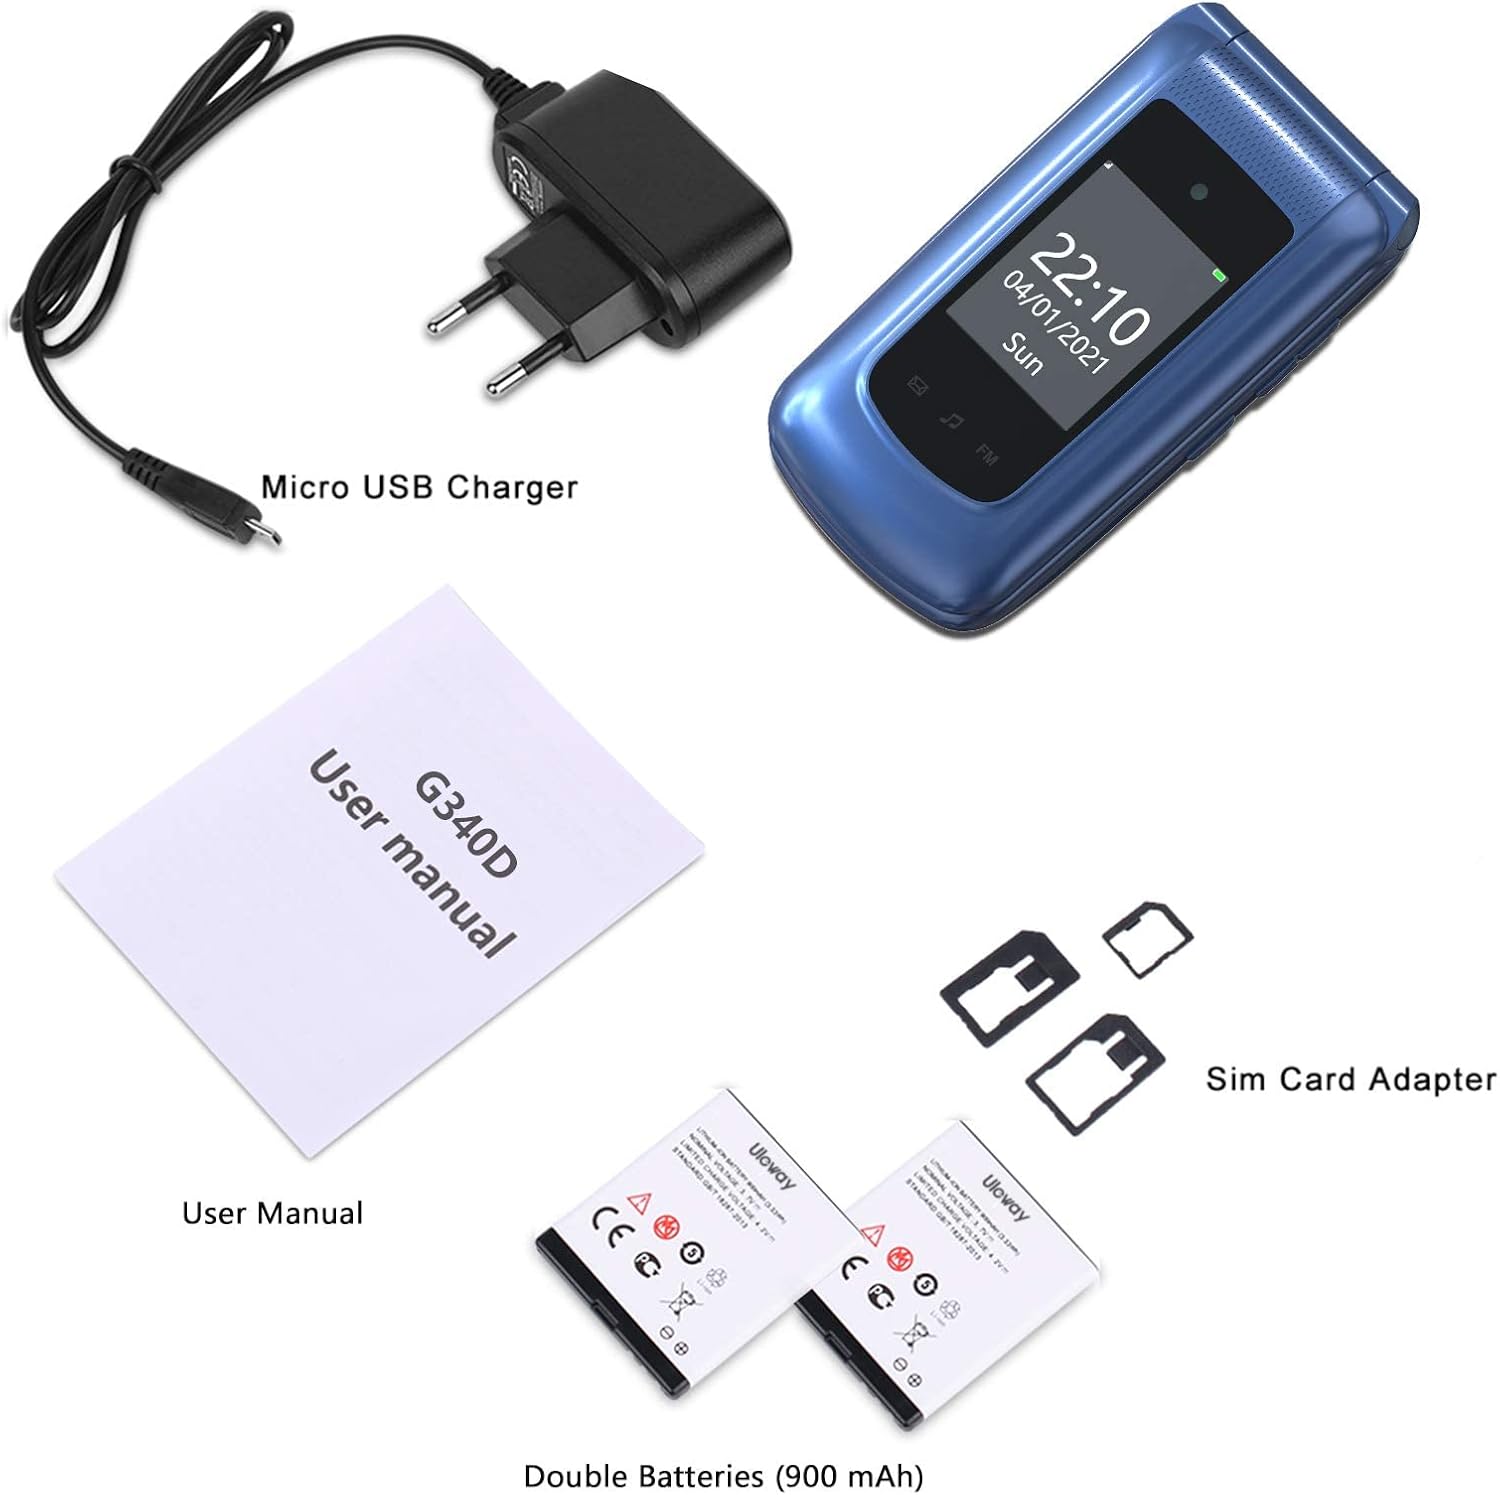
Image 2.1: All items included in the Uleway phone package.
3. Setup
3.1 Installing the SIM Card and Micro SD Card
- Open the back cover of the phone.
- If a battery is present, remove it.
- Locate the SIM card slot(s). This phone supports dual SIM cards (Standard size). Insert your SIM card(s) into the designated slot(s) with the gold contacts facing down.
- If you wish to expand storage, insert a Micro SD card (up to 32GB, not included) into the Micro SD card slot.
- Ensure both cards are securely seated.

Image 3.1: Illustration of SIM card and Micro SD card installation.
3.2 Installing the Battery
- After installing the SIM/SD cards, place one of the provided 900 mAh Lithium-ion batteries into the battery compartment, ensuring the gold contacts align with the phone's terminals.
- Gently press down on the battery until it clicks into place.
- Replace the back cover, ensuring it is securely closed.
3.3 Charging the Phone
- Connect the Micro USB charger cable to the charging port on the phone.
- Plug the charger into a standard wall outlet.
- The battery indicator on the screen will show the charging status. For first-time use, it is recommended to fully charge the battery.
- When charging is complete, disconnect the charger.
4. Operating Instructions
4.1 Power On/Off
- To Power On: Press and hold the red End Call/Power button (✆) until the screen lights up.
- To Power Off: Press and hold the red End Call/Power button (✆) until the power off options appear, then select 'Power off'.
4.2 Making and Receiving Calls
- Making a Call: Dial the desired phone number using the large keypad. Press the green Call button (✆) to initiate the call.
- Receiving a Call: When the phone rings, press the green Call button (✆) to answer. To end a call, press the red End Call button (✆).
4.3 SOS Emergency Function
The SOS button is located on the back of the phone and is designed for quick access to emergency contacts.
- Setting up SOS Contacts: Navigate to the SOS settings in the phone's menu. You can add up to 5 emergency numbers (e.g., family members, doctor, first aid).
- Activating SOS: In an emergency, press and hold the SOS button on the back of the phone for a few seconds. The phone will automatically call and send an emergency SMS to the pre-set contacts in sequence until one answers.

Image 4.1: The SOS emergency call feature, highlighting the dedicated button and its function.
4.4 Speed Dial (M1, M2, M3)
The phone features three dedicated speed dial buttons (M1, M2, M3) and allows for speed dial assignment to number keys (2-9).
- Setting up Speed Dial: In the phone's settings, assign frequently called numbers to M1, M2, M3, or number keys 2-9.
- Using Speed Dial: Simply press and hold the assigned M1, M2, M3, or number key to dial the pre-set contact.
4.5 Other Functions
The Uleway phone includes several useful features accessible via the main menu:
- FM Radio: Listen to your favorite radio stations.
- Camera: Capture photos.
- Bluetooth: Connect to compatible wireless devices like headsets.
- Calendar: Keep track of dates and appointments.
- Alarm Clock: Set multiple alarms.
- Calculator: Perform basic calculations.
- Torch: A built-in flashlight for convenience.

Image 4.2: Visual representation of the phone's key features.

Image 4.3: Demonstration of the large font and big keys designed for ease of use.
5. Maintenance
5.1 Battery Care
- Always use the original Uleway charger provided with the phone.
- Avoid exposing the battery to extreme temperatures (hot or cold).
- Do not puncture, disassemble, or short-circuit the battery.
- If the phone will not be used for an extended period, store it with a partially charged battery (around 50%) and recharge it every few months to prevent deep discharge.
- Dispose of batteries responsibly according to local regulations.
5.2 General Care
- Keep the phone dry. Moisture can damage electronic circuits.
- Avoid dropping or subjecting the phone to strong impacts.
- Clean the phone with a soft, dry cloth. Do not use harsh chemicals or cleaning solvents.
6. Troubleshooting
If you encounter issues with your Uleway phone, please refer to the following common problems and solutions:
| Problem | Possible Cause / Solution |
|---|---|
| Phone does not power on | Battery is depleted. Charge the phone for at least 30 minutes. Ensure battery is correctly inserted. |
| Cannot make or receive calls | SIM card not inserted correctly or not activated. Check network signal strength. Ensure phone is not in Airplane Mode. |
| Poor call quality / No sound | Adjust call volume. Ensure nothing is blocking the speaker/microphone. Move to an area with better network coverage. |
| SOS button not working | Ensure emergency contacts are correctly set up in the SOS settings. Check if the button is physically obstructed. |
| Battery drains quickly | Excessive use of features (e.g., FM radio, camera). Weak network signal. Battery may be old and need replacement. |
| Cannot connect to Bluetooth device | Ensure Bluetooth is enabled on both devices. Make sure devices are within range. Check pairing instructions for the other device. |
If the problem persists after trying these solutions, please contact Uleway customer support.
7. Specifications
| Feature | Specification |
|---|---|
| Brand | Uleway |
| Model Number | SC6531E |
| Color | Blue |
| Product Type | Flip Phone |
| Operating System | Symbian |
| Main Screen Size | 2.4 Inches |
| External Screen Size | 1.77 Inches |
| Connectivity | USB (Micro USB) |
| Battery Composition | Lithium-ion |
| Battery Capacity | 900 mAh (x2 included) |
| Internal Storage (RAM + ROM) | 32 MB RAM + 32 MB ROM |
| Expandable Memory | Up to 32 GB (Micro SD card, not included) |
| Wireless Carrier | All carriers (GSM 850/900/1800/1900 MHz) |
| Cellular Technology | 2G |
| Wireless Network Technology | GSM |
| Languages Supported | Spanish, English, French, Italian, German |
8. Warranty and Support
Uleway provides technical service and customer support for a period of two years from the date of purchase. This warranty covers manufacturing defects and malfunctions under normal use. Please note that artificial damage (damage caused by misuse, accidents, or unauthorized modifications) is not covered under this warranty.
For technical assistance or warranty claims, please contact Uleway customer service through the retailer where you purchased the product or refer to the contact information provided in your product packaging.