
Pioneer DJ VM-50
Pioneer DJ VM-50 5.25-inch Active Monitor Speaker Instruction Manual
Brand: Pioneer DJ
Model: VM-50
Introduction
The Pioneer DJ VM-50 active monitor speaker is designed to produce clear audio with fast-attacking, punchy bass. This speaker can be precisely tuned to suit the acoustic characteristics of any room, making it ideal for recreating a club sound during DJ performances or providing a flat frequency response essential for music production in both home and professional studio environments.

Figure 1: Pioneer DJ VM-50 Active Monitor Speaker. This image shows the front view of the black VM-50 speaker, highlighting its compact and robust design.
Key Features
- Low/High EQ Controls: Allows for precise sound adjustments to match your listening environment or production needs.
- Constant Directivity Horn: Delivers mid and high frequencies with power, creating a broad and uniform listening space. The horn and woofer edge are designed for a smooth frequency crossover, ensuring natural sound reproduction.

Figure 2: Side view of the VM-50 speaker, illustrating the design of the constant directivity horn for optimal sound dispersion.
- DSP Control: Each VM speaker includes DSP settings with 16 configurations, enabling users to find the perfect sound for DJing or music production, regardless of room shape, size, or construction.

Figure 3: Detailed view of the DSP control panel on the rear of the VM-50, showing the Low and High EQ adjustment knobs and their corresponding frequency response curves.
- 4-mm Rigid Aluminum Front Baffle: The hexagonal aluminum front baffle not only provides a fresh aesthetic but also significantly improves sound quality and durability by reducing unwanted vibrations.

Figure 4: Close-up of the VM-50's hexagonal aluminum front baffle, showcasing its robust construction and brushed texture.
- Aramid Fiber Woofer Cone: Ensures fast response for bass and low-mid frequencies, contributing to the speaker's clear and punchy sound.

Figure 5: Detailed view of the Aramid Fiber Woofer Cone, designed for precise and responsive low-frequency reproduction.
- Vortex Bass Accelerator: Features a bass reflex port with grooves that reduce air friction, ensuring tight and punchy bass without unwanted vibrations, even at high volumes.
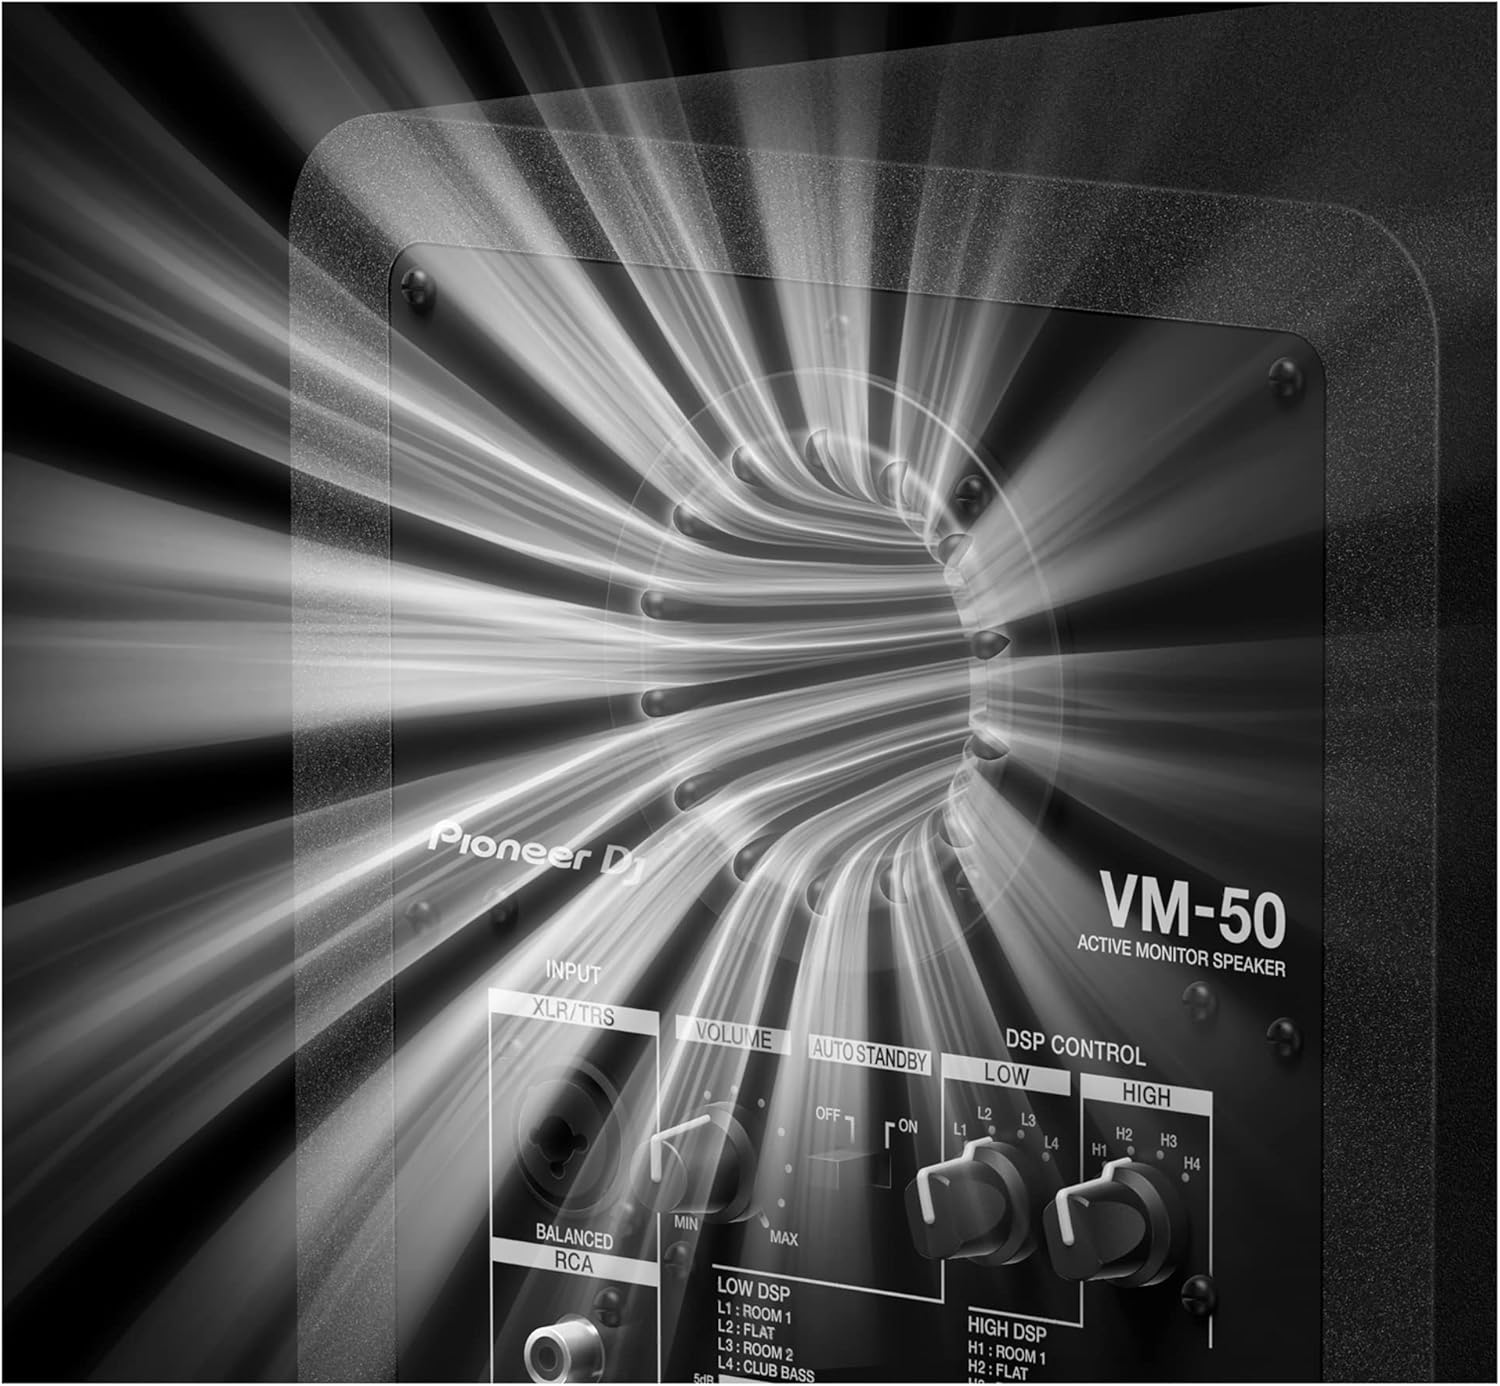
Figure 6: Close-up of the Vortex Bass Accelerator port on the rear of the VM-50, engineered for smooth airflow and distortion-free bass.
Official Product Video
Video 1: Pioneer DJ Official new VM series active monitor speakers. This video provides an overview of the VM series, highlighting key features such as clear bass, club-style sound recreation, rigid aluminum baffle, Class D amplifier, Aramid fiber woofer cone, Vortex Bass Accelerator, and DSP control.
Setup Guide
1. Unpacking and Placement
Carefully remove the VM-50 speaker from its packaging. Place the speaker on a stable, flat surface, ideally at ear level in your listening position. Ensure there is adequate space around the speaker for proper ventilation and bass port function. For optimal stereo imaging, position the speakers equidistant from your listening position, forming an equilateral triangle.
2. Connections
The VM-50 offers versatile input options:
- XLR/TRS Balanced Input: For professional audio equipment, use an XLR or 1/4-inch TRS cable to connect your audio interface, mixer, or controller to the speaker's balanced input.
- RCA Unbalanced Input: For consumer-level audio devices, use an RCA cable to connect to the speaker's unbalanced input.
Connect the power cable to the AC IN port on the rear of the speaker, then plug it into a suitable power outlet. Ensure the power switch is in the OFF position before connecting to power.

Figure 7: Rear panel of the VM-50, showing the XLR/TRS and RCA input ports, volume control, auto standby switch, DSP controls, and power input.
Operating Instructions
1. Power On/Off
After all connections are made, flip the power switch on the rear panel to the ON position. The power indicator on the front of the speaker will illuminate.
2. Volume Adjustment
Use the VOLUME knob on the rear panel to adjust the output level of the speaker. Start with the volume at its minimum setting and gradually increase it to a comfortable listening level. Avoid setting the volume too high to prevent distortion and potential damage to the speaker or your hearing.
3. DSP Control (EQ Settings)
The VM-50 features a DSP control section on the rear panel, allowing you to tailor the sound to your room acoustics or personal preference. There are separate controls for LOW EQ and HIGH EQ, each offering four distinct settings:
- LOW EQ Settings:
- L1: Room 1 (Boosted low-end for smaller rooms)
- L2: Flat (Neutral low-end response)
- L3: Room 2 (Slightly attenuated low-end for larger rooms or bass-heavy environments)
- L4: Club Bass (Enhanced low-end for a powerful, club-like sound)
- HIGH EQ Settings:
- H1: Room 1 (Slightly attenuated high-end for brighter rooms)
- H2: Flat (Neutral high-end response)
- H3: Room 2 (Slightly boosted high-end for duller rooms)
- H4: Bright Treble (Enhanced high-end for a crisp, detailed sound)
Experiment with these settings to achieve the desired sound profile for your specific application, whether it's critical listening for production or dynamic playback for DJing.
4. Auto Standby
The AUTO STANDBY switch allows the speaker to automatically enter a low-power standby mode when no audio input is detected for a certain period. Flip the switch to ON to enable this feature, or OFF to keep the speaker fully active at all times.
Maintenance
- Cleaning: Regularly wipe the speaker's exterior with a soft, dry cloth. For stubborn dirt, a slightly damp cloth can be used, followed by a dry one. Avoid using abrasive cleaners, solvents, or chemical sprays, as these can damage the finish.
- Ventilation: Ensure the rear panel and bass port are free from obstructions to allow for proper airflow and prevent overheating.
- Storage: If storing the speaker for an extended period, disconnect it from power and store it in a cool, dry place, away from direct sunlight and extreme temperatures.
- Handling: Always handle the speaker carefully. Avoid dropping it or subjecting it to strong impacts, which can damage internal components.
Troubleshooting
| Problem | Possible Cause | Solution |
|---|---|---|
| No sound from speaker |
|
|
| Distorted or unclear sound |
|
|
| Speaker enters standby mode unexpectedly |
|
|
Specifications
| Attribute | Value |
|---|---|
| Material | Aluminum |
| Model Name | VM-50 |
| Speaker Type | Woofer |
| Special Feature | Bass Boost |
| Recommended Uses For Product | Music |
| Compatible Devices | Desktop, Laptop, Smartphone, Tablet, Television |
| Subwoofer Diameter | 5.25 Inches |
| Unit Count | 1.0 Count |
| Controller Type | Corded electric |
| Color | Black |
| Included Components | Earbuds |
| Product Dimensions | 1"D x 1"W x 1"H |
| Item Weight | 15.5 Pounds |
| Is Waterproof | False |
| Warranty Type | Limited |
| Number of Items | 4 |
| Control Method | Touch |
| Speaker Size | 5.25 Inches |
| Power Source | Corded Electric |
| Woofer Diameter | 5.25 Inches |
| Subwoofer Connectivity Technology | Wired |
| Connectivity Protocol | Bluetooth |
| Includes MP3 player? | No |
| Number of Power Levels | 1 |
| Specific Uses For Product | Home Studios, Professional Studios, DJing |
| UPC | 841300102021 |
| Style | VM-50 |
| Manufacturer | Pioneer DJ |
| ASIN | B0918FSSRZ |
| Item model number | VM-50 |
| Date First Available | March 30, 2021 |
| Brand | Pioneer DJ |
| Speaker Maximum Output Power | 60 Watts |
| Connectivity Technology | Coaxial |
| Audio Output Mode | Stereo |
| Mounting Type | Tabletop Mount |
What's in the Box
- Earbuds (as per product data, though unusual for a monitor speaker)
- Pioneer DJ VM-50 Active Monitor Speaker
- Power Cable
- Operating Instructions / Safety Information
Warranty and Support
The Pioneer DJ VM-50 Active Monitor Speaker comes with a Limited Warranty. For detailed information regarding warranty terms, conditions, and duration, please refer to the warranty card included with your product or visit the official Pioneer DJ website.
For technical support, troubleshooting assistance beyond this manual, or to inquire about service, please visit the Pioneer DJ Store on Amazon or their official support channels.
Related documentsVM-50


Ask a question about this manual
Ask about setup, troubleshooting, compatibility, parts, safety, or missing instructions. Manuals+ will review the question and use this page’s manual context to help answer it.