1. Introduction
Thank you for choosing the ieGeek RDS Handsfree Car Radio Bluetooth 5.0. This car stereo is designed to provide a comprehensive in-car audio experience, featuring FM/AM radio with RDS, Bluetooth 5.0 for hands-free calling and audio streaming, and multiple media playback options including USB, SD card, and AUX input. With its user-friendly interface and robust features, it aims to enhance your driving journey with quality sound and convenient connectivity.

Figure 1.1: ieGeek Car Radio K301 with included remote control, showcasing the main unit and its wireless remote for convenient operation.
2. Safety Information
Please read all safety instructions carefully before installation and operation. Failure to follow these instructions may result in injury or damage to the device or vehicle.
- Professional Installation Recommended: For optimal safety and performance, it is highly recommended to have this product installed by a qualified professional.
- Power Source: Connect the unit only to a 12V DC power supply with a negative ground.
- Wiring: Ensure all wiring is correctly connected according to the wiring diagram to prevent short circuits or damage. Insulate all exposed wires.
- Driving Safety: Do not operate the unit in a way that distracts you from driving. Adjust settings only when it is safe to do so.
- Temperature: Avoid exposing the unit to extreme temperatures, direct sunlight for prolonged periods, or high humidity.
- Cleaning: Use a soft, dry cloth for cleaning. Do not use abrasive cleaners or solvents.
3. What's in the Box
Upon opening the package, please verify that all the following items are included:
- 1 x ieGeek Car Radio (Main Unit)
- 1 x Remote Control
- 2 x ISO Connection Cable
- 2 x Disassembly Keys
- 1 x User Manual

Figure 3.1: All components included in the ieGeek Car Radio package, including the main unit, remote, cables, keys, and manual.
4. Setup and Installation
4.1 Wiring Diagram
Before installation, ensure the vehicle's battery is disconnected. Refer to the following wiring diagram for correct connections. Use the provided ISO connection cables for simplified installation if your vehicle supports them.

Figure 4.1: Detailed wiring diagram showing connections for power, ground, speakers, and antenna. Ensure correct polarity and secure connections.
- Power (Yellow): Connect to constant 12V power (B+).
- Accessory (Red): Connect to switched 12V power (ACC).
- Ground (Black): Connect to vehicle chassis ground.
- Antenna (Blue): Connect to power antenna or amplifier remote turn-on lead (if applicable).
- Speakers: Connect speaker wires according to the diagram, ensuring correct positive and negative terminals for each speaker.
4.2 Initial Power On
After successful installation, reconnect the vehicle battery. Press the ON button on the head unit to power it on. The display will illuminate.
4.3 Setting the Clock
To set the correct time on your car stereo:
- Ensure the unit is powered on.
- Press the Volume knob repeatedly until "Timeset" is displayed on the screen.
- Press and hold the Volume knob for a few seconds until the hours on the clock begin to flash.
- Rotate the Volume knob to adjust the hour.
- Press the Volume knob again to select the minutes, then rotate the knob to set the minutes.
- Press the Volume knob one more time to save the time setting.
4.4 Changing Display Color
To customize the display illumination color:
- Ensure the unit is powered on.
- Press the Volume knob repeatedly until either "Auto" or the name of a color appears on the screen.
- Rotate the Volume knob to cycle through available colors until your preferred color is displayed.
- Once the desired color is shown, press the Volume knob again to select and confirm it.
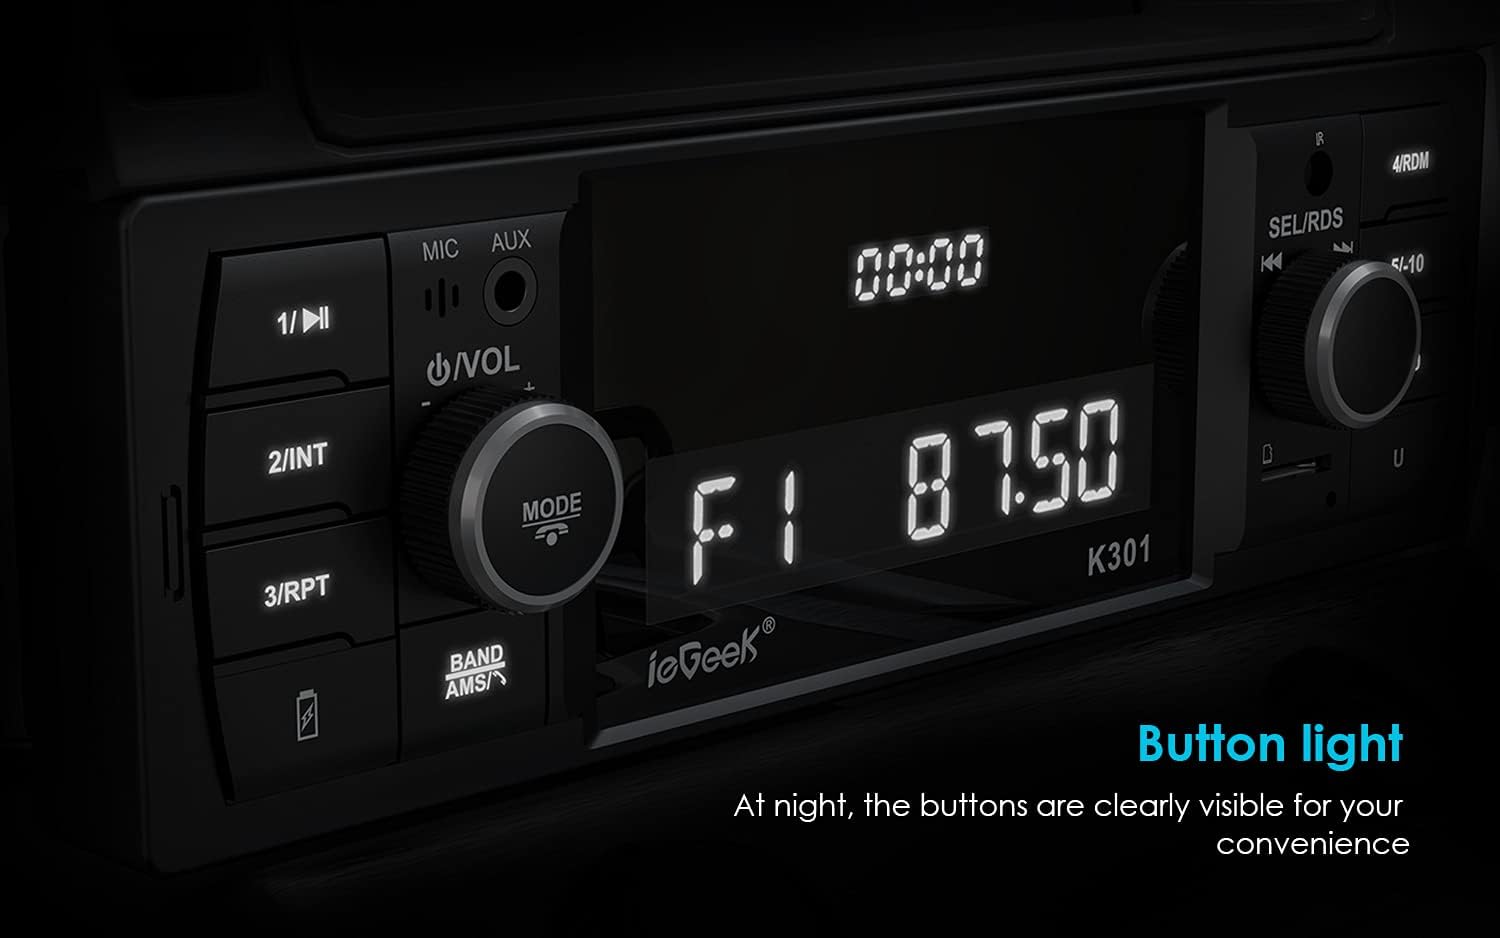
Figure 4.2: The car radio display and buttons illuminated, showing clear visibility for night-time use.
5. Operating Instructions
5.1 Source Selection
To switch between different audio sources (FM, AM, Bluetooth, AUX, USB, SD):
- Press the MODE button on the front panel or the corresponding source button on the remote control to cycle through available inputs.
- Alternatively, press the "Hang Up" button (typically above the ON button) on the head unit repeatedly until the desired source (e.g., "BT", "AUX", "FM", "AM") is displayed.
5.2 Radio Operation (FM/AM/RDS)
The unit supports FM and AM radio reception with RDS functionality.
- Tuning: Use the SEL/RDS knob or the forward/backward buttons to manually tune or seek for stations.
- Auto Scan/Preset Store: Press and hold the BAND/AMS button to automatically scan and store strong stations into presets (up to 18 FM and 12 AM stations).
- Recalling Presets: Briefly press the numbered buttons (1-6) on the front panel to recall stored stations.
- RDS Function: When RDS is active, the unit can display station information, program type (PTY), and traffic announcements (TA), enhancing your radio experience.

Figure 5.1: The car radio displaying an FM frequency, indicating its ability to tune into radio stations. Up to 30 stations can be stored.
5.3 Bluetooth 5.0 Hands-Free and Audio Streaming
The unit features Bluetooth 5.0 for stable and clear wireless connections.
- Pairing:
- Ensure Bluetooth is enabled on your mobile device.
- Select "BT" as the source on the car stereo. The display will show "PAIRING" or similar.
- Search for "ieGeek K301" or similar on your device's Bluetooth settings and select it to pair.
- Once paired, the unit will confirm the connection.
- Hands-Free Calling:
- Answer/End Call: Press the Call/Answer button on the unit or remote.
- Reject Call: Press and hold the Call/Answer button.
- Dialing: Use your phone to dial, and the audio will automatically transfer to the car stereo.
- Audio Streaming (A2DP): Play music from your paired device. Use the unit's controls or your device to play/pause, skip tracks, and adjust volume.

Figure 5.2: The car radio facilitating a hands-free Bluetooth call, demonstrating its stable Bluetooth 5.0 transmission for communication and audio.
5.4 Media Playback (USB, SD, AUX)
The unit supports various media formats and inputs.
- USB Playback: Insert a USB flash drive (up to 32GB) into the USB port. The unit will automatically switch to USB mode and begin playing supported audio files (MP3/WMA/WAV/APE/FLAC).
- SD Card Playback: Insert a Micro SD card (up to 32GB) into the SD card slot. The unit will automatically switch to SD mode and play supported audio files.
- AUX-IN: Connect external audio devices (e.g., MP3 players, smartphones) to the 3.5mm AUX-IN port using an audio cable. Select "AUX" as the source.

Figure 5.3: The AUX-IN port on the car radio, demonstrating its connection to a smartphone for high-fidelity audio input.
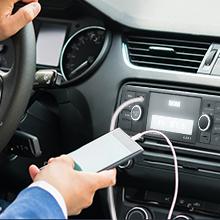
Figure 5.4: Close-up view of the USB and SD card slots, indicating support for external storage devices up to 32GB.
5.5 Audio Settings (EQ)
Customize your sound experience with preset equalizer settings:
- Press the EQ button on the remote or cycle through EQ modes using the Volume knob (if available) to select from presets like Pop, Rock, Classic, or Flat.
- Adjust Bass, Treble, Fade, and Balance settings as desired for personalized audio.
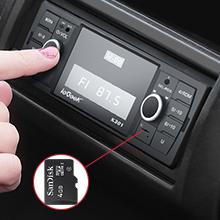
Figure 5.5: Visual representation of available EQ presets including Classic, Pop, Rock, and Nation, allowing users to tailor sound output.
5.6 Remote Control Usage
The included remote control provides convenient access to various functions from a distance of up to 3 meters.
- Point the remote control directly at the car stereo's front panel.
- Use buttons for power, mode selection, volume adjustment, track skip, station tuning, and EQ presets.

Figure 5.6: The compact remote control for the ieGeek Car Radio, designed for easy operation within a 3-meter range.
6. Maintenance
- Cleaning the Unit: Use a soft, dry cloth to wipe the front panel and display. Do not use liquid or aerosol cleaners, as they may damage the unit.
- Preventing Damage: Avoid dropping the unit or subjecting it to strong impacts. Do not insert foreign objects into the slots or openings.
- Temperature Control: While the unit is designed for automotive use, extreme temperatures can affect its lifespan. Avoid leaving the car in direct sunlight for extended periods in hot weather.
7. Troubleshooting
If you encounter issues with your ieGeek car radio, refer to the following common problems and solutions:
| Problem | Possible Cause | Solution |
|---|---|---|
| No Power | Incorrect wiring; Blown fuse; Loose connection. | Check power and ground connections. Inspect vehicle's fuse box and the unit's fuse. Ensure all wires are securely connected. |
| No Sound | Volume too low; Mute activated; Incorrect speaker wiring; Incorrect source selected. | Increase volume. Check if mute is on. Verify speaker connections. Ensure the correct audio source (FM, BT, AUX, USB, SD) is selected. |
| Bluetooth Not Connecting/Unstable | Device not in pairing mode; Interference; Previously paired device causing conflict. | Ensure Bluetooth is enabled on your phone and the unit is in BT mode. Delete "ieGeek K301" from your phone's paired devices and re-pair. Move closer to the unit. |
| Radio Stations Not Saving (Memory Loss) | Constant 12V (Yellow wire) not connected or incorrectly wired. | Verify that the yellow wire is connected to a constant 12V power source, not a switched accessory wire. An ISO adapter might be needed for some car models. |
| Remote Control Not Working | Battery depleted; Obstruction; Not pointing correctly. | Replace the remote control battery. Ensure no objects are blocking the signal path. Point the remote directly at the unit's front panel. |
| Poor Radio Reception | Antenna not connected; Damaged antenna; Weak signal area. | Check antenna connection. Inspect antenna for damage. Try tuning to different stations or moving to an area with better signal. |
8. Specifications
Key technical specifications for the ieGeek RDS Handsfree Car Radio Bluetooth 5.0:
- Model Number: MR-CR4358-UK
- Brand: ieGeek
- Product Dimensions: 18.5 x 10 x 6 cm (Unit); 9D x 23W x 16H cm (Overall)
- Weight: 450 g
- Connectivity Technology: Bluetooth 5.0, Auxiliary, USB
- Controller Type: iOS, Android (via Bluetooth)
- Special Feature: RDS (Radio Data System)
- Compatible Devices: Smartphone
- Connector Type: 4-Pin Mini DIN (ISO connection cables provided)
- Audio Encoding: Stereo
- Audio Output Mode: Stereo
- Output Power: 4 x 60W (Max)
- FM Frequency Range: 87.5-107.9 MHz
- AM Frequency Range: 522-1620 KHz
- USB/SD Capacity: Up to 32 GB
- USB Charging: 5V - 2.1A
- Color: Grey
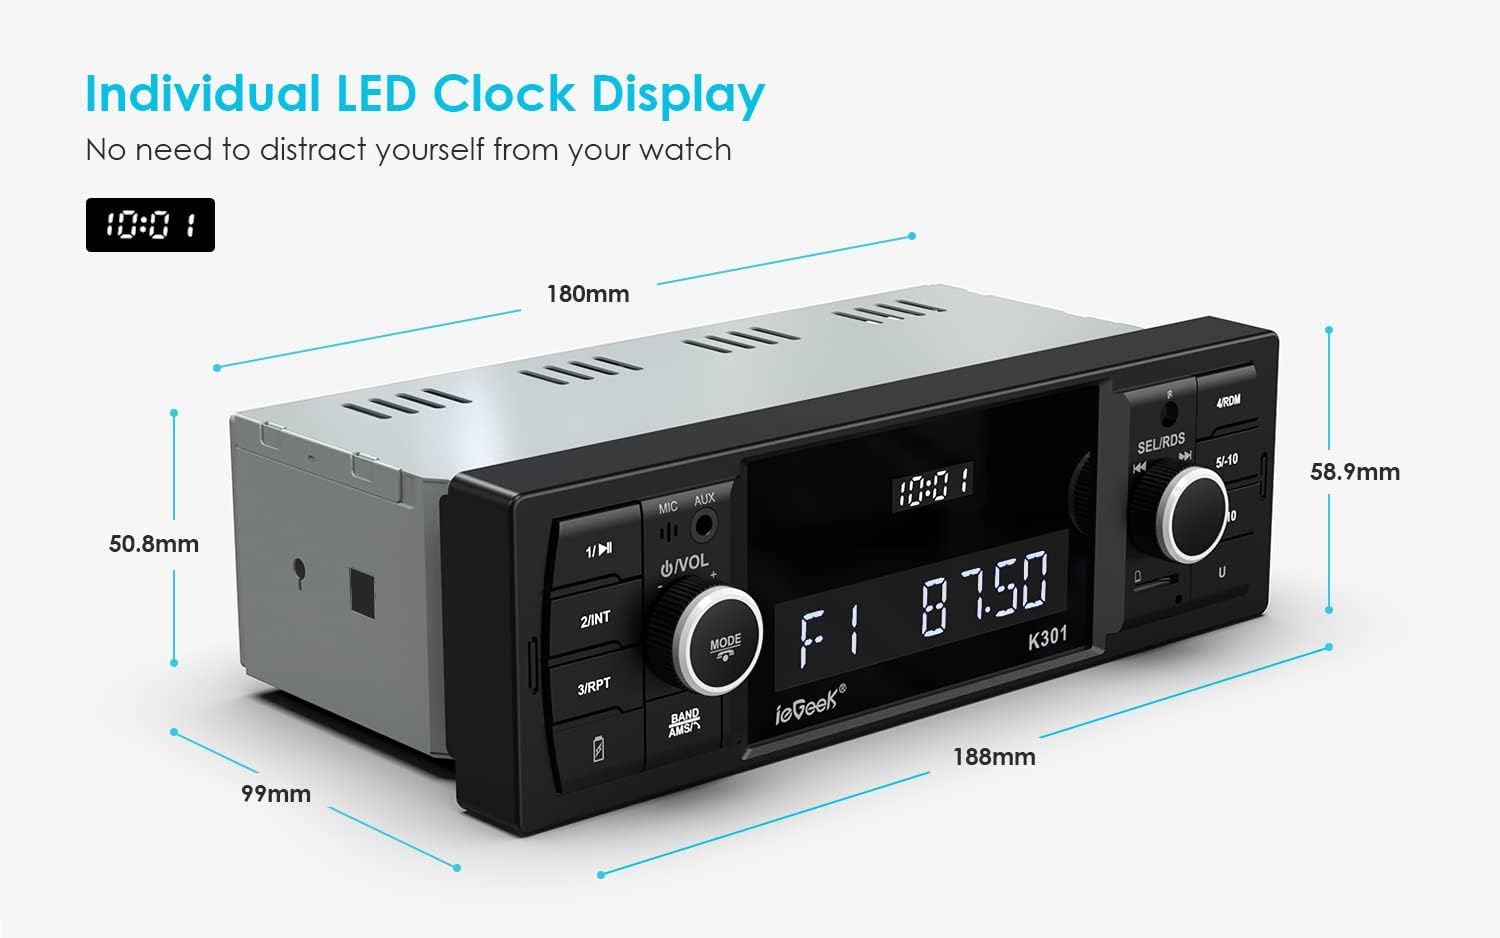
Figure 8.1: Dimensional drawing of the ieGeek Car Radio, showing key measurements for installation planning.
9. Warranty and Support
ieGeek products are designed for reliability and performance. For any questions, technical assistance, or warranty claims, please contact ieGeek customer support through the retailer where you purchased the product or visit the official ieGeek website for contact information.
Please retain your proof of purchase for warranty purposes.