
Introduction
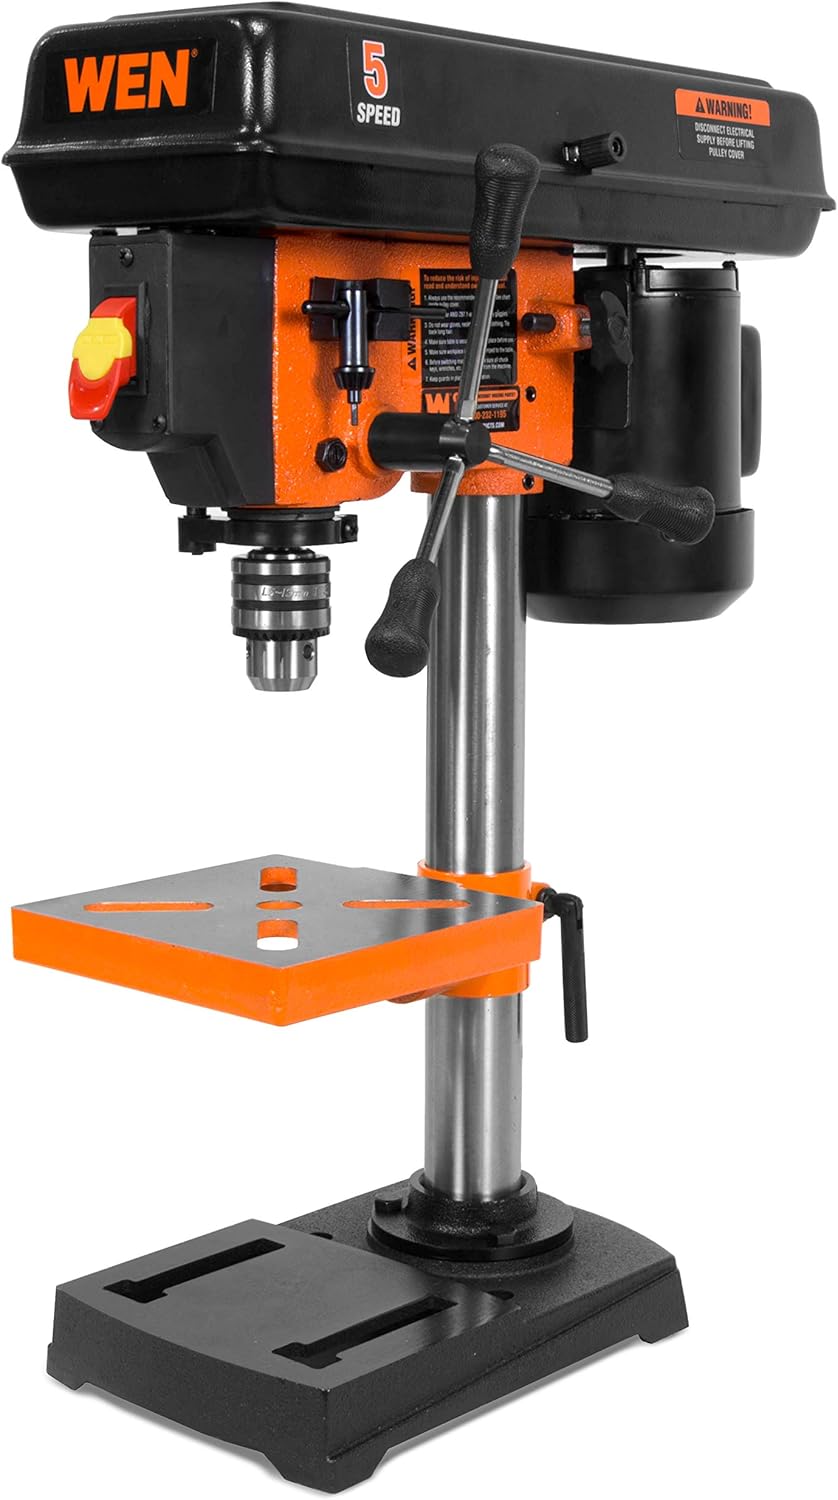
This manual provides essential information for the safe operation, assembly, maintenance, and troubleshooting of your WEN 2.3-Amp 8-Inch 5-Speed Cast Iron Benchtop Drill Press, Model 4206T. Please read and understand all instructions before using the tool to ensure proper function and personal safety.
Safety Information
WARNING: Always wear appropriate personal protective equipment, including eye protection, hearing protection, and gloves, when operating this drill press. Ensure the workpiece is securely clamped before drilling. Disconnect power before making adjustments or performing maintenance.
This product may contain chemicals known to the State of California to cause cancer, birth defects, or other reproductive harm. For more information, visit www.P65Warnings.ca.gov.
Product Features
- 2.3-Amp Induction Motor: Provides reliable power for various drilling tasks.
- 8-Inch Swing: Accommodates larger workpieces.
- 2-Inch Spindle Travel: Allows for deep and precise drilling.
- 5-Speed Operation: Adjustable speeds (750, 1100, 1500, 2100, or 3200 RPM) for different materials and bit sizes.
- 1/2-Inch Keyed Chuck: Securely holds drill bits.
- Onboard Key Storage: Conveniently keeps the chuck key accessible.
- 6.5 x 6.5 Inch Worktable: Height adjustable and bevels up to 45 degrees left and right.
- Cast Iron Table & Base: Enhances stability and reduces vibration during operation.
- Locking Depth Stop: Ensures accurate and repeatable drilling depths.
Setup and Assembly
- Base and Column Assembly: Securely attach the support column to the cast iron base using the provided fasteners. Ensure all connections are tight to maintain stability.
- Worktable Installation: Slide the worktable assembly onto the support column. Position it at a suitable height and tighten the locking lever. The worktable can be adjusted vertically and tilted up to 45 degrees for angled drilling.
- Drill Head Placement: Carefully place the drill head assembly onto the top of the support column. Secure it using the set screws and Allen keys provided, ensuring it is centered and stable.
- Feed Handles Attachment: Thread the three feed handles into the feed assembly on the drill head. These handles control the vertical movement of the chuck.
- Chuck Installation: Clean the tapered spindle and the inside of the chuck. Manually press the chuck onto the tapered spindle. Once seated, tap it firmly with a mallet to ensure a secure fit. Ensure the chuck jaws are fully retracted before tapping.

Operating Instructions
- Power On/Off: The power switch is located on the front of the drill head. Push the switch up to turn the drill press ON and down to turn it OFF. A safety lock is included to prevent inadvertent activation.
- Adjusting Worktable: Loosen the worktable locking lever to adjust its height or to tilt it for angled drilling. Re-tighten the lever firmly once the desired position is achieved.
- Changing Drill Bits: Use the chuck key, stored on the side of the drill head, to loosen or tighten the chuck jaws. Insert the drill bit into the chuck, ensuring it is centered and securely tightened.
- Setting Depth Stop: The locking depth stop is located on the side of the drill head. Loosen the nuts on the depth stop adjustment rod and set them to the desired drilling depth. This ensures consistent hole depths for repetitive tasks.
- Adjusting Speed: Open the pulley cover on top of the drill head. Loosen the belt tensioner knob. Refer to the speed chart inside the cover to select the appropriate belt position for your desired RPM based on drill bit size and material. Move the belt to the correct pulleys, then re-tension the belt and tighten the knob.
- Drilling Techniques: Place your workpiece on the worktable and secure it with clamps or a drill press vise. Align the drill bit with your marked drilling point. Slowly lower the drill bit into the workpiece using the feed handles, applying steady pressure.


Maintenance
- Regular Cleaning: Keep the drill press clean from dust, chips, and debris. Use a brush or vacuum to remove buildup, especially around the chuck, spindle, and worktable.
- Lubrication: Periodically apply a light coat of machine oil to moving parts, such as the column and spindle, to ensure smooth operation and prevent rust.
- Belt Inspection: Check the drive belt for wear, cracks, or damage. Replace the belt if any signs of deterioration are present. Ensure proper belt tension for optimal performance.
- Chuck Maintenance: Keep the chuck jaws clean and free of debris to ensure a secure grip on drill bits.
- Fastener Check: Regularly inspect all nuts, bolts, and screws for tightness. Re-tighten as necessary to maintain the structural integrity and safety of the drill press.
Troubleshooting
- Excessive Vibration/Wobble:
- Ensure the drill bit is properly seated and tightened in the chuck.
- Check if the drill bit itself is bent or damaged; replace if necessary.
- Verify that the drill press is securely mounted to a stable workbench.
- Inspect the drive belt for proper tension and wear.
- Motor Overheating:
- Avoid continuous heavy-duty operation without breaks.
- Ensure proper ventilation around the motor.
- Check for excessive friction or binding in moving parts.
- Inaccurate Drilling:
- Confirm the workpiece is firmly clamped to the worktable.
- Verify the worktable is locked securely and not shifting.
- Check the depth stop setting for accuracy.
Specifications
| Specification | Value |
|---|---|
| Brand | WEN |
| Model Number | 4206T |
| Power Source | AC |
| Amperage | 2.3 Amps |
| Voltage | 120V |
| Number of Speeds | 5 |
| Maximum Rotational Speed | 3200 RPM |
| Maximum Chuck Size | 0.5 Inches |
| Drilling Capacity (Wood) | 8 Inches |
| Drilling Capacity (Metal) | 0.5 Inches |
| Item Dimensions (L x W x H) | 16.88"L x 8.63"W x 22.88"H |
| Item Weight | 32 Pounds |
| Material Type | Cast Iron |
Warranty and Support
The WEN 2.3-Amp 8-Inch 5-Speed Cast Iron Benchtop Drill Press (4206T) comes backed by a two-year warranty. For replacement parts or customer assistance, please contact WEN customer support.


