
Dicfeos didi98
Dicfeos Professional HVLP Paint Sprayer User Manual
Model: didi98
Brand: Dicfeos
Introduction
Thank you for choosing the Dicfeos Professional 700W HVLP Home Paint Spray Gun. This high-power paint sprayer is designed for efficient and even application of various paints and stains on surfaces such as cabinets, fences, and furniture. Its user-friendly design ensures easy operation and cleaning, making your painting projects simpler and more professional.
Safety Instructions
Always observe the following safety precautions to prevent injury or damage:
- Wear appropriate personal protective equipment (PPE) including safety glasses, gloves, and a respirator.
- Ensure adequate ventilation in your work area to avoid inhaling paint fumes.
- Keep children and pets away from the work area.
- Do not spray flammable liquids near open flames or ignition sources.
- Always unplug the sprayer before cleaning, maintenance, or when not in use.
- Never immerse the motor unit in water or other liquids.
- Use only recommended thinning agents for your paint type.
Product Components
The Dicfeos Paint Sprayer comes with the following components:

Image: The main paint sprayer unit, showing the motor, handle, trigger, and paint container, along with various nozzles and a paint filter funnel.
- Main Sprayer Unit (700W motor)
- 1300ml Paint Container
- 4 Nozzle Sizes (Φ1.3mm, Φ1.8mm, Φ2.6mm, Φ3.0mm)
- Viscosity Measuring Cup
- Cleaning Brush
- Cleaning Needle
- 3-Pack of Paint Strainers
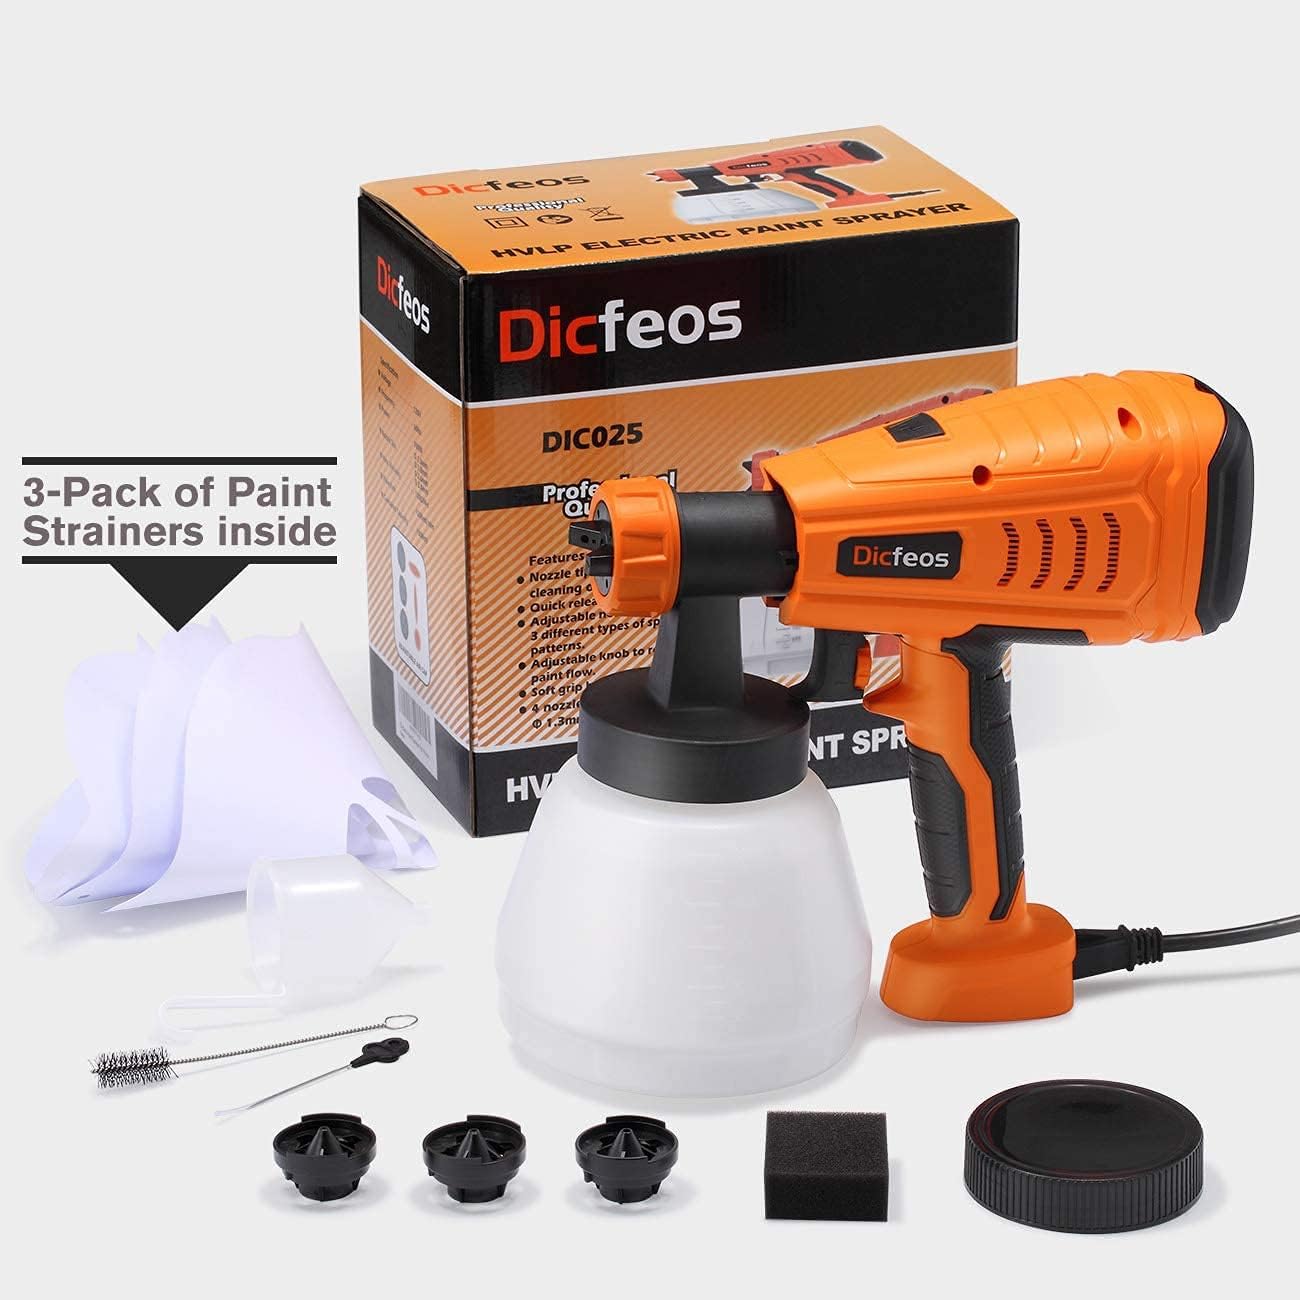
Image: All components of the Dicfeos paint sprayer laid out, including the main unit, paint container, various nozzles, cleaning tools, and paint strainers, alongside its product packaging.
Setup and Preparation
- Prepare the Work Area: Ensure the area is clean, well-ventilated, and protected from overspray. Cover anything you don't want painted.
- Prepare the Paint:
- Measure the viscosity of your paint using the provided measuring cup.
- Thin the paint as necessary according to the paint manufacturer's instructions and the sprayer's viscosity guidelines. Common thinning ratios are provided in the table below.
- Strain the paint using the included paint strainers to remove any particles that could clog the nozzle.
Note: Latex paint may require slight thinning. Oil-based paints and stains may also need thinning.
- Select the Correct Nozzle: Choose a nozzle size appropriate for your paint type and desired finish.

Image: Close-up view of the four interchangeable nozzles (Φ1.3mm, Φ1.8mm, Φ2.6mm, Φ3.0mm), indicating their suitability for different paint types like latex, sealers, and varnish.
- Φ3.0mm: Ideal for thicker paints like latex, chalk type, and milk type paint.
- Φ2.6mm: Great for thin paints like sealers and varnish.
- Φ1.8mm: Suitable for thin paints like sealers and varnish.
- Φ1.3mm: Best for very thin paints and stains.
- Assemble the Sprayer:
- Attach the selected nozzle to the sprayer head.
- Fill the 1300ml container with your prepared paint.
- Securely attach the paint container to the main sprayer unit.
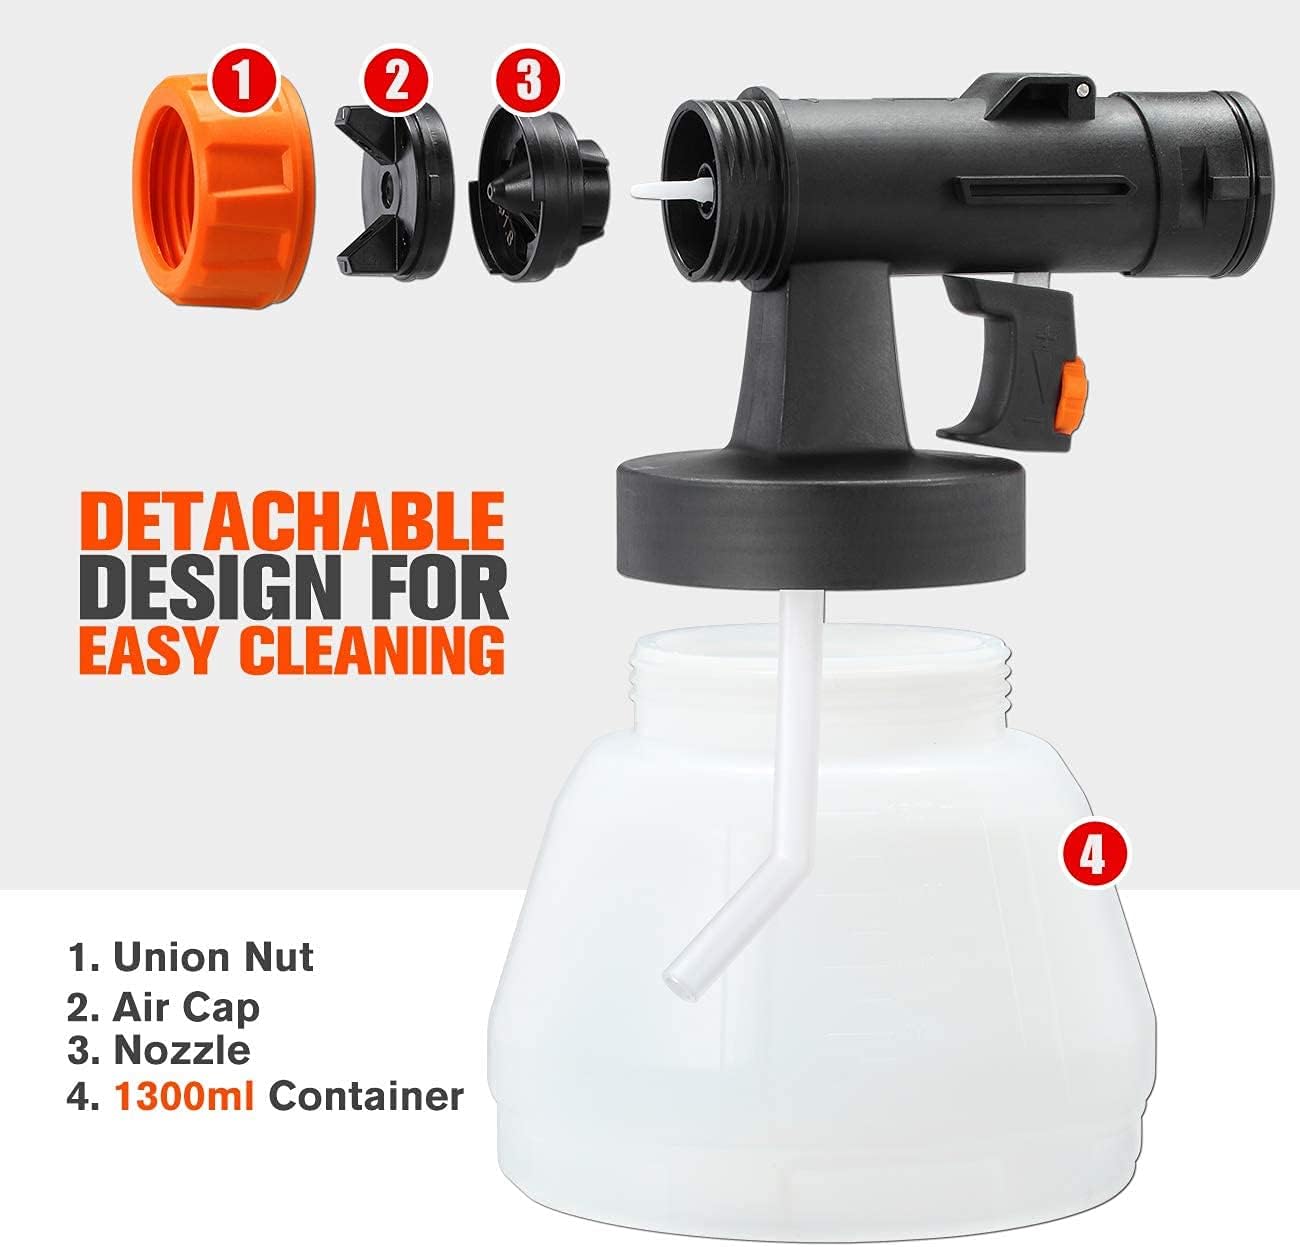
Image: An exploded view diagram illustrating the detachable components of the sprayer head: Union Nut, Air Cap, Nozzle, and the 1300ml Container, highlighting the easy cleaning design.
Operating Instructions
- Adjust Spray Pattern: The sprayer offers three spray patterns:

Image: A visual guide demonstrating how to adjust the air cap to achieve three distinct spray patterns: Circular (45°), Vertical (180°), and Horizontal (90°).
- Circular (45°): For small areas or detailed work.
- Vertical (180°): For horizontal surfaces.
- Horizontal (90°): For vertical surfaces.
Rotate the air cap to change the spray pattern.
- Adjust Flow Control: Use the flow control knob located near the trigger to adjust the paint output volume.

Image: A detailed view highlighting the flow control knob, which allows adjustment of the paint flow up to a maximum of 1200ml/min, and the main trigger for operation.
- Turn clockwise for less paint flow.
- Turn counter-clockwise for more paint flow (up to 1200ml/min).
- Begin Spraying:
- Plug in the sprayer. The 6.6 ft extra long cord provides increased accessibility.
- Hold the sprayer approximately 6-12 inches from the surface.
- Press the trigger to start spraying.
- Move the sprayer in smooth, even strokes, overlapping each pass by about 50% for uniform coverage.
- Release the trigger at the end of each stroke.

Image: A person using the Dicfeos paint sprayer to apply paint to a wooden fence, demonstrating the sprayer in action and highlighting the long power cord for extended reach.
Maintenance and Cleaning
Proper cleaning after each use is crucial for the longevity and performance of your paint sprayer. The detachable design makes cleaning easy.
- Empty Paint Container: Unplug the sprayer. Remove the paint container and empty any remaining paint back into its original can or a waste container.
- Initial Rinse: Fill the container with warm soapy water (for latex/water-based paints) or appropriate solvent (for oil-based paints). Reattach the container and spray the cleaning solution into a waste bucket until clear.
- Disassemble and Clean:
- Unscrew the union nut and remove the air cap and nozzle.
- Thoroughly clean all disassembled parts (nozzle, air cap, container, suction tube) using the provided cleaning brush and needle.
- Pay special attention to the small air filter located near the suction tube inside the container. This filter must be kept clean for proper air flow and spraying.
- Clean the exterior of the sprayer unit with a damp cloth. Do not immerse the motor unit.
- Clean Air Filter: The air filter on the motor unit should be checked and cleaned regularly.

Image: A close-up view of the paint sprayer's rear, illustrating the removable cover that provides access to the air filter for cleaning or replacement.
- Open the filter cover on the back of the motor unit.
- Remove the foam filter and clean it with warm soapy water. Rinse thoroughly and let it dry completely before reinserting.
- Reassemble and Store: Once all parts are clean and dry, reassemble the sprayer. Store it in a clean, dry place away from extreme temperatures.
Troubleshooting
| Problem | Possible Cause | Solution |
|---|---|---|
| No spray or weak spray |
|
|
| Uneven spray pattern or spitting |
|
|
| Paint leaking from nozzle area |
|
|
Specifications
- Brand: Dicfeos
- Model Number: didi98
- Power: 700W
- Tank Volume: 1300 Milliliters
- Max Flow Rate: 1200ml/min (adjustable)
- Nozzle Sizes: Φ1.3mm, Φ1.8mm, Φ2.6mm, Φ3.0mm
- Product Dimensions: 9.84 x 9.84 x 9.84 inches
- Item Weight: 3.52 pounds
- Cord Length: 6.6 ft
- Color: Multicolor (Orange and Black)
Warranty and Support
Dicfeos stands behind the quality of its products. For any questions, technical support, or warranty claims, please refer to your purchase documentation or contact the seller directly through the platform where the product was purchased. Please retain your proof of purchase for warranty purposes.
Ask a question about this manual
Ask about setup, troubleshooting, compatibility, parts, safety, or missing instructions. Manuals+ will review the question and use this page’s manual context to help answer it.