1. Introduction
This manual provides detailed instructions for the setup, operation, and maintenance of your Chtoocy Solar Wireless Driveway Alarm Sensor. Please read thoroughly before use to ensure proper functionality and longevity of your device.
2. Product Overview
2.1 Package Contents

Image showing the complete package contents, including the sensor, receiver, adapter, screws, screwdriver, and cables.
- Solar Wireless Driveway Alarm Sensor
- Receiver Unit
- Power Adapter
- Mounting Screws and Anchors
- Screwdriver
- USB Charging Cables (x2)
- Instruction Manual
2.2 Key Features
- Vehicle Detection Only: Reliably detects moving vehicles and large metal objects, minimizing false alarms from animals and leaves.
- Long Range: Up to 1/2 mile (2640 feet) wireless transmission range from sensor to receiver, with a detection range of up to 12 feet for vehicles.
- Solar Powered: Sensor includes solar panels and an 1800 mAh rechargeable battery, offering up to 12 months of operation on a full charge.
- Weatherproof Design: Sensor is built to withstand rain, snow, lightning, and thunderstorms, operating effectively from -4℉ to 140℉.
- Expandable System: The system can be expanded to include up to 8 sensors and multiple receivers.
- Adjustable Settings: Features adjustable sensitivity, 4 volume levels (including MUTE), and 12 selectable chimes.
- Low Battery Indicator: Receiver provides a low battery alert for the sensor.
3. Setup and Installation
3.1 Charging the Sensor
Video demonstrating how to charge the Chtoocy Solar Wireless Driveway Alarm Sensor. The sensor eye will light up red when charging and green when fully charged.
Before initial installation, fully charge the sensor. The sensor can operate for up to 12 months on a full charge. Sensors are typically charged to about 20% power when leaving the factory, so a full charge is recommended before use. Connect the charging cable to the sensor's charge port and a power source. The sensor eye will illuminate red during charging and turn green when fully charged.
3.2 Testing the Connection
Video illustrating how to test the connection between the sensor and receiver. Wave your hand slowly in front of the sensor; a red light will illuminate, and the receiver will ring if pairing is successful.
After charging and setting the desired sensitivity level, wave your hand slowly in front of the sensor. The sensor will detect the movement, a red light will illuminate, and the receiver will ring to indicate successful pairing and connection.
3.3 Installing the Sensor
Video showing the installation of the sensor using the included screwdriver. The angle of the sensor eye can be adjusted with the ball joint after installation.
Install the sensor in your desired location using the provided screwdriver and mounting hardware. The sensor's ball joint allows for angle adjustment to optimize detection coverage. Ensure the solar panel faces an area with adequate sunlight.
3.4 Pairing Additional Units
Video tutorial on how to pair additional sensors or receivers to your existing Chtoocy driveway alarm system. This process involves turning on the receiver, entering pairing mode, selecting a channel, and waving your hand in front of the sensor to confirm pairing.
To add more sensors or receivers to your system:
- Ensure both the new unit and the existing receiver are powered on.
- Press and hold the 'PAIRED' button on the receiver for three seconds to enter pairing mode. The 'PAIRED' channel indicator will light up, and the 'start to pair' channel indicator will flash.
- Continue pressing the 'PAIRED' button to select the desired channel number for the new unit.
- Wave your hand in front of the new sensor. The channel indicator on the receiver will move to the next indicator and flash, signifying successful pairing.
- Press the 'RESET' button again to exit pairing mode.
- Test the pairing by waving your hand in front of the sensor again. The corresponding channel indicator will flash and ring if successful.
The system can expand to include up to 8 sensors and more receivers. The system automatically detects the expansion range.
4. Operation
4.1 Adjusting Sensitivity Levels
Video explaining the three sensitivity levels (Low, Medium, High) of the sensor and their corresponding detection ranges for different objects like people, dogs, cats, and cars.
The sensor offers three sensitivity levels (L, M, H) to detect motion at varying distances. This allows you to customize detection based on your environment and specific needs, reducing unwanted alerts.
- L (Low): Detection range 0-15 ft. Ideal for detecting cars only.
- M (Middle): Detection range 0-25 ft. Suitable for detecting people and cars.
- H (High): Detection range 0-33 ft. Detects small animals, people, and cars.
4.2 Volume Levels and Chimes
Video demonstrating the four volume levels, including a mute mode, and the 12 different chimes available on the receiver.
The receiver features 4 adjustable volume levels, including a mute mode, and 12 distinct chimes. Use the volume buttons on the receiver to cycle through the levels and the music note button to select your preferred chime.
4.3 Turning Detection Light On/Off
Video showing how to turn the sensor's detection light on or off for privacy.
The red light that flashes when the sensor detects motion can be turned off to increase discretion. This feature is useful in situations where you prefer not to have a visible indicator of detection.
5. Maintenance
5.1 Solar Charging
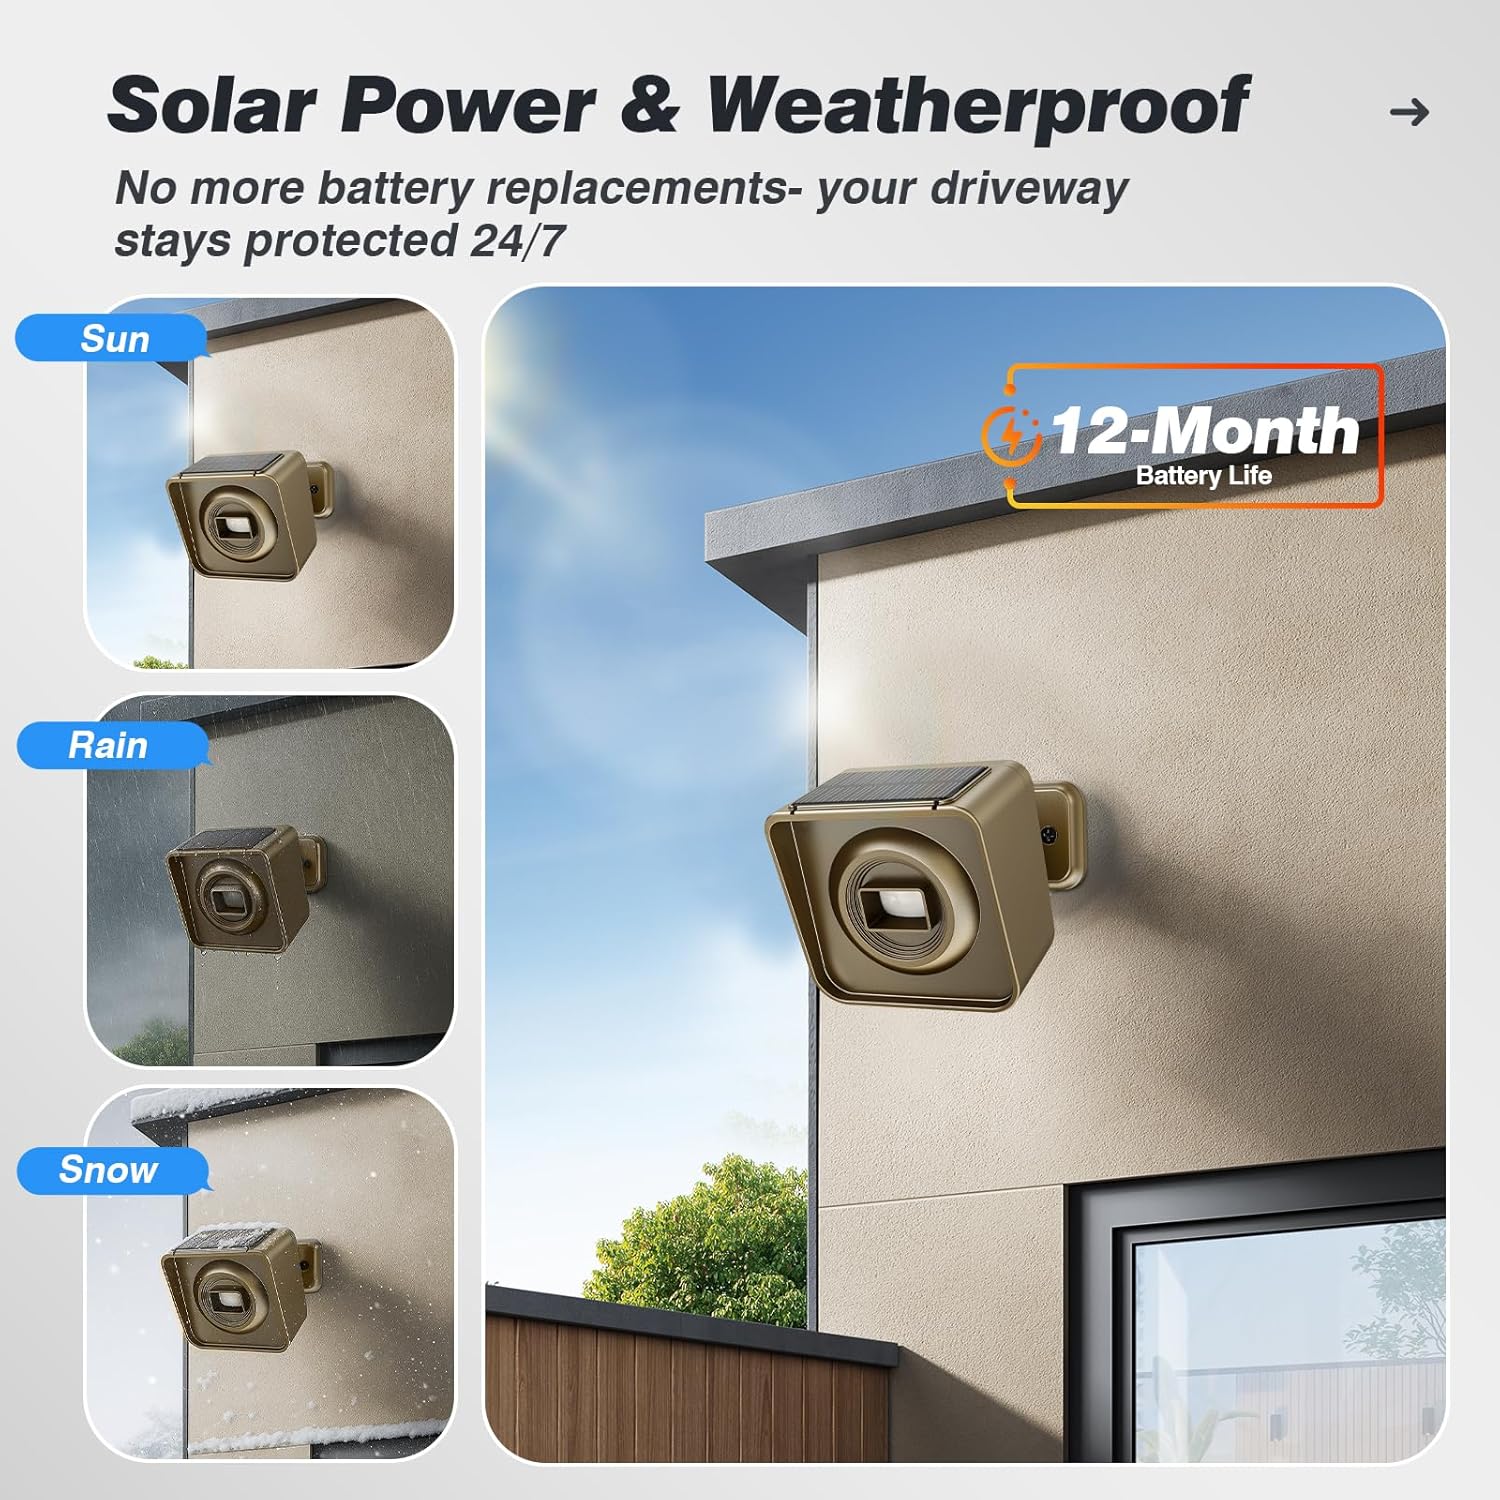
Image illustrating the solar panel on the sensor, highlighting its ability to recharge the internal battery and its weatherproof design.
The sensor's integrated solar panel continuously recharges the internal battery. For optimal charging, ensure the solar panel is positioned to receive direct sunlight throughout the day. Regular exposure to sunlight will maximize battery life and minimize the need for manual charging.
5.2 Weatherproof Design
The sensor is designed to be weatherproof, functioning reliably in various outdoor conditions including rain, snow, lightning, and thunderstorms. It operates effectively within a wide temperature range of -4℉ to 140℉. While robust, avoid submerging the sensor in water or exposing it to extreme physical impact.
6. Troubleshooting
If you encounter any issues with installation or operation, please refer to the troubleshooting steps below or contact customer support.
- False Alarms: Ensure the sensor is positioned to detect only vehicles and large metal objects, avoiding animals and leaves. Adjust the sensitivity level to 'L' (Low) if frequent false alarms occur due to smaller objects.
- No Detection: Verify the sensor is charged and properly positioned. Check the sensitivity settings; a lower sensitivity might miss distant objects. Ensure there are no obstructions blocking the sensor's detection path.
- Pairing Issues: If the sensor and receiver are not pairing, ensure both units are powered on. Try resetting the pairing history on the receiver by pressing and holding the 'RESET' button for three seconds until all channel indicators flash. Then, attempt the pairing process again.
- Low Battery: If the receiver indicates a low battery for the sensor, recharge the sensor fully.
6.1 Contact Support
For further assistance or if troubleshooting steps do not resolve your issue, please contact Chtoocy customer service with your order ID number. We are available 24 hours to provide support.
7. Specifications
| Feature | Detail |
|---|---|
| Brand | Chtoocy |
| Color | Grey |
| Power Source | Solar, Battery Powered |
| Item Weight | 1.2 Pounds |
| Maximum Range | 3000 Feet |
| Mounting Type | Wall Mount |
| Compatible Devices | Motion Detector |
| Product Dimensions | 3.5"D x 3"W x 3.8"H |
| Number of Batteries | 1 Lithium Ion batteries required (included) |
| Manufacturer | Chtoocy |
| UPC | 786411748235 |
| ASIN | B08ZHZ1L3Z |
| Item model number | 1 Receiver |
8. Warranty and Support
For detailed warranty information, please refer to the product listing page on Amazon. If you have any questions regarding the use of your Chtoocy Solar Wireless Driveway Alarm Sensor, you can download the updated user manual from the product listing page under the 'Technical Specification' section. Alternatively, you can contact Chtoocy customer service directly via Amazon email with your order ID number for assistance. We aim to respond within 24 business hours.


