
1. Introduction
The SUNLU S1 Plus Filament Dryer Box is designed to dry 3D printer filaments, removing moisture to improve print quality and prevent common printing issues. It also functions as a storage box to keep filaments dry during printing. This manual provides essential information for the safe and effective use of your filament dryer.
2. Safety Information
Please read all safety instructions before operating the device. Failure to follow these instructions may result in electric shock, fire, or serious injury.
- Do not expose the device to water or moisture.
- Ensure the power adapter is securely connected to a suitable power outlet.
- Do not block the ventilation openings.
- Keep out of reach of children.
- Unplug the device when not in use or before cleaning.
- Do not attempt to disassemble or repair the device yourself. Contact qualified personnel for service.
3. Product Overview
3.1. Components
The SUNLU S1 Plus Filament Dryer Box package typically includes the following items:
- SUNLU S1 Plus Filament Dryer Box
- Power Adapter
- User Manual

Figure 1: Package Contents. The image displays the SUNLU S1 Plus Filament Dryer Box, its power adapter, and the included user manual, illustrating all items typically found in the product packaging.
3.2. Features
- Improved Built-in Fan: Features a circulation fan for 360-degree uniform heating, ensuring faster and more effective moisture removal from the filament.
- Rapid Heating & Constant Temperature: The dryer quickly reaches the set temperature and maintains it consistently. Internal rotating rollers ensure uniform heating and effective drying of the filament.
- User-Friendly Interface: Simple operation with a 2-inch LCD screen and two control buttons for temperature and time settings.
- Multiple Settings: Adjustable temperature range from 35°C to 55°C and operating time from 0 to 6 hours, allowing customization based on filament material.
- Wide Compatibility: Compatible with 3D printer filaments of 1.75mm, 2.85mm, and 3.00mm diameters.
- Practical Design: Features a transparent lid for easy filament monitoring and a maximum capacity of 210 × 89 mm.

Figure 2: 360-degree Hot-air Circulation. This diagram illustrates how the built-in fan circulates hot air uniformly within the dryer box, ensuring efficient drying of the filament.
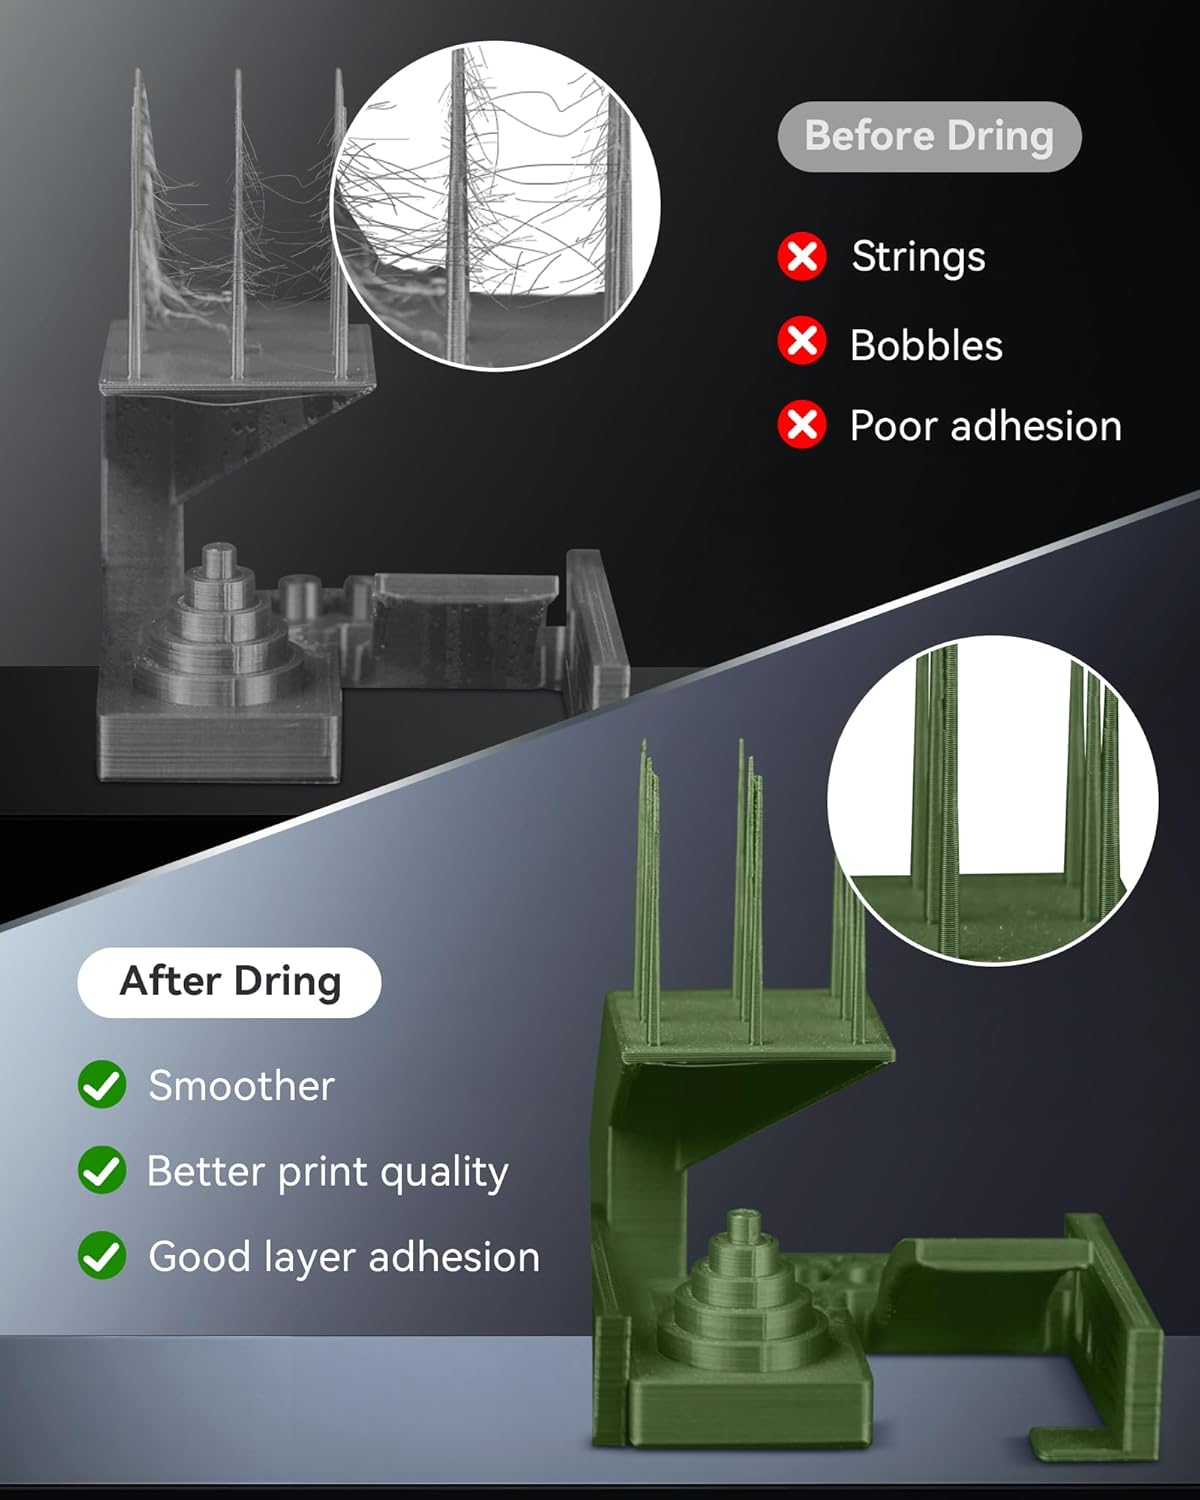
Figure 3: Function Diagram. This image highlights the 2-inch LCD screen and the two control buttons (left and right) on the SUNLU filament dryer, indicating their roles in operation.

Figure 4: Filament Compatibility. This image demonstrates the dryer's compatibility with various filament spool sizes and diameters, specifically 1.75mm, 2.85mm, and 3.00mm.
4. Setup
Follow these steps to set up your SUNLU S1 Plus Filament Dryer Box:
- Unpack: Carefully remove all components from the packaging.
- Connect Power: Plug the power adapter into the dryer box and then into a wall outlet.
- Load Filament: Open the lid and place your filament spool inside the dryer box. Ensure the filament can rotate freely on the internal rollers.
- Close Lid: Securely close the transparent lid.
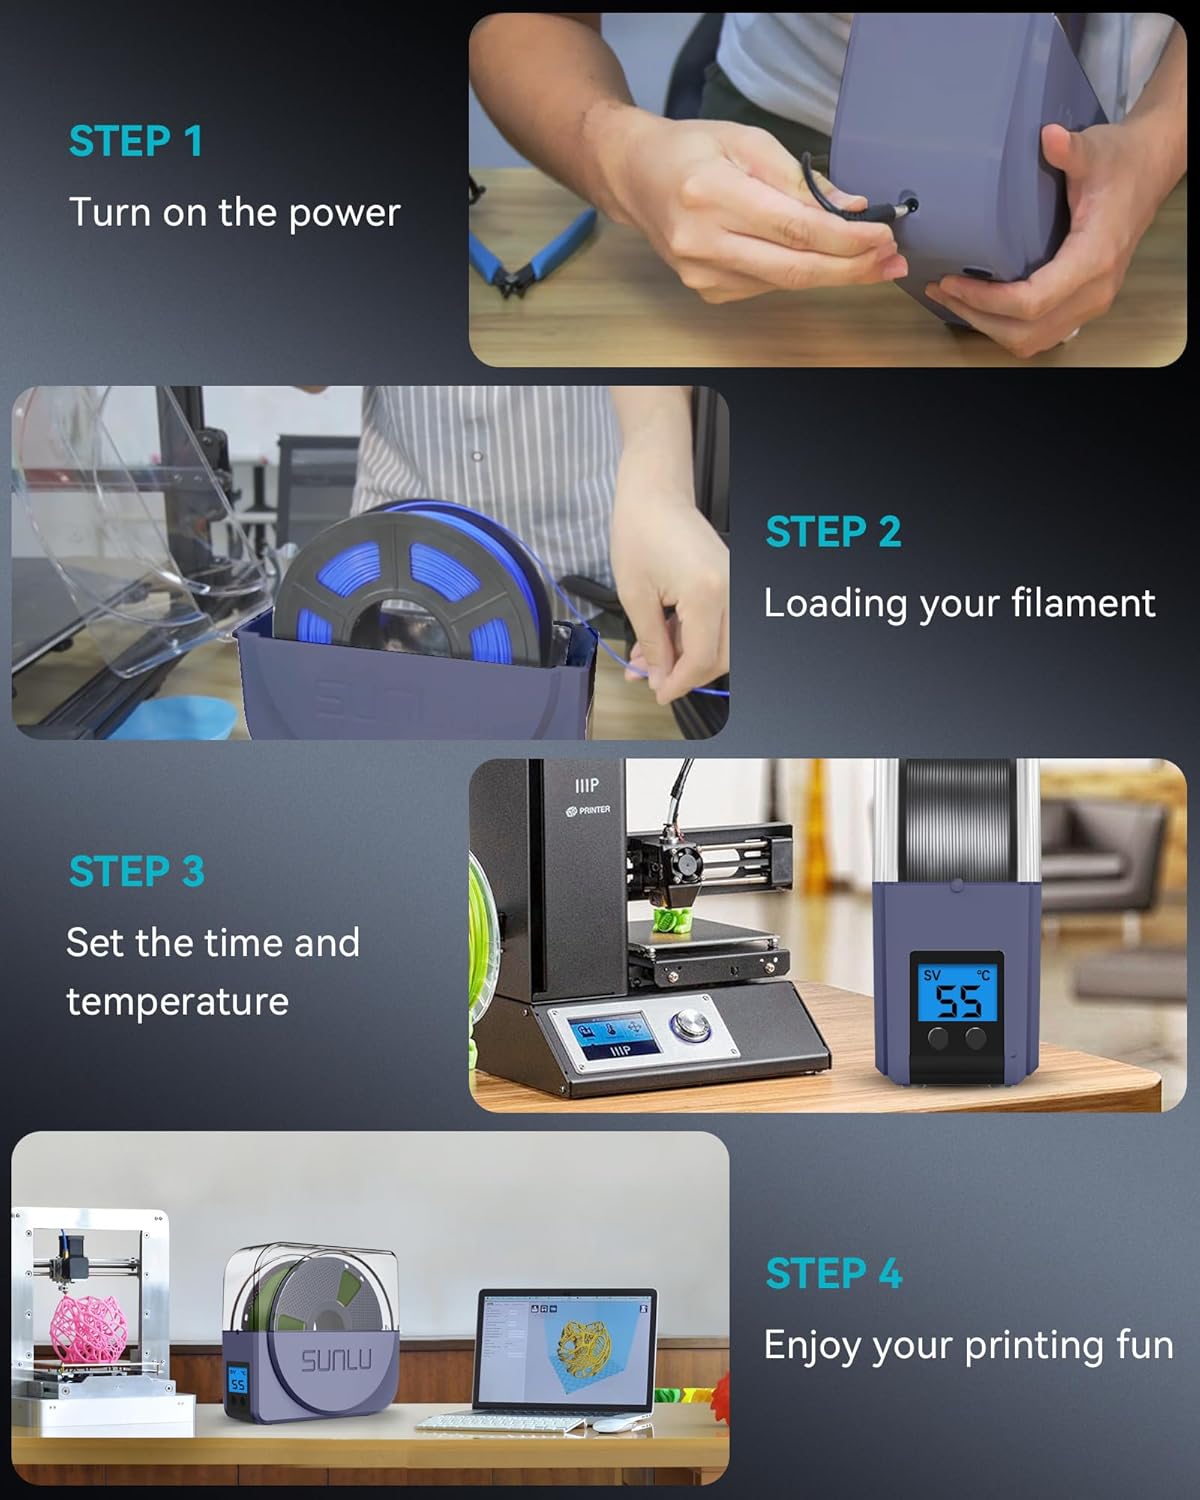
Figure 5: Quick Setup Guide. This visual guide outlines the four simple steps to prepare the dryer for use: connecting power, loading filament, setting parameters, and beginning your print.
5. Operating Instructions
Operating the SUNLU S1 Plus Filament Dryer Box is straightforward:
- Power On: Press either the left or right button to turn on the device. The LCD screen will illuminate.
- Set Temperature: Use the buttons to adjust the desired drying temperature. The temperature range is 35°C to 55°C. Refer to the recommended drying temperatures below for optimal results.
- Set Time: Use the buttons to set the drying duration. The time can be adjusted from 0 to 6 hours. The device will automatically shut off after the set time.
- Start Drying: Once temperature and time are set, the drying process will begin automatically.
5.1. Recommended Drying Temperatures and Times
The optimal drying settings vary depending on the filament type:

Figure 6: Recommended Drying Temperatures. This chart provides suggested temperature ranges for drying common 3D printer filament types like PLA, PETG/TPU, and ABS/PA/ASA.
| Filament Material | Drying Temperature | Drying Time |
|---|---|---|
| PLA | 45-50°C | 3-6 hours |
| PETG / TPU | 48-52°C | 3-6 hours |
| ABS / PA / ASA | 50-55°C | 3-6 hours |
6. Maintenance
To ensure the longevity and optimal performance of your SUNLU S1 Plus Filament Dryer Box, follow these maintenance guidelines:
- Cleaning: Disconnect the power adapter before cleaning. Use a soft, dry cloth to wipe the exterior of the device. Do not use abrasive cleaners or solvents.
- Storage: When not in use for extended periods, store the dryer in a cool, dry place away from direct sunlight and excessive moisture.
- Inspection: Periodically check the power adapter and cable for any signs of damage. If damage is found, discontinue use and replace the adapter.
7. Troubleshooting
If you encounter issues with your 3D prints, moisture in your filament might be the cause. The SUNLU S1 Plus Filament Dryer Box can help resolve common moisture-related printing problems.
7.1. Common Moisture-Related Print Issues
- Stringing: Fine strands of plastic appearing between printed parts.
- Bubbles/Blobs: Irregular bumps or imperfections on the print surface.
- Poor Adhesion: Layers not sticking together properly, leading to weak or delaminated prints.
- Clogging: Filament expanding due to moisture and blocking the printer nozzle.

Figure 7: Print Quality Improvement. This image demonstrates the significant improvement in 3D print quality after drying filament, showcasing smoother surfaces and enhanced layer adhesion compared to prints made with moist filament.
7.2. General Troubleshooting
- Device Not Turning On: Ensure the power adapter is correctly plugged into both the device and a working power outlet.
- Filament Not Drying Effectively: Verify that the correct temperature and time settings are selected for your specific filament type. Ensure the lid is properly closed.
- Unusual Noises: While the device operates with low noise, any unusual sounds should prompt you to unplug the device and inspect for obstructions or damage.
8. Specifications
| Feature | Specification |
|---|---|
| Model Number | filadryer S1 |
| Dimensions | 28 x 25.7 x 10.5 cm |
| Weight | 1 Kilogram |
| Material | THERMOPLASTIC_FILAMENT (housing) |
| Color | S1 Plus Blue Gray |
| Maximum Capacity | Ø210 × 89 mm (H) |
| Compatible Filament Diameters | 1.75 mm / 2.85 mm / 3.00 mm |
| Temperature Setting Range | 35°C - 55°C |
| Maximum Working Current | 1.8A |
| Maximum Working Power | 48W |
| Working Noise | <10dB |
| Country of Origin | China |
| First Available Date | March 20, 2021 |
9. Warranty and Support
For information regarding product warranty and return policies, please refer to the purchase platform's specific terms and conditions. Typically, products can be returned within 30 days of receipt if you change your mind. For defective or damaged products, specific return policies apply.
For technical support or further assistance, please contact SUNLU customer service through their official website or the platform where the product was purchased.